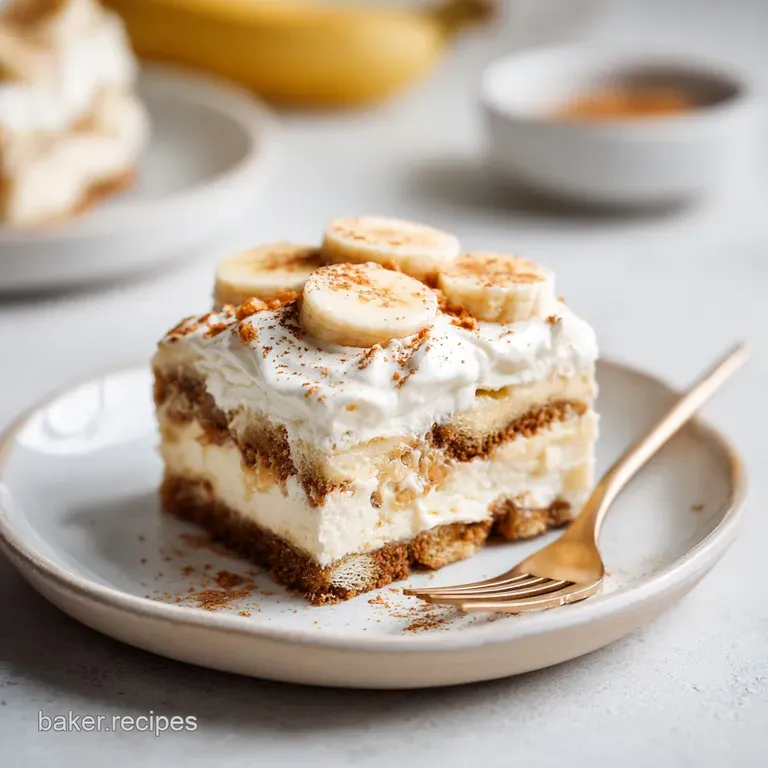
Banana Pudding Bars: Creamy and Sliceable
- Time: Active 20 minutes, Passive 4 hours, Total 4 hours 20 minutes
- Flavor/Texture Hook: Velvety pudding meets a buttery, crunchy wafer base
- Perfect for: Backyard barbecues, family reunions, or meal prep snacks
- Why You Need These Banana Pudding Bars
- How Flavor Layers Build Perfect Texture
- Specific Measurements for Best Recipe Results
- The Elements Required for Creamy Bars
- Tools to Make Your Baking Easier
- Step by Step Guide to Perfect Perfect Bars
- Fixing Common No Bake Dessert Problems
- Adjusting the Recipe for Different Needs
- Kitchen Myths Debunked
- Keeping Your Leftovers Fresh and Tasty
- Plating Your Bars for Maximum Impact
- Recipe FAQs
- 📝 Recipe Card
Why You Need These Banana Pudding Bars
The sound of a rolling pin smashing Nilla Wafers inside a plastic bag is basically the soundtrack of my childhood summers. I remember standing in my grandmother’s kitchen, the air thick with the scent of overripe bananas and vanilla, waiting for that first bite of pudding.
But the classic version always turned into a bit of a messy heap on the plate, didn't it? It tasted like heaven, but it looked like a puddle. That is exactly why I started making these bars. They give you every bit of that creamy, nostalgic flavor but in a tidy square you can actually pick up with your hands.
We are taking the soul of a traditional Southern dessert and giving it some structural integrity. There is something deeply satisfying about the contrast between a cold, silky pudding layer and the crunch of a buttery crust.
It is the kind of treat that makes people at a potluck stop talking for a second because they are too busy enjoying the way the flavors melt together. If you have ever felt frustrated by a dessert that falls apart the moment you slice it, you are going to love how these hold their shape.
This version is all about the layers. We aren't just tossing things into a bowl, we are building a foundation of salt flecked wafers, followed by a tangy cream cheese seal that keeps everything crisp. It is a little bit of kitchen magic that solves the "soggy bottom" problem forever.
Whether it is a humid July afternoon or a Sunday dinner, these bars fit the moment perfectly. Let's get into how we make that magic happen.
How Flavor Layers Build Perfect Texture
Lipid Moisture Barrier: The cream cheese layer acts as a fat based seal that prevents the water in the pudding from migrating into the wafer crust.
Starch Stabilization: Instant pudding contains modified cornstarch that sets rapidly without heat, allowing the bars to remain firm even at room temperature.
Enzymatic Delay: Slicing bananas into 1/4 inch rounds and sandwiching them between cream cheese and pudding limits oxygen exposure, which slows down the browning process.
Cold Crystallization: Freezing the butter bound crust for 10 minutes helps the fats solidify instantly, creating a shatter proof base that supports the heavier layers above.
| Servings | Ingredient Adjustments | Pan Size | Cook Time |
|---|---|---|---|
| 8 People | Halve all ingredients | 8x8 inch square | 0 minutes |
| 16 People | Use quantities as listed | 9x13 inch rectangular | 0 minutes |
| 32 People | Double all ingredients | Two 9x13 inch pans | 0 minutes |
When you are planning for a crowd, keep in mind that these bars are quite rich. A standard 9x13 inch pan provides 16 generous squares, but you can easily cut them into 24 smaller "bite sized" pieces for large parties.
The density of the cream cheese and pudding means a little goes a long way, so don't feel like you need massive portions for everyone to leave happy.
Specific Measurements for Best Recipe Results
| Ingredient | Science Role | Pro Secret |
|---|---|---|
| 225g Cream Cheese | Fat Barrier | Use full fat bricks only to ensure the "seal" doesn't weep moisture into the crust. |
| 193g Pudding Mix | Structural Binder | Whisk for exactly 2 minutes to fully hydrate the starches before pouring. |
| 300g Nilla Wafers | Foundation | Pulse into a fine sand rather than chunky bits for a crust that won't crumble. |
The Elements Required for Creamy Bars
- 300g Nilla Wafers, finely crushed: Why this? Provides the iconic vanilla malt flavor and absorbs butter perfectly for a sturdy base.
- Substitute: Graham crackers work well, though they lack that specific vanilla wafer nostalgia.
- 115g unsalted butter, melted: Why this? Acts as the "glue" that binds the wafer crumbs together into a solid crust.
- Substitute: Salted butter is fine, just omit the extra sea salt in the crust.
- 25g granulated sugar: Why this? Adds a hint of sweetness and helps the crust caramelize slightly in flavor.
- Substitute: Light brown sugar adds a nice molasses depth if you prefer.
- 0.25 tsp sea salt: Why this? Balances the sugar and makes the vanilla notes in the wafers pop.
- Substitute: Standard table salt works, use just a pinch less.
- 225g full fat cream cheese, softened: Why this? Provides the tangy "cheesecake" layer that prevents the crust from getting soggy.
- Substitute: Mascarpone offers a richer, less tangy profile if you want a luxury twist.
- 120g powdered sugar, sifted: Why this? Sweetens the cream cheese layer without adding any grittiness or graininess.
- Substitute: You can use a sugar-free powdered erythritol for a lower sugar option.
- 225g whipped topping, divided: Why this? Stabilized whipped topping holds its shape better than fresh cream for bars.
- Substitute: Stabilized whipped cream (with gelatin) if you avoid pre made toppings.
- 193g instant banana cream pudding mix (two 3.4 oz packages): Why this? Offers instant thickness and intense banana flavor without extra liquid.
- Substitute: Vanilla instant pudding works if you want a more subtle banana taste.
- 710ml cold whole milk: Why this? The fat in whole milk is necessary for the pudding to set firmly.
- Substitute: 2% milk is okay, but avoid skim or the bars will be too soft.
- 4 large bananas, sliced into 1/4 inch rounds: Why this? Fresh fruit provides the essential texture and natural sweetness of the dish.
- Substitute: Very ripe plantains (sauteed briefly) if you want an experimental fusion version.
- 50g extra Nilla Wafers for garnish: Why this? Adds a final decorative crunch to the top of the bars.
- 112g extra whipped topping for garnish: Why this? Creates a cloud like finish for the ultimate dessert presentation.
Tools to Make Your Baking Easier
While you don't need an oven for this recipe, having the right gear makes the layering process much smoother. I always recommend using a stand mixer such as a KitchenAid for the cream cheese layer because getting it perfectly smooth by hand can be a real workout.
You want that layer to be velvety so it spreads easily without tearing up the crust. An offset spatula is also your best friend here. It allows you to smooth out the pudding and whipped topping right to the edges of the pan without getting your knuckles in the dessert.
If you don't have a food processor to crush the 300g of Nilla Wafers, don't worry. A heavy duty freezer bag and a rolling pin do the job just as well, plus it's a great way to get out some frustration. Just make sure the crumbs are very fine.
Large chunks of wafer will make the bars fall apart when you try to lift them out of the pan. Finally,, make sure you have enough parchment paper to leave a "sling" or overhang on the long sides of your 9x13-inch pan. This is the secret to lifting the entire chilled block out of the pan for clean, straight cuts.
step-by-step Guide to Perfect Perfect Bars
- Line the pan. Prepare a 9x13-inch baking pan with parchment paper, ensuring an overhang on the long sides. Note: This allows you to lift the bars out easily later.
- Prepare the crust. Combine the 300g crushed wafers, 25g sugar, sea salt, and 115g melted butter in a bowl.
- Pack it down. Press the mixture firmly into the bottom of the pan and freeze for 10 minutes. Note: Freezing creates a solid base that won't shift when you spread the next layer.
- Beat the cheese. In a large bowl, whisk 225g of softened cream cheese and 120g powdered sugar until completely silky and smooth.
- Fold the topping. Gently fold 225g of the whipped topping into the cream cheese mixture.
- Seal the base. Spread the cream cheese mixture evenly over the chilled crust until the wafer layer is fully covered.
- Layer the fruit. Arrange the 4 sliced bananas in a single layer over the cream cheese. Note: Pack them tightly so every bite gets a piece of fruit.
- Whisk the pudding. Combine 193g pudding mix and 710ml cold milk. Whisk for 2 minutes until the mixture starts to resist the whisk.
- Pour and spread. Immediately pour the pudding over the bananas and spread evenly.
- Add the finish. Spread the remaining whipped topping over the pudding and top with the extra 50g of wafers.
- Chill for success. Refrigerate for at least 4 hours, or 12 hours for the cleanest, most defined slices.
Fixing Common No Bake Dessert Problems
Why Your Crust is Crumbly
If your bars are falling apart as you lift them, the crust likely wasn't packed down hard enough or the butter ratio was slightly off. You want the consistency of wet sand before you press it in. If you can see loose crumbs before freezing, add another tablespoon of melted butter.
Also, make sure you aren't skipping the freezing step, as that "sets" the butter and turns the crumbs into a solid sheet.
The Problem of Brown Bananas
Bananas turn brown when they are exposed to air. To keep your bars looking fresh, ensure the pudding layer completely covers the banana slices. If even a tiny bit of the fruit is poking through, it will oxidize.
Some people like to toss their banana slices in a little lemon juice first, but I find that changes the flavor too much. Instead, just work quickly and seal them under that pudding layer as fast as you can.
| Problem | Root Cause | Solution |
|---|---|---|
| Soft, runny pudding | Milk was not cold enough | Use milk straight from the fridge; whisk for the full 2 mins. |
| Soggy wafer crust | Skipped the cream cheese seal | Ensure the cream cheese layer covers the crust entirely to the edges. |
| Topping is weeping | Used fresh cream without stabilizer | Stick to whipped topping or add a stabilizer to fresh cream. |
For more tips on handling fruit based desserts without them getting watery, you might find my layered banana pudding recipe helpful for understanding different pudding textures.
Common Mistakes Checklist
- ✓ Use full fat cream cheese to prevent the filling from becoming too soft.
- ✓ Ensure the cream cheese is at room temperature before beating to avoid lumps.
- ✓ Do not over slice the bananas; 1/4 inch is the sweet spot for structural integrity.
- ✓ Whisk the pudding for the full 2 minutes don't stop early just because it looks thick.
- ✓ Allow at least 4 hours of chilling time; rushing this leads to a messy serve.
Adjusting the Recipe for Different Needs
When you need to scale this recipe down for a smaller household, you can easily cut it in half. Use an 8x8 inch square pan and follow the same layering process. Since there is no baking involved, you don't need to worry about adjusting oven temperatures, which makes it one of the easiest recipes to modify.
If you are scaling up for a massive party, I recommend making two separate 9x13 inch pans rather than trying to find one giant pan. It makes the chilling and fridge storage much more manageable.
| Method | Time | Texture | Best For |
|---|---|---|---|
| Standard Chill | 4-12 hours | Creamy and firm | Classic party squares |
| Flash Freeze | 1 hour | Ice cream like | Hot summer days |
| Room Temp Set | 2 hours | Very soft/mousse like | Immediate bowl serving |
For those who want to experiment with the flavors while keeping the same structure, consider adding a layer of chocolate. For a similar flavor profile in a different format, my banana chocolate chip muffins use that same classic pairing of fruit and sweetness.
Kitchen Myths Debunked
"You have to use slightly green bananas to keep them from getting mushy." This is a half truth. While very green bananas stay firm, they lack the sugar and aroma needed for a good pudding. Use bananas that are yellow with just a few brown speckles.
They are soft enough to bite through easily but still hold their round shape inside the layers.
"Hand whisking pudding is just as good as a machine." Actually, for bars that need to be sliced, you want a very vigorous whisking to ensure the starches are fully activated. A hand whisk works perfectly well, but you have to be consistent for the full 120 seconds.
If you stop the moment it looks thick, it might not reach the "set" state required to hold up as a bar once it reaches room temperature.
"Parchment paper isn't necessary if you grease the pan." This is a myth that leads to many broken desserts. Because this is a no bake recipe with a high fat content in the crust, it can stick stubbornly to the bottom of the pan.
The parchment "sling" is the only way to ensure you get those beautiful, clean squares out of the pan without the first one becoming a sacrificial crumbly mess.
Keeping Your Leftovers Fresh and Tasty
Store any leftover bars in the refrigerator in an airtight container for up to 3 days. The crust will naturally soften over time as it absorbs a little moisture from the cream cheese, but the "barrier" we built should keep it from becoming complete mush.
I don't recommend leaving these out on a counter for more than 30 minutes, especially on a warm day, as the whipped topping and pudding will lose their structural integrity.
You can actually freeze these bars for a frozen treat that tastes like a banana cream ice cream bar. Wrap individual squares tightly in plastic wrap and then foil. They will stay good in the freezer for up to 1 month.
To eat, let them sit at room temperature for about 10-15 minutes so they soften just enough to bite through. For zero waste, if you have broken wafers at the bottom of the bag, don't throw them away! Save them in a jar to sprinkle over oatmeal or yogurt for a little crunch.
Even the banana peels can be used to fertilize your garden plants by soaking them in water overnight.
Plating Your Bars for Maximum Impact
If you want your bars to look like they came from a high end pastry shop, the secret is all in the slicing. Use a long, sharp knife and dip it in hot water, then wipe it dry between every single cut.
This prevents the white whipped topping from dragging down into the yellow pudding and brown crust, keeping those layers looking sharp and distinct. It takes a few extra minutes, but the visual result is worth it.
For a final flourish, don't just toss the extra wafers on top. Place them in a deliberate pattern, or even crush a few into a fine dust to sprinkle over the edges for a "velvet" look.
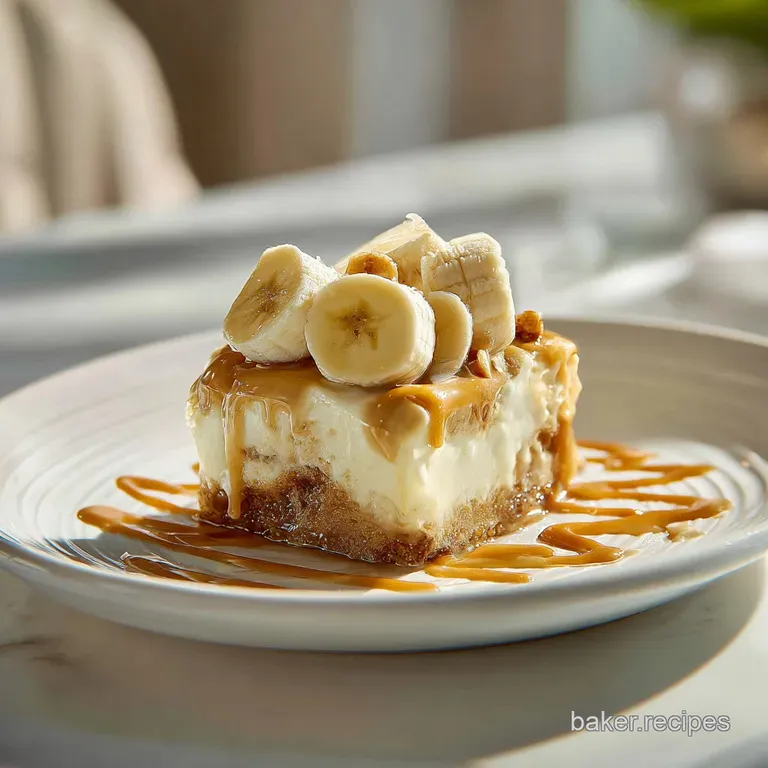
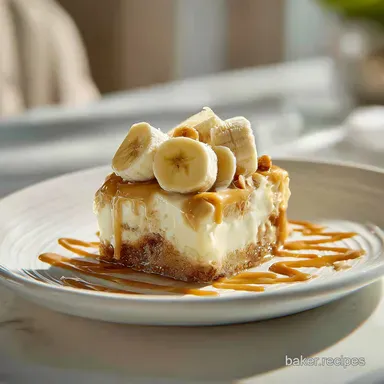
A few extra slices of fresh banana placed on top right before serving can add a pop of brightness, though I'd avoid doing this too far in advance so they don't brown. If you're feeling fancy, a drizzle of salted caramel over the top of each square just before it hits the plate will send these bars into a whole different league of indulgence.
These are simple to make, but with a little care in the presentation, they become a real showstopper.

Recipe FAQs
Is it true I must bake these bars to get them to set?
No, this is a common misconception. The structure relies on the chemical thickening of the instant pudding and the chilling process rather than heat, which is why these are a great entry point into no-bake dessert assembly.
How to ensure the bars don't stick to the pan when slicing?
Line your 9x13-inch pan with parchment paper, leaving an overhang on the sides. This creates "handles" that allow you to lift the entire block out of the pan once set, making clean, even slices much easier.
How to stop the bananas from turning brown?
Cover the sliced bananas completely with the pudding layer immediately. By sealing them away from oxygen, you prevent the oxidation that causes discoloration while maintaining the fresh texture.
Can I use low-fat milk for the pudding layer?
No, stick to whole milk. The higher fat content is essential for the instant pudding mix to thicken properly and reach the correct consistency for a firm bar.
How to achieve the perfect crust texture?
Press the crushed wafer and butter mixture firmly into the pan and freeze for exactly 10 minutes. This short freeze time locks the fats into place, preventing the crust from crumbling when you add the cream cheese layer.
How to fix a runny pudding layer?
Whisk the instant pudding mix and cold whole milk for a full 2 minutes. If the mixture still looks thin, you likely haven't agitated it long enough to activate the thickening agents required for a stable set.
Is it okay to serve these immediately after assembly?
No, you must refrigerate for at least 4 hours. Allowing the bars to rest for 12 hours is ideal, as this extended time allows the flavors to meld and the internal structure to firm up sufficiently for clean slicing.
Banana Pudding Bars
Ingredients:
Instructions:
Nutrition Facts:
| Calories | 391 calories |
|---|---|
| Protein | 4g |
| Fat | 21g |
| Carbs | 49g |
| Fiber | 2g |
| Sugar | 35g |
| Sodium | 340mg |
