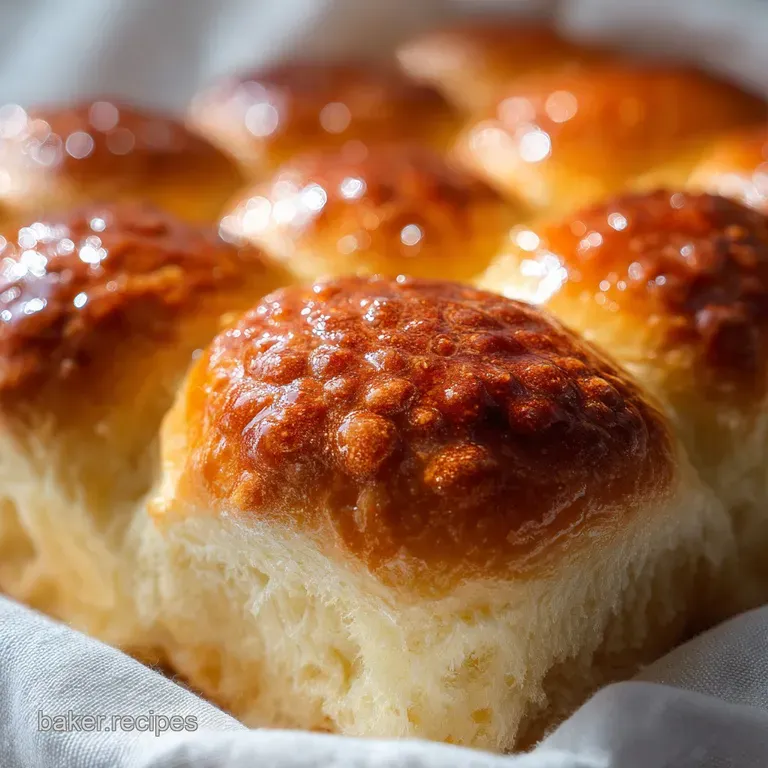
The Best Dinner Rolls Recipe: Soft Honey Milk
- Time: Active 30 mins, Passive 1 hours 38 mins, Total 2 hours 8 mins
- Flavor/Texture Hook: Velvety interior with a golden, buttery slicked crust
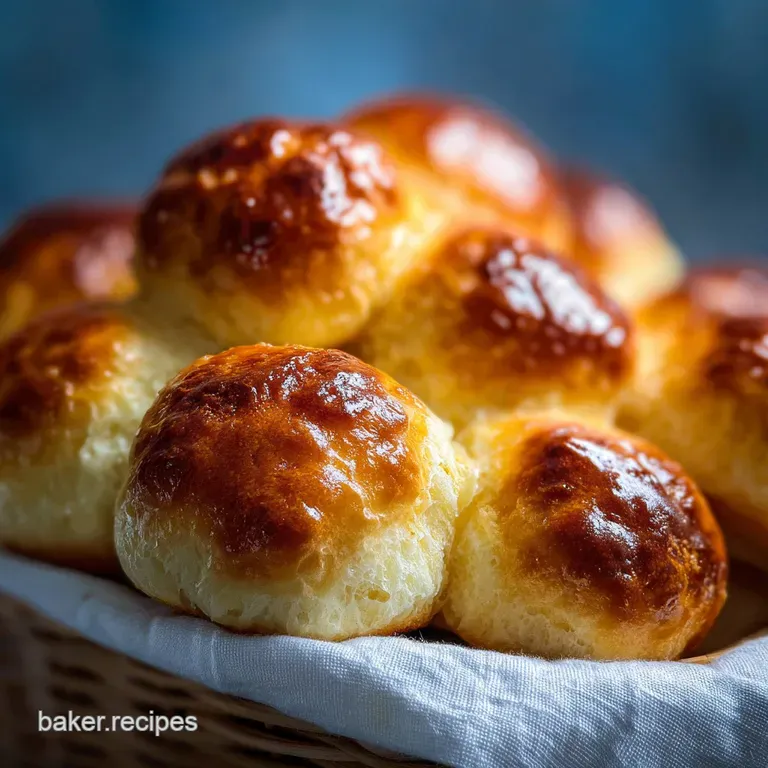
- Perfect for: Holiday dinners, Sunday roasts, or beginner bread makers
- Mastering the cloud like texture of the best dinner rolls recipe
- Essential metrics for baking these buttery clouds
- Essential elements for these perfect yeasted rolls
- Tools needed for your bread baking adventure
- The Building Blocks: Ingredients and Substitutions
- Foolproof steps for baking these golden pillows
- Fixing common issues with your dough
- Scaling this recipe for any crowd
- Flavor twists for your homemade rolls
- Storage tips for keeping rolls fresh
- Perfect pairings for your bread basket
- Dinner Roll Recipe FAQs
- 📝 Recipe Card
Mastering the cloud like texture of the best dinner rolls recipe
You know that specific, intoxicating scent of yeast waking up in warm milk? It's the kind of aroma that hits you the second you walk into a kitchen and instantly makes everything feel right with the world. I remember the first time I tried to make rolls for a big family Thanksgiving. Honestly, it was a disaster.
I didn't realize that killing the yeast with boiling milk would turn my hard work into literal hockey pucks. We ended up using them as doorstops, and I spent the rest of the night apologizing to my grandmother.
But that failure sent me on a mission to find the absolute best dinner rolls recipe. I tested different flours, messed with hydration levels, and realized that you don't need a fancy bakery setup to get that iconic, "tear apart" soft texture.
You just need a bit of patience and a few smart tricks that I've picked up over years of messy countertops. This isn't just a side dish; it's usually the first thing that disappears from the basket before the turkey even hits the table.
We're going for a dough that feels like a silky marshmallow in your hands. It’s a bit tacky but not sticky, and when it hits the oven, it transforms into these gorgeous, golden spheres that shatter slightly at the crust before revealing a velvety center. If you've been intimidated by yeast before, don't be.
We’re going to walk through this together, and I promise your house is about to smell like the best bakery in town.
Essential metrics for baking these buttery clouds
To get consistent results, we need to focus on three specific checkpoints that separate "okay" rolls from the "everyone wants the recipe" rolls. First, keep your milk between 100-110°F. If it's too cold, the yeast stays asleep; if it's too hot, you'll kill it.
Second, the bake time is exactly 18 minutes at 375°F for that perfect golden hue. Finally, use 500g (about 4 cups) of flour, but rely on the weight if you can, as it's the most accurate way to ensure the crumb isn't too dense.
| Preparation Method | Total Time | Texture Outcome | Best For |
|---|---|---|---|
| Standard Oven | 2 hours 8 mins | Crispy top, airy center | Traditional dinner service |
| Stovetop (Cast Iron) | 2 hours 15 mins | Extra crusty bottom, dense | Rustic, campfire style |
| Slow Cooker | 4 hours | Soft, pale, steamed | Keeping the oven free |
Using the oven is my go to because the dry, circulating heat allows the crust to develop that beautiful Maillard reaction. While the stovetop method in a heavy skillet is fun for a rustic vibe, you'll lose that uniform "poof" that makes these rolls so iconic.
If you're tight on oven space during a big meal, the oven method still wins because you can bake two trays at once.
Essential elements for these perfect yeasted rolls
The magic here isn't just in the kneading; it's in the science of the enrichment. By adding fat and sugar to a basic bread dough, we're essentially "interfering" with the gluten. This interference is exactly what we want for a tender bite rather than a chewy, sourdough like texture.
- The Honey Yeast Symbiosis: Honey provides immediate glucose for the yeast to consume, which speeds up the fermentation process and produces carbon dioxide for a better rise.
- Enriched Softness: The milk and butter coat the flour's proteins, preventing long, tough gluten strands from forming, resulting in a velvety crumb.
- Starch Gelatinization: Using warm milk starts to swell the starch granules early, which helps the dough retain more moisture during the bake.
| Ingredient | Science Role | Pro Secret |
|---|---|---|
| Whole Milk | Hydration & Fat | Fat in milk slows down staling, keeping rolls soft for 3 days |
| Active Dry Yeast | Leavening Agent | Bloom it in honey water first to ensure it's alive and kicking |
| Large Egg | Structure & Color | The lecithin in the yolk acts as a natural emulsifier for a smoother dough |
| Unsalted Butter | Tenderness | Melt it but let it cool; hot butter can weaken the yeast activity |
The egg is a non negotiable for me. Some recipes skip it, but the egg provides a richness and a specific "spring" to the dough that you just can't get with water or milk alone. It's the difference between a plain bun and a luxury roll.
Tools needed for your bread baking adventure
You don't need a garage full of gadgets to pull this off, but a few basics will make your life much easier. I usually reach for my stand mixer (like a KitchenAid) because it saves my arms from the ten minute knead, but doing it by hand is a great workout if you're feeling ambitious.
You'll also need a 9x13 inch baking pan metal is preferred for a better crust, but glass works too if you lower the temp by 25 degrees.
- Mixing Bowl: Large enough to let the dough double in size.
- Kitchen Scale: For measuring that 500g of flour precisely.
- Plastic Wrap or Damp Towel: To keep the dough from drying out during the rise.
- Pastry Brush: Essential for that final butter glaze that makes them shine.
| Servings | Flour (Approx) | Pan Size | Cook Time |
|---|---|---|---|
| 15 Rolls | 4 cups (500g) | 9x13 inch | 18 minutes |
| 30 Rolls | 8 cups (1000g) | Two 9x13 pans | 22 minutes |
| 8 Rolls | 2 cups (250g) | 8x8 inch | 15 minutes |
When you're scaling up for a huge party, remember that the dough will take slightly longer to rise in a larger mass because the center stays cooler for longer. I usually split the dough into two bowls for the first rise if I'm doubling the batch.
The Building Blocks: Ingredients and Substitutions
Gather your ingredients before you start. There's nothing worse than having your yeast blooming and realizing you're out of butter. I’ve included some budget friendly swaps here too, because I know sometimes you just have to use what's in the pantry.
- 1 cup whole milk, warmed: Why this? Provides fat for tenderness and liquid for hydration.
- 3 tbsp honey: Why this? Adds sweetness and keeps the rolls moist longer.
- 1 packet (7g) active dry yeast: Why this? The engine that makes the bread rise.
- 1 large egg: Why this? Adds structure and a rich, golden color.
- 0.25 cup unsalted butter, melted: Why this? Creates that signature melt in-your mouth feel.
- 4 cups all purpose flour: Why this? Provides the right amount of protein for a soft roll.
- 1 tsp fine sea salt: Why this? Tightens gluten and balances the honey's sweetness.
- 2 tbsp melted butter (glaze): Why this? For that shiny, irresistible finish.
- 1 pinch flaky sea salt: Why this? For a tiny crunch and flavor pop on top.
| Original Ingredient | Substitute | Why It Works |
|---|---|---|
| Whole Milk | Unsweetened Soy Milk | Similar protein content. Note: Will have a slightly nuttier finish. |
| Honey | Granulated Sugar | Provides the necessary sweetness for yeast to eat. |
| Unsalted Butter | Margarine | Same fat to water ratio. Note: Flavor will be less rich. |
| All Purpose Flour | Bread Flour | Higher protein. Note: Rolls will be slightly chewier/tougher. |
If you're out of honey, don't sweat it. Sugar works perfectly fine, though you might lose that tiny hint of floral depth. I've even used maple syrup in a pinch during the autumn months, which adds a lovely cozy vibe to the finished bread.
Foolproof steps for baking these golden pillows
1. The Bloom and Mix
Combine the 1 cup of warm milk (100-110°F) with the 3 tbsp of honey and 1 packet of yeast. Let it sit for about 5-10 minutes until it looks foamy and smells like a brewery. Note: If it doesn't foam, your yeast is dead; start over.
2. The Enrichment
Whisk in the 1 large egg and the 0.25 cup of cooled, melted butter. Ensure the butter isn't hot enough to scramble the egg.
3. Adding the Flour
Add 2 cups of the all purpose flour and the 1 tsp salt to the liquid. Stir with a wooden spoon until a shaggy, wet paste forms.
4. The Knead
Gradually add the remaining 2 cups of flour while kneading. If using a mixer, use the dough hook for 5-7 minutes. If by hand, knead on a floured surface for 10 minutes until the dough is smooth and bounces back when poked.
5. The First Rise
Place the dough in a greased bowl and cover. Let it sit in a warm, draft free spot for 1 hour until it has doubled in size.
6. Shaping the Rolls
Punch the dough down to release the air. Divide it into 15 equal pieces (about 60-65g each). Roll each piece into a tight ball until the surface is smooth and taut.
7. The Second Rise
Place the balls in a greased 9x13 pan. Cover and let rise for another 30-45 minutes until they are puffy and touching each other.
8. The Golden Bake
Preheat your oven to 375°F. Bake for 18 minutes until the tops are deeply golden brown and sound hollow when tapped.
9. The Glaze
Immediately after removing from the oven, brush the remaining 2 tbsp of melted butter over the tops. Sprinkle with a pinch of flaky sea salt until the butter is absorbed and the rolls shine.
10. Cooling
Let them rest in the pan for 10 minutes before pulling them apart. Serve them warm while the center is still steaming.
Fixing common issues with your dough
One of the biggest hurdles with any yeast recipe is the environment. If your kitchen is cold, that first rise might take two hours instead of one. Don't rush it! The dough is the boss here.
If you try to bake them before they've properly doubled, you'll end up with dense, heavy rolls that feel like lead in your stomach.
Why are my rolls dense?
If your rolls feel more like biscuits, you likely over floured the dough. It’s tempting to keep adding flour when it feels sticky, but the dough should remain slightly tacky. Another culprit is under proofing.
If the second rise is skipped or shortened, the yeast hasn't had enough time to create those tiny air pockets that make the bread light.
My dough didn't rise!
This usually comes down to the temperature of your milk. If it was over 120°F, you likely killed the yeast. If the milk was cold, the yeast is just "hibernating." Try moving the bowl to a warmer spot, like on top of a running dishwasher or inside an oven that is OFF but has the light turned on.
| Problem | Root Cause | Solution |
|---|---|---|
| Rolls are dry/crumbly | Too much flour added | Measure flour by weight next time; don't add extra during kneading. |
| Tops are too dark | Oven temp too high | Tent with foil halfway through baking to prevent burning. |
| Bottoms are soggy | Not baked long enough | Ensure the rolls sound hollow when tapped on the bottom. |
Common Mistakes Checklist
- ✓ Always check the expiration date on your yeast packet (old yeast won't rise).
- ✓ Measure your flour using a scale or the "spoon and level" method to avoid packing it.
- ✓ Use room temperature eggs so they don't chill the warm milk and stall the yeast.
- ✓ Don't skip the second rise - this is where the actual "fluff" happens.
- ✓ Brush the butter on while they are piping hot to let it soak into the crust.
Scaling this recipe for any crowd
If you're cooking for a small group, you can easily halve this recipe. Since it calls for one egg, just crack the egg into a small bowl, whisk it well, and use roughly half of it (about 2 tablespoons). You can save the other half for an egg wash on a different pastry or just scramble it for breakfast!
Use an 8x8 inch square pan for 7-8 rolls and keep the bake time around 15 minutes.
For a massive holiday gathering, you can double or triple the batch. However, don't just triple the salt and spices linearly sometimes 1.5x or 2x is enough to avoid an overly salty dough.
I find it’s easier to make two separate batches of dough rather than one giant one, as it’s easier to knead and ensure even fermentation. If you're doubling, you'll need two 9x13 pans and you might need to rotate them halfway through the bake to ensure they brown evenly.
Flavor twists for your homemade rolls
Once you've mastered the base recipe, you can start getting creative. I love adding a teaspoon of garlic powder and some dried parsley to the flour for a savory kick. If you're serving these with a Sunday roast, a tablespoon of chopped fresh rosemary in the dough adds an incredible earthy aroma that pairs perfectly with beef or lamb.
Garlic Herb Infusion
Add 2 cloves of minced garlic and 1 tablespoon of fresh herbs (like thyme or rosemary) to the melted butter glaze. This transforms the rolls into something that tastes like it came from a high end Italian bistro. You can also sprinkle some parmesan cheese on top during the last 5 minutes of baking.
Honey Wheat Swap
For a heartier roll, swap 1.5 cups of the all purpose flour for whole wheat flour. You might need an extra tablespoon of milk as whole wheat absorbs more liquid. This version is fantastic with a bit of extra honey and pairs beautifully with a Chicken Stew Recipe on a cold winter night.
| Strategy | Adjustment | Flavor Impact |
|---|---|---|
| Cheesy Top | Add 1/2 cup cheddar to dough | Salty, sharp, and gooey |
| Cinnamon Sugar | Swap salt for 1 tsp cinnamon | Sweet, dessert like rolls |
| Onion Rolls | Add dried onion flakes to glaze | Savory, savory, and aromatic |
Storage tips for keeping rolls fresh
Bread is best on the day it's made, but these rolls hold up surprisingly well thanks to the honey and milk. You can store them in an airtight bag at room temperature for up to 3 days. If you want to keep them longer, the freezer is your best friend. They freeze beautifully for up to 3 months.
Just wrap them individually in plastic wrap and then put them in a freezer bag.
To reheat, don't just microwave them that often makes bread chewy and rubbery. Instead, wrap the rolls in foil and pop them into a 350°F oven for about 10 minutes. They’ll come out tasting almost as fresh as the day you baked them. For zero waste, if you have any rolls that have gone a bit stale, they make the absolute best croutons or the base for a savory bread pudding. You can even pulse them in a food processor for fresh breadcrumbs to top a Homemade Green recipe.
Perfect pairings for your bread basket
These rolls are the ultimate "mop" for any saucy dish. I personally love serving them alongside a Neiman Marcus Chicken recipe because the velvety sauce and the soft bread are a match made in heaven. They are also sturdy enough to be used as sliders for leftover turkey or ham the day after a big feast.
If you’re doing a seafood night, these rolls work surprisingly well as a side to dip into a My GoTo Seafood recipe. The slight sweetness of the honey in the dough balances out the tang of a classic Marie Rose sauce. No matter what you serve them with, just make sure there’s plenty of extra butter on the table. People will want to slather it on!
Right then, you're all set. Grab your flour and get that milk warming. There is honestly nothing more satisfying than pulling a tray of these golden, shimmering rolls out of the oven and knowing you made them from scratch. Trust me, once you taste these, you'll never go back to the store-bought ones again.
Happy baking!

Dinner Roll Recipe FAQs
What makes a dinner roll perfect?
Achieving a velvety, tender crumb. Perfect rolls have a high enrichment level (fat and sugar) which interferes with gluten development, ensuring they are soft rather than chewy, and they must possess a thin, shatteringly crisp, buttered crust.
What makes Texas Roadhouse rolls so good?
Their signature is high butter content and a strong yeast flavor. They use a poolish or biga (a pre-ferment) for deeper flavor and are brushed heavily with melted butter immediately upon exiting the oven.
Is it better to use bread flour or all-purpose flour for dinner rolls?
Stick with all-purpose flour for the softest texture. Bread flour has higher protein, which creates strong gluten strands resulting in chewier bread; all-purpose keeps the structure softer, which is ideal for rolls.
What makes rolls fluffy and light?
Proper proofing and dough enrichment lead to fluffiness. The trapped carbon dioxide from the yeast creates air pockets, and using milk and butter coats the flour proteins, preventing overly tough gluten formation.
How do I ensure my yeast is active before mixing the dough?
Bloom the yeast in warm liquid with sugar or honey for 5-10 minutes. If the mixture becomes foamy and smells distinctly yeasty, the organisms are active and ready to leaven your dough.
Can I make these rolls ahead of time for a dinner party?
Yes, shape the dough and refrigerate before the final rise. This technique, called cold proofing, develops flavor and allows you to delay baking until moments before serving; you can adapt this chilling concept for sauces like our Keto Alfredo Sauce recipe to save time.
If my rolls didn't rise much, can I save them?
Try warming the proofing environment, but do not overwork the dough. If they are still somewhat risen, give them an extra 30 minutes in a warm spot; if they are completely flat, consider adjusting the final temperature down slightly when baking the dense dough, similar to how you manage the final heat
phase in a rich [Slow cooker recipe] for beef stew.
Best Dinner Rolls Recipe
Ingredients:
Instructions:
Nutrition Facts:
| Calories | 184 kcal |
|---|---|
| Protein | 4.4 g |
| Fat | 5.8 g |
| Carbs | 28.4 g |
| Fiber | 0.9 g |
| Sugar | 4.3 g |
| Sodium | 175 mg |
