Sunshine Coconut Authentic Chewy Brazilian Cocada Cocada De Corte
- Decoding the Magic of Authentic Brazilian Cocada
- Why This Chewy Coconut Square Reigns Supreme
- Assembling Your Essential Cocada Components
- Sourcing the Perfect Coconut for Maximum Flavor
- The Step-by-Step Alchemy of Perfect Brazilian Cocada
- Mastering Longevity: Storing Your Homemade Delight
- Troubleshooting and Flavor Enhancements for Your Batch
- Recipe FAQs
- 📝 Recipe Card
Decoding the Magic of Authentic Brazilian Cocada
When you think of Brazilian street food, images of sizzling street meat or vibrant açaí bowls might spring to mind, but tucked just as prominently among the vibrant stalls is the humble, yet profoundly satisfying, Cocada .
This isn't just a simple candy; it’s a foundational piece of Brazilian confectionary culture. Our focus today is crafting the ultimate Brazilian Cocada recipe , specifically aiming for the dense, chewy squares known as Cocada de Corte .
It’s intensely sweet, deeply satisfying, and surprisingly easy to master once you understand the basic principles of sugar and coconut interaction. This Cocada Brazilian coconut dessert promises a chewy texture that melts slowly on the tongue, far surpassing any pre-packaged version you may have encountered.
Why This Chewy Coconut Square Reigns Supreme
The allure of Cocada lies in its deceptive simplicity. It requires minimal ingredients, yet the resulting flavour is complex, combining the deep, almost caramelized notes from the cooked sugar base with the bright, tropical essence of coconut.
This particular Cocada recipe elevates the standard bar by leaning heavily on sweetened condensed milk, which contributes richness and that signature pull to the final product.
More Than Just Candy: A Taste of Rio Street Food
In Brazil, particularly along the coastal cities like Rio de Janeiro, you often find vendors selling this treat warm, freshly pressed into sheets. It’s a beloved snack that bridges the gap between a light dessert and an indulgent afternoon pick-me-up. It encapsulates the warmth and vibrancy of the country.
Preparing this Brazilian coconut candy at home allows you to control the texture and sweetness precisely, ensuring every square reminds you of a sun-drenched afternoon by the ocean.
The 'Cocada de Corte' Difference Explained
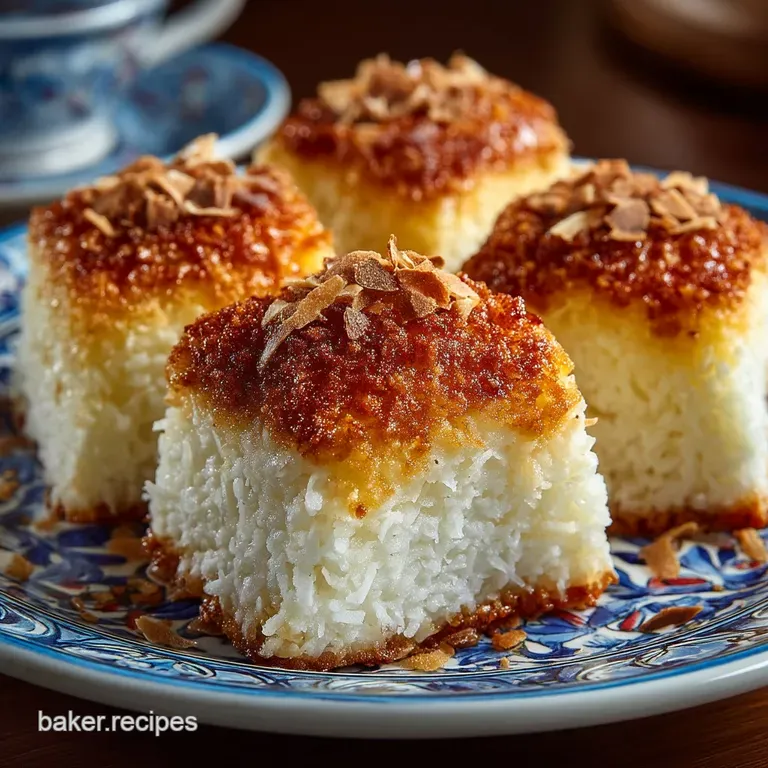
There are several regional variations of Cocada, some soft and pudding like ( Cocada Mole ) and others baked until slightly crisp. We are focusing on Cocada de Corte , meaning "cut cocada." This style is cooked long enough to achieve a robust structure, making it firm enough to slice cleanly into precise squares or diamonds.
This firmness is achieved through dedicated stirring during the cooking process, which concentrates the sugars and thickens the condensed milk base considerably. This is what sets our Easy Cocada recipe apart from lighter, gooier preparations.
Setting Expectations: Richness vs. Fudgy Texture
Because this creamy cocada recipe utilizes a significant amount of condensed milk, be prepared for a rich experience. It is intensely sweet that is the tradition! The goal is not a light, airy fudge, but rather a dense, chewy bite where the individual coconut strands remain discernible.
The addition of granulated sugar helps create the necessary crystalline structure to support the richness of the milk, preventing the final product from becoming overly soft or sticky post cooling.
Assembling Your Essential Cocada Components
Crafting authentic Brazilian flavour starts with selecting the right base ingredients. While the ingredient list is short, the quality matters immensely. We are aiming for a ratio that balances the chewiness of the coconut with the creamy structure provided by the milk base.
For our 8x8 inch slab, we require one 14-ounce can of sweetened condensed milk, 4 cups of packed shredded coconut (unsweetened is key), 1/2 cup of granulated sugar, 1 tablespoon of butter, 1/4 cup of whole milk, and a tiny pinch of salt to counteract the intense sweetness.
Sourcing the Perfect Coconut for Maximum Flavor
The coconut is undeniably the star of the show; therefore, its preparation is paramount to the success of your Brazilian Cocada .
Precise Measurements for Deep Sweetness
Using precisely 4 cups of packed, unsweetened shredded coconut ensures we have enough solid material to absorb the sweet liquid base without creating a soupy mess. If you use sweetened coconut, you risk an overly sugary final product that may not set correctly because the added sugar interferes with the intended caramelization process.
The 1/2 cup of granulated sugar is essential not just for sweetness but also for structure when combined with the condensed milk.
Mandatory Equipment Checklist for Success
While no specialized confectionery equipment is required, a medium, heavy bottomed saucepan is non-negotiable. Coconut and sugar mixtures heat quickly, and a thin bottomed pot will scorch the milk, leading to gritty or burnt flavours that cannot be salvaged.
You will also need an 8x8 inch pan lined with parchment paper, ensuring you have a parchment overhang to easily lift the entire solidified block out later.
Exploring Coconut Types: Fresh vs. Shredded Debate
While Cocada is traditionally made with fresh, moist coconut meat grated right off the shell, achieving that texture consistently outside of Brazil can be challenging. For this foolproof Cocada recipe , we rely on high-quality, unsweetened dried shredded coconut.
If you do opt for fresh coconut (about 3 cups worth), be aware that it contains more water, meaning your cooking time in Step 4 will likely extend by an additional 10 to 15 minutes to ensure adequate moisture reduction before setting.
The step-by-step Alchemy of Perfect Brazilian Cocada
The magic happens on the stovetop. Begin by preparing your 8x8 inch pan by lining it with parchment paper and lightly greasing the paper. Next, take your saucepan and combine the shredded coconut, granulated sugar, and salt over medium heat.
Toasting this mixture for just two minutes gently awakens the coconut’s oils and helps the sugar start to dissolve slightly before introducing the liquids.
Melding the Base: Sugar, Milk, and Heat Management
Reduce the heat to medium low immediately after the initial toast. Now, add the butter, the full can of sweetened condensed milk, and the 1/4 cup of whole milk. From this point forward, stirring must be constant and vigorous. This isn’t the time to walk away!
You are essentially making a very thick caramel base infused with coconut.
Incorporating the Shredded Coconut Layer
As you stir continuously, the mixture will begin to change texture dramatically. It will transition from a loose, milky slurry to a thick, cohesive mass. The key indicator that the creamy cocada recipe is nearly done is when you drag your spatula across the bottom of the pan and it takes a noticeable 2 to 3 seconds for the mixture to flow back and fill the gap.
This means the mixture has reached the correct concentration stage for a firm, chewy set.
The Crucial Setting Stage: Cooling and Cutting Techniques
Once that ‘clean pull’ is achieved, remove the pan from the heat instantly to halt cooking. Quickly scrape the hot, sticky mass into your prepared pan. Using a greased spatula or another sheet of parchment paper, press the mixture down firmly and evenly across the entire surface.
Allow it to cool on the counter for about 30 minutes to temper slightly before moving it to the refrigerator. Chill for a minimum of two hours until the slab is completely firm and easy to handle.
Once chilled, use the parchment overhang to lift the whole block and slice into 16 perfect squares with a sharp, oiled knife.
Mastering Longevity: Storing Your Homemade Delight
This dense Brazilian coconut candy keeps remarkably well, thanks to its high sugar content.
Tips for Maintaining Peak Freshness
Once cut, store the squares in an airtight container at cool room temperature or in the refrigerator. If stored properly, homemade Cocada can maintain its ideal chewy texture for up to a week. If you notice any slight stickiness developing, returning them to the fridge briefly can often firm them up again.
Avoid freezing, as the texture can become slightly crystalline upon thawing.
Troubleshooting and Flavor Enhancements for Your Batch
Even in a straightforward Brazilian Cocada recipe , minor hiccups can occur, usually related to texture or sticking.
Variations Beyond the Classic: Adding Citrus or Spice
To give your Cocada de forno recipe (though this is stove top, the principle applies to depth of flavour) an extra dimension, consider adding flavour boosts during the initial dry-toasting phase (Step 2).
A half teaspoon of ground cinnamon is traditional in some regions, offering warmth that complements the coconut beautifully. Alternatively, if you like a zing, grate the zest of one lime directly into the wet mixture before cooking; the citrus brightens the overall profile beautifully.
Understanding the Ideal Internal Temperature for Cutting
While we avoid complex candy thermometers, the goal for Cocada de Corte is to cook until it reaches what candy makers call the "firm ball" stage, though visually confirmed.
If you undercook it, it will remain soft and gooey, making cutting nearly impossible and failing to achieve the desired corte texture. If you suspect you cooked it slightly too long and it seems excessively hard, adding an extra tablespoon of milk during the initial cooking phase next time will help maintain that desired, satisfying chewiness.
Enjoy this taste of Brazilian sunshine!

Recipe FAQs
Why is my Brazilian Cocada turning out too hard or crumbly instead of chewy?
That’s usually down to one of two things: either you cooked the mixture for too long, letting too much moisture evaporate, or you skipped the liquid ingredient (the extra milk).
For that perfect chewiness, you need to watch for the mixture to pull away cleanly from the pan when stirred, but stop immediately when you hit that stage.
Can I use sweetened coconut instead of unsweetened for this Brazilian Cocada recipe?
While technically you can, I wouldn't recommend it as the main ingredient. Since this recipe already relies heavily on sweetened condensed milk, using pre-sweetened coconut can make the final product cloyingly sweet you’ll risk it tasting like pure sugar, frankly!
How long will this amazing Brazilian Cocada keep, and what's the best way to store leftovers?
These keep remarkably well, provided they are stored correctly; treat them like fudge. Once fully chilled, you can store them in an airtight container at room temperature for up to a week, or in the fridge for up to two weeks.
Make sure they are completely cooled before sealing them up, or condensation might make them sticky.
My stove runs hot; how do I stop the condensed milk from burning while making the Cocada?
Ah, temperamental ovens and stoves we’ve all been there! The key here is a heavy bottomed saucepan, which distributes heat much more evenly. Keep the heat on medium low, and commit to stirring continuously, especially scraping the very bottom of the pan every few seconds until it thickens up.
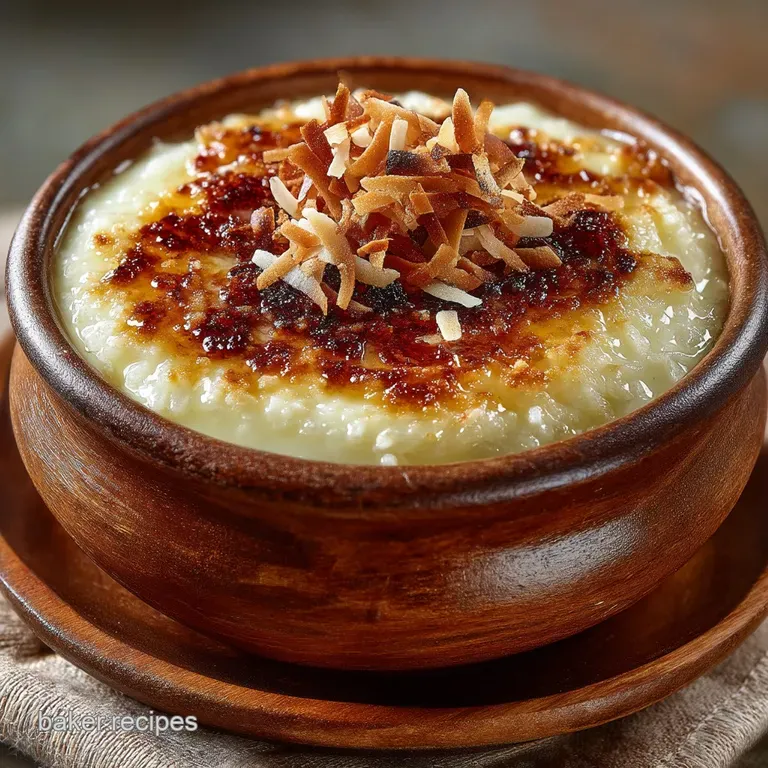
I prefer a softer, almost spoonable coconut candy. Can I make a different texture than these firm cut squares?
Absolutely! To achieve a softer, slightly runnier texture (often called 'Cocada Mole'), you simply need to reduce the cooking time. Stop stirring and transfer the mixture to the pan as soon as it’s hot and well combined, rather than waiting for it to pull completely away from the sides of the pan.
Chewy Brazilian Cocada
Ingredients:
Instructions:
Nutrition Facts:
| Calories | 95 kcal |
|---|---|
| Protein | 1.1 g |
| Fat | 10.0 g |
| Carbs | 12.9 g |
| Fiber | 1.0 g |
| Sodium | 63 mg |
