Fudgy Chocolate Crinkle Cookies
- Time: Active 15 minutes, Passive 3 hours 10 mins, Total 3 hours 25 mins
- Flavor/Texture Hook: Fudgy, velvety centers with a delicate, shattering sugar crust
- Perfect for: Holiday cookie swaps, budget-friendly gifting, or weekend baking projects
- Bake the Best Chocolate Crinkle Cookies
- The Essential Science Behind the Fudgy Crinkle
- Analyzing the Components for Rich Cocoa Flavor
- Tools Required for Making Perfect Holiday Treats
- Step by Step Guide to Mixing Dough
- Practical Solutions for Common Cookie Baking Issues
- Simple Swaps for Various Dietary Needs
- Guidelines for Storing and Freezing Your Cookies
- Creative Pairings to Enhance the Chocolate Experience
- Recipe FAQs
- 📝 Recipe Card
Bake the Best Chocolate Crinkle Cookies
The kitchen fills with the scent of toasted cocoa and warm vanilla the moment these go into the oven. I remember the first time I tried making these; I was impatient and skipped the chilling step. The result was a flat, greasy mess that looked nothing like the beautiful "snowy" photos I'd seen.
It was a chocolate disaster that taught me everything I know now about the importance of temperature and sugar coating.
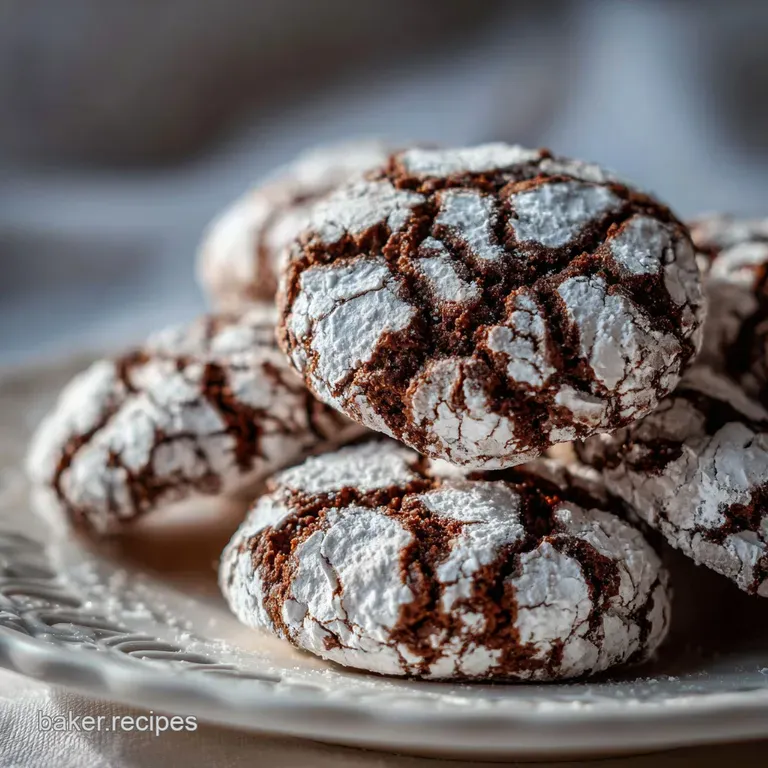
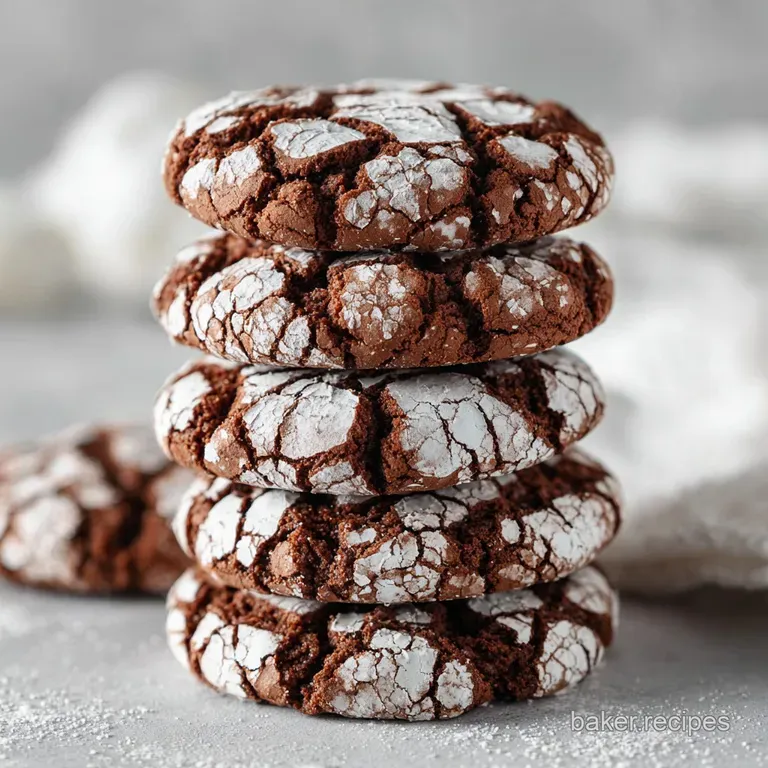
When you pull a tray of Chocolate Crinkle Cookies out of the oven, the contrast is what gets you. The stark white powdered sugar doesn't just melt; it stays bright and crisp, while the dark dough underneath expands to create those beautiful, rugged valleys.
It's a texture play that feels sophisticated but uses basic pantry staples that won't break your weekly budget.
We are aiming for a cookie that shatters slightly on the outside but remains almost underbaked and silky in the middle. If you've ever felt intimidated by holiday baking, this is the place to start. It's high reward for very little technical skill, as long as you respect the chill time.
Let's get into the specifics of why this method actually works and how to avoid the "melting sugar" trap I fell into years ago.
The Essential Science Behind the Fudgy Crinkle
Understanding the "how" helps you avoid mistakes before they happen. These cookies rely on a specific interaction between the dough and the two types of sugar we roll them in.
- Thermal Shock: The cold dough hitting the hot oven causes a rapid rise from the baking powder, forcing the surface to expand and "crackle" before the sugar can fully dissolve.
- Moisture Migration: The initial coating of granulated sugar creates a barrier that prevents the powdered sugar from absorbing moisture from the dough, keeping it white.
- Starch Gelatinization: Using Dutch process cocoa helps the structure set quickly, which keeps the "valleys" deep and the "peaks" high.
- Fat Emulsification: The vegetable oil keeps the crumb velvety and prevents it from becoming "cakey," which often happens with butter based versions.
| Method | Time | Texture | Best For |
|---|---|---|---|
| No Chill | 20 mins | Thin, oily, spreads flat | Emergency cravings only |
| Standard Chill | 3.5 hrs | Fudgy center, high cracks | Most home bakers |
| Overnight Chill | 12+ hrs | Intense cocoa, thickest shape | Maximum flavor development |
Giving the dough hours to rest in the fridge isn't just about making it easier to handle. It allows the flour to fully hydrate and the cocoa to "bloom" within the fats, leading to a much deeper chocolate profile. If you're looking for another reliable treat to add to your rotation, you might find my How to Bake recipe just as satisfying for its texture.
Analyzing the Components for Rich Cocoa Flavor
Success starts with picking the right types of fat and cocoa. Since we are being budget conscious, we don't need expensive bar chocolate here, but the quality of your cocoa powder matters.
| Ingredient | Science Role | Pro Secret |
|---|---|---|
| Dutch Process Cocoa | Provides color and structure | Sift it first to avoid bitter lumps in the dough |
| Vegetable Oil | Ensures a moist, fudgy crumb | Use a neutral oil like canola for a clean flavor |
| Baking Powder | Creates the "crinkle" expansion | Check expiration to ensure a strong, fast rise |
| Powdered Sugar | Creates the snowy visual contrast | Use a heavy hand; more is better for visibility |
Mastering the Thermal Shock
The secret to the crinkle is all about the temperature difference. When you place a cold, sugar coated ball of dough into a 350°F oven, the outside sets almost immediately. As the interior warms up and the leavening agents react, the dough expands and bursts through the set crust.
This is what creates those beautiful dark fissures against the white sugar.
Shielding the Sugar Coating
One mistake many beginners make is rolling the dough only in powdered sugar. The dough is naturally moist, and it will "eat" the powdered sugar, turning it into a gray glaze. By rolling in granulated sugar first, you create a dry "shield" that lets the powdered sugar sit on top without dissolving into the dough.
Tools Required for Making Perfect Holiday Treats
You don't need a high end stand mixer for these. In fact, I often prefer mixing them by hand with a sturdy silicone spatula to ensure I don't overwork the flour.
- Large Mixing Bowl: For the main dough.
- Small Shallow Bowls: Two of these, one for granulated sugar and one for powdered sugar.
- Fine Mesh Sifter: Essential for the cocoa powder and powdered sugar to prevent "clumps."
- Cookie Scoop: A 1 tablespoon scoop ensures all 24 cookies are the same size for even baking.
- Parchment Paper: Don't skip this; the high sugar content makes these prone to sticking to the tray.
Chef Tip: Freeze your metal cookie sheets for 5 minutes before placing the dough on them. This extra bit of cold helps prevent the cookies from spreading too fast while the cracks are forming.
step-by-step Guide to Mixing Dough
Follow these steps exactly. The order of operations is vital for achieving that specific fudge like consistency.
- Whisk dry ingredients. Combine 125g all purpose flour, 60g cocoa powder, 1 tsp baking powder, and 0.25 tsp salt in a bowl. Note: Sifting the cocoa here is non negotiable.
- Mix wet ingredients. In a separate large bowl, whisk 60ml vegetable oil and 200g granulated sugar until the mixture looks like wet sand.
- Add eggs. Beat in 2 large eggs and 1 tsp vanilla extract one at a time until the batter is glossy and smooth.
- Combine. Gradually fold the dry flour mixture into the wet ingredients until no white streaks remain.
- Chill. Cover the bowl tightly and refrigerate for at least 3 hours. until the dough is firm and scoopable.
- Preheat. Set your oven to 350°F (175°C) and line your trays with parchment paper.
- Scoop. Form the dough into 1 inch balls (about 24 total).
- Double coat. Roll each ball in the extra 50g granulated sugar, then immediately in the 100g powdered sugar until completely white and heavily coated.
- Bake. Place on the tray and bake for 10 minutes until the cracks are set and the edges are firm.
- Cool. Let them sit on the hot pan for 5 minutes until they are stable enough to move.
Practical Solutions for Common Cookie Baking Issues
Sometimes things go sideways even with the best intentions. If your cookies aren't looking quite right, it's usually a matter of temperature or measurement precision.
Why Your Sugar Disappeared
If your cookies come out of the oven looking dark and speckled rather than snowy, the sugar has dissolved. This happens if the dough was too warm when rolled, or if you didn't use enough powdered sugar. The "double roll" method (granulated then powdered) is the ultimate fix for this.
Fixing Flat and Spread Cookies
When the cookies spread into thin pancakes, it's a sign the oil was too warm or the dough wasn't chilled long enough. Another culprit is over beating the eggs, which incorporates too much air. If this happens, try adding another 20g of flour to the remaining dough and chilling it for an extra hour.
| Problem | Root Cause | Solution |
|---|---|---|
| No Cracking | Oven temp too low | Check oven with a thermometer; ensure it's at 350°F |
| Burnt Bottoms | Dark baking sheets | Use parchment or a silicone mat to insulate |
| Tough Texture | Over mixing flour | Mix until just combined; don't use a high speed mixer |
Common Mistakes Checklist
- ✓ Never skip the 3 hour chill; the dough needs to be cold to the touch.
- ✓ Use Dutch process cocoa; natural cocoa is too acidic and can change the rise.
- ✓ Pat the powdered sugar onto the balls rather than just rolling them lightly.
- ✓ Do not overbake! They should look slightly soft in the cracks when you pull them out.
- ✓ Use a kitchen scale for the 125g of flour to avoid adding too much, which makes them cakey.
Simple Swaps for Various Dietary Needs
You can easily adapt this recipe without spending a fortune on specialty flours or replacement ingredients. If you enjoy experimenting with different textures, you might also like trying a How to Bake recipe which uses a similar shortcut method.
| Original Ingredient | Substitute | Why It Works |
|---|---|---|
| Vegetable Oil | Melted Coconut Oil | Similar fat profile; adds a very subtle nutty note |
| Large Eggs (2) | Flax Eggs (2 tbsp meal + 6 tbsp water) | Provides binding; results in a denser, fudgy texture |
| All Purpose Flour | 1 to-1 gluten-free Blend | Rice based blends mimic the structure well in fudgy cookies |
Swapping for Cake Mix
If you are in a massive hurry, you can use a boxed devil's food cake mix. You'll need to reduce the flour and sugar in the main recipe and follow the box's oil/egg ratios, but still use the "double roll" sugar technique. It won't be as rich as the scratch version, but it's a great budget shortcut.
Going gluten-free and Vegan
For a vegan version, use the flax egg substitute mentioned above and ensure your sugar is bone char free. For gluten-free, a high-quality blend with xanthan gum works best. Because these cookies are naturally fudgy and don't rely on a lot of gluten development, they actually transition to gluten-free better than most crispy cookies.
Guidelines for Storing and Freezing Your Cookies
Because of the oil and high sugar content, these stay moist longer than butter cookies. However, you have to be careful about how you stack them so you don't ruin the sugar coating.
Storage: Keep them in an airtight container at room temperature for up to 5 days. Do not put them in the fridge after baking, as the humidity will cause the powdered sugar to become sticky and melt. If you must stack them, place a piece of parchment paper between the layers.
Freezing: You can freeze the baked cookies for up to 3 months. To serve, let them thaw at room temperature uncovered so moisture doesn't build up on the sugar. Even better, freeze the dough balls before rolling them in sugar.
When you're ready to bake, let them sit on the counter for 15 minutes, roll in the sugars, and bake as directed, adding 1-2 minutes to the cook time.
Zero Waste Tip: If you end up with broken cookies or "uglies" that didn't crinkle well, crumble them up! They make an incredible topping for vanilla ice cream or can be folded into a chocolate cheesecake crust.
Creative Pairings to Enhance the Chocolate Experience
These cookies are quite sweet, so they benefit from being served alongside something that offers a bit of contrast.
- Cold Milk: The classic choice. The fat in the milk cuts through the intensity of the Dutch cocoa.
- Espresso or Strong Coffee: The bitterness of a dark roast complements the fudgy sweetness of the center.
- Raspberry Sorbet: The tartness of the fruit provides a bright counterpoint to the deep chocolate.
- Salted Caramel Dip: If you want to go all out, a light drizzle of salted caramel over the cracks is a total crowd pleaser.
If you want a different flavor profile, consider these adjustments: If you want a minty twist, add 1/2 tsp of peppermint extract to the wet ingredients. If you want extra texture, fold in 50g of mini chocolate chips before chilling the dough.
If you want a spicy kick, add 1/4 tsp of cayenne pepper and 1 tsp of cinnamon to the dry ingredients.
The beauty of the Chocolate Crinkle Cookies lies in their simplicity. They look like they took all day to decorate, but the oven does all the heavy lifting for you. Just remember: chill the dough, double roll the sugar, and don't overbake.
Trust me, once you see those first cracks forming through the oven window, you'll be hooked on this recipe forever.

Recipe FAQs
What is the secret to crinkle cookies?
Cold dough rolled heavily in sugar. The secret lies in the thermal shock: extremely cold dough hits the hot oven, forcing a rapid, outward expansion that cracks the set sugar coating, creating the signature fissures.
What are common crinkle cookie mistakes?
Skipping the required dough chilling time is the biggest mistake. If the dough is too warm, it spreads too fast before the cracks can form, resulting in flat, greasy cookies that absorb the powdered sugar coating.
How to make chocolate crinkles from scratch?
Whisk dry ingredients first, then combine oil and sugar until sandy. Mix in the eggs until glossy, fold in the dry mix until just combined, chill for at least three hours, then double roll the cold dough in granulated and powdered sugar before baking.
Why did my chocolate crinkle cookies come out flat?
Your dough was likely too warm or you overmixed the flour. Overmixing develops gluten, leading to a flatter spread, while warm dough melts the fats too quickly in the oven before the structure sets.
Is it true I must use Dutch process cocoa for the best color?
Yes, using Dutch process cocoa yields the deepest, darkest color. Natural cocoa powder is acidic and can result in a reddish brown hue, while Dutch process provides the necessary low acidity for that intense, near black color contrast against the white sugar.
What is the best way to ensure the powdered sugar stays white?
Double roll the dough: once in granulated sugar, then heavily in powdered sugar. The initial layer of granulated sugar acts as a dry shield, preventing the dough's moisture from dissolving the final white coating before baking.
Can I substitute vegetable oil for butter in this recipe?
Yes, substituting oil is encouraged for achieving a fudgier texture. Oil remains liquid at lower temperatures than butter, keeping the cookie center very moist, a technique similar to what is used for richness in our How to Make Delicious Dip Cookie Dough Truffles in Chocolate: A Sweet Indulgence!.
Chocolate Crinkle Cookies Recipe

Ingredients:
Instructions:
Nutrition Facts:
| Calories | 108 kcal |
|---|---|
| Protein | 1.5 g |
| Fat | 3.0 g |
| Carbs | 20.0 g |
| Fiber | 0.8 g |
| Sugar | 14.6 g |
| Sodium | 42 mg |
