Chocolate Peppermint 4 Layer Dessert: No Oven Needed
- Time: Active 30 minutes, Passive 4 hours, Total 4 hours 30 mins
- Flavor/Texture Hook: Silky chocolate against a crunchy peppermint cookie base
- Perfect for: Holiday parties, office potlucks, and busy weeknight prep
- Create a Chocolate Peppermint 4 Layer Dessert
- Why This Layered Treat Works
- Analyzing Each Essential Ingredient
- Minimal Tools for Maximum Results
- Following the Easy Assembly Steps
- Fixing Common Dessert Mistakes
- Customizing the Minty Flavors
- Scaling
- Myths
- Safe Storage Practices
- Serving the Perfect Slice
- Recipe FAQs
- 📝 Recipe Card
Create a Chocolate Peppermint 4 Layer Dessert
The sound of 36 Peppermint Oreos being pulverized in a zip top bag is, quite honestly, the official soundtrack of my holiday season. There’s this specific "crunch shatter" noise that happens when the rolling pin hits the cookies, and suddenly the kitchen smells like a winter wonderland.
I remember the first time I whipped this up; my oven had decided to blow a fuse right before a big family dinner, and I needed a win that didn't involve heat. This dish wasn't just a backup plan it became the thing everyone asked for the following year.
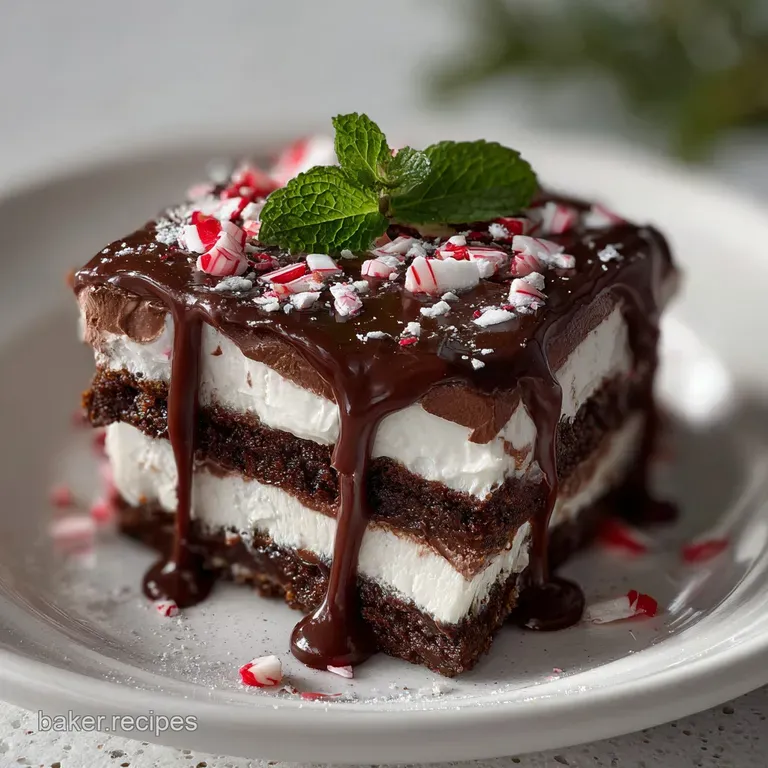
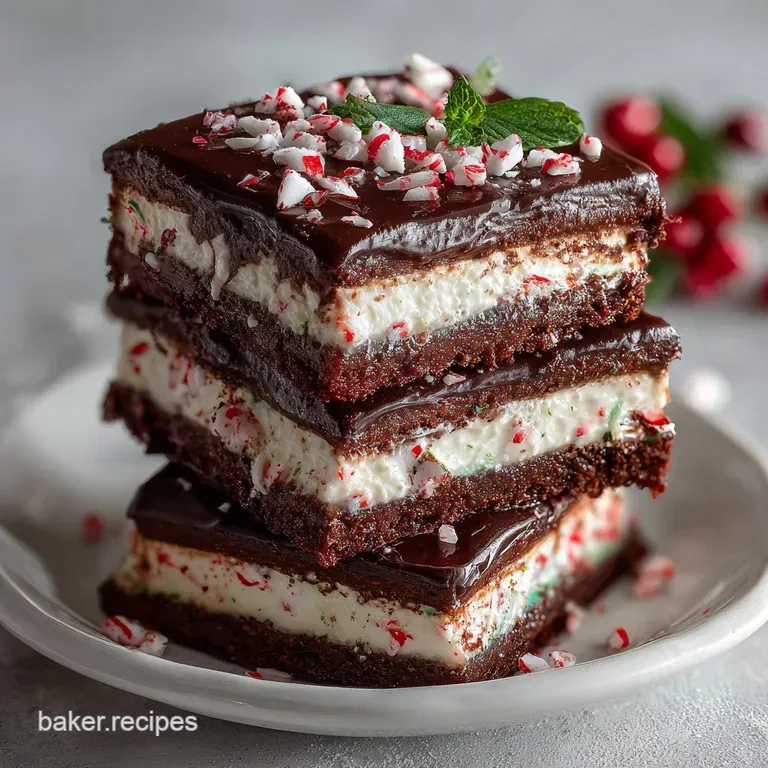
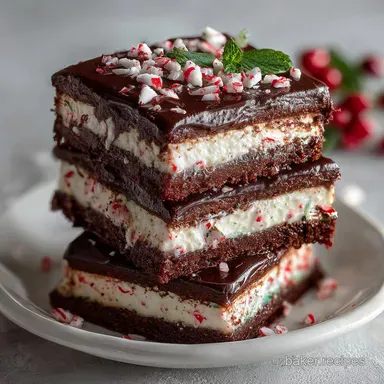
We're talking about a foundation of dark, minty cocoa, a cloud like layer of peppermint cream cheese, a deep well of chocolate silk, and a snowy peak of whipped cream. It’s the kind of dessert that looks like it took you all afternoon, but really, it just took a bit of bowl swapping and some patience while it sets in the fridge.
Trust me on this: the contrast between the cold, velvety pudding and the sharp, icy crunch of candy canes is exactly what your palate wants after a heavy meal.
There is no need to be a professional pastry chef to nail this. We are leaning on reliable shortcuts that don't sacrifice flavor, focusing on techniques that ensure every slice comes out clean. If you've ever struggled with "soupy" no bake desserts, we’re going to fix that today.
Let’s get into the mechanics of why this works so well.
Why This Layered Treat Works
- Structural Integrity: The saturated fats in the 85g of melted butter and 225g of full fat cream cheese act as a binder, creating a solid base that won't crumble when sliced.
- Starch Stability: Using slightly less milk (650ml) than the pudding package calls for ensures a denser, more stable chocolate layer that supports the weight of the whipped cream.
- Flavor Layering: Adding 0.5 tsp of peppermint extract specifically to the cream cheese layer creates a concentrated "mint hit" that isn't diluted by the chocolate.
- Moisture Control: Sifting the 120g of powdered sugar prevents lumps and helps the sugar dissolve instantly into the fats, preventing a grainy mouthfeel.
The Physics of the Firm Chill
The "set" of this dessert relies on the recrystallization of fats. When you combine melted butter with crushed cookies and then chill them, the butter returns to a solid state, effectively "gluing" the crumbs together into a stable floor.
Similarly, the cream cheese layer benefits from being whipped with sugar and cream. The air bubbles are trapped by the fat network, which firms up significantly at fridge temperatures. This creates a sturdy platform for the heavier pudding layer to sit on without mixing.
| Method | Prep Time | Texture Result | Stability |
|---|---|---|---|
| No Bake (This Recipe) | 30 minutes | Velvety and creamy | High (after 4 hour chill) |
| Baked Cheesecake Style | 1 hour 30 mins | Dense and rich | Very High (solid) |
| Frozen Mousse Style | 45 minutes | Icy and sharp | Medium (melts quickly) |
Choosing the no bake method gives you that classic "lush" feel that people love at parties. It stays cool on the tongue and provides a much needed break from the typical heavy cakes served this time of year. If you find yourself making desserts often, you might notice the layering technique is quite similar to the one used in a How to Make recipe for a traditional pudding pie.
Analyzing Each Essential Ingredient
| Ingredient | Science Role | Pro Secret |
|---|---|---|
| Peppermint Oreos | Provides structural base and primary cocoa flavor | Keep the cream filling; it adds moisture to the crust |
| Full fat Cream Cheese | Acts as an emulsifier and thickener | Use room temp cheese to avoid tiny "white dots" in the mint layer |
| Instant Pudding Mix | Modified cornstarch thickens without heat | Whisk for exactly 2 minutes to fully activate the starches |
| Heavy Whipping Cream | Adds volume and lightens the dense fats | Ensure the cream is under 4°C for the stiffest peaks |
The 650ml of cold whole milk is non negotiable here. Don't try to swap it for skim or 1% milk; the fat content in whole milk is what helps the instant pudding reach that "stand up" thickness we need for a 4 layer dessert.
Minimal Tools for Maximum Results
You don't need a pantry full of specialized gear to make this work. A simple 9x13 inch (approx. 23x33 cm) glass baking dish is the standard, but you can use a ceramic one if that’s what you have on hand. The key is visibility; seeing those layers through the glass is half the fun.
A sturdy spatula is your best friend here. You'll need it to press the cookie crust firmly into the corners and to smooth out the layers without dragging the bottom one into the top.
If you have an electric hand mixer, it’ll save your arms when whipping the 600ml of heavy cream, but a balloon whisk and some elbow grease will get the job done too.
Following the Easy Assembly Steps
1. Constructing the Foundation
Crush 36 Peppermint Oreo cookies (approx. 400g) until they look like coarse sand. Mix with 85g melted unsalted butter and 1/4 tsp fine sea salt. Press this mixture firmly into the bottom of your dish. Note: Use the bottom of a flat measuring cup to get an even, compacted surface.
2. Whipping the Peppermint Cream
Beat 225g softened cream cheese with 120g sifted powdered sugar and 0.5 tsp peppermint extract until smooth and pale. Fold in 1 cup (240ml) of the heavy cream that has been whipped to stiff peaks. Spread this over the chilled crust.
3. Layering the Chocolate Silk
In a separate bowl, whisk two 3.9 oz (approx. 221g total) packages of instant chocolate pudding mix with 650ml cold whole milk and 0.5 tsp vanilla extract until the whisk leaves tracks in the bowl. Let it sit for 3 minutes to thicken further, then pour over the mint layer.
4. Finishing the Cloud Peak
Whip the remaining heavy cream with 3 tbsp (25g) powdered sugar until it forms soft, pillowy mounds. Spread this gently over the chocolate layer, being careful not to swirl the two together.
5. Garnishing for Impact
Top the dessert with 0.5 cup crushed candy canes and 20g dark chocolate shavings. Note: Only add the candy canes right before serving to prevent them from melting into the cream.
Chef Tip: Freeze your mixing bowl and beaters for 10 minutes before whipping the cream. This ensures the fat stays cold and traps air more efficiently, giving you a much more stable "cloud" topping.
Fixing Common Dessert Mistakes
Preventing Lumpy Cream Cheese
If you try to beat cold cream cheese, you’ll end up with tiny lumps that never fully disappear. If you forgot to take it out of the fridge, unwrap the 225g block and microwave it on 10% power for 15-20 seconds. It should be soft enough to leave an indentation when pressed, but not melted.
Managing the "Bleeding" Peppermint
Candy canes are made of sugar, which is hygroscopic (it attracts water). When placed on whipped cream too early, they will start to dissolve and leak red dye into your pristine white topping. To avoid this, always garnish within 30 minutes of serving.
| Problem | Root Cause | Solution |
|---|---|---|
| Runny pudding layer | Too much milk or using non dairy milk | Stick to 650ml whole milk; non dairy milks often won't set instant pudding |
| Soggy cookie crust | Butter was too hot or crumbs too large | Let butter cool slightly; ensure cookies are finely ground |
| Layers mixing | Spreading too forcefully | Dollop the mixture across the surface first, then gently join the dots |
Common Mistakes Checklist
- ✓ Ensure the cream cheese is truly at room temperature before mixing.
- ✓ Use full fat ingredients; the fat is what provides the structure for the layers.
- ✓ Chill the crust for at least 15 minutes before adding the second layer.
- ✓ Sift your powdered sugar to avoid tiny white clumps in the mint layer.
- ✓ Never use "Cook and Serve" pudding mix for this recipe; it won't set without heat.
Customizing the Minty Flavors
If you want to branch out, this recipe is incredibly flexible. You can swap the Peppermint Oreos for regular chocolate ones and double the peppermint extract in the cream cheese layer to keep that minty punch. For another fun twist, try my How to Dip recipe for inspiration on adding salty sweet elements like crushed pretzels to the crust.
The White Chocolate Peppermint Twist
For a lighter look, replace the chocolate pudding with white chocolate instant pudding. This creates an "all white" aesthetic that looks stunning with the red candy cane garnish. Since white chocolate pudding is often sweeter, reduce the powdered sugar in the cream cheese layer to 100g to keep the flavors balanced.
The dairy-free Adaptation
While this recipe relies heavily on dairy for structure, you can make a version using firm silken tofu blended with cocoa and maple syrup for the pudding layer, and a coconut cream based topping. Note: The texture will be much softer and won't hold "sharp" edges when sliced.
Scaling
- Halving the Recipe: Use an 8x8 inch (20x20 cm) square pan. Follow all measurements at exactly 50%. The setting time remains the same, as the thickness of the layers will be similar.
- Doubling for a Crowd: Use two 9x13 pans rather than one giant deep dish. Deep layers take significantly longer to chill to the center, which can lead to a "slumping" effect when the first slice is removed.
- Baking Adjustment: Since this is a no bake dish, there is no need to adjust for oven temps. If doubling, just ensure you have enough fridge space to keep both pans level while they set.
Myths
Myth: You must use a food processor for the crust. Truth: While a food processor is fast, a zip top bag and a rolling pin actually give you a better "textured" crust. A few larger pieces of cookie provide a satisfying snap that a fine powder lacks.
Myth: Whipped topping (like Cool Whip) is the same as whipped cream. Truth: While you can substitute them, real heavy whipping cream provides a much richer flavor and a cleaner finish on the palate.
Stabilized whipped topping can sometimes have an oily aftertaste that competes with the peppermint.
Safe Storage Practices
Store any leftovers in the fridge, tightly covered with plastic wrap or a lid, for up to 4 days. The crust will naturally soften slightly over time as it absorbs moisture from the cream cheese, but many people actually prefer it on day two.
For zero waste, if you have leftover cookie crumbs, save them in a jar! They make an incredible topping for vanilla ice cream or a Bake Classic German recipe as a crunchy garnish. If you have leftover peppermint cream, it’s a great dip for fresh strawberries or chocolate wafers.
Serving the Perfect Slice
To get those clean, professional looking layers when you serve, use a sharp knife and wipe it clean with a damp paper towel between every single cut. This prevents the chocolate pudding from dragging into the white peppermint layer.
If you want to go the extra mile, serve each slice on a chilled plate with a small sprig of fresh mint. The 20g of dark chocolate shavings should be applied generously they add a bitter counterpoint to the sweetness of the 51.6g of sugar per serving.
Whether it's a casual weeknight or a festive gathering, this chocolate peppermint 4 layer dessert is always a guaranteed hit.

Recipe FAQs
Can I make this dessert entirely ahead of time?
Yes, up to 24 hours in advance. Assemble the entire dish, cover tightly, and chill. This allows the layers to fully marry, though wait to add the final candy cane garnish until just before serving.
How to ensure the pudding layer is thick enough to support the topping?
Whisk the instant pudding for the full two minutes until tracks are visible. Using slightly less milk than directed on the package also helps create a denser structure that won't slump under the weight of the whipped cream.
How do I prevent the crushed candy canes from melting and bleeding color?
Garnish the dessert no more than 30 minutes before serving. Candy canes are sugar based and attract moisture; placing them on the whipped topping too early causes them to dissolve and leak red dye onto the white layer.
Is it true that using skim milk instead of whole milk will still result in a firm set?
No, this is a common misconception. Instant pudding relies on the fat content of whole milk to reach its intended stabilization level; using skim milk will likely result in a soft or soupy pudding layer.
How to cut clean slices through the four layers?
Wipe a sharp, thin knife with a hot, damp paper towel between every cut. This friction free method ensures the chocolate and cream cheese layers don't drag or smear into each other when slicing.
What is the best way to soften the cream cheese quickly for the mint layer?
Microwave the unwrapped block at 10% power for about 15-20 seconds. The cheese should yield to light pressure but not feel warm or melted, which keeps the texture smooth and prevents lumps when mixing.
Can I substitute the Oreo crust with a graham cracker crust?
Yes, you can substitute the crust, but you will lose some flavor depth. If you enjoy working with dense, press-in bases, mastering the technique of packing them down firmly is key; see how we use that same compaction principle in our How to Bake recipe for sturdy bases.
Chocolate Peppermint Layer Dessert
Ingredients:
Instructions:
Nutrition Facts:
| Calories | 632 kcal |
|---|---|
| Protein | 6.1 g |
| Fat | 39.1 g |
| Carbs | 64.3 g |
| Fiber | 1.8 g |
| Sugar | 51.6 g |
| Sodium | 452 mg |
