The Black Forest Gateaus Little Sister Decadent Chocolate Raspberry Icebox Cake
- The Ultimate No-Bake Sensation: Unveiling the Chocolate Raspberry Icebox Cake
- Why This Effortless Dessert Trumps Traditional Baking
- Gathering the Components for Creamy Perfection
- Essential Equipment for Assembling Your Masterpiece
- Step-by-Step Assembly: Building the Decadent Layers
- Maximizing Flavor and Shelf Life
- Recipe FAQs
- 📝 Recipe Card
The Ultimate No-Bake Sensation: Unveiling the Chocolate Raspberry Icebox Cake
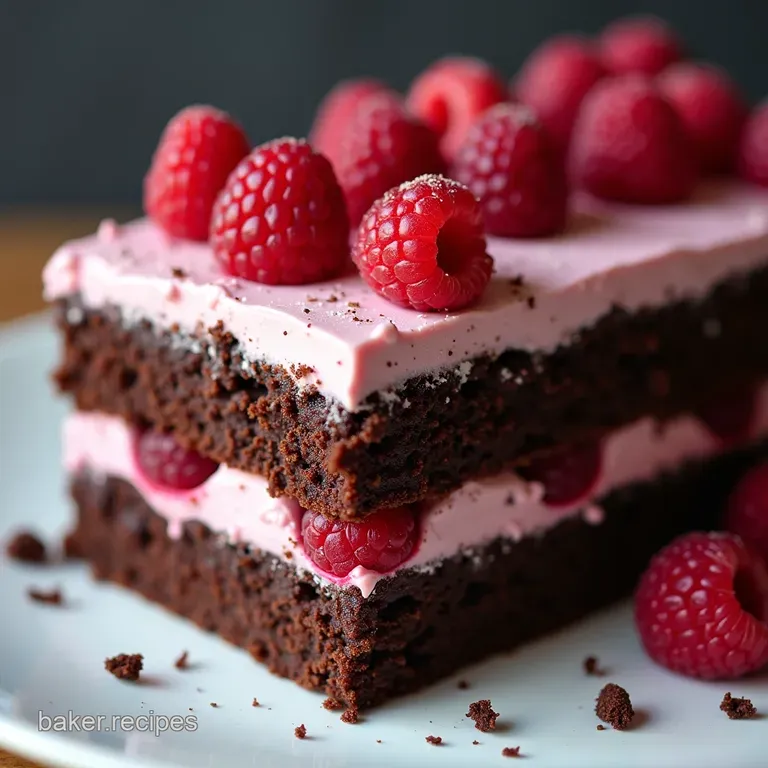
There are certain desserts that transcend the need for fussy ovens and complicated techniques, achieving sheer elegance through simplicity. Among these champions of effortless entertaining stands the Chocolate Raspberry Icebox Cake .
This isn't just a dessert; it’s a promise of rich, creamy indulgence that materializes almost magically from simple pantry staples. Inspired by the classic method of allowing crisp cookies to soften into a tender, cake like crumb, we elevate this concept by pairing the deep, brooding flavour of dark chocolate with the bright, exhilarating sharpness of fresh raspberries.
Prepare to meet your new go-to centrepiece for warm evenings and impromptu celebrations a truly stunning No Bake Chocolate Raspberry Dessert .
Why This Effortless Dessert Trumps Traditional Baking
What truly sets this creation apart is its reliance on texture transformation rather than heat application. Traditional baking demands precision with leavening agents and oven temperatures, but this Easy Icebox Cake Recipe strips away that complexity, leaving only pure layering skill.
It’s a dessert built on anticipation, yielding a result that tastes far more sophisticated than the effort expended.
A Summer Dream Built in Minutes, Not Hours
The active preparation time for this Raspberry Icebox Cake Recipe is delightfully short barely twenty five minutes from start to finish. This makes it the perfect solution for hot days when you simply cannot contemplate firing up the oven.
You spend your active time whipping cream to airy perfection and assembling the beautiful strata; the refrigerator does the heavy lifting overnight, tenderising the cookies and melding the flavours into a cohesive, sliceable dream.
Decoding the Magic: What Makes an Icebox Cake So Irresistible?
The brilliance of the icebox cake lies in its chemistry. The moisture from the whipped cream slowly permeates the crisp chocolate wafer cookies. Over several hours, these wafers shed their crunchiness, transforming into layers reminiscent of a dense, tender cake, far superior in many ways to a standard sponge for this particular pairing.
The result is an almost sinfully moist experience that defines the Chocolate Icebox Cake Recipe genre.
The Perfect Harmony: Dark Chocolate Meets Tart Raspberry
The flavour profile here is meticulously balanced. We rely on a deeply flavourful, Dutch processed cocoa powder to achieve a rich, Dark Chocolate Raspberry Dessert essence. This intensity is crucial, as it needs to stand up to the natural acidity of the fresh raspberries.
That tart burst cuts through the velvety sweetness of the chocolate cream, ensuring every bite is refreshing rather than overwhelmingly rich.
Gathering the Components for Creamy Perfection
To achieve the ideal structural integrity and sublime flavour profile of our Chocolate Raspberry Icebox Cake , sourcing quality components is paramount. We are dealing with just a few key players, so their quality really shines through.
You will need three cups of very cold heavy whipping cream, which forms the foundation of our luscious filling. For the depth of flavour, half a cup of high-quality, unsweetened cocoa powder is essential, paired with a full cup of sifted powdered sugar to ensure a smooth, non-gritty texture when whipped.
A teaspoon of good vanilla extract and a small pinch of fine sea salt round out the cream components.
Related Recipes Worth Trying
- Easy NoFuss Vanilla Wafer Mini Cheesecakes Recipe — Love cheesecake but hate the fuss These easy Mini Cheesecakes with Vanilla Wafers use a simple crust for perfect individual servings So creamy and satisfying
- Easy Bills Wafer Mini Cheesecakes Crunchy Crust Recipe — Stop messing with digestive biscuits These Bills Wafer Mini Cheesecakes use readymade wafers for a quick creamy and satisfyingly crisp treat
- Foolproof Mini Cheesecakes with Oreo Crust Recipe — These mini cheesecakes with Oreo crust are wonderfully easy to makeno springform pan drama Enjoy the perfect rich creamy bite every time Get the recipe
Essential Equipment for Assembling Your Masterpiece
While baking tools are unnecessary, specific pieces of equipment will make the assembly of this No Oven Chocolate Cake far smoother. The most important item is a large mixing bowl preferably metal that you’ve chilled beforehand, along with your whisk attachment for a stand mixer or a reliable hand mixer.
Cold equipment aids significantly in achieving stiff peaks quickly. You’ll also need a sturdy rubber spatula for folding and, crucially, a 9x5 inch loaf pan or an 8 inch springform pan, lined meticulously with plastic wrap or parchment paper to ensure easy unmolding later.
Curating the Ideal Chocolate Whipped Filling
The filling dictates the success of this dessert. Remember, we are creating a stable, yet light, chocolate whipped cream that must support the layers. Ensure your cocoa powder is sifted before adding it to the cold cream mixture along with the powdered sugar.
This prevents any unsightly lumps from forming when you begin beating. The goal is a texture that is firm enough to hold its shape when spread but still melts elegantly on the tongue think stiff, but not grainy.
Selecting the Best Cookies for Structural Integrity
For this specific flavour combination, the classic choice remains the chocolate wafer cookie. Their thinness and density allow them to absorb the cream moisture evenly without dissolving entirely into mush. When shopping, look for the familiar thin, crisp, dark chocolate wafers.
If they are unavailable, a very thin chocolate graham cracker can work, but the expected texture will lean slightly towards grainier rather than smooth cake.
The Role of Fresh Raspberries in Flavor Depth
Do not substitute frozen raspberries unless absolutely necessary, and if you do, ensure they are thoroughly thawed and drained of all excess liquid. The vibrancy, the subtle tartness, and the slight textural pop offered by fresh raspberries are integral to contrasting the heavy chocolate cream.
They are the necessary bright counterpoint in this White Chocolate Raspberry Icebox Cake adjacent dessert (though we are using dark chocolate here, the fruit balance principle remains).
step-by-step Assembly: Building the Decadent Layers
Once your components are ready, the assembly moves quickly. The process is less about precision baking and more about meticulous layering, ensuring every inch of cookie surface makes contact with the cream.
We start by securing a thin base layer of cream in your lined pan before setting down the first contiguous layer of chocolate wafers.
Preparing the Rich Chocolate Cream Base
Before layering, gently fold the cocoa mixture into the partially whipped cream, scraping down the sides frequently. Once fully incorporated, continue beating until stiff peaks form. This rich base is what will penetrate the cookies, forming the cake structure.
Techniques for Perfect Layering and Distribution
After the first layer of cookies, spread about one-third of the remaining chocolate cream evenly over the top, making sure to push the cream right up to the edges where the cookies meet the pan. Then, gently scatter half of your fresh, gently patted dry raspberries across this creamy expanse.
Repeat this sequence once more: cookies, cream, and the remaining half of the raspberries. The final layer should be the remaining chocolate cream, smoothed meticulously across the top to create a flawless surface for chilling.
The Overnight Transformation: Allowing Flavors to Marry
This is the step that separates an assembled snack from a true Chocolate Raspberry Icebox Cake Recipe . It requires patience. Once the top is smoothed, cover the entire pan tightly with plastic wrap.
Place it immediately into the refrigerator and leave it undisturbed for a minimum of eight hours, though overnight is strongly recommended. During this period, the cookies soften, absorbing the rich chocolate essence and marrying their flavour profile with the fruit.
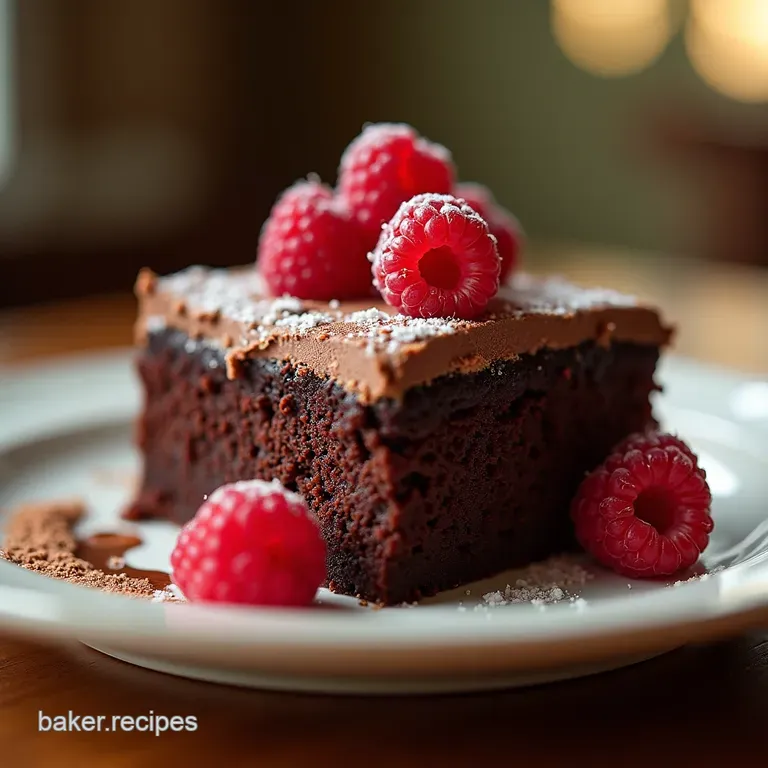
Garnishing Your Finished Chocolate Raspberry Icebox Cake
When you are ready to serve this magnificent Summer Icebox Cake , use the plastic overhang to gently lift the entire chilled dessert out of the pan and transfer it to your serving platter. For the grand finale, decorate the surface generously.
A scattering of reserved, perfectly ripe whole raspberries and a light dusting of delicate chocolate shavings will enhance the visual appeal immensely.
Maximizing Flavor and Shelf Life
While this dessert tastes divine almost immediately after chilling, allowing it a full twelve hours to set truly maximizes the flavour infusion. The slightly firm, cake like texture is the hallmark of success.
Optimal Storage Guidelines for Maximum Freshness
Because this No Bake Chocolate Raspberry Dessert relies on fresh cream and fruit, storage must be managed correctly. Keep the cake tightly covered in the refrigerator.
It maintains peak flavour and texture for up to three days, though it is best consumed within the first 48 hours when the raspberry brightness is at its peak.
Troubleshooting: Avoiding Soggy or Under Set Layers
If your layers seem too soft after the required chill time, it usually means one of two things: either the cream wasn't whipped to stiff enough peaks, or the chilling time was too short. If the cookies remain crunchy, give it another three to four hours.
If the cream was under whipped, it will collapse, and unfortunately, that’s hard to correct once assembled.
Flavor Adventures: Swapping Out Cookies and Cream Bases
To pivot towards a different profile, consider experimenting with the cream. For a richer take, you could introduce a thin layer of ganache between the cream layers, transforming this into a decadent White Chocolate Raspberry Icebox Cake alternative if you switch the base to a cream cheese/white chocolate whip instead of cocoa.
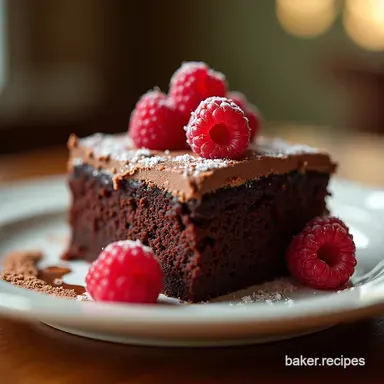
Serving Suggestions for an Elegant Presentation
To ensure clean slices that truly showcase the beautiful alternating layers, employ the warm knife trick: dip a long, sharp knife into hot water, wipe it completely dry, and slice.
Wipe and re-heat the knife between each cut for professional looking results that honour this fantastic Chocolate Raspberry Icebox Cake .

Recipe FAQs
How long does the Chocolate Raspberry Icebox Cake really need to chill? Can I get away with just 4 hours?
Oh, I wouldn't risk it, mate! For the wafers to properly transform into that lovely cake like texture, you really need a minimum of 8 hours, but overnight is the golden rule. If you cut it early, the cookies will still be crunchy, and you’ll end up with soft cream and hard biscuits rather than a unified slice.
My whipped cream isn't getting stiff; what am I doing wrong?
This is a classic kitchen hurdle! Firstly, ensure everything the cream, the bowl, and the whisk attachment are absolutely freezing cold; that's half the battle won. If it’s still lagging, try switching from medium speed to medium high and ensure you've added all your powdered sugar, as it helps stabilise the structure.
Can I make this Chocolate Raspberry Icebox Cake ahead of time for a party, and how should I store leftovers?
Absolutely, making it ahead is the whole point! It actually tastes better the next day. Store any leftovers tightly covered in the fridge; it should keep beautifully for up to three days, though it’s best enjoyed within the first 48 hours for optimal texture.
What's the trick to getting clean slices when serving the finished icebox cake?
Ah, the clean slice dilemma! Before cutting, run your sharpest knife under very hot tap water until it’s hot, dry it quickly with a clean tea towel, and then slice. Wipe the knife clean and reheat it for every single cut; this keeps the cream from smearing beautifully, looking like something from a bakery window!
I can't find chocolate wafer cookies; what's the best substitute to keep the texture right?
If you're stuck, you could try thin chocolate graham crackers, but they will be slightly grainier when softened. For the closest match, look for thin plain biscuits or even very thin shortbread, but be warned: you might need to increase the cocoa in your cream slightly to compensate for the missing chocolate flavour.
Chocolate Raspberry Icebox Cake
Ingredients:
Instructions:
Nutrition Facts:
| Calories | 714 kcal |
|---|---|
| Protein | 5.7 g |
| Fat | 11.3 g |
| Carbs | 47.5 g |
| Fiber | 6.3 g |
| Sodium | 122 mg |
