Corn Casserole Recipe
- Time: Active 10 mins, Passive 45 mins, Total 55 mins
- Flavor/Texture Hook: Silky, buttery, and subtly smoky
- Perfect for: Holiday potlucks, easy weeknight sides, or beginner meal prep
- Bring Comfort Home With This Corn Casserole Recipe
- Science Behind The Golden Crust
- Essential Metrics For Better Results
- Pantry Elements For Silky Texture
- Minimal Tools For Fast Cleanup
- Simple Steps For Creamy Bakes
- Fixing Common Texture Mistakes Easily
- Adjusting Batches For Any Crowd
- Storing Leftovers And Using Scraps
- Visual Finishing For Better Service
- Corn Casserole Recipe FAQs
- 📝 Recipe Card
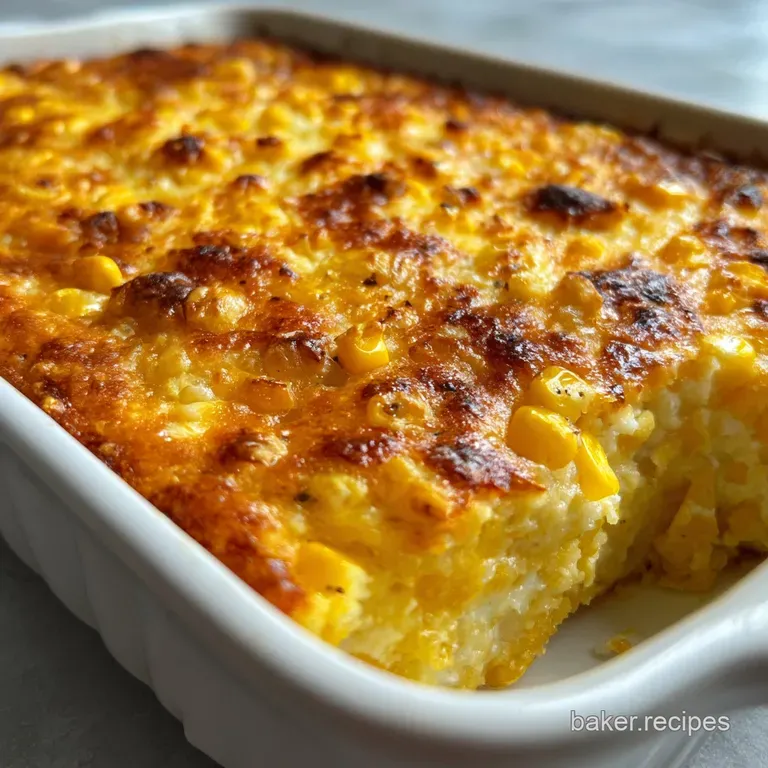
Bring Comfort Home With This Corn Casserole Recipe
The first time I pulled this dish out of the oven, the aroma of toasted corn and melted butter filled my kitchen so quickly that my neighbors practically knocked the door down. I used to think a side dish was just filler, but then I saw how the edges of this bake had started to pull away from the pan, creating a golden, slightly chewy rim that everyone fought over.
It’s the kind of food that makes you close your eyes for a second after the first bite.
Most people settle for a dry, crumbly version that feels like a sad muffin. I’ve made that mistake more than once. But through a bit of kitchen tinkering, I realized that the magic isn't just in the mix, it’s in the fat ratios and the way we handle the corn.
We aren't just making cornbread here; we are creating a hybrid between a savory pudding and a structured cake. It’s indulgent, sure, but it’s also remarkably simple to get right if you follow a few specific cues.
You don't need fancy equipment or a culinary degree to nail this. We are focusing on a one bowl method that minimizes the mess and maximizes the flavor. Whether you’re looking for a holiday staple or just something to pair with a roast chicken on a Tuesday, this version is the one that actually works.
Trust me, once you see that steam rising from the center of the pan, you'll never go back to the boxed instructions again.
Science Behind The Golden Crust
The Emulsion Principle: By whisking eggs into the sour cream and softened cream cheese first, you create a stable emulsion that suspends the corn kernels, preventing them from sinking to the bottom of the pan. This ensures every single forkful has a balanced ratio of creaminess and vegetable texture.
The Physics of the Set: The starch in the cornbread mix gelatinizes during the bake, absorbing the liquid from the cream style corn to create a structure that is soft but sliceable.
Without the specific ratio of fat from the butter and sour cream, the starch would become tough and rubbery instead of velvety.
| Method | Time | Texture | Best For |
|---|---|---|---|
| Standard Oven | 45 minutes | Crispy edges, soft center | Traditional family dinners |
| Slow Cooker | 3 hours | Uniformly moist, pudding like | Large parties with limited oven space |
| Cast Iron | 40 minutes | Intense crust, nutty bottom | Fans of crunchy textures |
Choosing your method depends entirely on how much you value that golden "shatter" on the outer rim versus a more custard like consistency throughout. If you're pairing this with a main dish like my How to Make recipe, the oven method provides a nice textural contrast to the creamy chicken.
Essential Metrics For Better Results
Component Analysis
| Ingredient | Science Role | Pro Secret |
|---|---|---|
| Cornbread Mix | Provides the structural starch backbone. | Sift it first to avoid flour pockets. |
| Sour Cream | Adds acidity to tenderize the corn protein. | Use full fat for the richest mouthfeel. |
| Cream Cheese | Acts as a stabilizer for the cream style corn. | Ensure it is completely soft before mixing. |
Pantry Elements For Silky Texture
To get the results we want, we need to be specific about the components. This isn't just about throwing things in a bowl; it’s about how these textures play together.
- 8.5 oz cornbread mix: This is the foundation. Why this? It provides the perfect balance of sweet cornmeal and leavening agents.
- 0.5 tsp smoked paprika: A tiny hint of smoke. Why this? It cuts through the sweetness of the corn with a savory depth.
- 0.25 tsp cracked black pepper: For a subtle bite.
- 0.5 cup unsalted butter: Melted and slightly cooled. Why this? Controls the moisture and adds that essential fatty richness.
- 1 cup full fat sour cream: The secret to the tang.
- 4 oz cream cheese: Softened to room temperature.
- 2 large eggs: Room temperature is best.
- 15 oz whole kernel corn: Drained thoroughly.
- 14.75 oz cream style corn: Do not drain this!
| Original Ingredient | Substitute | Why It Works |
|---|---|---|
| Sour Cream | Greek Yogurt (full fat) | Similar acidity but adds a slight tangier punch. |
| Unsalted Butter | Salted Butter | Works well, just reduce any added salt in the mix. |
| Cream Cheese | Mascarpone | Provides a milder, even creamier texture. Note: Less tangy than cream cheese. |
| Cornbread Mix | gluten-free mix | Same volume works. Note: Texture may be slightly grainier. |
Minimal Tools For Fast Cleanup
You really don't need much to get this done. I prefer keeping things streamlined so I'm not stuck at the sink for an hour after dinner.
- 9x13 inch baking dish: A ceramic or glass dish works best for even heat distribution.
- Large mixing bowl: Give yourself enough room to fold the ingredients without spilling.
- Whisk: Essential for getting the eggs and cream cheese smooth.
- Silicone spatula: This helps you scrape every bit of the mixture into the pan.
Chef's Tip: Grease your baking dish with a bit of the wrappers from the butter sticks. It adds an extra layer of flavor to the crust and saves on waste!
Simple Steps For Creamy Bakes
1. The Creamy Foundation
Preheat your oven to 350°F and grease your 9x13 dish. In your large bowl, whisk the 4 oz of softened cream cheese and 1 cup of sour cream together. Whisk until no large lumps remain, ensuring a velvety base for the other ingredients.
2. Integrating the Fats
Pour in the 0.5 cup of melted butter and add the 2 large eggs. Mix these in gently. Note: If the butter is too hot, it might scramble the eggs, so let it cool for a few minutes first.
3. Seasoning the Base
Stir in the 0.5 tsp smoked paprika and 0.25 tsp cracked black pepper. Stir until the spices are evenly distributed, giving the batter a light orange hue.
4. Adding the Corn
Fold in the 14.75 oz of cream style corn and the 15 oz of drained whole kernel corn. Use a folding motion to keep the whole kernels intact so they provide a nice pop of texture.
5. Incorporating the Mix
Gently sprinkle the 8.5 oz of cornbread mix over the wet ingredients. Fold it in until just combined. Stop as soon as the dry streaks disappear to avoid overworking the gluten.
6. Preparing the Dish
Pour the batter into your prepared baking dish. Use your spatula to smooth the top into an even layer. This ensures the casserole bakes at a uniform rate across the entire pan.
7. The Final Bake
Place the dish on the center rack of the oven. Bake for 45 minutes until the center is set and the edges are golden brown.
8. The Testing Phase
Gently shake the pan; the center should have a very slight jiggle but not look liquid. Insert a toothpick into the center; it should come out mostly clean with a few moist crumbs.
9. The Rest Period
Remove from the oven and let it sit for at least 10 minutes. Note: This is the most important step, as it allows the starches to fully set and the flavors to meld.
Fixing Common Texture Mistakes Easily
The "Wet Center" Fix
If you pull your corn casserole recipe out of the oven and the middle looks like soup, don't panic. This usually happens if the eggs were too cold or the oven temperature fluctuated. Simply tent the dish loosely with foil to prevent the edges from burning and give it another 10 minutes.
The residual heat often finishes the job during the resting period anyway.
Moisture Control
Using frozen corn instead of canned can sometimes introduce extra water. If you notice a pool of liquid forming around the edges, it’s likely because the corn wasn't drained well enough or the frozen kernels released their internal moisture too quickly.
| Problem | Root Cause | Solution |
|---|---|---|
| Gritty Texture | Undissolved cornbread mix | Sift the dry mix and whisk the wet base thoroughly. |
| Bland Flavor | Lack of acidity or salt | Ensure you use full fat sour cream and don't skip the paprika. |
| Burnt Edges | Oven too hot or dark pan | Reduce heat by 25°F if using a dark metal pan. |
Common Mistakes Checklist:
- ✓ Soften the cream cheese completely to avoid white lumps in the finished bake.
- ✓ Drain the whole kernel corn thoroughly to prevent a soggy bottom.
- ✓ Resist the urge to over mix once the dry ingredients are added.
- ✓ Let the casserole rest for the full 10 minutes before slicing.
- ✓ Use a glass or ceramic dish for the best heat retention.
Adjusting Batches For Any Crowd
If you're hosting a massive party, you can easily double this corn casserole recipe. However, don't just throw everything into a deeper pan. Use two 9x13 dishes instead. This maintains the surface area to volume ratio, ensuring those coveted crispy edges aren't lost.
If you try to bake a double batch in one deep pot, the center will stay raw while the outside dries out.
When scaling down for a solo dinner or a couple, you can halve the recipe and use an 8x8 inch square pan. Since the volume is smaller, start checking for doneness about 10 minutes earlier than the full recipe suggests. If you're looking for a similar comforting vibe in a smaller format, you might also enjoy my Proper Homemade Green recipe for a different take on classic sides.
| Premium | Budget | Flavor Impact | Savings |
|---|---|---|---|
| Fresh Roasted Corn | Canned Sweet Corn | More smoky depth | Save $4-6 |
| Artisan Cornmeal | Boxed Cornbread Mix | More rustic texture | Save $2-3 |
| Organic Sour Cream | Store Brand Sour Cream | Negligible in a bake | Save $1.50 |
Storing Leftovers And Using Scraps
Storage: This casserole keeps beautifully in the fridge for up to 4 days. Store it in an airtight container or cover the baking dish tightly with plastic wrap. To reheat, I recommend using the oven at 300°F for about 15 minutes to keep the edges from getting rubbery.
If you're in a rush, a microwave works, but you'll lose that slight crust on the top.
Freezing: You can freeze the baked casserole for up to 3 months. Let it cool completely, wrap it in a double layer of foil, and thaw it in the fridge overnight before reheating. I don't recommend freezing the raw batter, as the leavening agents in the cornbread mix will lose their punch.
Zero Waste: If you have small scraps left over, don't toss them! Crumble the cold casserole into a hot skillet with a little butter the next morning. It makes an incredible "corn hash" when topped with a fried egg.
You can also stir leftovers into a chili or a corn chowder to act as a thickener and flavor booster.
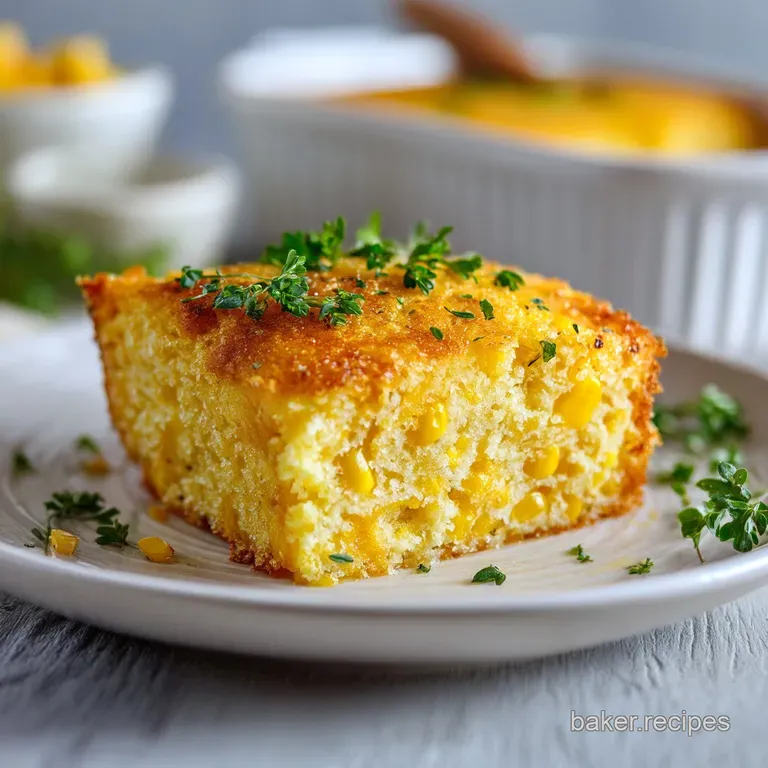
Visual Finishing For Better Service
Presentation matters, even for a "homestyle" dish. While the casserole looks great on its own, a few small touches can make it look like something from a professional kitchen. A simple sprinkle of fresh chives or chopped scallions right before serving adds a pop of color and a fresh, sharp contrast to the rich, buttery corn.
If you want to go a bit more "modern simplicity," try a light drizzle of honey over the top while it's still warm. The honey seeps into the small cracks of the crust, highlighting the natural sweetness of the corn and the smokiness of the paprika.
Serve it directly from the baking dish to lean into that rustic, cozy feeling. It’s the kind of dish that doesn't need to be fancy to be the star of the table.

Corn Casserole Recipe FAQs
What are the main ingredients in a classic corn casserole?
Typically, five key ingredients form the base: cornbread mix, cream style corn, whole kernel corn, sour cream, and butter. These provide the structure, moisture, and richness.
What essential components go into corn casserole?
Corn casserole relies on a blend of pantry staples for its signature texture and flavor. Beyond the corn itself (both whole kernel and cream style), it usually includes a cornbread mix for structure, sour cream for tang and moisture, and butter for richness.
What ingredients are in Paula Deen's corn casserole?
Paula Deen's version often features a rich combination of ingredients for an extra indulgent bake. While variations exist, it commonly includes cornbread mix, cream style corn, whole kernel corn, sour cream, butter, and sometimes cream cheese or eggs for added richness and binding.
Should I put eggs in my corn casserole?
Yes, eggs are often included and recommended for structure and binding. They help create a more cohesive casserole, preventing it from being too crumbly and ensuring a richer, more custard like texture, similar to how they help bind components in dishes like a Dorito Chicken Bake Casserole.
Why does my corn casserole come out too wet?
A wet corn casserole is usually due to excess moisture or underbaking. Ensure you drain the whole kernel corn very well and consider that using frozen corn can introduce more water than canned. Baking until the center is set and a toothpick comes out with moist crumbs is crucial.
How do I get crispy edges on my corn casserole?
Achieve crispy edges by using a shallower baking dish, like a 9x13 inch pan, and ensuring the oven temperature is correct. Spreading the batter evenly and baking until the edges pull away from the pan and turn golden brown will give you that sought after texture, much like the satisfying crispiness found when frying, as in our How to Make Crispy Fried Corn Fritters with Greek Yogurt Sauce: A Family Favorite!.
Can I make corn casserole ahead of time?
Yes, corn casserole is excellent for making ahead. You can assemble the entire mixture up to 24 hours in advance, cover it tightly, and refrigerate. When ready to bake, allow it to sit at room temperature for about 30 minutes before baking, or add a few extra minutes to the baking time.
Corn Casserole Recipe

Ingredients:
Instructions:
Nutrition Facts:
| Calories | 274 kcal |
|---|---|
| Protein | 4.7 g |
| Fat | 17.5 g |
| Carbs | 26.6 g |
| Fiber | 1.7 g |
| Sugar | 6.8 g |
| Sodium | 315 mg |
