Magic Cookie Bars from Eagle Brand Recipe
- Time: Active 10 mins, Passive 25 mins, Total 35 mins
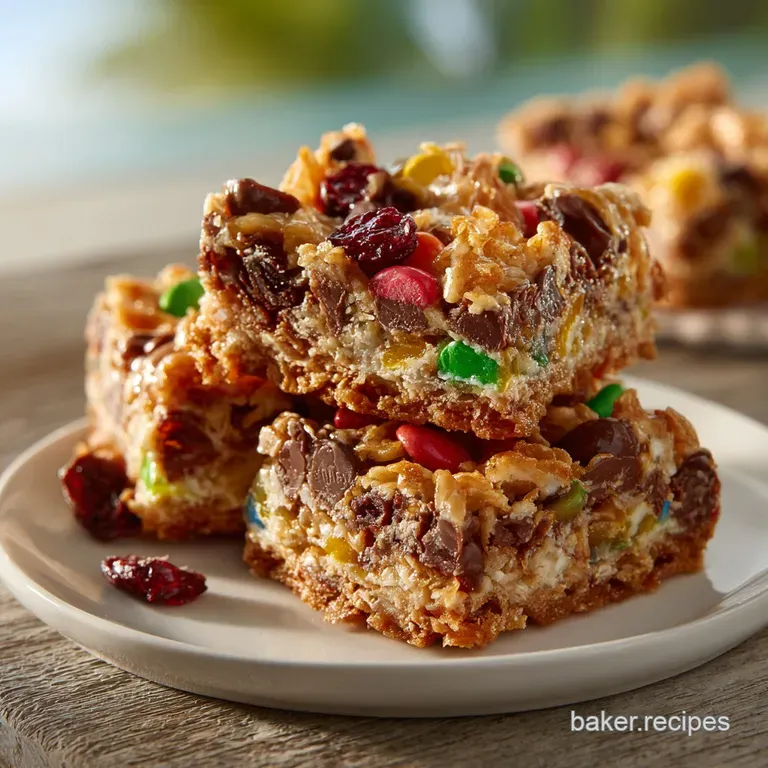
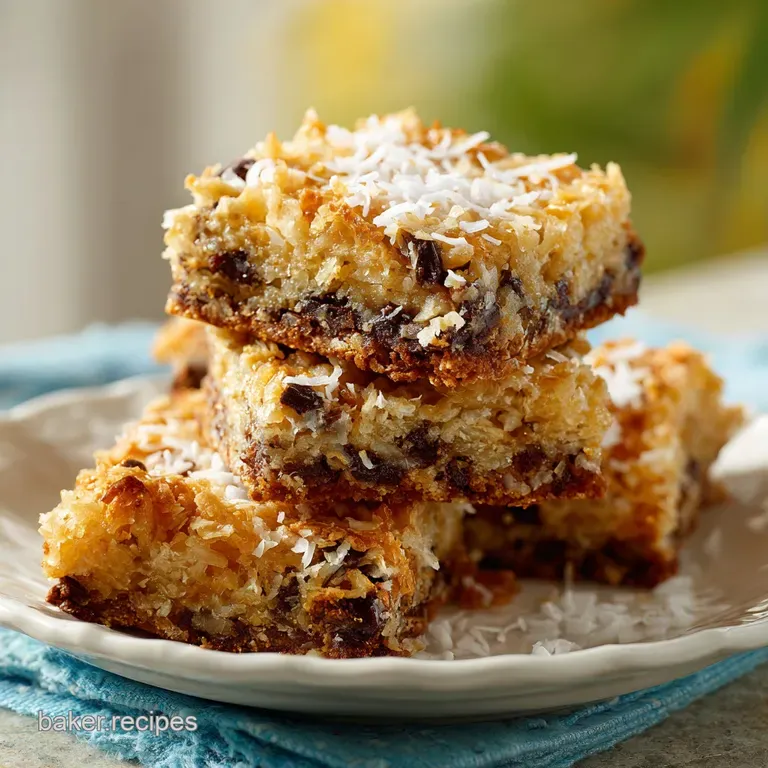
- Flavor/Texture Hook: A velvety, caramelized center contrasted by a shatter crisp coconut topping.
- Perfect for: Stress free entertaining, holiday gift tins, or beginner bakers wanting high impact results.
- Master These Magic Cookie Bars from EAGLE BRAND
- Essential Specs for Seven Layer Bars
- Kitchen Disaster to Gooey Success Story
- The Physics of the Bind
- Component Analysis and Deep Dive
- Core Elements for the Perfect Set
- Minimal Tools for Maximum Flavor
- Critical Steps for Flawless Layered Bake
- Common Mistakes and Quick Fixes
- Creative Ways to Personalize This Recipe
- Storage Guidelines for Freshness and Quality
- Optimal Serving and Enjoyment Tips
- Recipe FAQs
- 📝 Recipe Card
Master These Magic Cookie Bars from EAGLE BRAND
The first time I pulled these out of the oven, the smell of toasted coconut and butterscotch hit me like a warm hug. I remember standing in my tiny first apartment, watching the edges of the pan sizzle with bubbling, caramelized sugar while the center remained tantalizingly gooey.
There is something almost hypnotic about the way the layers transform from a pile of dry ingredients into a singular, decadent bar that somehow feels both nostalgic and fancy at the same time.
We've all been there: you need a win in the kitchen but don't want to spend three hours scrubbing mixing bowls. This recipe is the ultimate shortcut that doesn't taste like one. It is a masterclass in textures, where the base provides a salty, buttery snap that anchors the sweet, molten layers above.
If you've ever struggled with bars that fall apart or toppings that stay dry, stick with me - we're going to fix all of that today.
Essential Specs for Seven Layer Bars
When you are planning your baking schedule, precision is your best friend. This dish is remarkably fast to assemble, but the magic happens during the resting phase. If you try to slice these while they are still warm, you'll end up with a delicious but structurally unsound mess.
I usually make these the night before a party to let the flavors meld and the structure fully set.
| Factor | Metric |
|---|---|
| Bake Temperature | 180°C (350°F) |
| Pan Dimensions | 23 x 33 cm (9 x 13 inch) |
| Cooling Time | 2 hours minimum |
It is worth noting that the thickness of your graham cracker base dictates the final bite. If you prefer a sturdier, cookie like foundation, press the crumbs down firmly with the bottom of a flat measuring cup. For a more crumbly, delicate texture, use a lighter touch with your fingers.
Kitchen Disaster to Gooey Success Story
I used to think all canned milk was created equal. Big mistake. One year, I accidentally grabbed a can of evaporated milk instead of EAGLE BRAND Sweetened Condensed Milk, and let's just say the result was a soggy, milky soup that went straight into the bin. It was a lesson in food science I'll never forget.
Condensed milk isn't just a sweetener; it is the structural glue that binds every chip, nut, and coconut flake into a cohesive bar.
Once I understood that the milk actually undergoes a caramelization process (the Maillard reaction) right there in the pan, everything clicked. These bars are the result of layers behaving exactly as they should under heat.
The butter melts into the crumbs to create a crust, while the milk seeps down, surrounding the chocolate and butterscotch to form a fudge like middle. It is brilliant, simple, and honestly, a little bit addictive.
The Physics of the Bind
Protein Denaturation: The proteins in the condensed milk coagulate when heated, turning a liquid into a semi solid matrix that holds the toppings in place.
Sugar Concentration: As water evaporates during baking, the high sugar content in the milk reaches the "soft ball" stage, creating that signature velvety chew.
Fat Emulsification: The melted butter acts as a barrier, preventing the crust from becoming soggy while the milk sets above it.
Fast vs Classic Method Comparison
| Feature | Fast Method (Microwave Melt) | Classic Method (Oven Melt) |
|---|---|---|
| Preparation | Melt butter in microwave, then stir in crumbs | Melt butter directly in the baking pan in the oven |
| Texture | Uniform, tight crust with less mess | Rustically buttery with potential for "greasy" spots |
| Time | Saves 5 mins of oven pre heating | Adds 5 mins to total cook time |
Whichever path you choose, the outcome remains satisfyingly rich. The microwave method is my go to when I'm in a rush because it gives me a more consistent, even base.
Component Analysis and Deep Dive
Understanding why each part of this recipe exists helps you become a better cook. We aren't just tossing things in a pan; we are layering based on density and melting points. The chocolate and butterscotch chips need the milk to surround them so they don't scorch, while the coconut needs to be on top to catch the direct heat and turn golden brown.
| Ingredient | Science Role | Pro Secret |
|---|---|---|
| EAGLE BRAND Milk | Structural Binder | Pour in a zigzag pattern for even coverage |
| Graham Crumbs | Structural Foundation | Add a pinch of sea salt to balance the sugar |
| Shredded Coconut | Moisture Barrier | Use unsweetened if you prefer a less sugary finish |
Core Elements for the Perfect Set
Gathering your elements before you start is the secret to a stress free bake. Since we aren't using a mixer, the quality of your ingredients really shines through here.
- 113g Unsalted Butter: Melted. Why this? Provides the fat needed to bind the dry graham crumbs into a crust.
- 150g Graham Cracker Crumbs: Fine texture. Why this? Creates a classic, sandy base that mimics a traditional cheesecake crust.
- 1/4 tsp Fine Sea Salt: To balance the sweetness.
- 396g EAGLE BRAND® Sweetened Condensed Milk: The magic binder. Why this? Its specific viscosity and sugar content are essential for the bars to set.
- 340g Semi Sweet Chocolate Chips: high-quality cocoa.
- 85g Butterscotch Chips: Adds a deep, toasty caramel note.
- 115g Shredded Flaked Coconut: Sweetened or unsweetened.
- 120g Chopped Walnuts or Pecans: For essential crunch.
If you are looking for other ways to use up your pantry staples, you might enjoy my Christmas Cookies recipe which also focuses on that classic buttery flavor profile.
Minimal Tools for Maximum Flavor
You don't need a stand mixer or even a hand beater for this one. That is the beauty of a "dump and bake" style dessert. I usually just use a single 23 x 33 cm glass or metal baking pan and a fork.
Chef's Note: If you use a glass pan, remember that it retains heat longer than metal. You may need to take the bars out 2 minutes early to prevent the edges from getting too hard.
Make sure you have some parchment paper on hand. While the original recipe says you can just grease the pan, lining it with parchment that hangs over the sides (sling method) makes lifting the entire block out for clean slicing a dream. It also means zero cleanup for the pan itself, which is a massive win in my book.
Critical Steps for Flawless Layered Bake
Creating the Structural Foundation
- Preheat your oven to 180°C (350°F).
- Combine 113g melted butter, 150g graham crumbs, and salt in a small bowl. Note: Stir until it looks like wet sand.
- Press the mixture firmly into the bottom of your 23 x 33 cm pan. Bake 5 mins until fragrant.
- Remove the pan from the oven and pour the 396g of sweetened condensed milk evenly over the crust.
- Distribute 340g chocolate chips and 85g butterscotch chips over the milk. Layer them evenly for consistent bites.
- Sprinkle 120g chopped nuts over the chips. Note: Press them down slightly with a spatula.
- Top everything with 115g shredded coconut.
- Bake for 25 mins until the coconut is golden and the edges sizzle.
- Cool completely in the pan for at least 2 hours before lifting out to slice.
For those who love the holiday baking season, these bars are a fantastic addition to any tray of Xmas Cookie Recipes, as they provide a much needed chewy texture alongside traditional shortbread.
Common Mistakes and Quick Fixes
The most common issue I see is the "greasy bottom." This usually happens when the butter and crumbs aren't fully integrated or if the oven temperature is too low, causing the butter to separate rather than bake into the crumbs.
Why Your Crust Is Crumbly
If your bars fall apart the moment you pick them up, the base wasn't compacted enough. You really need to put some muscle into pressing those crumbs down. Think of it like making a sandcastle; if the sand is loose, the tower falls.
| Problem | Root Cause | Solution |
|---|---|---|
| Soggy Center | Underbaked or too much milk | Bake until the edges are deep brown; follow measurements exactly. |
| Burnt Coconut | Top rack placement | Move the pan to the middle or lower rack; tent with foil if needed. |
| Hard Edges | Overbaking in metal pan | Reduce bake time by 3 minutes and check for the "jiggle" in the center. |
Common Mistakes Checklist
- ✓ Always use sweetened condensed milk, never evaporated milk (they are not interchangeable).
- ✓ Press the graham cracker base firmly to ensure the bars don't crumble when sliced.
- ✓ Let the bars cool completely at room temperature; do not rush this by putting them in the fridge too early.
- ✓ Toast your nuts for 5 minutes before adding them to the layers to maximize the flavor.
- ✓ Use a sharp, warm knife for the cleanest cuts through the chocolate and butterscotch layers.
Creative Ways to Personalize This Recipe
If you aren't a fan of walnuts, pecans are a classic substitute that brings a sweeter, more buttery flavor. For a nut free version, you can swap the walnuts for toasted sunflower seeds or simply add more graham cracker chunks for texture.
Swapping the Seven Layer Classic
If you want to experiment, try replacing the butterscotch chips with white chocolate chips or even dark chocolate chunks. The key is to keep the ratios the same. If you remove 85g of one chip, replace it with 85g of another.
- Dark Decadence: Use 70% dark chocolate chips and sea salt on top.
- Tropical Twist: Swap nuts for dried pineapple and use extra coconut.
- Pretzel Crunch: Use crushed pretzels instead of graham crumbs for a salty kick.
Storage Guidelines for Freshness and Quality
These bars are surprisingly hardy. You can keep them at room temperature in an airtight container for about 3 to 5 days. If you find they are getting a bit soft, popping them in the fridge will firm up the chocolate and the condensed milk layer, giving them a fudgy, candy bar-like texture.
For long term storage, these freeze beautifully. Wrap individual squares in plastic wrap and then place them in a freezer bag. They will stay fresh for up to 3 months. When you're ready for a treat, just let them thaw on the counter for 20 minutes, or eat them straight from the freezer - they are actually quite good cold!
Optimal Serving and Enjoyment Tips
Magic Cookie Bars from EAGLE BRAND are very rich, so I recommend cutting them into smaller squares than you might for brownies. A 2 inch square is usually plenty for most people. They pair exceptionally well with a bitter cup of black coffee or a cold glass of milk to cut through the intense sweetness of the butterscotch and coconut.
If you are serving these at a party, try placing them in individual cupcake liners. This makes them easy for guests to grab and prevents the sticky edges from clinging to each other on a serving platter.
They are the ultimate "make-ahead" dessert because the texture actually improves after a day of sitting, allowing the moisture from the milk to fully soften the chips and crumbs into a singular, velvety bite.
 : PIN FOR LATER")
Recipe FAQs
Do magic cookie bars need to be refrigerated?
No, room temperature storage is sufficient. Keep them in an airtight container at room temperature for up to 5 days; refrigeration isn't required unless your kitchen is extremely warm.
What is the history of magic cookie bars?
They originated with EAGLE BRAND marketing. These bars, originally called "Seven Layer Bars," became popular in the mid-20th century as a simple, no-mixer recipe promoted heavily in condensed milk cookbooks.
How do you cut magic cookie bars neatly?
Chill the bars completely before slicing. After cooling to room temperature, refrigerate for at least 1 hour, then use a long, sharp knife dipped in hot water and wiped dry between each cut for clean separation.
Can I freeze magic cookie bars?
Yes, they freeze exceptionally well for long term storage. Wrap individual squares tightly in plastic wrap, then place them in a freezer safe bag; they maintain good texture for up to three months.
Why are my magic cookie bars greasy on the bottom?
The butter likely separated from the graham crumbs during baking. Ensure you press the crumb mixture firmly into the pan and pre-bake it briefly to set the fat before adding the wet ingredients.
Is it true that I must use sweetened condensed milk and not evaporated milk?
False, evaporated milk will ruin the structure of the bars. Sweetened condensed milk is highly concentrated with sugar, which caramelizes to form the fudgy matrix; evaporated milk contains too much water and will result in a soupy, unset bar.
What can I substitute for pecans if I have a nut allergy?
Replace the volume with extra coconut or seeds. You can use an equal amount of toasted sunflower seeds for crunch, similar to the seed based texture you achieve when making a quick savory sauce, just remember these are sweet!
Eagle Brand Magic Cookie Bars

Ingredients:
Instructions:
Nutrition Facts:
| Calories | 256 calories |
|---|---|
| Protein | 3.2 g |
| Fat | 15.5 g |
| Carbs | 27.7 g |
| Fiber | 1.8 g |
| Sugar | 20.8 g |
| Sodium | 83 mg |
