S'mores Bark: No Bake Chocolate Crunch
- Time: Active 15 minutes, Passive 45 minutes, Total 1 hour
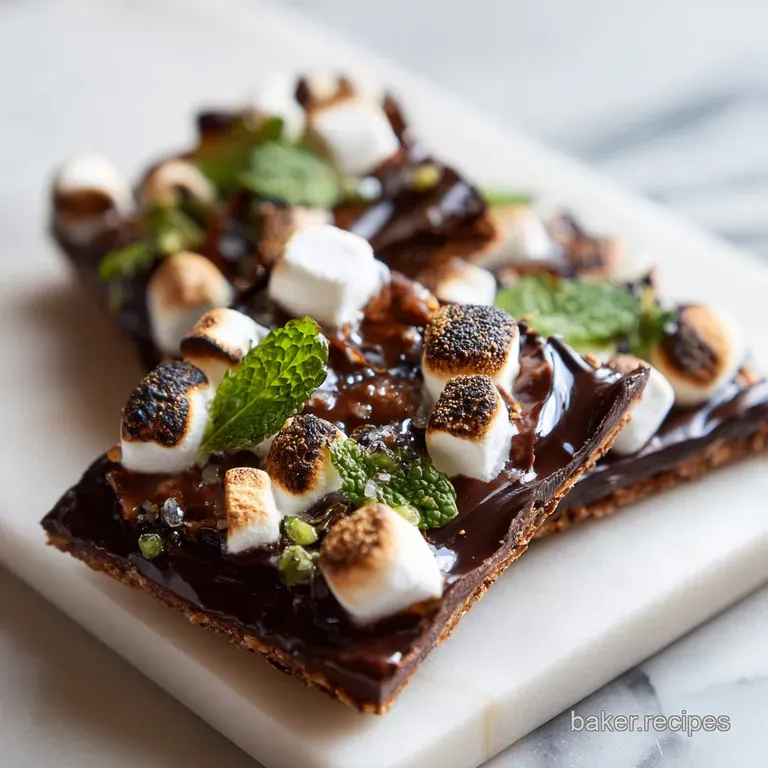
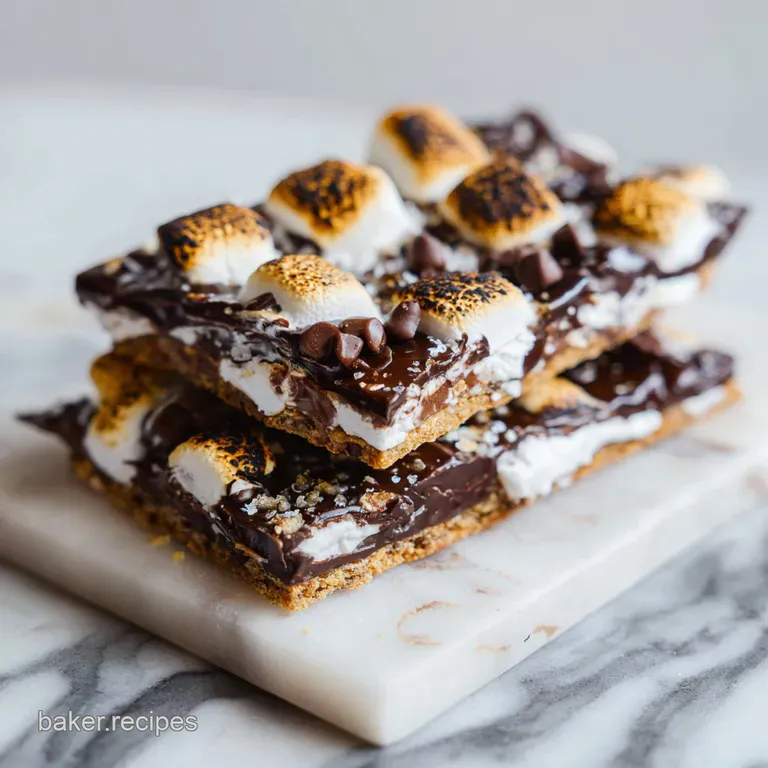
- Flavor/Texture Hook: Avelvety chocolate layer topped with gooey, charred marshmallows and a salty graham cracker shatter.
- Perfect for: Movie nights, Budget-Friendly party favors, or a quick sweet fix for the kids.
- Master the Crunchy Layers of Homemade S'mores Bark
- Why Sugar and Fat Create That Addictive Shatter
- The Essential Elements for a Budget-Friendly Chocolate Treat
- Simple Tools for a Hassle Free No Bake Dessert
- Step-by-Step Guide to Achieving the Perfect Toasted Finish
- Avoid These Common Mistakes for the Best Results
- Creative Ways to Customize Your Sweet Chocolate Creation
- Keeping Your Sweet Treats Crispy and Fresh for Days
- Perfect Pairings for Your New Favorite Chocolate Snack
- Recipe FAQs
- 📝 Recipe Card
Master the Crunchy Layers of Homemade S'mores Bark
The first time I tried making this, I actually managed to set a marshmallow on fire in my kitchen. The smell of singed sugar and the sound of my smoke alarm were definitely not what I had in mind for a relaxed Sunday afternoon.
But that "mistake" taught me something vital: the best flavor comes from that borderline burnt sugar, and you don't need a forest or a tent to get it. Now, every time I hear that specific shatter of the chocolate breaking against the graham cracker base, I'm transported back to those summer nights, minus the mosquito bites.
There is something deeply satisfying about the contrast between a cold, crisp chocolate layer and the soft, pillowy marshmallow topping. When you bite into a piece, you first get the hit of flaky sea salt, followed by the rich cocoa, and finally the crunch of the crackers.
It's a textured experience that feels way more expensive than it actually is to make. We've all been there, standing in the baking aisle wondering if we need the "premium" cocoa butter. Trust me, with this recipe, we're going for smart, Budget Friendly choices that still deliver a high end result.
We are going to focus on building a foundation that doesn't go soggy and a chocolate topping that stays shiny without the fuss of traditional tempering. This isn't just about melting things together; it's about managing textures so every bite is as good as the last.
If you've ever felt intimidated by candy making, this is your gateway. It's forgiving, it's fast, and honestly, it’s hard to stop eating once you start. Let’s get stuck into the mechanics of why this works so well.
Why Sugar and Fat Create That Addictive Shatter
Understanding the "how" behind the crunch makes you a better cook instantly. When we talk about S'mores Bark, the magic lies in the moisture barrier we create between the crackers and the toppings.
Without it, the crackers absorb the humidity from the chocolate and marshmallows, turning into a sad, floppy mess within an hour.
- Fat Barrier: The melted butter coats the starch in the graham crackers, creating a hydrophobic layer that prevents moisture from seeping in.
- Thermal Snap: Mixing semi sweet and milk chocolate balances the sugar to fat ratio, ensuring the bark sets firmly at room temperature but melts quickly on the tongue.
- Surface Area: Using mini marshmallows instead of large ones increases the surface area for browning, which means more caramelization flavor in every single bite.
- Starch Suspension: Adding extra graham cracker crumbs into the chocolate itself provides "anchor points" that help the bark stay structurally sound when you break it into pieces.
| Method | Time | Texture | Best For |
|---|---|---|---|
| Oven Broiler | 2 mins | Charred & Smokey | Authentic campfire flavor |
| Stovetop Melt | 5 mins | Soft & Gooey | Avoiding the "burnt" taste |
| Kitchen Torch | 1 min | Precision Toasted | Picture perfect presentation |
The choice of heat source really changes the personality of the dish. While the oven broiler is the most efficient for a large batch, it requires a watchful eye. Just like the technique used in our Pecan Pie Bark recipe, heat management is the difference between a golden toasted topping and a charred disaster. If you want that deep, smokey aroma, the broiler is your best friend, but you have to stand right there and watch it happen.
The Essential Elements for a Budget Friendly Chocolate Treat
Getting the right ingredients doesn't mean spending a fortune. I usually grab the store brand crackers and chocolate chips because, once they are melted and toasted, the nuances of "artisan" chocolate are often lost. What matters more is the chemistry between the salted butter and the cocoa solids.
| Component | Science Role | Pro Secret |
|---|---|---|
| Salted Butter | Emulsifier | Use cold butter and melt it slowly to keep the milk solids intact for a nutty flavor. |
| Semi Sweet Chips | Structure | Chips contain stabilizers that help the bark maintain its shape better than bar chocolate. |
| Mini Marshmallows | Aeration | Freezing them for 10 minutes before toasting prevents them from melting into a puddle. |
- 10 full sheet Graham Crackers: These form our structural base.
- 0.5 cup Salted Butter (115g): This provides the fat needed to crisp the crackers.
- 12 oz Semi Sweet Chocolate Chips (340g): The main body of the bark.
- 4 oz Milk Chocolate (113g): Adds creaminess and a lighter color for marbling.
- 2 cups Mini Marshmallows: The iconic s'mores topping.
- 0.5 cup Graham cracker crumbs: For extra texture and visual appeal.
- 1 tsp Flaky Sea Salt: To cut through the intense sweetness.
For the butter, I always stick with salted. It adds a layer of complexity that unsalted butter just can't touch. If you only have unsalted, just add a pinch of fine salt to it while melting. As for the chocolate, the mix of semi sweet and milk chocolate is non negotiable for me.
The semi sweet provides the "snap," while the milk chocolate gives it that velvety mouthfeel we associate with classic candy bars.
Simple Tools for a Hassle Free No Bake Dessert
You don't need a fancy kitchen to pull this off. In fact, some of my best batches were made in a tiny apartment with a toaster oven. The key is having a flat surface and something to handle the heat.
- Large Baking Sheet: A standard 13x18 inch rimmed pan is ideal.
- Parchment Paper: Essential for lifting the bark out without it sticking.
- Heat Proof Bowls: Use glass or stainless steel for the "double boiler" method on the stovetop.
- Offset Spatula: This makes spreading the chocolate much smoother than a regular spoon.
- Kitchen Scale: To ensure the chocolate ratios are exact for the best set.
If you don't have an offset spatula, the back of a large metal spoon works in a pinch, though it’s a bit clunkier. One trick I've learned is to slightly warm the spoon or spatula in hot water (then dry it completely!) before spreading the chocolate. It glides like a dream. This is a great tip for many chocolate based treats, similar to what you'd do for the Baking Chocolate Chip recipe when smoothing out a cake base.
step-by-step Guide to Achieving the Perfect Toasted Finish
- Line the pan. Place parchment paper on your baking sheet, ensuring it hangs over the edges slightly. Note: This acts as a handle later.
- Arrange the base. Lay 10 full sheet Graham Crackers side-by-side until the bottom of the pan is covered.
- Apply the butter. Drizzle 0.5 cup melted Salted Butter evenly over the crackers.
- Toast the crackers. Bake at 180°C for 8 minutes until the butter is bubbling and the crackers smell nutty.
- Melt the chocolate. Use a microwave or double boiler to melt 12 oz Semi Sweet Chocolate Chips. Note: Stir every 30 seconds to avoid scorching.
- Layer it up. Pour the melted semi sweet chocolate over the hot crackers and spread thinly.
- Create the marble. Melt 4 oz Milk Chocolate and drop dollops onto the semi sweet layer; swirl with a knife until a marbled pattern appears.
- Add the toppings. Sprinkle 2 cups Mini Marshmallows and 0.5 cup Graham cracker crumbs over the wet chocolate.
- The final toast. Place under the broiler for 1-2 minutes until the marshmallows are golden brown and starting to soften.
- Set and chill. Let it sit at room temperature for 20 minutes, then refrigerate for 45 minutes until the chocolate is firm and cold.
Once the bark is set, lift the whole sheet out using the parchment paper. I like to use a heavy chef's knife to start the breaks, but then I just use my hands. There’s something therapeutic about snapping off jagged, irregular pieces. It shouldn't look perfect; it should look like a delicious pile of rubble.
Avoid These Common Mistakes for the Best Results
The biggest heartbreak in bark making is seized chocolate. This happens when a single drop of water gets into your melting bowl. The chocolate goes from silky to a gritty, clumpy mess in seconds. To avoid this, make sure your bowls and spatulas are bone dry.
If it does happen, you can sometimes save it by whisking in a teaspoon of neutral oil, but it’s better to just keep the water far away.
Why Your Chocolate Didn't Set
If your bark stays soft even after an hour in the fridge, it's usually because the chocolate was overheated. High heat breaks down the fat crystals that help it harden. Always melt slowly. Another culprit could be the humidity in your kitchen; on very rainy days, chocolate takes twice as long to firm up.
Dealing with Soggy Crackers
This usually happens if you skip the initial "butter toast" step. That 8 minutes in the oven isn't just for flavor; it's a drying process. By toasting the crackers with the butter first, you're essentially waterproofing them before the heavy chocolate goes on top.
| Problem | Root Cause | Solution |
|---|---|---|
| Separating layers | Chocolate cooled too much | Pour chocolate while crackers are still warm from the oven. |
| Burnt Marshmallows | Broiler was too close | Lower the oven rack to the middle position for more control. |
| Grainy Texture | Water contamination | Ensure all tools are dry; avoid steam from double boilers. |
Common Mistakes Checklist - ✓ Don't rush the cooling process in the freezer; the fridge is better for a stable set. - ✓ Use a serrated knife if you want straight edges, but hands are best for "bark" style.
- ✓ Avoid using "low-fat" spreads; they contain too much water and will ruin the crunch. - ✓ Keep the marshmallow layer even so they all toast at the same rate. - ✓ Don't over swirl the chocolates or you'll just end up with a muddy brown color.
Creative Ways to Customize Your Sweet Chocolate Creation
If you are feeding a crowd, this recipe scales up beautifully. You can easily double it by using two baking sheets. Just remember that when you double the chocolate, you don't necessarily need to double the salt keep it to about 1.5x so it doesn't become over seasoned. If you’re looking for other variations, consider using the base logic from a How to Mix recipe for an even more snackable version.
For a smaller batch, simply halve everything and use a 9x9 inch square pan. The cook times stay mostly the same, but watch the broiler closely as smaller pans can heat up faster. If you want to go the "luxury" route, swap the semi sweet chips for a 70% dark chocolate bar and use high-quality European butter.
The result is a much deeper, more adult version of the childhood classic.
| Servings | Crackers | Chocolate Total | Pan Size |
|---|---|---|---|
| 9 People | 5 sheets | 8 oz | 9x9 inch |
| 18 People | 10 sheets | 16 oz | 13x18 inch |
| 36 People | 20 sheets | 32 oz | Two 13x18 inch |
Chef's Tip: If you want a really unique twist, replace half of the graham crackers with salty pretzels. The extra salt and the different crunch profile are absolutely brilliant.
Keeping Your Sweet Treats Crispy and Fresh for Days
One of the most common myths is that chocolate bark needs to be kept in the freezer. Actually, the freezer can cause "bloom" that white, dusty look on the surface because of the moisture. It’s totally safe to eat, but it doesn't look great.
Keep your S'mores Bark in an airtight container at room temperature if your house is cool, or in the fridge if it's warm. It will stay perfectly snappy for up to 7 days.
Another misconception is that you need a blowtorch for "real" s'mores. While a torch gives you great control, the oven broiler actually does a better job of warming the chocolate underneath the marshmallow, which helps everything fuse together. The torch only heats the very top surface.
- - Fridge
- 1 week in an airtight container.
- - Freezer
- Up to 3 months (wrap in parchment then foil to prevent freezer burn).
- - Zero Waste
- Take any leftover crumbs or tiny shards from the bottom of the pan and stir them into vanilla ice cream or use them as a topping for morning oatmeal. Never throw away the "dust" it's pure flavor!
Perfect Pairings for Your New Favorite Chocolate Snack
This bark is pretty rich, so it plays well with things that have a bit of acidity or bitterness. I love serving a few pieces alongside a strong cup of black coffee or a glass of cold milk.
If you're putting together a dessert board, pair it with some tart green apple slices or fresh strawberries to cut through the sugar.
If you are feeling adventurous, try serving a piece of this bark on top of a warm brownie. The heat from the brownie slightly softens the chocolate base of the bark, creating a multi layered dessert that feels like something out of a high end bistro. It’s also a fantastic addition to a holiday gift box.
People always assume you spent hours tempering chocolate when, in reality, you just had a productive hour in the kitchen with some crackers and butter.
Right then, you've got the science, the steps, and the secrets. It's time to get that oven preheated and start layering. Just remember: keep your eyes on the broiler, keep your bowls dry, and don't be afraid to get your hands messy when it's time to break it all apart. Happy snacking!

Recipe FAQs
Can I substitute regular marshmallows for mini marshmallows?
No, stick with mini marshmallows for best results. Large marshmallows melt unevenly under the broiler, creating huge un-toasted spots next to overly burnt areas.
How to prevent the graham cracker base from becoming soggy?
Bake the crackers first with the melted butter. This initial baking step dries out the crackers and the butter creates a fat barrier, preventing moisture absorption from the chocolate layer above.
Is it true that using only milk chocolate makes the bark too soft to snap?
Yes, that is true for a crisp snap. Milk chocolate contains more sugar and less cocoa solids, resulting in a softer set; use at least 50% semi sweet chocolate for that signature brittle texture, similar to achieving the perfect snap in our Ritz Smores Cookies recipe.
How to achieve the classic toasted marshmallow look without a kitchen torch?
Place the pan under the oven broiler for 1-2 minutes. Watch it constantly as the radiant heat toasts very quickly; this is a core technique for surface caramelization.
What is the best way to store S'mores Bark to maintain its crunch?
Store it airtight at cool room temperature or refrigerated. Freezing is not ideal as the moisture fluctuation can cause sugar bloom, though it remains safe to eat.
How can I ensure the chocolate spreads thinly and evenly?
Warm your spreading tool slightly before use. Dip an offset spatula in hot water, dry it completely, and then use it to glide the melted chocolate over the warm cracker base.
Can I swap graham crackers for another crunchy component?
Yes, pretzels are an excellent substitute for part of the base. Replacing half the crackers with thin, salty pretzels adds a savory counterpoint that balances the sweetness beautifully; see how this technique applies to flavor contrast in other baking projects.
Easy S Mores Bark Recipe

Ingredients:
Instructions:
Nutrition Facts:
| Calories | 237 kcal |
|---|---|
| Protein | 2.2g |
| Fat | 13.1g |
| Carbs | 30.0g |
| Fiber | 1.8g |
| Sugar | 20.1g |
| Sodium | 182mg |
