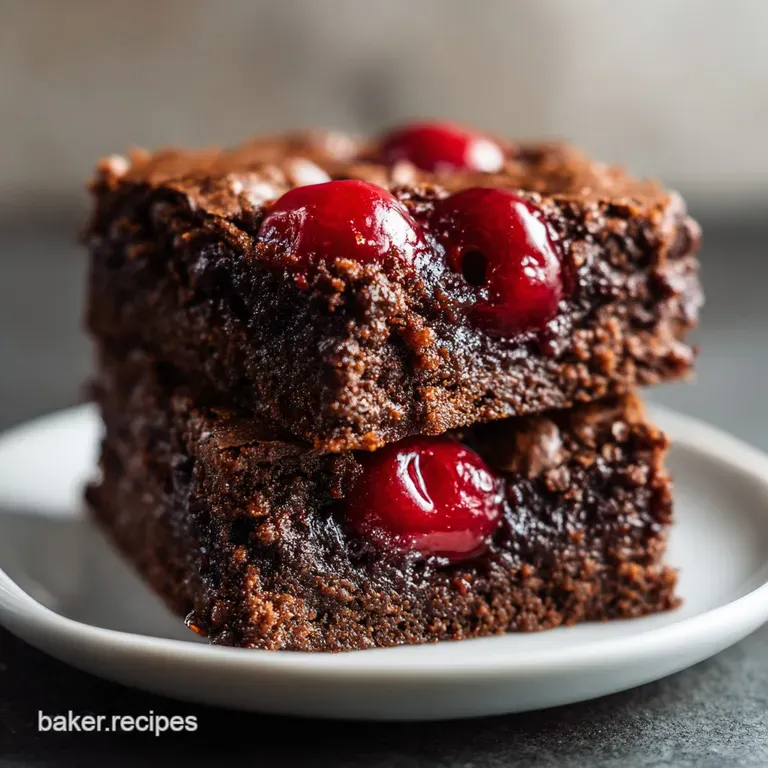
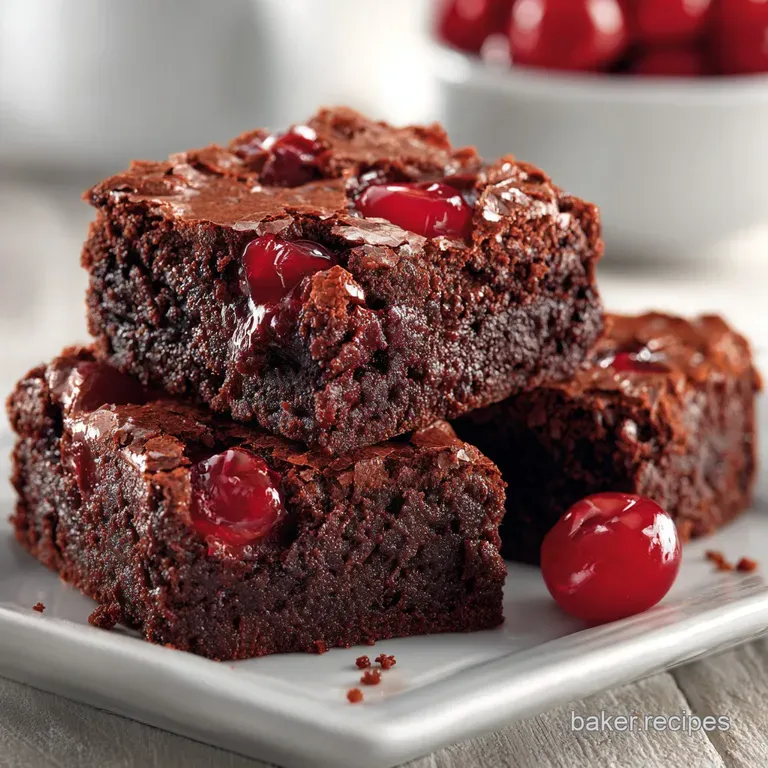
Cherry Brownie Bars with Cream Cheese Swirl
- Time: Active 20 minutes, Passive 35 minutes, Total 55 minutes
- Flavor/Texture Hook: Velvety dark chocolate with a tart, creamy finish
- Perfect for: Weekend indulgence or impressing guests at a potluck
- Mastering These Fudgy Cherry Brownie Bars
- Why This Chocolate Cherry Combo Wins
- Essential Pantry Items for Success
- Tools for the Perfect Bake
- Step by Step Baking Guide
- Fixing Common Brownie Baking Blunders
- Clever Ingredient Swaps and Twists
- Keeping Your Leftovers Fresh Longer
- Plating and Garnish Idea Guide
- Myths Regarding Brownie Baking
- Recipe FAQs
- 📝 Recipe Card
Mastering These Fudgy Cherry Brownie Bars
The first time I pulled a batch of these out of the oven, the aroma of toasted cocoa and sweet almond extract filled the kitchen so intensely that my neighbor actually knocked on the door to ask what was happening.
There is something about the way the dark, mahogany brownie batter bubbles around the tart cherry filling that feels like a cozy hug in dessert form. I remember watching the steam rise off the pan, desperate to cut into them, but learning the hard way that patience is the only path to that perfect, clean sliced square.
We’ve all had those brownies that are either too dry like a sponge or so oily they leave a residue on the roof of your mouth. I spent months tweaking this specific balance because I wanted a bar that felt heavy and substantial, almost like a truffle, but with the brightness of a cheesecake.
These Cherry Brownie Bars aren't just a snack; they're an experience of textures, from the slight "shatter" of the paper thin top crust to the velvety center that practically melts when it hits your tongue.
If you are looking for a project that yields high impact results without needing a professional pastry degree, you are in the right place. We are going to lean into a few smart budget tricks like using canned cherry filling to save time and money while focusing on the technique that makes them taste like they came from a high end bakery.
Trust me, once you see that marble swirl against the dark chocolate, you’ll never go back to a boxed mix again.
Why This Chocolate Cherry Combo Wins
The Physics of the Fudgy Sink: The high sugar to flour ratio ensures the gluten structure remains weak, which prevents the bars from becoming "cakey" and keeps them dense.
By using both melted butter and oil, we create a dual fat system where the butter provides flavor while the oil stays liquid at room temperature for maximum softness.
Maillard Reaction Control: The Dutch processed cocoa powder has a neutral pH, allowing the chocolate flavor to bloom without the acidic bite of natural cocoa, leading to a deeper color.
Fat Induced Emulsification: Adding an extra egg yolk introduces more lecithin, which binds the moisture from the cherries to the fats in the brownie batter, preventing a greasy finish.
Synergistic Flavor Pairing: The almond extract in the cheesecake swirl acts as a bridge, chemically mirroring the flavor compounds found in cherry pits to intensify the fruitiness.
Actually, the texture of this batter before it hits the oven is very similar to my Brownie Batter Dip recipe, which relies on that same cocoa heavy base.
| Method | Time | Texture | Best For |
|---|---|---|---|
| All-Butter Base | 40 minutes | Firm, fudge like, rich | Serving cold with coffee |
| Butter & Oil Mix | 35 minutes | Velvety, soft, moist | Room temperature snacking |
| Shortcut Mix | 25 minutes | Spongy, light, aerated | Last minute bake sales |
The mix of butter and vegetable oil is the real winner here because it gives us the best of both worlds: that undeniable dairy flavor and a crumb that stays moist for days. When you use only butter, brownies can get quite hard in the fridge, but that little hit of oil keeps things supple.
Essential Pantry Items for Success
| Component | Science Role | Pro Secret |
|---|---|---|
| Dutch Processed Cocoa | Provides color and depth | Sift it with the flour to avoid "cocoa bombs" (unmixed dry lumps) |
| Cream Cheese | Adds acidity and fat | Use full fat brick style only; tub spreads contain too much water |
| Egg Yolk | Acts as an emulsifier | Room temperature yolks incorporate faster, creating a smoother emulsion |
For the Brownie Base
- 1 cup unsalted butter, melted: Provides the foundational rich flavor. Why this? Using melted butter instead of creamed creates a denser, more fudgy texture. (Sub: Salted butter, but reduce sea salt by half)
- 2 tbsp neutral vegetable oil: Keeps the bars moist at room temperature. (Sub: Melted coconut oil for a subtle nutty hint)
- 1 1/4 cups granulated white sugar: Responsible for the crackly top. (Sub: All light brown sugar for a chewier, more caramel like bar)
- 3/4 cup packed light brown sugar: Adds moisture and a hint of molasses. (Sub: Dark brown sugar for a deeper, more robust flavor)
- 2 large eggs + 1 yolk: The yolk adds richness without making the brownies rise too much. (Sub: 3 whole eggs, though it will be slightly more cake like)
- 1 tbsp pure vanilla extract: Enhances the chocolate notes. (Sub: Vanilla bean paste for those beautiful black specks)
- 3/4 cup Dutch processed cocoa powder: For that dark, intense mahogany color. (Sub: Natural cocoa powder, but the bars will be lighter and more acidic)
- 1 cup all purpose flour: Just enough to hold the structure together. (Sub: 1:1 gluten-free flour blend)
- 1/2 tsp sea salt: Cuts through the sweetness. (Sub: Table salt, use slightly less)
- 1 cup semi sweet dark chocolate chunks: For molten pockets of chocolate. (Sub: Semi sweet chocolate chips)
For the Cream Swirl
- 8 oz full fat brick cream cheese, softened: The base of our tangy swirl. (Sub: Mascarpone for a richer, less tangy profile)
- 1/4 cup granulated sugar: Sweetens the cheese layer. (Sub: Powdered sugar for a finer texture)
- 1 large egg: Sets the cheesecake layer so it doesn't run. (Sub: 2 tbsp heavy cream if you want a softer, sauce like swirl)
- 1/2 tsp pure almond extract: The secret weapon for cherry flavor. (Sub: Extra vanilla extract)
- 1 cup canned cherry pie filling: Provides the tart fruit punch. (Sub: Fresh pitted cherries tossed in 1 tbsp sugar and 1 tsp cornstarch)
Tools for the Perfect Bake
You don't need a kitchen full of gadgets, but a few specific items will make your life much easier. I always reach for a metal 9x9 inch square baking pan. Glass pans are beautiful, but they hold heat differently and can lead to overcooked edges before the center is set.
If you only have glass, just drop your oven temperature by about 10 degrees.
A sturdy whisk is essential for getting the sugar and eggs to the right consistency. You're looking for that "ribbon stage" where the mixture falls off the whisk in a thick, slow trail. Also, grab some parchment paper.
Leaving a bit of an overhang on the sides creates a "sling," allowing you to lift the entire block of Cherry Brownie Bars out of the pan once they've cooled. It's the difference between clean squares and a crumbled mess.
step-by-step Baking Guide
1. Preparation and Pan Lining
Preheat your oven to 180°C (350°F). Line a 9x9 inch square pan with parchment paper, ensuring there is a 2 inch overhang on at least two sides. Note: This prevents the cream cheese from sticking to the metal walls.
2. Crafting the Mahogany Base
Whisk together the 1 cup melted butter, 2 tbsp vegetable oil, and both sugars in a large bowl. Whisk vigorously for 2 minutes until the sugar starts to dissolve and the mixture looks shiny.
3. Integration of Key Elements
Add the 2 large eggs, the extra yolk, and 1 tbsp vanilla. Beat until the mixture lightens in color. Sift in the 3/4 cup cocoa powder, 1 cup flour, and 1/2 tsp salt. Fold gently with a spatula until no dry streaks of flour remain. Stir in the chocolate chunks.
4. For the Cream Swirl
In a separate medium bowl, beat the 8 oz softened cream cheese with 1/4 cup sugar, 1 egg, and 1/2 tsp almond extract. Mix until completely smooth and velvety with no lumps of cheese remaining.
5. The Marbling Technique
Pour about 3/4 of the brownie batter into the prepared pan and smooth the top. Drop spoonfuls of the cream cheese mixture over the batter, followed by the 1 cup cherry pie filling.
6. Creating the Pattern
Dollop the remaining brownie batter over the top. Use a butter knife or a skewer to gently swirl the layers together. Stop before the colors blend into a muddy brown; you want distinct streaks of white and red.
7. The Precision Bake
Bake for 35 minutes. At the 30 minute mark, check the center. It should still have a very slight jiggle, but the edges should be firm. Bake until the top looks set and crackly.
8. Cooling and Slicing
Remove from the oven and let the pan cool completely on a wire rack for at least 2 hours. Note: The residual heat continues to cook the center, setting the fudge. Lift the bars out using the parchment sling and slice into 16 squares.
Fixing Common Brownie Baking Blunders
Why Your Bars Are Oily
If you notice a pool of oil on top of your bars, the emulsion likely broke. This happens if the butter was too hot when the eggs were added, essentially "scrambling" the proteins and preventing them from binding the fats.
To fix this next time, ensure your melted butter has cooled to a lukewarm temperature before proceeding.
The Weeping Cherry Fix
Sometimes canned cherry filling can release extra moisture, leading to a soggy middle. This is often called "weeping."
| Problem | Root Cause | Solution |
|---|---|---|
| Soggy Center | Excess fruit moisture | Drain 1 tbsp of the syrup from the can before adding cherries |
| Gritty Texture | Undissolved sugar | Whisk the butter and sugar longer before adding eggs |
| Tough Brownies | Overworking the flour | Fold in dry ingredients by hand, never use an electric mixer for the flour |
Common Mistakes Checklist
- ✓ Always use room temperature eggs to ensure a smooth, stable batter.
- ✓ Never skip sifting the cocoa powder; Dutch process cocoa is notorious for small, bitter clumps.
- ✓ Avoid over swirling the cherry layer, as this can make the bars look messy rather than marbled.
- ✓ Use a metal pan for sharp, crispy edges; glass retains too much heat and can burn the bottom.
- ✓ Wait for the bars to be stone cold before slicing to get those clean, professional looking lines.
Clever Ingredient Swaps and Twists
If you want to move away from the traditional profile, there are plenty of ways to adapt this recipe. For a festive spin, you might try a variation similar to My Grandmother's Bake recipe, which swaps the fruit for nutty swirls, though cherries provide a much more sophisticated acidity here.
The Black Forest Deluxe
Add 1 tbsp of Kirsch (cherry brandy) to the brownie batter and top the finished, cooled bars with a dollop of whipped cream and a shaving of dark chocolate. This takes it from a casual snack to a dinner party worthy dessert.
The gluten-free Alternative
You can swap the all purpose flour for a high-quality 1:1 gluten-free baking blend. Because brownies rely more on fat and sugar for their structure than gluten, they are one of the most successful desserts to convert. Just be aware that the crumb may be slightly more fragile when warm.
The Tart and Crunchy Twist
Instead of semi sweet chunks, use white chocolate chips in the batter. The sweetness of the white chocolate contrasts beautifully with the tartness of the cherries. You can also sprinkle 1/2 cup of sliced almonds on top before baking for a crunch that echoes the almond extract in the filling.
| Servings | Ingredient Adjustment | Pan Size | Cook Time |
|---|---|---|---|
| 8 People | Halve all ingredients | 9x5 Loaf Pan | 30 minutes |
| 16 People | Standard recipe | 9x9 Square | 35 minutes |
| 32 People | Double all ingredients | 9x13 Rectangular | 45 minutes |
Keeping Your Leftovers Fresh Longer
Storage is key with these because of the cream cheese. Since there is dairy in the swirl, these Cherry Brownie Bars should not sit on the counter for more than a couple of hours.
Fridge Storage: Place the bars in an airtight container with layers of parchment paper between them to prevent sticking. They will stay fresh and fudgy for up to 5 days. I actually think they taste better on day two after the flavors have had time to "marry."
Freezer Guidelines: These freeze beautifully. Wrap individual squares tightly in plastic wrap and then place them in a freezer safe bag. They will last for up to 3 months. To eat, simply thaw in the fridge overnight or for 30 minutes on the counter.
Zero Waste Tip: If you end up with some "ugly" edges or broken pieces, don't throw them out! Crumble them up and use them as a mix in for vanilla bean ice cream. The frozen chunks of cream cheese and chocolate are a total revelation.
Plating and Garnish Idea Guide
When serving these, I like to keep it simple but elegant. A light dusting of powdered sugar over the top can highlight the dark swirls of the brownie batter. If you're feeling fancy, a drizzle of warmed cherry syrup (reserved from the can) over the plate adds a professional touch.
One of my favorite ways to serve these for a crowd is to cut them into smaller, bite sized "tapas" style squares. They are so rich that a small piece is often enough to satisfy a sweet craving. If you have leftovers that are starting to get a bit dry after a few days, you can repurpose them into a Chocolate Brownie Trifle recipe by layering the cubes with whipped cream and extra cherries.
The "If you want X, do Y" Decision List: If you want a cake like texture, add an extra 1/4 cup of flour and whisk the eggs until very frothy. If you want extra gooey centers, pull the pan out of the oven 3 minutes early when the center still looks slightly "wet." If you want a stronger tang, add 1 tsp of lemon juice to the cream cheese mixture.
Myths Regarding Brownie Baking
One common misconception is that you need baking powder to make brownies rise. In reality, fudgy brownies rely on the air beaten into the eggs and the steam from the butter to create their structure.
Adding leavening agents like baking soda or powder often results in a cakey, airy texture that detracts from the dense "dream bar" experience we are aiming for here.
Another myth is that you can't over mix brownie batter. While it's true you want to whisk the sugar and eggs vigorously, once the flour is added, you must be gentle. Over mixing the flour develops gluten, which makes the brownies tough and bready instead of tender and melting.
Stop the moment you see the last streak of white disappear.
Finally, many people believe that "more chocolate is always better." While it's tempting to double the chocolate chunks, too much solid chocolate can actually interfere with the batter's ability to set, leading to bars that fall apart.
Stick to the 1 cup measurement for the perfect balance of batter to "bits." Trust me, these are plenty decadent as they are!

Recipe FAQs
Should I use fresh or frozen cherries in this recipe?
No, stick with canned filling. Frozen berries release too much moisture and can create a soggy center, compromising the fudgy texture we are seeking.
What is the secret to achieving the distinct crackly top on these bars?
Whisk the butter and both sugars vigorously for two minutes before adding eggs. This dissolves the sugar crystals enough to form a meringue like structure on the surface as they bake.
How do I prevent the cream cheese swirl from sinking to the bottom?
Ensure your cream cheese mixture is completely smooth and at room temperature before adding it. An uneven emulsion will separate, just as we saw when learning about stable fat mixtures in our How to Bake recipe.
Is it true that using Dutch processed cocoa makes the brownies taste less chocolatey?
False. Dutch processed cocoa has a neutral pH, meaning it delivers a deeper, darker chocolate flavor without the acidic bite natural cocoa provides.
How long must the bars cool before I attempt to slice them neatly?
Wait a minimum of two hours at room temperature. Slicing warm brownies causes the fudge center to tear and the cream cheese swirl to smear; patience yields clean squares.
Can I substitute the butter and oil blend with just butter for a richer taste?
No, you should keep the dual fat system. While pure butter is flavorful, the added oil remains liquid at room temperature, which is crucial for maintaining the velvety softness of the final bar.
What step should I focus on most if I want these to be ultra fudgy instead of cakey?
Fold the dry ingredients in by hand until just combined. Overmixing develops gluten, which is what creates a cake structure; gentle handling keeps the batter dense, similar to achieving a perfect batter consistency in our Seriously Fudgy Homemade recipe.
Fudgy Cherry Brownie Bars

Ingredients:
Instructions:
Nutrition Facts:
| Calories | 399 kcal |
|---|---|
| Protein | 4.7 g |
| Fat | 23.1 g |
| Carbs | 47.8 g |
| Fiber | 1.6 g |
| Sugar | 39.2 g |
| Sodium | 122 mg |
