Grandmas Perfect Cherry Pie Filling from Scratch
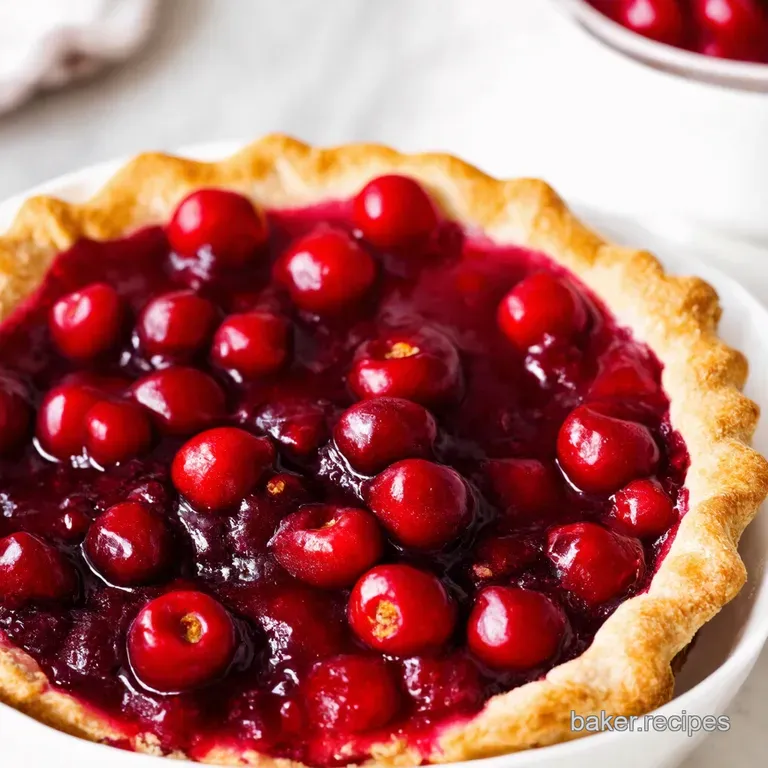
Grandma's Cherry Pie Filling: Better Than Tinned!
Ever wonder why your cherry pie never tastes like grandma’s? Honestly, the secret’s in the cherry pie filling . Let's ditch the canned stuff! We are talking about a recipe that's proper lush, bursting with fresh cherry pie filling goodness, and it's surprisingly easy.
This is the best cherry pie filling ever!
Why Bother Making Your Own Homemade Cherry Pie Filling ?
Alright, so you might think, "Why bother?" Well, once you taste this cherry pie filling from scratch , you'll never go back to the tinned version.
I mean, think about it: you know exactly what's going in it! There is a world of difference in quality between store-bought cherry pie filling and homemade.
The taste is just so much better, it's a no-brainer! Plus, the satisfaction of making something amazing from scratch? Priceless.
This recipe is inspired by classic American baking but is easily accessible to those with little experience. It's all about simplicity.
You will only need about 40 minutes, including prep and cook time. The recipe makes enough for a 9 inch pie.
Sweetness, Tartness, and Everything Nice
Let's talk flavour. This isn't just sweet; it's got that lovely tartness that cherries are all about. A good classic cherry pie filling is balanced.
A bit of lemon juice brightens everything up, and a touch of almond extract adds a little something special. It’s delicious in a pie, as a cherry cobbler filling , or even just dolloped over ice cream.
One of the cool things about this easy cherry pie filling is that you can use fresh or frozen cherry pie filling .
It's perfect for any occasion, from a Sunday roast to a bake off with your mates. You'll use simple ingredients, cherries of course, sugar, cornstarch, a splash of lemon and a touch of almond extract for that little something special.
It keeps in the fridge too, so you can make a big batch and have cherry pie ready whenever you fancy it.
This is your chance to shine as the top baker in your household!
Alright, let's talk about what you need to nail this cherry pie filling recipe. Trust me, getting your ducks in a row makes all the difference. Makes everything easier.
Gear Up: Ingredients and Equipment
This ain't rocket science. We're just making cherry pie filling from scratch , not building a spaceship. Let's get to it.
Main Ingredients: Cherry Goodness
- Fresh or frozen pitted cherries: 4 cups (600g) . Go for plump, juicy ones if you can. If using frozen, don’t thaw, chuck 'em straight in, innit. Quality matters, honestly.
- Granulated sugar: ¾ cup (150g) .
- Cornstarch: ¼ cup (30g) . This is our thickener, like magic dust.
- Almond extract: ¼ teaspoon . A little goes a long way!
- Lemon juice: 2 tablespoons (30ml) , freshly squeezed. Seriously, fresh is best here.
- Water: ¼ cup (60ml) .
- Unsalted butter: 1 tablespoon (15g) , cut into small pieces. This adds a lovely richness.
I had this one time; The cherry pie filling was bland. That was a bummer
Spice It Up: Seasoning Notes
Let's talk flavours, yeah? These little additions can take you're homemade cherry pie filling to the next level!
- Essential spice: A pinch of salt. Seriously, it balances the sweetness.
- Flavour enhancer: Almond extract, you know, it gives it that "bakery" vibe.
- Substitution options: If you haven't got almond extract, vanilla extract is your mate. Use the same amount.
Honestly, playing with spices is half the fun. My nan used to add a tiny bit of cinnamon to her cherry cobbler filling , always got compliments.
Kit Out: Equipment Needed
No fancy gadgets needed here, thank goodness!
- Medium sized saucepan .
- Wooden spoon or heat resistant spatula .
- Cherry pitter . (If you're using fresh cherries, obviously!)
- Measuring cups and spoons .
Don't have a cherry pitter? A paperclip works in a pinch. I did that once, took ages but it worked.
If you're thinking about the best cherry pie filling , you need the best tools to make that filling.
Cooking Method: Achieving Cherry Pie Filling Perfection
Okay, let's talk about making cherry pie filling . Honestly, it's way easier than you think! Forget the tinned stuff. Trust me, a homemade version is a game changer.
We are going to cook homemade cherry pie filling , and there is a classic cherry pie filling recipe you can start with, or you can find an easy cherry pie filling that suits your needs.
Whether you want to make a cherry cobbler filling or a cherry pie filling from scratch , it's all about technique.
Prep Steps: Your Mise en Place Mission
First things first, get organised. This is our essential mise en place . We need to wash and pit the cherries.
If you are using frozen cherry pie filling , just measure it straight from the freezer. Measure out your sugar, cornstarch, lemon juice, almond extract, and get your butter ready.
Having everything prepped saves so much time! A cherry pitter is a lifesaver if you are using fresh cherry pie filling !
step-by-step: Let's Get Cooking
- Combine 3/4 cup sugar and 1/4 cup cornstarch in a saucepan.
- Stir in 1/4 cup water and 2 tablespoons lemon juice until smooth.
- Gently fold in 4 cups cherries .
- Simmer over medium heat, stirring constantly.
- Cook until thickened, about 5- 10 minutes . It should coat the back of a spoon.
- Remove from heat, stir in 1/4 teaspoon almond extract and 1 tablespoon butter .
You'll know it's ready when it's lovely and thick!
Pro Tips: Secrets From My Kitchen
Don't overcook the filling! Overcooking equals gummy. I think one of the most common mistakes is to cook it on too high of a heat! Keep it at a gentle simmer.
For a deeper flavour, a pinch of salt works wonders. Also, you can easily make this filling ahead of time and store it in the fridge for a few days.
I have baked with this best cherry pie filling recipe a few times before, you won't be dissapointed!
And there you have it! Homemade cherry pie filling that's better than anything you can buy. Perfect for pies, cobblers, or just spooning straight from the jar. Enjoy!
Recipe Notes: The Nitty Gritty for Epic Cherry Pie Filling
Alright, you've got the recipe for my killer cherry pie filling . Now, let's chat about a few extras. These tips will take your cherry pie recipe from "meh" to "OMG, this is amazing!".
Honestly, it's all about the little things, innit?
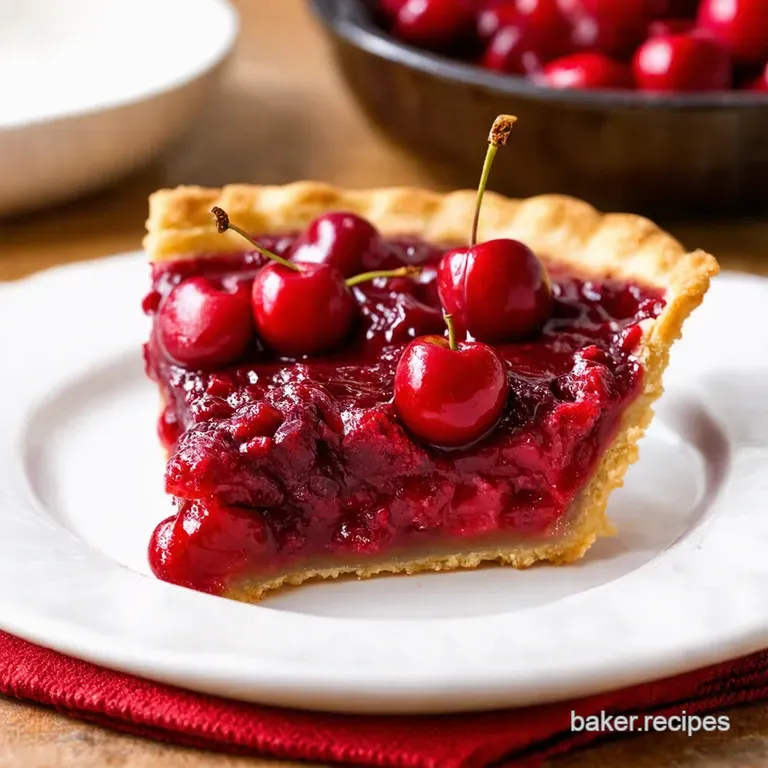
Serving Suggestions: Make it a Showstopper!
Presentation matters, loves! For a classic look, try a lattice crust on your pie. A dollop of vanilla ice cream or a generous helping of custard alongside is always a winner.
Alternatively, why not serve it warm over buttery scones? Now that's posh!
Feeling adventurous? Turn your cherry pie filling into individual hand pies. They're perfect for parties and picnics. Oh, and a cheeky glass of chilled Prosecco goes down a treat with any cherry pie recipe !
Storage Tips: Keep it Fresh!
Got leftover cherry pie filling ? No worries! It'll keep in the fridge for up to 3 days in an airtight container. It's perfect for topping yogurt or porridge.
Fancy making a big batch for later? You can freeze it! Just make sure it's completely cool first. Pop it in a freezer safe bag or container, leaving a little space for expansion.
It'll be good for up to 3 months. To reheat, thaw it overnight in the fridge and then gently warm it in a saucepan over low heat.
Stir it frequently to prevent sticking.
Variations: Make it Your Own!
Want to get creative with your best cherry pie filling ? Try adding a splash of Kirsch for a boozy kick.
Or, for a festive twist, throw in a pinch of cinnamon and nutmeg.
Got dietary needs? Swap out the sugar for a sugar substitute like Stevia. Just remember to adjust the amount to your taste.
For a gluten-free option, make sure your pie crust is gluten-free too. It's all about making it work for you! Another way to do it is by making a cherry cobbler filling !
Nutrition Basics: A Treat for the Soul (and Body!)
Okay, let's be real. Cherry pie isn't exactly a health food. But it does have some redeeming qualities! Cherries are packed with antioxidants, which are great for your health.
And, honestly, a little bit of what you fancy does you good, right? Each serving of this homemade cherry pie filling contains approximately 200 calories, 1g of protein, 2g of fat and 50g of carbohydrates including 40g of sugars and 2g of fibre.
Don't let the sugar content scare you off. Enjoy your cherry pie filling in moderation as part of a balanced diet.
And remember, cooking from scratch is always better than relying on processed foods. Fresh cherry pie filling is always best to reduce additives!
So there you have it! Everything you need to know to make a classic cherry pie filling . Now go forth and bake! And remember, baking should be fun.
Don't be afraid to experiment and make it your own. You got this, love!

Frequently Asked Questions
Can I use frozen cherries to make cherry pie filling, or do I need fresh ones?
Absolutely, you can use frozen cherries! In fact, many bakers find frozen cherries to be even better, as they're often picked at their peak ripeness and frozen immediately. Just don't thaw them before adding them to the recipe; toss them in frozen.
They'll release their juices as they cook, which contributes to a lovely, saucy cherry pie filling.
My cherry pie filling is too runny! How can I thicken it up?
A runny cherry pie filling is a common woe, but easily fixed! The most common fix is to mix a tablespoon of cornstarch with a tablespoon of cold water to create a slurry, then gently stir it into the simmering filling. Cook for another minute or two until thickened.
Alternatively, if you've already baked the pie, you can try cooling it completely, as chilling often helps the filling set up further. A soggy bottom won't do at all!
How long does homemade cherry pie filling last, and how should I store it?
Your homemade cherry pie filling will happily keep in the refrigerator for up to 5 days in an airtight container. If you want to store it for longer, you can freeze it for up to 3 months. Just be sure to let it cool completely before freezing, and consider portioning it out so you only thaw what you need.
This will keep it as fresh as a daisy.
Can I adjust the sweetness of the cherry pie filling recipe?
Yes, definitely! The amount of sugar in a cherry pie filling is a personal preference and depends on the tartness of your cherries. Taste the filling as it simmers and add more sugar if needed, a tablespoon at a time. Remember, you can always add more, but you can't take it away!
A little extra sweetness can really bring out the cherry flavor.
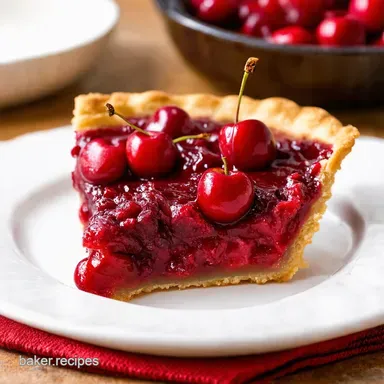
What are some tasty ways to use cherry pie filling besides just in a pie?
Oh, the possibilities are endless! Cherry pie filling is fantastic spooned over vanilla ice cream or yogurt for a quick dessert. It's also delicious as a topping for pancakes, waffles, or French toast. For a rustic treat, try using it as a filling for hand pies or stirring it into a cobbler.
You could even use it as a base for a delicious cherry sauce served with roast duck!
Is there a way to make a healthier cherry pie filling?
Absolutely! You can reduce the amount of sugar in the recipe or substitute it with a sugar alternative like stevia or erythritol. Also, using whole wheat flour in the pie crust (if using the filling in a pie) and reducing the amount of butter can help lower the overall fat content.
Remember that nutritional information is just a rough estimate, so it's best to calculate it based on the specific ingredients you use.
Grandmas Perfect Cherry Pie Filling From Scratch
Ingredients:
Instructions:
Nutrition Facts:
| Calories | 200 |
|---|---|
| Fat | 2g |
| Fiber | 2g |
