Grasshopper Mini Cheesecakes: Silky Mint Custard
- Time: Active 20 minutes, Passive 20 minutes, Total 40 minutes
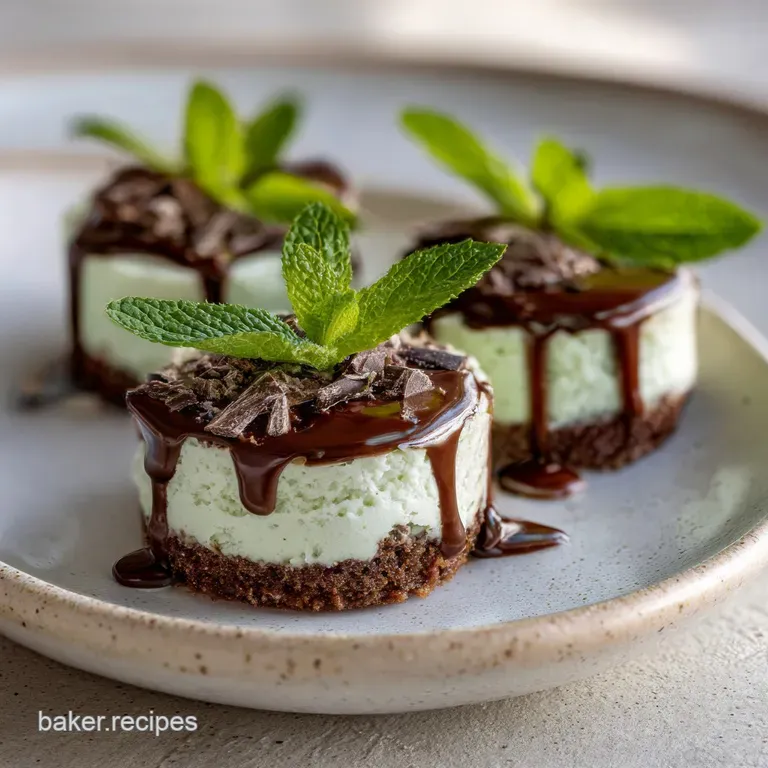
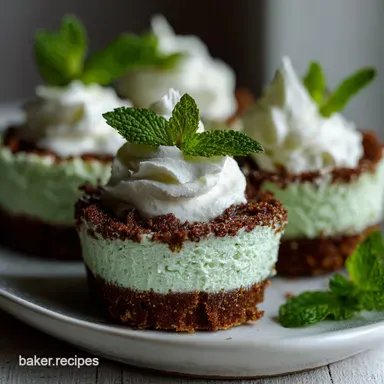
- Flavor/Texture Hook: Silky mint custard atop a shattering dark cocoa crust
- Perfect for: St. Patrick’s Day, retro themed dinner parties, or high end meal prep
- Crafting the Best Grasshopper Mini Cheesecakes
- Essential Specs for Timely Dessert Success
- The Elements of Minty Chocolate Harmony
- Tools Needed for a Velvety Batter
- Mastering the Full Cooking Process Steps
- Solving Common Texture and Baking Issues
- Adapting Your Treats for Every Diet
- Preserving the Fresh Minty Flavor Profile
- Presenting Your Bites with Professional Flair
- Recipe FAQs
- 📝 Recipe Card
Crafting the Best Grasshopper Mini Cheesecakes
The first time I encountered a Grasshopper was at a wood paneled Wisconsin supper club where the air smelled of prime rib and old-fashioneds. The bartender slid a bright green, frothy drink across the laminate, and one sip of that minty chocolate silkiness changed my dessert standards forever.
I spent weeks trying to capture that specific nostalgia in a solid form something that had the "snap" of a dark chocolate wafer but melted into a cool, creamy finish. These Grasshopper Mini Cheesecakes are the result of several messy kitchen experiments and one very important realization: the liqueurs aren't just for flavor; they are the secret to the texture.
We've all had those mint desserts that taste more like a mouthwash accident than a gourmet treat. The trick I discovered is the balance between the crème de menthe and the white crème de cacao. It’s a botanical dance that needs a sturdy, bitter chocolate base to ground it.
When you pull these out of the oven, the aroma is enough to stop a conversation. You’re looking for a specific jiggle not a wobble that signals the center has reached that cloud like state.
It’s a sophisticated little bite that looks like you spent hours tempering chocolate when, in reality, we’re just using some smart kitchen chemistry.
Essential Specs for Timely Dessert Success
Cryogenic Crunch: Freezing the chocolate wafer crust for just 5 minutes before adding the batter prevents the butter from migrating into the cheesecake. This ensures the base remains a distinct, shattering layer rather than a soggy sponge.
The Alcohol Buffer: Crème de menthe contains sugar and alcohol which lowers the freezing point of the batter. This results in a finished cheesecake that feels colder and creamier on the tongue than a standard vanilla version.
Density Control: By using room temperature sour cream and cream cheese, we avoid over beating the mixture. Less incorporated air means a denser, more fudge like consistency that mimics the mouthfeel of a high end truffle.
The Prep and Finish Timeline
| Method | Total Time | Texture | Best For |
|---|---|---|---|
| Standard Oven | 40 minutes | Velvety and firm | Classic presentation |
| No Bake Shortcut | 25 minutes | Mousse like | Last minute guests |
| Air Fryer | 15 minutes | Slightly caramelized | Small batches |
If you find yourself craving a different flavor profile after mastering this minty version, you might want to try my Foolproof Mini Cheesecakes recipe which uses a similar ratio but focuses on a classic cookie crunch.
The Elements of Minty Chocolate Harmony
Understanding the "why" behind your ingredients makes the difference between a flat dessert and a vibrant one. We aren't just throwing things in a bowl; we are building a structural masterpiece.
| Ingredient | Science Role | Pro Secret |
|---|---|---|
| Full fat Cream Cheese | Structural base via fat | Always use block form; tub versions contain too much air and water. |
| Crème de Menthe | Flavor and sugar stability | The green color is iconic, but the sugar content helps prevent ice crystals. |
| Large Eggs | Protein binding agent | Whisk them last to avoid creating a "soufflé" rise that collapses. |
| Sour Cream | Acidic tenderizer | Breaks down the heavy proteins in the cheese for a silky finish. |
Working with these specific ratios is much like the technique used in our Creamy Mini Cheesecakes recipe, where the fat to acid ratio defines the final crumb.
Tools Needed for a Velvety Batter
To get that restaurant style finish, you don't need a professional pastry kitchen, but a few specific items make the job significantly easier.
- Standard 12 cup Muffin Tin: This provides the structure for the individual servings.
- Paper or Foil Liners: Foil liners are my preference here because they peel away from the chilled cheesecake without tearing the sides.
- Stand Mixer or Electric Hand Mixer: Essential for getting the cream cheese smooth. If you see even one lump, keep mixing before you add the liquids.
- Small Offset Spatula: This is the only way to get that glossy ganache topping perfectly flat and professional looking.
- Fine mesh Sieve: If you're worried about lumps in your chocolate wafer crumbs, pulse them in a processor and then sift them.
Chef's Tip: To get a perfectly flat crust, use the bottom of a shot glass or a small spice jar to press the chocolate crumbs into the liners. It applies even pressure that fingers just can't match.
Mastering the Full Cooking Process Steps

- Prep the base. Pulse 1.5 cups (150g) chocolate wafer crumbs with 3 tbsp (42g) melted unsalted butter, 1 tbsp (12g) granulated sugar, and a pinch of sea salt. Note: The salt is vital to balance the sweetness of the mint.
- Form the crusts. Press the mixture firmly into 12 lined muffin cups. Bake at 325°F for 5 minutes until fragrant and set.
- Smooth the cheese. Beat 16 oz (450g) softened cream cheese and 0.5 cup (100g) sugar until no lumps remain.
- Incorporate the liquids. Add 0.25 cup (60ml) sour cream, 3 tbsp (45ml) green crème de menthe, 1 tbsp (15ml) white crème de cacao, and 0.5 tsp peppermint extract. Mix on low until the color is a uniform pale green.
- Add the eggs. Incorporate 2 large eggs one at a time. Stop mixing the moment the yellow streaks disappear to prevent air bubbles.
- The main bake. Pour the batter over the crusts. Bake for 18–20 minutes until the edges are set but the centers still jiggle slightly.
- Cooling phase. Let them sit in the tin for 10 minutes, then move to a wire rack. Chill in the fridge for at least 3 hours.
- Prepare the ganache. Heat 0.5 cup (120ml) heavy cream until it barely simmers. Pour over 4 oz (113g) finely chopped semi sweet chocolate. Let sit for 2 minutes, then whisk until glossy and dark.
- The final touch. Spoon a tablespoon of ganache over each chilled cheesecake. Use your offset spatula to swirl it to the edges.
- Set and serve. Return to the fridge for 30 minutes until the chocolate is firm to the touch.
For a different fruity twist on this individual serving style, check out my Easy Mini Cherry Cheesecakes Recipe.
Solving Common Texture and Baking Issues
Even with a steady hand, cheesecakes can be temperamental. The most common heartbreak is the surface crack. This usually happens because the eggs were beaten too much, causing the cheesecake to rise like a cake and then shrink too fast as it cools.
Fixing Grainy Cheesecake Bases
If your filling feels "sandy" or grainy on the tongue, it’s usually because the cream cheese was too cold when you started. It won't emulsify with the sugar properly. If this happens mid mix, set your bowl over a pot of steaming water for 30 seconds to gently warm the fats, then resume mixing.
| Problem | Root Cause | Solution |
|---|---|---|
| Surface Cracking | Over beating eggs | Mix eggs by hand or on the lowest speed only until combined. |
| Soggy Crust | Butter leakage | Par bake the crust and let it cool completely before adding the batter. |
| Lumpy Filling | Cold cream cheese | Ensure cheese is at room temperature (leave out for 2 hours). |
Common Mistakes Checklist
- ✓ Using "spreadable" cream cheese from a tub (it's too soft and won't set).
- ✓ Over baking until the tops turn brown (they should be pale and matte).
- ✓ Skipping the chill time (the flavor of the mint actually intensifies after 4 hours).
- ✓ Using milk chocolate for the ganache (it's too sweet; semi sweet provides the necessary bitterness).
Adapting Your Treats for Every Diet
Sometimes you need to swap things out based on what's in the pantry or who is coming for dinner. This recipe is surprisingly flexible if you keep the fat ratios consistent.
| Original Ingredient | Substitute | Why It Works |
|---|---|---|
| Crème de Menthe | Peppermint oil + Green dye | Provides the flavor and color without the extra sugar content. |
| Chocolate Wafers | Graham crackers + Cocoa | Adds a slightly nuttier flavor but keeps the dark aesthetic. |
| Sour Cream | Full fat Greek Yogurt | Similar acidity levels; Note: Result will be slightly tangier. |
Decision Shortcut
- If you want a deeper chocolate flavor, swap the white crème de cacao for dark crème de cacao.
- If you want a booze free version, use 1 tsp peppermint extract and green food coloring instead of the liqueurs.
- If you want a crustless version, bake the batter in greased ramekins for a gluten-free mint custard.
Preserving the Fresh Minty Flavor Profile
Storage: These beauties keep exceptionally well in an airtight container in the fridge for up to 5 days. In fact, I think they taste better on day two because the peppermint extract has time to mellow and meld with the chocolate.
Freezing: You can freeze these for up to 2 months. To do this properly, freeze them on a baking sheet first until solid, then wrap each one individually in plastic wrap before putting them in a freezer bag. This prevents the ganache from getting "freezer burn" or absorbing other smells.
Zero Waste Tip: Don't throw away any leftover chocolate wafer crumbs. I save them in a jar in the freezer to sprinkle over vanilla ice cream or to use as a "dirt" topping for future puddings. If you have leftover ganache, let it harden in the fridge and roll it into truffles!
Presenting Your Bites with Professional Flair
To really make these pop, I like to lean into the retro aesthetic. A tiny sprig of fresh mint tucked into the ganache just before serving adds a hit of fresh aroma that complements the liqueurs. You can also take a vegetable peeler to a block of dark chocolate to create long, elegant curls to pile on top.
If you’re serving these at a party, try placing them on a dark slate board. The vibrant green against the dark chocolate and black stone looks incredibly high end. Trust me, these are the first things to disappear at any gathering.
They have that rare combination of being visually striking and genuinely easy to eat while standing up with a drink in your other hand.
Right then, let's get that oven preheated. You’re going to love the way your kitchen smells in about twenty minutes!

Recipe FAQs
Can I substitute the crème de menthe with peppermint extract only?
Yes, but adjust other ingredients. Substitute with 1 tsp peppermint extract and green food coloring to avoid adding too much liquid, which can destabilize the batter structure.
How to prevent the cheesecake centers from cracking during cooling?
Do not overbeat the eggs after adding them. Mix them in on the lowest speed only until the yellow streaks vanish; incorporating too much air causes an unstable rise and subsequent collapse.
How to achieve a perfectly shattering, non-soggy chocolate crust?
Par-bake the crust for 5 minutes first. Press the crumb mixture firmly into the liners and bake until fragrant, which sets the butter before the wet batter is added.
Is it true that using tub cream cheese yields a better texture for these minis?
False. Always use full fat block cream cheese, as the varieties sold in tubs contain stabilizers and excess water that result in a looser, less dense final product.
How long must the cheesecakes chill before they can be topped with ganache?
Chill them for at least 3 hours in the refrigerator. This ensures the internal structure is completely firm and cold enough to stop the warm ganache from melting the surface.
How to make the chocolate wafer crust gluten-free?
Swap the wafers for a cracker alternative. Use an equal volume of gluten-free graham crackers or finely crushed vanilla sandwich cookies for a similar structural base.
What is the secret to incorporating the alcohol without affecting the setting process?
Add the liqueurs with the sour cream. This allows the sugar and alcohol to disperse evenly before the eggs the main setting agents are introduced, leading to a smoother final texture.
Grasshopper Mini Cheesecakes
Ingredients:
Instructions:
Nutrition Facts:
| Calories | 364 calories |
|---|---|
| Protein | 4.9 grams |
| Fat | 26.8 grams |
| Carbs | 28.5 grams |
| Fiber | 1.1 grams |
| Sugar | 20.8 grams |
| Sodium | 184 milligrams |
