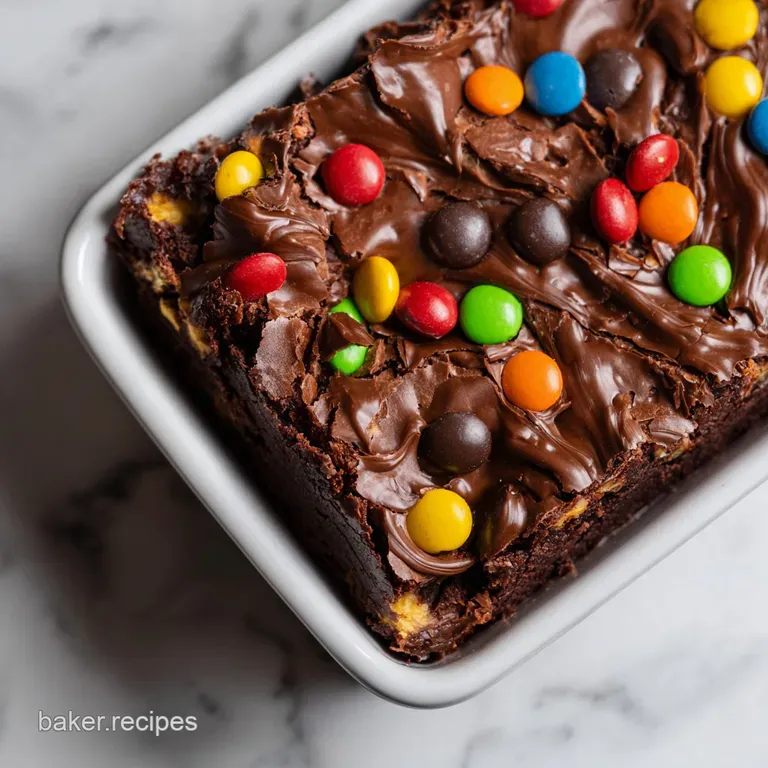
Cosmic Brownies: Fudgy and Rich
- Time: Active 15 minutes, Passive 22 minutes, Total 37 minutes
- Flavor/Texture Hook: Intensely chocolatey with a velvety, fudge like bite and a snap of candy coating.
- Perfect for: Nostalgic cravings, weekend baking, or sharing at casual gatherings.
- Mastering Rich and Fudgy Cosmic Brownies
- Why These Techniques Create Texture
- Ingredient Deep Dive for Better Baking
- Necessary Components and Smart Substitutions
- Step by Step Baking Process
- Troubleshooting Texture and Finish
- Adjusting for Different Batch Sizes
- Common Misconceptions About Fudgy Brownies
- Proper Storage and Using Leftovers
- Presentation for the Best Results
- Recipe FAQs
- 📝 Recipe Card
Mastering Rich and Fudgy Cosmic Brownies
Imagine the kitchen filling with the heavy, dark aroma of Dutch process cocoa hitting warm, melted butter. It is that specific, intoxicating scent that signals something serious is happening. We are talking about that deep, almost black looking batter that stays glossy and thick as you stir it by hand.
When you finally pull the pan out of the oven, the edges have just begun to pull away, but the center still wobbles ever so slightly, promising a texture that is more fudge than cake.
I remember the first time I moved away from the plastic wrapped version we all grew up with. The store-bought ones always had that slightly waxy coating and a flavor that was more "sweet" than "chocolate." When I finally tried making a version with real butter and high percentage cacao chips, the difference was staggering.
The "shatter" of the cold ganache when you bite into a chilled square is something you just cannot get from a preservative laden snack cake. This is about taking those neon colored memories and turning them into a sophisticated, modern treat that actually tastes like real chocolate.
This recipe is built for the cook who wants maximum impact with minimal fuss. We are skipping the heavy stand mixers and the complicated tempering of chocolate. Instead, we are focusing on simple stovetop melting and vigorous hand whisking to get that iconic shiny top and dense crumb.
It is honest, straightforward baking that rewards you with a tray of deep brown squares that look exactly like the ones from the lunchbox, but taste like a five star dessert.
Why These Techniques Create Texture
- The Bloom Phase: Mixing the Dutch process cocoa directly into the melted butter "blooms" the chocolate, releasing fat soluble flavor compounds that stay trapped in dry powder.
- Starch Reinforcement: Adding a small amount of cornstarch interferes with gluten formation, ensuring the brownies stay chewy and dense rather than becoming tough or bread like.
- Emulsification Focus: Whisking the eggs and sugar until glossy creates a stable structure that yields that coveted "crackly" thin crust on top of the fudge base.
- Glossy Finish: Adding a tiny bit of honey to the heavy cream and chocolate chip ganache prevents the chocolate from dulling as it cools, maintaining a professional shine.
While we are discussing the physics of a great bake, the moisture balance is everything. If you find yourself enjoying the science of how different fats and sugars interact in a tray bake, you might want to explore the variations in my Crimson Velvet Brownies which use a similar emulsification technique but with a very different acid to cocoa ratio.
| Thickness | Internal Temp | Rest Time | Visual Cue |
|---|---|---|---|
| 1.5 cm (Thin) | 88°C | 15 mins | Edges are firm, center is set |
| 2.5 cm (Standard) | 90°C | 30 mins | Slight wobble in the middle |
| 3.5 cm (Thick) | 92°C | 45 mins | Toothpick comes out with moist crumbs |
Choosing the right thickness often depends on how much ganache you plan to layer on top. For a classic feel, a 2.5 cm base allows the ganache to sit comfortably without the whole thing becoming top heavy. This balance ensures every bite has the right ratio of dense cake to silky topping.
Ingredient Deep Dive for Better Baking
Understanding what each component brings to the bowl helps you make better decisions in the kitchen. For instance, the choice between metal and glass pans can change your cook time by several minutes because of how they conduct heat.
| Ingredient | Science Role | Pro Secret |
|---|---|---|
| Dutch process Cocoa | Neutralizes acidity for deep color | Sift it before adding to prevent stubborn lumps |
| Unrefined Cane Sugar | Adds moisture and a hint of molasses | Do not swap for white sugar if you want that chew |
| Cornstarch | Softens the flour's protein | It acts as a "moisture lock" for the fudgy center |
| Heavy Cream | Thins the chocolate for a pourable ganache | Heat it until it just shivers, never let it boil |
The interaction between the cane sugar and the brown sugar is particularly interesting. The brown sugar brings acidity and moisture, while the cane sugar provides the structure. Together, they create a syrup like base that prevents the brownies from drying out, even after a few days in the fridge.
Necessary Components and Smart Substitutions
Before you start, ensure all your refrigerated items are at the correct temperature. Cold eggs will seize the melted butter, leading to a grainy texture that no amount of whisking can fix.
- Unsalted butter (170g): Using unsalted allows you to control the seasoning perfectly.
- Substitute: Salted butter (just omit the kosher salt later).
- Why this? Provides the fat base and helps bloom the cocoa powder.
- Unrefined cane sugar (200g): Offers a deeper flavor than standard white sugar.
- Substitute: Granulated white sugar (will be slightly less moist).
- Light brown sugar (100g): Essential for the chewy texture.
- Substitute: Dark brown sugar (will add a stronger molasses note).
- Dutch process cocoa powder (75g): This is non negotiable for the dark color.
- Substitute: Natural cocoa powder (note: the brownies will be lighter and more acidic).
- Why this? It has been treated with alkali to reduce acidity and deepen the color.
- Large eggs (2): These must be at room temperature to emulsify properly.
- Substitute: Flax eggs (note: the texture will be much denser and less glossy).
- Pure vanilla extract (1 tbsp): Don't skimp here; it rounds out the chocolate.
- Substitute: Vanilla bean paste for an even more intense aroma.
- All purpose flour (95g): Provides the minimal structure needed.
- Substitute: 1 to-1 gluten-free flour blend (works well in fudgy recipes).
- Cornstarch (1 tbsp): The secret to that commercial "chew."
- Substitute: Tapioca starch or arrowroot powder.
- Kosher salt (1/2 tsp): Balances the high sugar content.
- Substitute: 1/4 tsp fine table salt.
- Semi sweet chocolate chips (250g): Aim for 60% cacao for the best ganache.
- Substitute: Chopped dark chocolate bars for a more luxurious finish.
- Heavy cream (120ml): Creates the silky pourable topping.
- Substitute: Full fat coconut milk (note: adds a subtle tropical flavor).
- Honey (1 tsp): Gives the ganache a professional mirror shine.
- Substitute: Light corn syrup or agave nectar.
- Cosmic candy coated sprinkles (2 tbsp): For the iconic look.
- Substitute: Chopped M&Ms or colored chocolate pebbles.
step-by-step Baking Process

- Preheat your oven to 175°C (350°F). Line an 8x8-inch metal square baking pan with parchment paper, making sure the paper hangs over the sides for easy removal later. Note: Metal pans reflect heat better than glass, preventing burnt edges.
- Melt the 170g of unsalted butter in a medium saucepan over the lowest heat possible. As soon as it is liquid, pull it off the burner.
- Add the 75g of Dutch process cocoa powder to the warm butter. Whisk it until it is smooth and the cocoa smells toasted. This is the blooming phase where flavor develops.
- Stir in the 200g of unrefined cane sugar and the 100g of light brown sugar. The mixture will look gritty at first, but keep stirring until it starts to look integrated.
- Add the two room temperature eggs and the tablespoon of vanilla. Whisk vigorously for about 2 minutes until the batter looks silky and glossy.
- Sift the 95g of all purpose flour, the tablespoon of cornstarch, and the 1/2 teaspoon of salt directly into the pan.
- Fold the dry ingredients in gently with a silicone spatula. Stop the second you see no more white streaks. Note: Overmixing at this stage will make the brownies cakey instead of fudgy.
- Transfer the batter to your pan. Bake for exactly 22 minutes until the edges are set and a toothpick comes out with a few moist crumbs.
- While the base cools, heat the 120ml of heavy cream in a small pot until it just starts to simmer. Pour it over the 250g of chocolate chips and the teaspoon of honey.
- Let the ganache sit for 5 minutes, then stir from the center outward until it becomes velvety. Pour over the cooled brownies, top with sprinkles, and chill for 1 hour until the ganache is firm to the touch.
Troubleshooting Texture and Finish
Why Your Brownies Are Crumbly
If your brownies are falling apart when you try to slice them, it is usually a sign of overbaking or a lack of moisture. When the eggs aren't properly whisked into the sugar, they can't create the necessary structure to hold the fat and flour together. This results in a dry, sandy texture rather than a cohesive fudge.
| Problem | Root Cause | Solution |
|---|---|---|
| Greasy surface | Butter was too hot when eggs were added | Whisk vigorously to re emulsify the fats |
| Ganache is runny | Ratio of cream to chocolate is too high | Melt in more chocolate chips to thicken it up |
| Dull ganache | Chocolate was overheated or honey was skipped | Add a teaspoon of warm honey and stir gently |
If you are struggling with a different kind of texture, perhaps a nut based inclusion, you might find some answers in my Peanut Butter Chip Brownies where the fat from the peanut butter requires a slightly different temperature control strategy.
Common Mistakes Checklist
- ✓ Always use room temperature eggs to prevent the butter from seizing.
- ✓ Never skip the parchment paper overhang; these are too fudgy to flip out.
- ✓ Sift the cocoa powder to avoid bitter little pockets of dry powder.
- ✓ Let the brownies cool completely before adding the ganache, or it will melt the base.
- ✓ Use a hot knife (dipped in warm water and wiped dry) for those clean, sharp edges.
Adjusting for Different Batch Sizes
When you need to feed a crowd or just want a small treat for yourself, scaling this recipe requires a bit of math to keep the ratios intact. Brownies are forgiving, but they do have limits.
Scaling Down (Half Batch) Use a loaf pan instead of an 8x8-inch pan. To get half of the eggs, whisk two eggs together in a bowl and measure out 50 grams of the mixture. Reduce the baking time by about 5 minutes, checking for doneness at the 17 minute mark.
Scaling Up (Double Batch) Use a 9x13-inch pan. Keep the salt and vanilla at 1.5 times the original amount to avoid overpowering the chocolate. You will need to increase the baking time by about 10-15 minutes because the batter will be slightly deeper in a standard large pan.
| Pan Size | Batch Size | Bake Time | Yield |
|---|---|---|---|
| Loaf Pan (9x5) | 0.5x | 17-20 mins | 8 squares |
| Square (8x8) | 1x | 22 mins | 16 squares |
| Rectangular (9x13) | 2x | 32-35 mins | 32 squares |
Common Misconceptions About Fudgy Brownies
One of the biggest myths in baking is that you need baking powder for brownies. In fact, adding a leavening agent creates air pockets that turn a brownie into a "chocolate cake square." For that dense, heavy "Cosmic" feel, we want zero leavening.
The only lift should come from the eggs being whisked, which creates a tight, fine crumb.
Another common belief is that more flour makes a better brownie. Actually, the less flour you can get away with, the fudgier the result. The flour is simply there to act as a scaffold for the sugar and fat. This is why we use only 95 grams for the entire pan.
If you increase the flour, you lose that melt in-your mouth quality that defines the original snack.
Finally, some people think the ganache is just "melted frosting." A true ganache is an emulsion of cream and chocolate. It has a higher fat content and a much smoother mouthfeel than any butter and powdered sugar frosting.
The honey we add isn't just for sweetness; it is an invert sugar that keeps the ganache flexible and prevents it from cracking when you bite into it.
Proper Storage and Using Leftovers
These brownies are actually better on the second day. The flavors of the cocoa and vanilla have time to meld, and the ganache fully sets into that iconic fudge like consistency.
Storage Guidelines Keep these in an airtight container in the refrigerator for up to 7 days. If you leave them on the counter, the ganache may soften too much, losing that signature "snap." For long term storage, wrap individual squares in plastic wrap and then foil.
They will stay fresh in the freezer for up to 3 months. To eat, let them thaw in the fridge overnight.
Zero Waste Tips If you end up with scraps from trimming the edges to get perfect rectangles, do not throw them away. You can crumble the edges into a bowl and mix them with a tablespoon of leftover ganache to form "brownie truffles." Roll them into balls, dip them in melted chocolate, and you have a completely different treat.
You can also freeze the crumbs and use them as a high end topping for vanilla bean ice cream.
Presentation for the Best Results
To get that professional, sharp edged look, the cooling process is your best friend. After the ganache is applied, the "flash chill" in the fridge for at least an hour is vital. If you try to cut them while they are even slightly warm, the ganache will smear and the base will crumble.
When you are ready to serve, use a long, thin bladed knife. Prepare a tall glass of hot water and a clean kitchen towel. Dip the knife into the water, wipe it completely dry, and make one long, decisive cut. Repeat this cleaning and heating process between every single slice.
It sounds tedious, but it is the only way to ensure the neon sprinkles stay on top and the dark brownie base doesn't smudge into the shiny ganache.
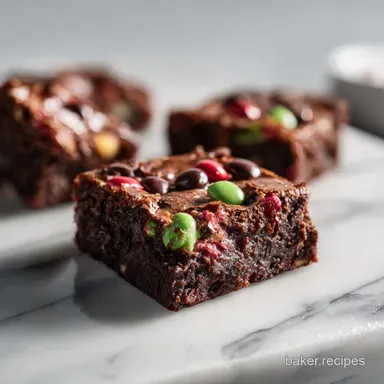
If you are serving these for a party, consider cutting them into long, thin rectangles rather than squares. This "baton" shape looks modern and makes them easier to pick up. Since these are incredibly rich, a smaller, thinner piece is often more satisfying than a massive block.
You can also garnish the plate with a few extra sprinkles or a light dusting of sea salt to really make the chocolate flavor pop.

Recipe FAQs
How to ensure the brownies have a glossy top?
Whisk the eggs and sugars vigorously until the mixture is fully emulsified and glossy. If you mastered this stable emulsion technique here, see how it creates a perfect texture in our seriously fudgy brownie recipe.
Is it necessary to use Dutch process cocoa powder?
Yes, it is essential for the authentic flavor and deep color. Dutch process cocoa has a neutralized pH, which helps achieve that classic dark brownie look and richer chocolate taste compared to natural cocoa.
How to tell when the brownies are perfectly baked?
Remove them from the oven at exactly 22 minutes when the edges are set but the center remains slightly soft. Overbaking will turn these from fudgy to cakey, so rely on the visual cue of the edges rather than a toothpick test.
Is it true I should use a glass pan for more even baking?
No, this is a common misconception. You must use a metal 8x8-inch pan because metal conducts heat efficiently and ensures the edges bake properly, whereas glass often leads to uneven results.
How to get perfectly clean slices every time?
Flash chill the finished brownies in the refrigerator for one hour before cutting. This hardens the ganache layer, allowing you to slice them into clean, professional looking rectangles without the topping smearing.
Can I speed up the cooling process for the ganache?
Avoid rushing the cooling step, as it prevents the ganache from achieving the right consistency. Once you stir the heavy cream and chocolate chips until silk smooth, it needs to sit properly to thicken before being spread over the base.
How to properly bloom the cocoa powder?
Whisk the cocoa powder directly into the warm, melted butter immediately after removing it from the heat. This simple action releases the cocoa's volatile aromatics and creates a significantly deeper chocolate flavor profile.
Homemade Cosmic Brownies
Ingredients:
Instructions:
Nutrition Facts:
| Calories | 306 kcal |
|---|---|
| Protein | 3.2 g |
| Fat | 17.3 g |
| Carbs | 37.8 g |
| Fiber | 1.9 g |
| Sugar | 31.3 g |
| Sodium | 78 mg |
