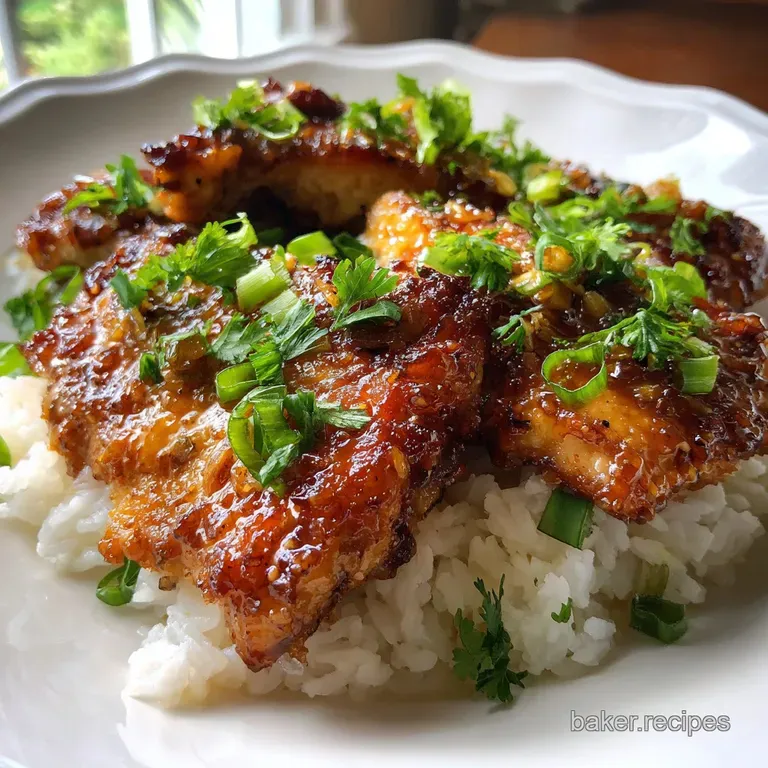
Honey Garlic Chicken: Pan-Seared & Glazed
- Time: Active 10 minutes, Passive 10 minutes, Total 20 minutes
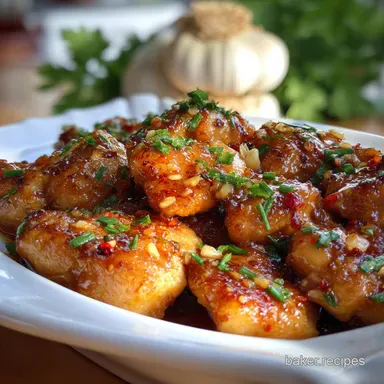
- Flavor/Texture Hook: Sweet savory glaze with a shatter crisp exterior
- Perfect for: Busy weeknight dinners or a budget-friendly takeout alternative
- Master This Easy Honey Garlic Chicken Recipe
- The Sticky Glaze Chemistry Logic
- Component Analysis and Selection
- Quick Prep and Cooking Stats
- Essential Kitchen Tools for Success
- Step By Step Cooking Process
- Avoiding Common Cooking Mistakes
- Easy Math for Batch Cooking
- Flavor Variations and Substitutions
- Debunking Kitchen Myths
- Smart Storage and Reheating Tips
- Best Ways To Serve This
- Recipe FAQs
- 📝 Recipe Card
Master This Easy Honey Garlic Chicken Recipe
Think about that distinct sizzle when cold, seasoned chicken cubes hit a hot, shimmering layer of oil. Within seconds, the kitchen fills with a sharp, sweet aroma of garlic hitting the honey, a scent so heavy it almost feels like a hug.
I remember the exact Tuesday I gave up on my local takeout spot after realizing I was paying twenty bucks for soggy meat when I could create this velvety, glossy masterpiece in my own skillet in under 20 minutes.
We've all been there staring at a pack of chicken breasts, wondering how to make them not taste like cardboard. This recipe is the answer because it relies on simple pantry math and a quick searing technique that locks in every drop of juice.
You don't need a wok or a culinary degree, just a hot pan and the willingness to let the honey bubble until it turns into a thick, amber glaze.
Expect a dish that balances the deep umami of soy sauce with the bright zing of rice vinegar and the warmth of fresh ginger. We are skipping the heavy breading and deep frying in favor of a light cornstarch "velveting" that gives you all the texture without the mess.
Trust me, once you see that sauce cling to the chicken, you'll never reach for a delivery menu again.
The Sticky Glaze Chemistry Logic
The Starch Barrier: Cornstarch creates a microscopic, porous crust that absorbs the sauce's moisture without losing its structural integrity. It prevents the chicken proteins from over tightening, ensuring a tender, velvety interior even at high heat.
Caramelization Control: Honey contains glucose and fructose, which brown at lower temperatures than table sugar, allowing for a deep amber color without needing a long simmer.
The rice vinegar provides the necessary acidity to break down these sugars just enough to prevent the sauce from becoming cloyingly sweet.
| Method | Time | Texture | Best For |
|---|---|---|---|
| Stovetop Skillet | 10 minutes | Crispy and charred | Maximum flavor and speed |
| Air Fryer | 12 minutes | Extra crunchy | A hands off, lower oil option |
| Slow Cooker | 3 hours | Soft and shredded | Large batches or meal prep |
The beauty of the stovetop method is the immediate feedback you get from the pan. You can see the sauce thicken in real time, ensuring you pull it off the heat at the exact moment it reaches peak glossiness. If you’re looking for a side that handles sauce just as well, this pairs incredibly with the techniques used in our Minced Chicken Fritters recipe.
Component Analysis and Selection
| Ingredient | Science Role | Pro Secret |
|---|---|---|
| Raw Honey | Viscosity Agent | Use room temp honey for faster emulsification into the soy base. |
| Cornstarch | Moisture Lock | Pat chicken dry before dusting to prevent a gummy, paste like coating. |
| Rice Vinegar | pH Balancer | Adds a "top note" that cuts through the heavy salt of the soy sauce. |
| Fresh Ginger | Protease Enzyme | Contains zingibain, which naturally tenderizes meat fibers during the brief cook. |
Using fresh aromatics is the difference between a flat dish and one that pops. While dried powders are convenient for a spice rub, they can't match the volatile oils found in freshly minced garlic and grated ginger. When that ginger hits the pan, it releases a fragrance that defines the entire profile of the dish.
Quick Prep and Cooking Stats
Before we grab the skillet, let's look at what is actually going into the pan. We are using 1.5 lbs boneless skinless chicken breast, cut into 1 inch cubes for maximum surface area. This ensures every bite is coated in that sticky goodness.
- 1.5 lbs chicken breast: Lean protein that cooks fast. Why this? Breast meat absorbs the honey glaze's moisture better than fat heavy thighs.
- 2 tbsp cornstarch: The secret to the "velvet" texture. Why this? It creates a thin, crisp film without the weight of flour.
- 1/4 cup raw honey: Our primary sweetener and thickener.
- 3 tbsp low sodium soy sauce: Provides the salty, umami backbone.
- 1 tbsp rice vinegar: For a necessary acidic "snap."
- 4 cloves garlic, minced: The soul of the dish.
- 1 tsp fresh ginger, grated: For warmth and tenderization.
- 1/2 tsp sea salt & black pepper: Basic seasoning.
- 1 tbsp avocado oil: High smoke point for the sear.
- 1/2 tsp red pepper flakes: For a subtle, back of-the throat heat.
- Garnish: 2 green onions and 1 tsp toasted sesame seeds.
If you don't have rice vinegar, apple cider vinegar works in a pinch, though it adds a slightly fruitier note. For those watching their sodium, coconut aminos are a stellar swap for soy sauce, though you might want to reduce the honey slightly since aminos are naturally sweeter.
Essential Kitchen Tools for Success
You don't need a kitchen full of gadgets, but a few specific items make this much easier. A large heavy bottomed skillet ideally cast iron or stainless steel is your best friend here.
These materials hold heat consistently, which is vital for getting that golden sear on the chicken without it steaming in its own juices.
A microplane or fine grater is also a total lifesaver for the ginger. Grating it directly into the sauce bowl ensures you catch all the juice, which is where the most intense flavor lives. I used to chop ginger with a knife, but the fibers always ended up stuck in my teeth.
The microplane turns it into a silky paste that dissolves instantly into the glaze.
Finally,, make sure you have a good pair of tongs. Using a spatula often results in the cornstarch coating being scraped off the chicken before it has a chance to set. Tongs allow you to flip each cube individually, ensuring every side gets that beautiful, bronzed crust.
step-by-step Cooking Process

Phase 1: The Prep and Dusting
- Dry the chicken. Use paper towels to pat the 1 inch chicken cubes until they are completely dry to the touch. Note: Excess moisture causes the cornstarch to clump and prevents a proper sear.
- Coat the protein. Toss the chicken in a bowl with 2 tbsp cornstarch, 1/2 tsp sea salt, and 1/2 tsp black pepper until every piece is evenly matte.
- Whisk the sauce. In a small jar, combine 1/4 cup honey, 3 tbsp soy sauce, 1 tbsp rice vinegar, 4 minced garlic cloves, 1 tsp grated ginger, and 1/2 tsp red pepper flakes.
Phase 2: The Flash Sear
- Heat the oil. Add 1 tbsp avocado oil to your skillet over medium high heat until it shimmers and just begins to smoke.
- Sear the chicken. Place the chicken in the pan in a single layer. Cook for 3 minutes without touching to let a golden crust form.
- Flip and finish. Turn the pieces over and cook for another 2-3 minutes until the exterior is opaque and firm.
Phase 3: The Glaze and Finish
- Deglaze the pan. Pour the honey mixture over the chicken. Listen for the immediate hiss and bubble as the sugar hits the heat.
- Thicken the sauce. Toss the chicken constantly for 1-2 minutes until the liquid reduces into a thick, clingy syrup.
- Garnish and serve. Remove from heat immediately and top with sliced green onions and toasted sesame seeds.
Chef's Tip: If the sauce thickens too quickly and becomes tacky, add a tablespoon of water or chicken broth to loosen it back to a velvety consistency.
Avoiding Common Cooking Mistakes
Even a simple dish can go sideways if you rush the details. The biggest culprit for "okay" chicken versus "wow" chicken is temperature control. If your pan isn't hot enough when the chicken hits, the meat will release its juices, and you'll end up boiling the chicken in a grey puddle instead of searing it.
Why Your Sauce Is Too Runny
This usually happens if the honey wasn't allowed to bubble and reduce, or if the chicken released too much water. If you find yourself with a soup instead of a glaze, don't panic. Remove the chicken from the pan to prevent overcooking and let the sauce simmer on its own for another 60 seconds.
It will thicken rapidly as the water evaporates and the sugars concentrate.
Why the Garlic Tastes Bitter
Garlic burns fast. If you add it to the pan at the beginning with the chicken, it will be charcoal by the time the meat is done. That’s why we whisk it into the sauce. The honey and soy sauce act as a heat buffer, allowing the garlic to soften and release its oils without scorching.
| Problem | Root Cause | Solution |
|---|---|---|
| Soggy Coating | Overcrowded pan | Cook in two batches to allow steam to escape. |
| Tough Meat | Overcooked breast | Remove from heat as soon as the sauce is glossy; chicken carries over heat. |
| Bland Sauce | Old ginger/garlic | Always use fresh aromatics for that sharp, vibrant punch. |
Common Mistakes Checklist
- ✓ Never skip the pat dry step; moisture is the enemy of the "shatter" crunch.
- ✓ Use a high smoke point oil like avocado or grapeseed; olive oil will burn and taste acrid.
- ✓ Don't move the chicken for the first 3 minutes; patience builds the crust.
- ✓ Use low sodium soy sauce to control the saltiness; regular soy can become too intense when reduced.
- ✓ Measure your honey carefully; too much will make the dish gummy rather than glossy.
Easy Math for Batch Cooking
If you’re cooking for one, halving the recipe is easy. Use 0.75 lbs of chicken and exactly half of all other ingredients. For the spices, a "pinch" usually suffices for the smaller measurements.
The cook time remains largely the same because you still want that over high heat sear, though the sauce will reduce faster in a smaller volume.
When doubling the recipe for a crowd, work in batches for the chicken. Trying to sear 3 lbs of chicken in one skillet will lower the pan temperature too much, resulting in steamed meat. Cook the first half, set it aside, cook the second half, then return all the chicken to the pan before adding the sauce.
For the spices, only increase the salt and red pepper to 1.5x rather than a full 2x to avoid overwhelming the dish.
| Original Servings | Chicken Weight | Honey Amount | Pan Size |
|---|---|---|---|
| 2 People | 0.75 lbs | 2 tbsp | 8 inch skillet |
| 4 People | 1.5 lbs | 1/4 cup | 12 inch skillet |
| 8 People | 3.0 lbs | 1/2 cup | Two 12 inch skillets |
Cooking for a larger group often means the sauce takes a bit longer to reduce. Be patient and keep the heat at medium high. If you find the chicken is getting too dark before the sauce is thick, lower the heat slightly and add a splash of water to slow down the caramelization.
Flavor Variations and Substitutions
One of my favorite things about this recipe is how adaptable it is. If you want a more "Restaurant Quality" vibe, you can add a tablespoon of oyster sauce to the honey mixture. It adds a deep, salty complexity that mimics the best Chinese takeout. For a similar flavor profile with a different texture, check out our RestaurantQuality Chicken in recipe.
Can I make this a Honey Garlic Chicken Pasta?
Absolutely. Instead of serving over rice, toss the finished chicken and extra sauce with linguine or fettuccine. Add a splash of heavy cream or a bit of the pasta cooking water to help the sauce emulsify and coat the noodles. It’s a brilliant fusion dish that feels much fancier than it is.
Is there a Paleo or Soy Free alternative?
For a paleo version, swap the cornstarch for arrowroot powder and the soy sauce for coconut aminos. You may need to add an extra pinch of salt since aminos are less salty than traditional soy sauce. Use maple syrup instead of honey if that's what you have on hand, though the texture will be slightly thinner.
Chicken Thighs vs. Breasts
While the schema calls for breasts, boneless skinless thighs are a fantastic swap. They are more forgiving and harder to overcook. If using thighs, increase the initial sear time by 1 minute per side to render out a bit more of the fat.
The result is a richer, silkier bite that some people prefer over the leaner breast meat.
Debunking Kitchen Myths
A common misconception is that you need to marinate the chicken for hours to get flavor. With a sauce this bold and a coating this effective, marinating is actually counterproductive.
The salt in a marinade would draw moisture out of the chicken, making it impossible to get that crispy cornstarch exterior we’re after. The flavor comes from the reduction of the sauce at the very end.
Another myth is that "honey is honey." In reality, the floral notes of the honey can change the dish significantly. Clover honey is neutral and works well, but orange blossom honey can add a lovely citrus undertone.
Avoid using very dark, buckwheat honey as its strong, almost molasses like flavor can easily overpower the delicate garlic and ginger.
Smart Storage and Reheating Tips
Storage: This chicken keeps beautifully in the fridge for up to 4 days. Store it in an airtight glass container to keep the sauce from absorbing any "fridge smells." The coating will soften as it sits, turning from crispy to a more traditional "velveting" texture, which is still quite pleasant.
Freezing: You can freeze this for up to 3 months. I recommend freezing the cooked chicken and sauce together. To eat, thaw it overnight in the fridge. Don't try to freeze the raw chicken with the cornstarch on it, as it will turn into a gummy mess once thawed.
Reheating: Avoid the microwave if you can. It tends to make the chicken rubbery and the sauce oily. Instead, toss the leftovers into a cold skillet with a tablespoon of water. Cover it and heat over medium low. The steam will loosen the sauce and gently warm the chicken without drying it out.
Zero Waste Tip: Don't throw away the white parts of the green onions! Chop them finely and sauté them with the garlic and ginger for extra depth. If you have leftover sauce in the pan, toss in some frozen broccoli or snap peas for a 2 minute side dish that uses every last drop of that honey garlic gold.
Best Ways To Serve This
The classic move is serving this over a bed of fluffy jasmine rice. The rice acts like a sponge, soaking up all the extra glaze so not a single drop is wasted. If you want something a bit lighter, cauliflower rice or even a simple slaw of shredded cabbage and carrots with a lime vinaigrette works wonders.
The crunch of the raw veggies provides a great contrast to the soft, sticky chicken.
For a more comforting, "Sunday dinner" feel, try serving the chicken alongside a creamy vegetable dish. It provides a nice counterpoint to the sharp ginger and sweet honey. Something like our Creamy Chicken Fricassee recipe shows how well chicken plays with creamier profiles, though here the honey garlic sauce provides a much brighter, more modern simplicity.
If you're feeling adventurous, turn these into honey garlic chicken tacos. Put the chicken into small corn tortillas, top with a quick pickled red onion and a drizzle of sriracha mayo. The sweetness of the honey pairs perfectly with the char of a corn tortilla and the creaminess of a spicy sauce.
It’s a total crowd pleaser and makes the leftovers feel like an entirely new meal.

Recipe FAQs
How to make honey and garlic chicken?
Toss chicken in cornstarch, salt, and pepper until evenly coated. Sear chicken in hot oil until golden brown on all sides. Add whisked honey, soy sauce, rice vinegar, garlic, ginger, and red pepper flakes to the pan. Toss constantly until the sauce reduces to a thick, glossy glaze.
What's the secret to juicy Honey Garlic Chicken?
Don't overcrowd the pan and use high heat for searing. This ensures the chicken browns properly instead of steaming, locking in juices. Patting the chicken completely dry before coating it in cornstarch is also crucial for a good crust and tender interior.
What is honey garlic sauce made of?
The base is typically honey and soy sauce, enhanced with garlic and ginger. Rice vinegar is often included to balance the sweetness. Red pepper flakes can add a touch of heat.
Is it better to bake chicken at 350 or 400?
For crispier results, 400°F is generally better. The higher temperature promotes faster browning and a crispier exterior. If you prefer a more tender, less browned chicken, 350°F is suitable.
Can I use chicken thighs instead of breasts?
Yes, chicken thighs are a great substitute and are more forgiving. They tend to stay juicier and are harder to overcook. If using thighs, you may want to increase the searing time slightly to render fat.
Why is my honey garlic sauce too thin?
The sauce likely needs more time to reduce or the heat was too low. Ensure the pan is hot enough when adding the sauce ingredients to encourage evaporation. You can also remove the chicken temporarily and let the sauce simmer on its own until thickened.
How can I make my Honey Garlic Chicken crispy?
Ensure the chicken is thoroughly dry before coating it with cornstarch. Sear the chicken in a hot pan without overcrowding it to achieve a good crust. Avoid adding the sauce until the chicken is mostly cooked, and let the sauce reduce quickly to maintain crispness.
Honey Garlic Chicken
Ingredients:
Instructions:
Nutrition Facts:
| Calories | 332 kcal |
|---|---|
| Protein | 39.1 g |
| Fat | 7.9 g |
| Carbs | 23.4 g |
| Fiber | 0.6 g |
| Sugar | 17.5 g |
| Sodium | 738 mg |
