Miniature Delight: Tasty Tinies Bake Shop Treats
Miniature Delight: Tasty Tinies Bake Shop Treats
You know those moments when you want to just dive into something sweet ? picture this: it's a sunday afternoon, and the sun is peeking in through your kitchen window.
You're craving a little something to lift your spirits. trust me, the right solution is whipping up a batch of miniature desserts from the tasty tinies bake shop .
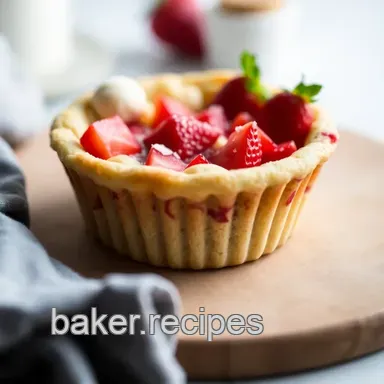
These bite sized pastries will not only satisfy your sweet tooth but make you feel like a pro baker, even if you’re just starting out.
Seriously, who wouldn’t want to serve delightful mini pastries to family and friends?
A Little History on These Tasty Tinies
So, where did these tiny wonders come from? miniature desserts like these get their roots from classic european pastries. they were served in cozy cafes, where people would catch up over coffee and indulge in fluffy pastries .
Today, these treats are super popular for everything from dinner parties to afternoon tea. the best part? they're not just a feast for the eyes.
These homemade treats are also easy to whip up, making them a fantastic choice for both beginner bakers and seasoned pros.
Now, if you’re wondering how much time you should set aside, this recipe takes about 1 hour and 50 minutes, including prep and bake time.
But don’t sweat it! the baking techniques for beginners i’ll share will ensure success every step of the way. plus, this little adventure will yield around 24 delightful mini pastries, perfect for sharing if you can resist the urge to eat them all yourself!
Why You'll Love These Mini Pastries
Let’s get into the good stuff the key benefits of whipping up these tasty treats! first off, they’re a feast of flavors.
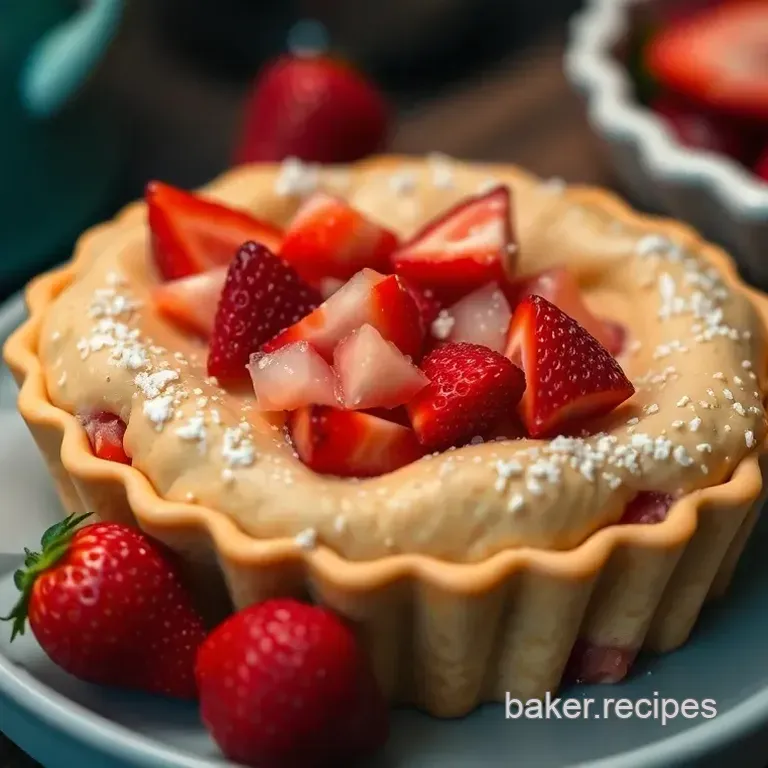
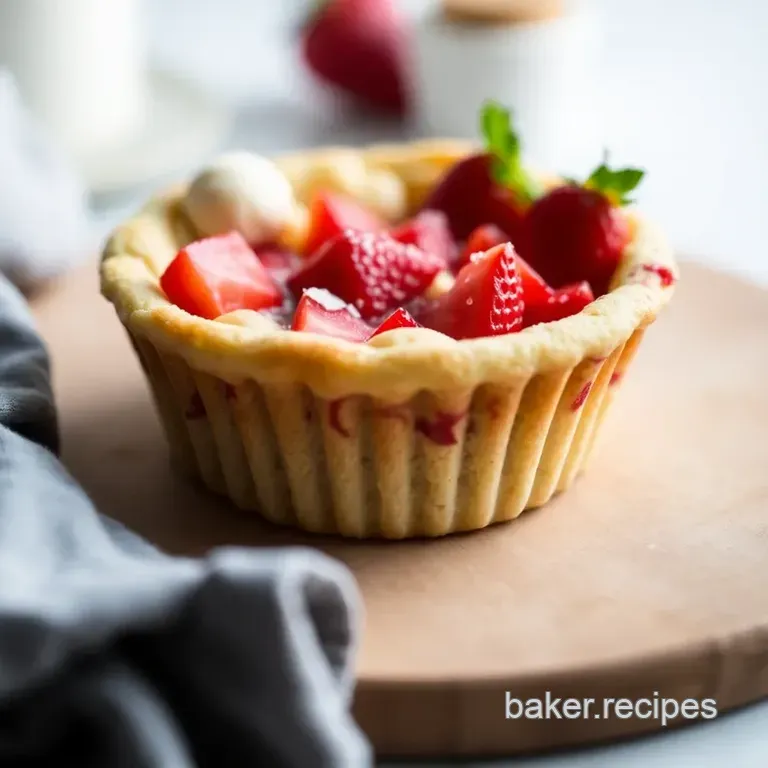
The fruity pastry fillings made with fresh strawberries add a burst of sweetness, while the buttery, flaky pastry dough has that perfect crunch.
Honestly, nothing beats the delight of biting into a homemade pastry right out of the oven.
Secondly, they’re perfect for any occasion! whether it’s a picnic, birthday, or simply a cozy afternoon tea, these mini pastries are the conversation starters.
And if you need to impress, you’ll look like a total rock star when you bring these to the table.
Want to make them even healthier? you can swap in some fresh fruit fillings for a lighter version, or even add a bit of whole wheat flour for a nuttier flavor.
Just think of the compliments you’ll get when everyone raves about your tasty, homemade treats!
Getting Started with Your Tasty Tinies
Before you dive in, gather your baking tools and pantry staple ingredients. don’t worry if you have a couple of baking mishaps along the way that’s part of the journey!
I’ve had my fair share of burning pastries or forgetting to add sugar, and honestly, even the toughest days in the kitchen are worth it when you bite into a warm mini pastry.
Ready to create some magic? here’s what you’ll need for these delightful mini pastries : all-purpose flour, unsalted butter, sugar, fresh strawberries, lemon juice , and some other simple ingredients.
All of it is easy to find, and you’ll likely have most of it already hanging around in your kitchen.
So grab your rolling pin and let’s get ready to impress your guests (or just yourself)! with some proper dough chilling techniques and a sprinkle of creativity, you’ll be on your way to delivering a batch of gourmet mini desserts that’ll have everyone coming back for seconds.
Stay tuned, because up next, I’ll dive into the ingredients you'll need to turn your kitchen into a mini bake shop!
Essential Ingredients Guide for Miniature Treats
Alright, my baking pals! let’s dive into the essential ingredients you’ll need for those adorable miniature desserts that will have your friends begging for more.
We’re talking scrumptious bite sized pastries from the tasty tinies bake shop that'll make your coffee breaks feel fancy.
Premium Core Components
First thing’s first, let’s chat about the premium core components —these are the backbone of your delightful mini pastries. You wouldn’t want stale ingredients ruining your baked goodies, right?
Measurements matter! for your dough: you'll need 2 cups (240g) of all-purpose flour it’s your go-to. mix in 1/2 cup (113g) of cold, cubed unsalted butter for that flakiness ( trust me, it makes a difference! ).
Add 1/4 cup (50g) granulated sugar and 1/4 teaspoon salt too. for a touch of the right moisture, you’ll want about 1/4 cup (60ml) of cold water.
Quality indicators: when selecting your butter, look for rich creaminess this ain’t the time for margarine! as for your floof, make sure the flour is fresh.
Stale flour can make your pastries tough. yikes! check the expiration dates, folks!
Storage guidelines: keep your flour sealed in a cool, dry place; think pantry vibes. butter? in the fridge or freezer works great.
As for the eggs, they can chill in the fridge until you’re ready to bake!
Freshness Tips: If your strawberries start looking sad, discard them. Look for bright red, firm ones those are bursting with flavor! The best fruits for fillings are seasonal hit festivals, farmers' markets, or your local store for the freshest picks!
Signature Seasoning Blend
Now that we’ve got our basics down, we must pump up the flavor. Seriously, nothing ruins a homemade treat like bland filling.
Essential Spice Combinations: Add a dash of nutmeg or cinnamon to your strawberry filling. It gives a cozy feel perfect for afternoon tea recipes .
Herb Pairings: Gosh, fresh mint could elevate those sweet notes, giving them a fabulous pop! Don’t feel shy about playing around here.
Flavor Enhancers: Don't forget vanilla extract —it's liquid gold. It brings out the sweetness in your fillings.
Regional Variations: Why not experiment with a little lemon zest in the mix? It’s a common twist in European pastries!
Smart Substitutions
Let’s say you’re out of butter or need a dietary modification . No sweat!
Common Alternatives: Coconut oil works as a butter substitute if you're looking for something dairy-free. Think a little outside the box!
Emergency Replacements: Ran out of cornstarch? Use flour or arrowroot instead lesser-known secrets of baking, my friends.
Seasonal Options: Use pumpkin puree or apple sauce for your filling in autumn. It's comforting and part of the seasonal fruit desserts team!
Kitchen Equipment Essentials
Last, but definitely not least, let’s chat tools! You don't want to get stuck mid-bake without the right gadgets.
Must Have Tools: Get yourself a rolling pin and a pastry cutter. They’ll be your best buds while making that flaky pastry dough !
Alternative Options: No rolling pin? Use a wine bottle! Ingenious, right?
Preparation Tips: Before you cut the dough, chill it for a bit. It makes the whole process much smoother.
Storage Solutions: Keep your baked treats in an airtight container; they’ll stay fresh longer. Just don't keep them too long trust me, they’re best enjoyed fresh!
Alright, there you have it, friends! you’ve got the scoop on creating those delightful mini pastries from tasty tinies bake shop! whether you’re diving into small batch baking or whipping up some elegant dessert ideas , you’re all set to impress your loved ones.
Now, let’s get into those easy to follow baking instructions and make some magic happen!
The Art of Professional Cooking: Preparing Your Absolute Best
When it comes to whipping up some serious goodness in the kitchen, embracing professional cooking methods can really level up your game.
Whether you’re baking those tasty tinies from your favorite bake shop or tackling a full course meal, the key lies in the details.
Let’s breakdown some essential prep steps and processes, so you’re armed and ready for your next culinary adventure.
Essential Preparation Steps
Mise en place is a fancy french term that just means "everything in its place." before you dive into baking those miniature desserts , gather all your ingredients.
Measure them out, chop any fruits, and have your equipment ready. this streamlines the process and saves you from scrambling mid-recipe.
Trust me, i’ve learned that the hard way!
Time management is your friend here. try to set a timer for each phase, especially when waiting for dough to chill (a must for achieving that buttery, flaky pastry).
Chilling times can be around 1 hour , but it’s crucial for those layers to develop. i typically use my phone timer; it really helps keep me organized.
Organization strategies ? Always clean as you go. I cannot stress this enough. A clean workspace helps keep your mind clear and your cooking flow uninterrupted.
Lastly, let’s touch on safety considerations . Dull knives can be more dangerous than sharp ones. And when baking, keep a close eye on temperatures sometimes a degree or two off can throw everything out of whack!
Step-by-step Process
Alright, let’s get to the nitty gritty. Here’s how you can make those adorable bite sized pastries your friends will rave about:
Prepare the dough : mix 2 cups of flour with a pinch of salt and sugar. cut in ½ cup of cold butter until crumbly.
Yes, it needs to be cold! gradually add ¼ cup of cold water until you can form a ball.
Chill for at least 1 hour : Wrap that dough up and let it chill. It’s a simple step, but it pays off with light and flaky results.
Make the filling : in a small saucepan, combine 1 cup of diced strawberries , ¼ cup of sugar , and a pinch of lemon juice for zing.
Heat until it thickens about 5- 7 minutes . let that cool before filling your pastries.
Roll & cut : when ready, roll out the dough to 1/8 inch thick , cut into small circles, and add your fruity filling right in the center.
Fold it over and crimp those edges make ‘em pretty!
Bake : Preheat your oven to 375° F and pop those in for 15- 20 minutes until golden brown. This is when your kitchen will smell heavenly!
Expert Techniques
Now that you have your pastries baked, there are some expert techniques to keep in mind. always check for doneness visually; you want those pastries to shimmer a golden hue.
If they’re pale, they need more time.
Quality checkpoints? Make sure everything is properly cooled before dusting with powdered sugar. This can help those flavors bloom.
If you run into issues, troubleshooting tips can help. If the dough splits, just pinch it back together. And don’t worry if everything doesn’t look “perfect” that's part of the charm of homemade treats !
Success Strategies for Perfect Pastries
Remember, common mistakes include overworking the dough, which leads to tough pastries. make sure to keep your pantry staple ingredients fresh and ready to go.
You can also do some small batch baking when testing new fillings or variations try nutella with bananas for a decadent twist!
And don’t forget, sometimes the best recipes are about adaptation. Use seasonal fruit fillings to make each batch special and unique. For me, experimenting is half the fun!
Additional Information
So there you have it, your guide to whip up delectable miniature delights. from easy bake shop recipes to charming combinations for your afternoon tea engagements, mastering these professional cooking methods will surely impress your friends and family.
Plus, imagine pairing those delightful mini pastries with your favorite tea or coffee pure bliss! happy baking, my friends!
Additional Recipe Information for Miniature Delight: Tasty Tinies Bake Shop Treats
Oh my gosh, let’s dive into the nitty gritty of those delightful mini pastries you’ve stumbled upon! once you get the basics down, prepare for a world of tasty tinies bake shop magic! here’s how you can make these irresistible treats even better.
Pro Tips & Secrets
We all want our homemade treats to turn out perfect trust me, I've been there! Here are some insider gems:
Chill, don’t spill! Seriously, make sure your butter is ice cold. This is the secret to flaky pastry dough ! It helps create those lovely layers that make each bite a delight.
Need to save time? Pre-chill the assembled pastries for about 10- 15 minutes before they hit the oven. This helps them keep their shape when baking.
Want to amp up the flavors? add a pinch of salt to your fruit filling! it brings out the sweetness like nobody’s business.
You can also throw in a little zest from a lemon or orange for a zesty kick!
When it comes to presentation, think color! Arrange your mini pastries on a pretty plate and throw in some fresh fruit or mint leaves for that extra chef-y vibe.
Perfect Presentation
Every great pastry deserves a spotlight, right? Here’s how to make those gourmet mini desserts look like they came straight out of a bakery:
Plating techniques: Don’t just plop them on the plate. Stack them slightly askew, or fan them out. It makes everything pop!
Garnish ideas: A light dusting of powdered sugar adds that wow factor. And if you’re feeling fancy, drizzle a little chocolate sauce or even caramel!
Color combinations: Pair those fruity pastry fillings with contrasting colors. Think deep red strawberries against flaky golden dough stunning!
Storage & make-ahead
If you’re anything like me, you might want to prep ahead. Here’s how to keep those tasty treats fresh:
Store these little gems in an airtight container at room temperature for up to three days . After that, they can start losing their charm.
For longer storage, toss them in the freezer. Just wrap them individually and freeze, and they can last for a month!
For reheating, a quick 5- 10 minutes in a preheated oven brings back that fresh baked goodness. Skip the microwave unless you want a soggy pastry.
Creative Variations
Let’s spice things up! There’s so much you can do with these recipes:
Flavor adaptations: Swap out filling with seasonal fruit. Blueberries in summer and cranberries in winter? Yes, please!
Dietary modifications: For a gluten-free option, use an all-purpose gluten-free flour mix. It’s an easy swap that keeps things light and fluffy!
Craving something nutty? Toss in some finely chopped nuts or chocolate chips into your filling for a fun surprise!
Complete Nutrition Guide
Let’s talk numbers. Here’s a breakdown for one serving of these little wonders:
- Calories: 150 kcal
- Protein: 2g
- Fat: 7g
- Carbohydrates: 21g
These comforting dessert recipes offer a delightful treat without breaking the calorie bank! They’re perfect for that little afternoon pick-me-up.
Expert FAQ Solutions
Why did my pastries come out flat? Ah, this might happen if your butter got too warm. Remember: cold is key!
What’s the best way to roll out my dough? Use plenty of flour on your surface and rolling pin. If your dough sticks, it’s a struggle.
Don’t forget, practice makes perfect.
Conclusion
So there you have it, folks! with these tips and tricks, your journey into the savory sweet world of the tasty tinies bake shop begins here.
Remember to play around with your own twists and enjoy the process. happy baking! trust me, you’re going to create cakes that not only look fabulous but taste even better! next time someone asks, “what’s that?” your answer will be, “oh, just my delightful mini pastries!” now go conquer the kitchen you got this!
Miniature Delight Tasty Tinies Bake Shop Treats