Moist Chocolate Cupcake Recipe
- Time: Active 27 minutes, Passive 18 minutes, Total 45 minutes
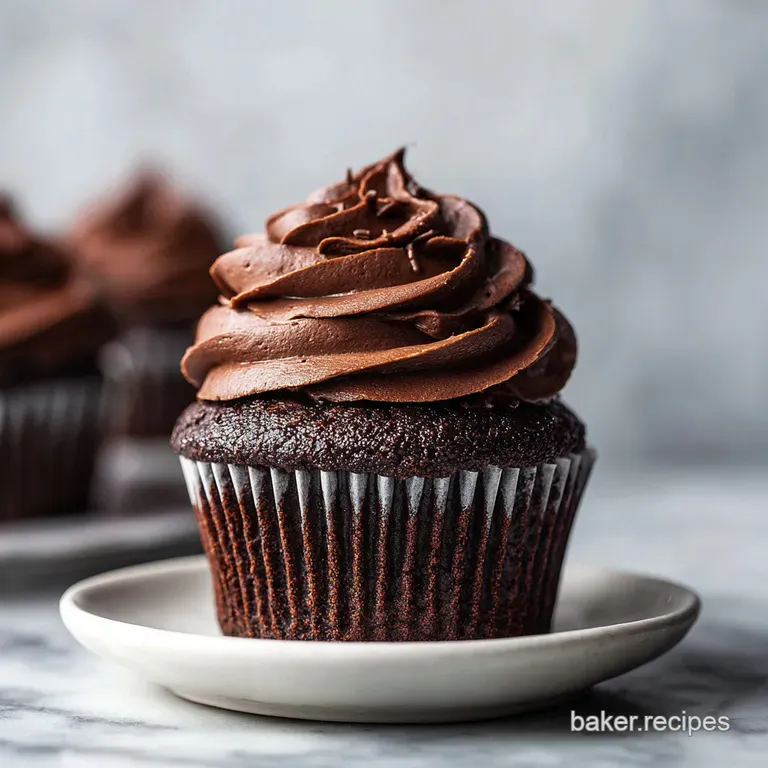
- Flavor/Texture Hook: Intensely fudgy with a velvety, moist crumb
- Perfect for: Birthday parties or a reliable weekend treat
- Stop Overpaying for This Moist Chocolate Cupcake Recipe
- Science Secrets for a Velvet Crumb
- Component Analysis for Home Cooks
- Selecting Your Elements and Substitutes
- Essential Tools for Home Cooks
- Step-by-Step Batter to Frosting
- Fixing Common Baking Hurdles
- Simple Swaps for Dietary Needs
- Debunking Kitchen Tales
- Long-Term Storage and Freshness
- What to Serve with Cupcakes
- Recipe FAQs
- 📝 Recipe Card
Stop Overpaying for This Moist Chocolate Cupcake Recipe
The smell of dark cocoa hitting boiling water is something you never forget. It's a sharp, earthy aroma that fills the kitchen the second you pour that liquid into the bowl. I remember the first time I tried this specific method; I was skeptical about adding what looked like "brown water" to a perfectly good batter.
I thought I'd ruined the whole batch for my friend's housewarming party. But when those tins came out of the oven, the tops were perfectly domed and the kitchen smelled like a high end chocolatier.
We've all been there, standing in line at a boutique bakery, shelling out five dollars for a single cupcake that looks great but tastes like dry sponge. It’s frustrating because a great chocolate cupcake recipe shouldn't be a luxury.
After years of testing hydration levels and fat ratios, I found that the secret isn't in expensive chocolate bars. It's in how you treat the cocoa powder. This version is my "ride or die" because it's consistent, uses basic pantry staples, and stays moist for days.
The goal here is a crumb that is open but stable enough to hold a swirl of rich buttercream. You don't need a professional kitchen or fancy gadgets to get that silk like texture. We are going to focus on simple physics and temperature control.
By the time we're done, you'll have a dozen treats that put those overpriced bakeries to shame. Honestly, once you see how easy it is to get that deep, dark color and tender bite at home, you’ll never go back to the box or the boutique.
Science Secrets for a Velvet Crumb
The Cocoa Bloom: Adding 120ml of boiling water to the cocoa powder dissolves lumps and releases trapped flavor compounds for a more intense chocolate profile. This process, known as "blooming," hydrates the cocoa solids instantly so they don't suck moisture from the finished cake.
Acidic Leavening: The 120ml of full fat buttermilk reacts with the 1 tsp of baking soda to create carbon dioxide bubbles. This reaction happens the moment they touch, giving the batter an immediate lift that results in a light, airy structure rather than a dense one.
Fat Saturation: Using 60ml of vegetable oil instead of butter in the batter ensures the cake stays soft even when cold. Oil remains liquid at room temperature, which coats the flour proteins more effectively than solid fats, preventing excessive gluten development.
Starch Gelatinization: The high heat from the boiling water begins to swell the starch granules in the 185g of all purpose flour. This creates a stable framework that supports the bubbles created by the baking soda, preventing the centers from collapsing as they cool.
| Feature | Fresh From Scratch | Box Mix Shortcut |
|---|---|---|
| Flavor Profile | Deep, complex cocoa notes | Predominantly sweet/vanilla |
| Texture | Silky and slightly open | Uniform and spongy |
| Shelf Life | Stays moist for 3-4 days | Dries out within 24 hours |
The difference between a scratch made treat and a box mix usually comes down to the quality of the fats and the lack of preservatives. If you're looking for a different way to use your pantry staples, this How to Bake recipe shows how to turn a mix into something chewy and fast. However, for the ultimate birthday worthy result, the scratch method is king.
Component Analysis for Home Cooks
| Ingredient | Science Role | Pro Secret |
|---|---|---|
| Unsweetened Cocoa Powder (90g) | Provides structure and flavor | Sift it twice to ensure it dissolves instantly in boiling water |
| Full fat Buttermilk (120ml) | Tenderizes gluten and activates soda | Bring to room temperature so it doesn't seize the oil |
| Boiling Water (120ml) | Hydrates cocoa and thins batter | Use water right off the boil for the best flavor release |
| Vegetable Oil (60ml) | Ensures long lasting moisture | Use a neutral oil like canola to let the cocoa shine |
Selecting Your Elements and Substitutes
To get the best results from this chocolate cupcake recipe, you need to be precise with your measurements. I always recommend using a scale for the 185g of flour, as a measuring cup can vary by as much as 20% depending on how you pack it.
- 185g all purpose flour: The backbone of the structure.
- Substitute: 185g gluten-free 1:1 blend. Why this? Provides enough protein to hold the air bubbles without making it tough.
- 200g granulated sugar: Adds sweetness and helps with browning.
- Substitute: 200g light brown sugar. Why this? Sugar is a liquid when hot; it keeps the crumb tender and soft.
- 90g unsweetened cocoa powder: The source of that dark color.
- Substitute: 90g Dutch processed cocoa. Why this? Dutch processed offers a smoother, less acidic flavor profile than natural cocoa.
- 1 tsp baking soda: Our primary lifting agent.
- Substitute: 3 tsp baking powder (but reduce buttermilk). Why this? Needs the acid in buttermilk to react and create a light rise.
- 0.5 tsp fine sea salt: Sharpens the chocolate flavor.
- Substitute: 0.5 tsp kosher salt. Why this? Salt balances the sugar and makes the cocoa taste more "chocolatey."
- 1 large egg: Binds everything together.
- Substitute: 1/4 cup applesauce. Why this? Provides fat and protein to stabilize the delicate cake walls.
- 120ml full fat buttermilk: Tenderizes the crumb perfectly.
- Substitute: 120ml whole milk + 1 tsp lemon juice. Why this? The acidity breaks down tough gluten strands for a velvet bite.
- 60ml vegetable oil: Keeps the cake moist for days.
- Substitute: 60ml melted coconut oil. Why this? Unlike butter, oil stays liquid at room temperature for a softer feel.
- 2 tsp pure vanilla extract: Rounds out the earthy cocoa notes.
- Substitute: 1 tsp espresso powder. Why this? Vanilla acts as a flavor enhancer for the chocolate, not just a scent.
- 120ml boiling water: The "secret" for the blooming process.
- Substitute: 120ml hot coffee. Why this? The heat thin out the batter and prevents a grainy texture.
Chef's Tip: If you want to take the flavor even deeper, use hot coffee instead of water. The caffeine molecules actually bond with the cocoa solids to highlight the fruity notes of the bean.
Essential Tools for Home Cooks
Before you start, make sure you have a standard 12 cup muffin tin. You'll also want high-quality paper liners; I prefer the greaseproof ones so the cake doesn't stick to the paper. A whisk is actually better than a mixer for the batter because it prevents you from overworking the flour.
Over mixing leads to a rubbery texture, and we want these to be as light as a cloud.
For the frosting, a stand mixer such as a KitchenAid is a huge help. You need to whip that 225g of unsalted butter until it is pale and doubled in volume before you even think about adding the 360g of powdered sugar.
If you don't have a stand mixer, a hand mixer works, but give it an extra 2 minutes of whipping time. Also, grab a large piping bag and a star tip if you want that professional "boutique" look.
step-by-step Batter to Frosting
Phase 1: The Dry Mix and Bloom
- Preheat your oven to 180°C (350°F) and line your tin with 12 paper liners.
- Whisk the 185g all purpose flour, 200g sugar, 90g cocoa powder, 1 tsp baking soda, and 0.5 tsp salt in a large bowl. Note: This ensures the leavening agent is evenly distributed so you don't get giant holes.
- Add the 1 large egg, 120ml buttermilk, 60ml vegetable oil, and 2 tsp vanilla to the dry ingredients.
- Whisk by hand until the mixture is thick and smooth with no dry pockets.
Phase 2: Emulsifying the Batter
- Carefully pour in the 120ml boiling water.
- Whisk gently until the batter is thin, glossy, and completely uniform. Note: Don't panic; the batter will be very watery, which is exactly what we want for a moist result.
- Divide the batter evenly among the 12 liners, filling them about two thirds full.
Phase 3: The Precision Oven Time
- Place in the center of the oven and cook for 18 minutes until a toothpick comes out with just a few moist crumbs.
- Remove the tin and let the cakes sit for 5 minutes before moving them to a wire rack. Note: Resting in the tin for too long will make the bottoms soggy from steam.
Phase 4: Finishing with Velvety Frosting
- Beat 225g softened butter for 5 minutes until it looks like whipped cream.
- Gradually add 360g powdered sugar and 3 tbsp heavy cream, beating until the frosting is stiff but spreadable.
- Once the cakes are completely cold, pipe or spread the frosting generously over the tops.
Fixing Common Baking Hurdles
If your cakes didn't turn out quite right, don't sweat it. Most issues come down to temperature or mixing. For example, if your liners are peeling away, it’s usually because you left them in the metal tin too long after taking them out of the oven.
The steam gets trapped between the paper and the cake, loosening the glue.
Why Your Centers Sank
A sinking center usually means one of two things: either the oven door was opened too early, causing a temperature drop, or the baking soda was expired. When the structure hasn't set yet, a puff of cold air can collapse the bubbles. Always wait at least 15 minutes before checking for doneness.
Why the Crumb is Tough
If the texture feels more like bread than cake, you likely over mixed the batter after adding the flour. Once the liquid hits the flour, gluten starts to form. If you whisk too vigorously, those gluten strands become strong and elastic, leading to a chewy cupcake instead of a tender one.
| Problem | Root Cause | Solution |
|---|---|---|
| Dry, crumbly texture | Over cooking or too much flour | Use a scale for 185g flour and check at 16 mins |
| Greasy liners | Oil separated during prep | Ensure buttermilk and egg are room temperature |
| Flat tops | Oven temp too low | Calibrate oven; ensure it reaches 180°C (350°F) |
Common Mistakes Checklist
- ✓ Check that your baking soda is fresh by dropping a pinch in vinegar (it should fizz violently).
- ✓ Don't skip sifting the cocoa powder; lumps of dry cocoa are bitter and won't dissolve.
- ✓ Use the "boiling" water immediately; if it cools down, it won't bloom the cocoa properly.
- ✓ Fill liners no more than 2/3 full to prevent the batter from spilling over and sticking to the tin.
- ✓ Wait until the cakes are cold to the touch before frosting, or the butter will melt into a puddle.
Simple Swaps for Dietary Needs
Scaling this chocolate cupcake recipe is straightforward as long as you keep the ratios in check. If you're making these for a large crowd, you can easily double the ingredients. Just be careful with the spices and salt; I usually only multiply those by 1.5x to avoid an overpowering flavor.
If you need a different flavor for a themed party, you might enjoy this How to Bake recipe which offers a lighter, spiced alternative. For these chocolate ones, if you want to scale down, beat the single egg in a small bowl and use exactly half by weight (about 25g).
| Servings | Flour | Cocoa | Boiling Water | Pan Size |
|---|---|---|---|---|
| 6 Cupcakes | 92g | 45g | 60ml | 6 cup tin |
| 12 Cupcakes | 185g | 90g | 120ml | 12 cup tin |
| 24 Cupcakes | 370g | 180g | 240ml | Two 12 cup tins |
If you are cooking for a larger group and need to save on costs, you can swap the heavy cream in the frosting for whole milk. The frosting will be slightly less stable at room temperature, but the flavor remains excellent.
- If you want a richer flavor, do 50% water and 50% strong coffee.
- If you want a lighter frosting, whip the butter for a full 8 minutes before adding sugar.
- If you want a sturdier cake, replace the oil with 60g of melted, cooled butter.
Debunking Kitchen Tales
You might have heard that you must use expensive "cake flour" for a tender crumb. That’s actually a myth. While cake flour has less protein, the combination of all purpose flour and the acid in buttermilk effectively "weakens" the gluten for you.
You get the same tender result without buying a specialty ingredient you'll only use once.
Another common misconception is that more baking soda means a higher rise. In reality, too much leavening will cause the cake to rise too fast and then collapse. It also leaves a soapy, metallic aftertaste. Stick to the 1 tsp measurement; it’s the perfect balance for the 120ml of acidic buttermilk.
Finally, some people think you have to cream the butter and sugar for the batter. This recipe uses the "two bowl" method with oil, which actually creates a more moist result than the creaming method.
The oil surrounds the flour particles more efficiently, ensuring that even if you over prepare the batter slightly, the cake remains soft.
Long Term Storage and Freshness
To keep these treats tasting fresh, store them in an airtight container at room temperature for up to 3 days. If you live in a very humid environment, you might want to move them to the fridge after 24 hours to keep the frosting from getting too soft.
In the fridge, they stay good for about 5 days, but let them sit on the counter for 20 minutes before eating so the butter in the frosting can soften back up.
For freezing, these are a dream. You can freeze the unfrosted cakes for up to 3 months. Wrap each one individually in plastic wrap and then place them in a freezer bag. When you're ready to serve, thaw them at room temperature for an hour and then whip up a fresh batch of buttercream.
Don't let any scraps go to waste. If you have a cupcake that broke or didn't rise perfectly, crumble it up and mix it with a spoonful of leftover frosting to make cake pops. You can also toast cake crumbs in the oven until crispy and use them as a topping for vanilla ice cream.
Even the cocoa powder container can be repurposed; wash it out and use it to store your sifter or small measuring spoons.
What to Serve with Cupcakes
These cupcakes are intensely chocolatey, so they pair beautifully with something tart or creamy to cut through the richness. A handful of fresh raspberries or a dollop of salted caramel sauce on top takes them to a whole new level.
If you're serving these at a dinner party, a small glass of cold milk or a robust espresso is the classic choice.
If you're looking for more variety on your dessert table, consider adding some smaller bites. These cupcakes go great alongside a batch of Bake Classic German recipe if you're hosting a true chocolate themed event. The different textures between the light cupcake and the dense, coconut laden German cake will keep your guests coming back for more.
Right then, you're ready to go. Remember to keep an eye on that 18 minute mark and don't forget the boiling water. It’s the one step that truly separates a "good" cupcake from one that people will be talking about for weeks. Trust me, the extra effort of blooming that cocoa is worth every single second.

Recipe FAQs
What is the secret to a good chocolate cupcake?
Blooming the cocoa powder with boiling water. This process dissolves the cocoa solids completely, releasing a much deeper chocolate flavor that dry cocoa cannot achieve on its own. This technique guarantees an intense color and flavor profile.
What is the secret to a moist cupcake?
Using oil instead of solid butter in the batter base. Oil remains liquid at cooler temperatures, ensuring the crumb stays soft and tender long after baking. This contrasts with butter, which solidifies and can make the cake feel dense when cold.
What is the secret ingredient for the best cupcakes?
Buttermilk or an acidic substitute. The acid in buttermilk reacts strongly with the baking soda, creating quick, fine bubbles that result in a lighter, velvety crumb texture. If you enjoyed mastering this flavor balancing, see how we use acid to enhance fruit notes in our How to Make recipe for chocolate truffles.
What is the secret to moist chocolate cake?
Adding a hot liquid at the end, like boiling water or coffee. This liquid hydrates the cocoa powder, which is key to moisture, and slightly gelatinizes the starches in the flour. The resulting thin batter bakes up incredibly tender and fudgy.
Can I substitute regular milk for buttermilk in this recipe?
No, you must use an acidic substitute. Regular milk will not provide the necessary acidity to activate the baking soda for a proper lift and tender crumb. Simply add 1 teaspoon of lemon juice or white vinegar to 120ml of whole milk and let it sit for five minutes to create a quick substitute.
How long should I mix the batter once the flour is added?
Mix only until just combined, especially after adding the boiling liquid. Overmixing develops tough gluten strands which leads to a rubbery cupcake texture. If you enjoyed controlling the structure here, see how the same principle of minimal mixing applies when working with high hydration dough in our How to Make recipe for cookie dough truffles.
Is it true that I must use room temperature egg and buttermilk?
Yes, using room temperature ingredients ensures a stable emulsion. Cold ingredients can cause the melted oil or liquid fats to seize up when combined, leading to a curdled batter. A curdled batter results in an uneven texture and sometimes greasy spots in the finished cupcake.
Moist Chocolate Cupcake Recipe
Ingredients:
Instructions:
Nutrition Facts:
| Calories | 452 kcal |
|---|---|
| Protein | 3.8 g |
| Fat | 22.3 g |
| Carbs | 62.8 g |
| Fiber | 2.9 g |
| Sugar | 48.2 g |
| Sodium | 192 mg |
