No Bake Chocolate Peanut Butter Bars
- Time: Active 20 minutes, Passive 120 minutes, Total 140 minutes
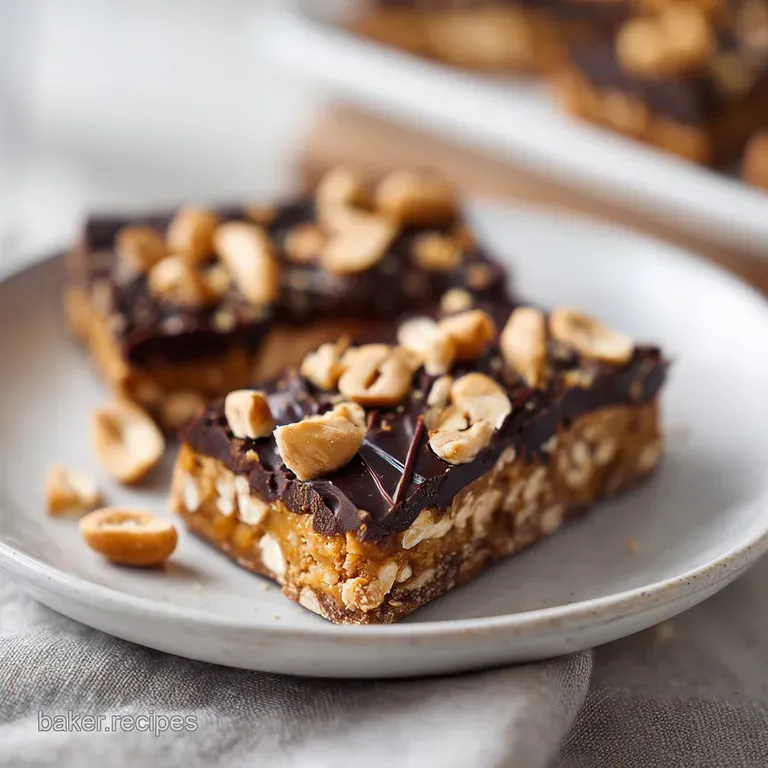
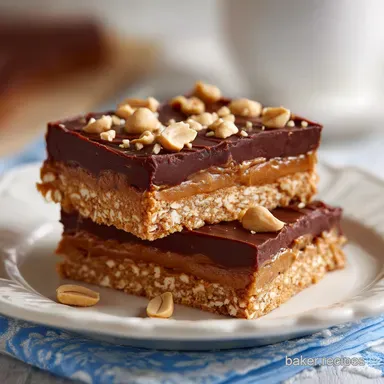
- Flavor/Texture Hook: A salty, fudgy peanut base topped with a snappy dark chocolate shell
- Perfect for: Stress free entertaining, humid summer days, or late night cravings
- Crafting the Perfect No Bake Chocolate Peanut Butter Bars
- Why This Cold Method Works
- Smart Serving Size Calculator
- A Deep Dive Into Components
- The Pantry List and Swaps
- Small Tools for Big Results
- The Easy Step by Step
- Fixing Your Texture Issues
- Flavor Twists and Dietary Changes
- Myths About No Bake Treats
- Storage and Freezing Basics
- What to Serve Alongside
- Recipe FAQs
- 📝 Recipe Card
Crafting the Perfect No Bake Chocolate Peanut Butter Bars
Picture this: It is a sweltering Tuesday afternoon, the kind where the air feels like a damp wool blanket. You have a house full of hungry teenagers, or perhaps just a very loud inner craving, but the thought of preheating the oven to 350°F feels like a personal affront.
This was exactly the scene in my kitchen last July. I wanted something decadent, something that felt like a reward for surviving the heat, but I refused to break a sweat. I pulled out a jar of peanut butter and a bag of dark chocolate chips, and these bars were born from sheer necessity.
The beauty of this specific treat is the lack of fuss. We are talking about one bowl, one pan, and a few minutes of stirring. There is no worrying about over mixing gluten or checking if a toothpick comes out clean.
Instead, you get to focus on the sensory experience: the glossy sheen of melting chocolate, the nutty aroma of the base, and that satisfying "thwack" as the spatula smooths everything into the corners.
It is the ultimate low effort, high reward project that makes you look like a kitchen wizard without actually doing any heavy lifting.
I have made these for school bake sales, office potlucks, and many midnight snacks standing over the kitchen sink. They never last more than an hour on a tray. People always ask if they are difficult to make, and I just smile, knowing it only took me 20 minutes of actual work.
If you are a fan of that classic salty sweet combination, you have found your new staple. Let’s get into why this method is so much better than the sugar heavy versions you might have tried before.
Why This Cold Method Works
When we skip the oven, we rely on the physical properties of our fats to do the structural work. In this recipe, the interaction between the almond flour and the natural peanut butter creates a dense, stable matrix that holds its shape at room temperature.
It is a fascinating bit of kitchen logic that replaces the need for eggs or heat set proteins.
- Solidification Control: The coconut oil acts as a natural binder because it transitions from liquid to solid at cool temperatures. This allows the bars to firm up in the fridge without becoming rock hard or brittle.
- Fiber Structure: Almond flour provides a soft, fine crumb texture that absorbs the moisture from the maple syrup. This prevents the base from feeling greasy or leaking oil as it sits.
- Emulsion Stability: By mixing the peanut butter with a liquid sweetener like maple syrup, we create a thick emulsion. This ensures the bars stay fudgy and moist rather than drying out like a traditional baked cookie might.
- Snap Factor: Adding a tiny bit of peanut butter to the chocolate topping prevents it from shattering when you bite in. It keeps the chocolate just soft enough to slice cleanly but firm enough to provide a distinct textural contrast.
Smart Serving Size Calculator
| Servings | Ingredient Adjustments | Pan Size | Setting Time |
|---|---|---|---|
| 8 Squares | Use 1/2 of all ingredients | 9x5 Loaf Pan | 120 minutes |
| 16 Squares | Follow recipe exactly | 8x8 Square Pan | 120 minutes |
| 32 Squares | Double all ingredients | 9x13 Rectangular Pan | 150 minutes |
Because these bars are quite rich, the standard 8x8 inch pan yields 16 generous servings. If you are making these for a larger crowd, I highly recommend doubling the batch and using a larger pan.
The setting time increases slightly when you double up because the volume of chocolate takes longer to cool all the way through to the center. Just make sure your fridge has enough flat space to accommodate the larger footprint.
A Deep Dive Into Components
Understanding what each element brings to the table helps you become a more intuitive cook. We aren't just throwing things in a bowl; we are building layers of flavor and stability. This is why I always insist on natural peanut butter for this specific recipe.
| Ingredient | Science Role | Pro Secret |
|---|---|---|
| Natural Peanut Butter | Primary fat and protein binder | Stir the jar thoroughly to incorporate all the natural oils before measuring. |
| Almond Flour | Moisture absorbent and structure | Use blanched, superfine flour to ensure the bars don't feel "gritty" on the tongue. |
| Coconut Oil | Temperature dependent solidifier | Melt it just until liquid; if it’s too hot, it might separate the peanut butter oils. |
If you are looking for other ways to use your peanut butter stash, you might find this Peanut Butter Bread recipe quite useful for a more traditional morning treat. It uses many of the same flavor profiles but in a soft, loaf form.
The Pantry List and Swaps
To get started, gather your ingredients. Accuracy is key here, especially with the almond flour, as it dictates the final texture of the base. If the base is too soft, the bars will be messy to eat; if it is too dry, they will crumble under the weight of the chocolate.
- 250g creamy, unsalted natural peanut butter: Why this? It provides the cleanest flavor and the most reliable fat content for binding.
- Substitute: Almond butter or sunflower seed butter for a nut free option.
- 80ml pure maple syrup: Why this? Adds a complex sweetness and essential moisture to the dough.
- Substitute: Honey works well, though it makes the bars slightly stickier.
- 120g blanched almond flour: Why this? Creates a grain free, velvety texture that mimics a shortbread base.
- Substitute: Heat treated oat flour for a nut free version.
- 45g melted coconut oil: Why this? The "glue" that keeps the bars firm at room temperature.
- Substitute: Grass fed butter (melted), though the bars will be slightly softer.
- 0.5 tsp fine sea salt: Why this? Cuts through the richness and balances the maple syrup.
- Substitute: Kosher salt, but use 3/4 tsp for the same impact.
- 1 tsp pure vanilla extract: Why this? Rounds out the nuttiness with a floral, sweet aroma.
- Substitute: Almond extract (use only 1/4 tsp) for an intense nutty flavor.
- 175g dark chocolate chips (70% cocoa): Why this? The bitterness of dark chocolate perfectly offsets the sweet base.
- Substitute: Milk chocolate chips for a sweeter, more kid friendly version.
- 15g extra creamy peanut butter: Why this? Softens the chocolate topping to prevent cracking.
- Substitute: A teaspoon of coconut oil mixed into the chocolate.
- 1 pinch flaky sea salt: Why this? Adds a crunch and a final pop of flavor on the surface.
- Substitute: A dusting of cocoa powder or crushed peanuts.
Small Tools for Big Results

You don't need a kitchen full of gadgets for these no bake chocolate peanut butter bars. In fact, keeping the equipment minimal is part of the charm. I usually reach for a sturdy silicone spatula and a glass mixing bowl.
Glass is great because it doesn't retain smells, which is important when you're working with strong scents like vanilla and peanut oil.
The most critical piece of equipment is actually the parchment paper. Don't try to just grease the pan. These bars are fudgy, and even a well greased pan won't release them as cleanly as parchment will. Use two strips of paper to create a "sling" that goes both ways.
This allows you to lift the entire block of chilled bars out of the pan in one piece. Once the block is on a cutting board, you can get those sharp, clean edges that make them look like they came from a professional confectionery.
The Easy step-by-step
Follow these steps closely to ensure your layers are distinct and your texture is spot on. The process is quick, so having your ingredients measured and ready to go (mise en place) is a smart move.
- Line the pan. Prep an 8x8 inch square baking pan with parchment paper, ensuring you leave an overhang on the sides for easy removal later.
- Mix the wet base. In a large mixing bowl, combine 250g peanut butter, 80ml maple syrup, 45g melted coconut oil, vanilla extract, and fine sea salt. Stir until glossy and uniform.
- Incorporate the flour. Gradually fold in 120g almond flour. The dough should reach a thick, non sticky consistency similar to play dough. Note: If it feels too wet, add a tablespoon more flour.
- Form the base. Press the peanut butter mixture firmly and evenly into the bottom of the prepared pan using an offset spatula until the surface is flat.
- Prepare the topping. In a small microwave safe bowl, melt 175g dark chocolate chips with 15g peanut butter in 30 second intervals.
- Finish the chocolate. Stir the chocolate between intervals until it is velvety and smooth.
- Layer the bars. Pour the melted chocolate over the peanut butter base, spreading it to the very edges with a clean spatula.
- Season and set. Sprinkle with flaky sea salt and refrigerate for at least 120 minutes until completely set.
- Slice and serve. Lift the parchment sling out of the pan and cut into 16 even squares using a hot, dry knife.
Fixing Your Texture Issues
Sometimes things don't go exactly to plan, usually due to the brand of peanut butter or the humidity in your kitchen. If your bars feel a bit off, don't panic. Most issues with no bake treats are easily solved with a little bit of temperature adjustment or a minor ingredient tweak.
Why Your Chocolate Layer Is Cracking
This is the most common frustration. You go to slice your beautiful bars and the chocolate top shatters into a dozen pieces. This happens because the chocolate becomes too brittle when cold. By adding that extra 15g of peanut butter to the chocolate as it melts, we lower the "snap" point.
If it still cracks, it usually means the knife was too cold. Dip your knife in hot water and wipe it dry between every single cut. The heat will melt through the chocolate like butter.
Why Your Bars Are Too Soft
If you pull the bars out and they feel like they are melting in your hands, the culprit is usually the ratio of coconut oil or the setting time. Natural peanut butter is very oily, and if it wasn't stirred well, you might have ended up with too much liquid fat in the base.
| Problem | Root Cause | Solution |
|---|---|---|
| Greasy Base | Peanut butter wasn't stirred | Add 20g more almond flour to absorb the excess oil. |
| Chocolate Won't Set | Microwave was too hot | Chill for an extra hour; the chocolate may have "bloomed" from heat. |
| Crumbly Texture | Too much almond flour | Add a teaspoon of melted coconut oil and re press into the pan. |
For a version that tastes even closer to the candy aisle, try these homemade Reeses Peanut Butter Cups. They use a similar logic but focus on a molded shape that holds up well.
Common Mistakes Checklist
- ✓ Stir the natural peanut butter all the way to the bottom of the jar to avoid "oil pools."
- ✓ Pack the base into the pan very firmly; use the bottom of a flat measuring cup to press it down.
- ✓ Don't skip the salt in the base; without it, the bars will taste flat and overly sweet.
- ✓ Give the bars the full 120 minutes in the fridge; rushing the set time leads to messy layers.
- ✓ Wipe your knife clean after every slice to keep the chocolate from smearing onto the peanut butter layer.
Flavor Twists and Dietary Changes
You can easily adapt this recipe to fit your personal preferences or what you have available in the pantry. If you find the dark chocolate too intense, swapping it for a high-quality milk chocolate creates a profile very similar to a famous peanut butter cup candy.
When scaling this recipe down for just one or two people, you can actually press the mixture into a small Tupperware container or even a lined muffin tin. If you scale up to a 9x13 inch pan, remember that the thickness of the bars will change unless you double the ingredients.
A doubled batch is perfect for parties, but I suggest cutting them into smaller "bite sized" pieces since they are quite calorie dense and satisfying.
For those who want a bit of crunch, you can use "crunchy" natural peanut butter instead of creamy. This adds a fantastic textural element to the base that contrasts well with the smooth chocolate top.
Alternatively, folding in 30g of crushed pretzels or roasted peanuts into the base provides a salty crunch that is absolutely addictive.
Myths About No Bake Treats
One of the biggest misconceptions is that no bake desserts are "lesser" than their baked counterparts because they don't require traditional skills. This isn't true at all. No bake recipes actually require a more precise understanding of ingredient temperatures and fat ratios.
Another myth is that you can't get a "professional" finish without an oven. By using the parchment sling and a hot knife technique, you can achieve edges that are just as sharp and clean as any brownie or cake. The key is patience.
The fridge does the work that the oven usually does, and you have to let it finish its job before you start slicing.
Finally, people often think no bake bars have a shorter shelf life. In reality, because these bars are low in moisture and high in stable fats, they actually last longer than many baked cookies which tend to go stale after a day or two. These bars stay fresh and fudgy for over a week if kept chilled.
Storage and Freezing Basics
Keep these bars in an airtight container in the refrigerator. They will stay perfectly fresh for up to 7 days. Because of the coconut oil and peanut butter, they will soften significantly if left on the counter for more than 30 minutes, especially in a warm house.
I always suggest serving them straight from the fridge for that perfect "snap" and chew.
If you want to keep them longer, they freeze beautifully. Wrap individual squares in parchment paper and place them in a freezer safe bag. They will stay delicious for up to 3 months. You can even eat them straight from the freezer for a texture that is almost like a frozen fudge bar.
To avoid waste, I like to take any "scraps" or uneven edges from the slicing process and crumble them over vanilla bean ice cream. It makes for an incredible sundae topping that ensures not a single crumb of this gold goes to waste.
What to Serve Alongside
These bars are the star of the show, but they play well with others. If you are serving these at a dinner party, a small glass of cold milk or a strong espresso is the classic pairing. The bitterness of the coffee cuts right through the richness of the peanut butter and chocolate.
For a more elaborate dessert spread, I love serving these alongside a bowl of fresh raspberries or tart strawberries. The acidity of the fruit provides a bright contrast to the heavy, nutty flavors.
If you're feeling particularly indulgent, a dollop of unsweetened whipped cream on top of each square can lighten the mouthfeel. No matter how you serve them, these no bake chocolate peanut butter bars are guaranteed to be the first thing to disappear from the table.
Trust me, once you make these once, they will become a permanent resident in your recipe rotation.

Recipe FAQs
How to get clean slices without the chocolate layer cracking?
Wipe your knife with a warm, damp cloth between every single cut. This prevents the warm knife from dragging through the chocolate and smearing it into the peanut butter base.
Is it true these bars can be left out at room temperature for a party?
No, this is a common misconception. Because the base contains coconut oil and peanut butter, the bars will soften significantly if left on the counter for more than 30 minutes and will lose their structural integrity.
How to ensure the peanut butter base isn't crumbly?
Pack the mixture firmly and evenly into the pan using the bottom of a flat measuring cup. Compressing the dough ensures the almond flour and peanut butter bind tightly, creating a dense texture similar to chewy granola bars.
Can I speed up the chilling process in the freezer?
Yes, you can place them in the freezer for about 45 minutes to set. However, you must move them to the refrigerator afterward if you aren't eating them immediately, as the texture changes if frozen too long.
How to fix oil separation in my peanut butter jar?
Stir the peanut butter vigorously all the way to the bottom of the jar before measuring. If you scoop from the top without mixing, you will end up with too much oil and not enough solids, which ruins the texture of the base.
How to prevent the chocolate from seizing when melting?
Microwave in short 30-second intervals and stir thoroughly between each burst. Keeping the intervals short prevents the chocolate from overheating, which is the primary cause of graininess or clumping.
Is it necessary to use flaky sea salt on top?
Yes, it is highly recommended to balance the sweetness. The salt cuts through the richness of the dark chocolate and peanut butter, preventing the bars from tasting flat or one-dimensional.
No Bake Peanut Butter Bars
Ingredients:
Instructions:
Nutrition Facts:
| Calories | 249 kcal |
|---|---|
| Protein | 6.6g |
| Fat | 19.7g |
| Carbs | 14.2g |
| Fiber | 3.1g |
| Sugar | 8.4g |
| Sodium | 88mg |
