Oven Fried Chicken Recipe: Crispy Baked
- Time: Active 20 minutes, Passive 40 minutes, Total 60 minutes
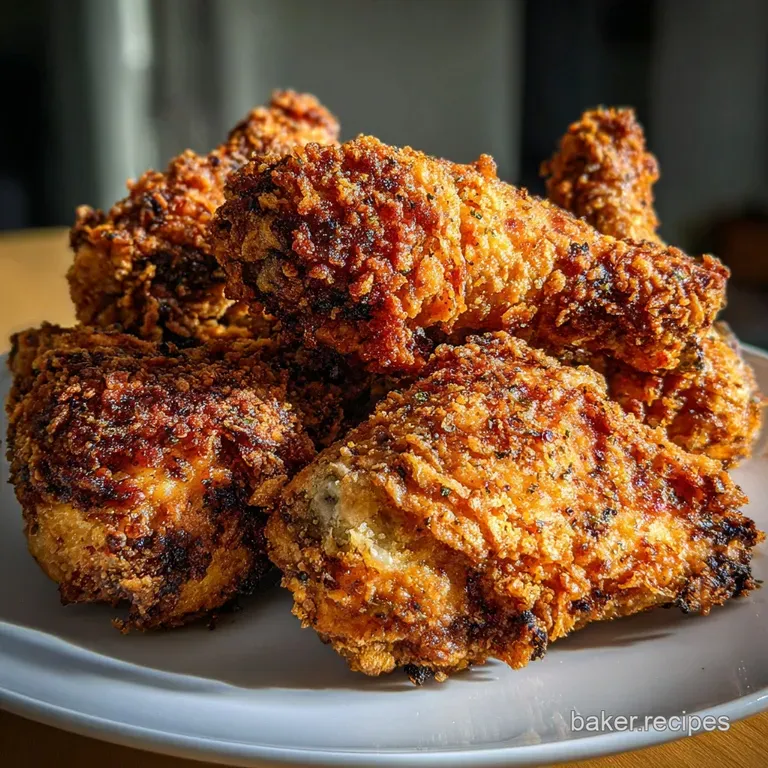
- Flavor/Texture Hook: Shatteringly crispy panko crust with a tangy, spiced finish
- Perfect for: Budget conscious weeknight dinners or fuss free family gatherings
- The Best Oven Fried Chicken Recipe
- Why This Coating Stays Crunchy
- Component Analysis and Ingredient Roles
- Selecting Your Thrifty Ingredients
- Tools Needed for Success
- Step By Step Cooking Method
- Fixing Common Cooking Errors
- Smart Recipe Substitutions
- Dietary Adaptations
- Storing and Reheating Tips
- Flavorful Sides to Serve
- Traditional Cooking Myths
- High in Sodium ⚠️
- Recipe FAQs
- 📝 Recipe Card
The Best Oven Fried Chicken Recipe
Listen, we've all been there. You crave that specific, oily crunch of the local chicken shack, but the thought of cleaning grease splatters off your backsplash for three days is a total deal breaker. I spent years trying to get that "shatter" texture in a standard oven, and I failed more times than I'd like to admit.
Most attempts ended up either as a soggy, pale mess or a piece of dry leather that required a gallon of water to swallow.
The secret isn't just turning up the heat. It is about how we handle the moisture and the choice of our breading. We're skipping the traditional flour only dredge because it just doesn't hold up in a dry heat environment. Instead, we're leaning on a heavy hitter combination of panko and cornstarch.
This setup creates a structural lattice that stays rigid even as the chicken juices start to flow.
If you are looking for a way to satisfy that comfort food itch without the heavy gut punch of deep fat frying, this is it. It’s a straightforward, practical approach that works every single time, provided you follow a few non negotiable rules about airflow.
Trust me, once you hear that first bite crackle, you’ll never bother with a deep fryer again.
Why This Coating Stays Crunchy
Proteolysis: The lactic acid in the buttermilk breaks down the protein structures in the chicken thighs, ensuring the meat remains tender despite the over high heat roasting.
Starch Gelatinization: Adding cornstarch to the flour mixture creates a moisture resistant barrier that prevents the crust from turning into a gummy paste as the meat cooks.
Maillard Reaction: The combination of smoked paprika and neutral oil encourages rapid browning at 400°F, giving us that deep mahogany color and savory depth.
Vaporization Management: Using a wire rack allows hot air to circulate under the meat, preventing the bottom from steaming in its own rendered fat.
| Thigh Thickness | Internal Temp | Rest Time | Visual Cue |
|---|---|---|---|
| 1 inch | 165°F | 5 mins | Juices run clear when pierced |
| 1.5 inches | 165°F | 7 mins | Crust is dark golden brown |
| 2 inches | 165°F | 8 mins | Bone in joint moves easily |
Getting the temperature right is the difference between a juicy dinner and a disappointing one. Since we're using bone in, skin on thighs for this oven fried chicken recipe, the bone actually acts as a thermal conductor, helping the meat cook more evenly from the inside out.
Don't be tempted to pull them out early just because the outside looks dark.
Component Analysis and Ingredient Roles
The architecture of a good crust depends on how the ingredients interact under heat. We aren't just throwing things in a bowl. Each element serves a specific purpose in the physics of the crunch. For example, using this specific Crispy Oven Baked recipe logic, we know that the binder is just as important as the breading itself.
| Ingredient | Science Role | Pro Secret |
|---|---|---|
| Buttermilk | Enzyme tenderizer | Soak for at least 30 mins to soften fibers |
| Panko | Structural crunch | Use Japanese style for larger surface area |
| Cornstarch | Moisture absorber | Keeps the flour from becoming doughy |
| Neutral Oil | Heat conductor | Spritzing the top mimics the frying process |
Selecting Your Thrifty Ingredients
We are keeping things budget friendly here. You don't need fancy organic heritage birds to make this work. In fact, the cheaper, fattier bone in thighs often result in a better flavor because that fat renders out and "fries" the bottom of the panko from within.
- 1.5 lbs bone in, skin on chicken thighs: Why this? The skin provides natural fats that help the panko crisp up beautifully.
- 2 cups buttermilk: Why this? Essential for tenderizing and helping the dry coating stick to the meat.
- 1 tbsp hot sauce: Why this? Adds vinegar and heat to cut through the richness of the breading.
- 2 cups Panko breadcrumbs: Why this? These are flakier and more porous than standard breadcrumbs, ensuring a loud crunch.
- 0.5 cup all purpose flour: Why this? Acts as the "glue" that fills the gaps between the larger panko flakes.
- 0.25 cup cornstarch: Why this? Lowering the protein content of the flour prevents the crust from getting tough.
- 1 tsp smoked paprika: Why this? Provides an earthy color and a hint of backyard grill flavor.
- 1 tsp garlic powder: Why this? Distributes flavor more evenly than fresh garlic, which might burn.
- 1 tsp onion powder: Why this? Adds a savory, "all day" cooked sweetness to the spice blend.
- 2 tsp kosher salt and 1 tsp black pepper: Essential for basic seasoning.
- 3 tbsp neutral oil: Why this? High smoke point oils like avocado or grapeseed won't smoke out your kitchen.
| Original Ingredient | Substitute | Why It Works |
|---|---|---|
| Buttermilk (2 cups) | Whole milk + 2 tbsp lemon juice | The acid curdles the milk, mimicking the buttermilk's tang. |
| Panko (2 cups) | Crushed cornflakes | Similar dry, jagged texture. Note: Adds a slightly sweeter finish. |
| Smoked Paprika | Cayenne pepper | Provides heat and color. Note: Significantly increases the spice level. |
Tools Needed for Success
You don't need a high tech kitchen to master this. However, the right hardware makes the difference between "fried" and "baked." A heavy rimmed baking sheet is your foundation. It needs to be sturdy enough not to warp at 400°F.
If your pan warps, the oil pools in the corners, and you lose that even cooking surface.
The most critical piece of equipment is a stainless steel wire cooling rack that fits inside your baking sheet. This elevates the chicken. Without it, the bottom of the chicken sits in its own moisture, and you'll end up with a soggy underside. Think of it as creating a mini convection environment right on your tray.
I also highly recommend using a pair of long tongs. When you're dredging the chicken in the panko, you want to keep your hands as dry as possible. There is nothing worse than "club hand" where your fingers end up more breaded than the actual chicken.
A simple spray bottle for the oil also helps get that even, golden brown finish without drenching the meat.
step-by-step Cooking Method
Chef's Tip: Toast your panko in a dry pan for 3 minutes before dredging. This gives you a head start on the color and ensures the crust is brittle rather than chewy.
- Whisk the buttermilk, hot sauce, and 1 tsp of salt in a large bowl. Note: This creates your brine.
- Submerge the 1.5 lbs of chicken thighs in the liquid. Note: Ensure they are fully covered for even tenderizing.
- Combine the 2 cups panko, 0.5 cup flour, 0.25 cup cornstarch, and all remaining spices in a wide, shallow dish.
- Preheat your oven to 400°F and place a wire rack inside a large rimmed baking sheet.
- Dredge one thigh at a time, lifting it from the buttermilk and letting the excess drip off.
- Press the chicken firmly into the panko mixture. Note: Use your palms to really anchor the crumbs into the skin.
- Arrange the chicken on the wire rack, leaving at least 2 inches of space between pieces.
- Mist the tops of the chicken generously with the 3 tbsp of neutral oil.
- Bake for 40 minutes until the crust is dark golden and the internal temp hits 165°F.
- Rest the chicken for 5 minutes on the rack before serving. Note: This allows the juices to redistribute and the crust to fully set.
Fixing Common Cooking Errors

If your chicken isn't turning out like the photos, it usually comes down to a few small mechanical errors. The most common heartbreak is the breading falling off in giant sheets. This happens if the chicken was too wet when it hit the flour, or if you didn't press the crumbs in hard enough.
Why Your Crust Is Soggy
This is usually an airflow issue. If you don't use a wire rack, or if you crowd the pan with too many pieces of meat, the steam released during cooking has nowhere to go. It gets trapped under the chicken and turns your beautiful panko into a wet sponge.
Ensure there is plenty of room for air to whistle between those thighs.
The Meat Is Too Dry
While thighs are more forgiving than breasts, they can still overcook. This usually happens if the oven is too cold and the chicken has to stay in too long to get brown. You want high, aggressive heat.
If you find the meat is dry but the crust is pale, try moving the rack to the top third of the oven for the last 10 minutes.
| Problem | Root Cause | Solution |
|---|---|---|
| Pale crust | Not enough oil on top | Mist more generously with oil before baking. |
| Breading falls off | Chicken was too slippery | Let excess buttermilk drip off completely before dredging. |
| Burnt panko | Oven rack too high | Move the tray to the middle rack and tent with foil. |
Common Mistakes Checklist
- ✓ Never skip the cornstarch; it's the secret to the "glassy" crunch.
- ✓ Don't use a glass baking dish; it doesn't conduct heat as well as metal for this recipe.
- ✓ Pat the chicken skin with a paper towel if it seems excessively slimy before the buttermilk soak.
- ✓ Resist the urge to flip the chicken; the wire rack handles the bottom for you.
- ✓ Ensure your spices aren't expired, as the heat will amplify any stale flavors.
Smart Recipe Substitutions
Scaling this oven fried chicken recipe is quite easy because it’s a modular process. If you’re cooking for a crowd, you just need more real estate in the oven. For a double batch (3 lbs of chicken), you'll want to use two separate baking sheets on different racks.
When scaling up, you don't actually need to double the spices exactly. Start with 1.5x the salt and pepper, then adjust. Too much salt can actually draw out too much moisture from the crust while it bakes. For a half batch, you can easily use 1 cup of buttermilk and 1 cup of panko.
Just use a smaller baking pan to keep the heat concentrated.
If you are looking for a leaner option, you can swap the thighs for drumsticks. They follow the exact same timing. For chicken breasts, you'll want to reduce the cook time to about 25 minutes so they don't turn into wood. It's also a great idea to pair this with a crisp side, like how you might How to Make recipe to keep the "fried" theme going without the guilt.
Dietary Adaptations
gluten-free Transformation
You can make a stellar gluten-free version of this by swapping the all purpose flour for a 1:1 gluten-free blend and using gluten-free panko (usually made from rice flour). The cornstarch is already naturally gluten-free, so you're halfway there.
The texture is remarkably similar because rice panko is actually even crispier than the wheat version.
The Hot Honey Twist
If you want to take this to a "southern oven fried chicken recipe" level, whisk together 3 tbsp of honey and 1 tsp of cayenne pepper. Drizzle this over the chicken the second it comes out of the oven.
The heat from the meat will melt the honey into the nooks and crannies of the panko, creating a sticky, spicy, sweet glaze that is absolutely addictive.
Storing and Reheating Tips
Fried chicken is rarely as good the next day, but with the oven method, we have a fighting chance. Store leftovers in an airtight container for up to 3 days in the fridge. Do not use a plastic bag, as it traps moisture and turns the crust into mush almost instantly. A glass container with a loose lid is better.
For reheating, please step away from the microwave. A microwave will vibrate the water molecules in the meat, steaming the crust from the inside out. Instead, put the chicken back on a wire rack in a 350°F oven for about 10-12 minutes.
This will re crisp the panko and bring the internal fats back to life.
You can freeze the breaded, uncooked chicken for up to 2 months. Place the dredged thighs on a tray in the freezer for an hour until they are hard, then transfer to a freezer bag. You can bake them straight from frozen; just add about 15 minutes to the total cook time.
Flavorful Sides to Serve
This chicken is the star of the show, but it needs a supporting cast that provides some acidity. Since the crust is quite rich, a vinegary coleslaw or a bright cucumber salad works wonders. If you want a full "southern" experience, a scoop of mashed potatoes with a light gravy is the classic move.
For a more modern vibe, try serving this with a charred broccoli salad or even some roasted sweet potatoes. The sweetness of the potatoes plays really well with the smoked paprika in the chicken coating. If you're in the mood for a casserole, this chicken pairs beautifully with a How to Make recipe on the side for a truly comforting meal.
Traditional Cooking Myths
Many people believe that you must flip the chicken halfway through to get it crispy on both sides. This is a myth when you use a wire rack. In fact, flipping it can actually knock off the breading or cause the juices to leak out and soften the top. Let the air do the work.
Another common misconception is that "oven fried" is just another way of saying "baked chicken." It’s not. Standard baked chicken relies on high moisture and often a sauce or skin only browning.
This method uses a specific dry matter ratio (the panko and cornstarch) to mimic the dehydration that happens in a deep fryer. Without that specific dry coating, it's just roast chicken.
Finally,, don't believe that you need a huge amount of oil. The 3 tablespoons of oil in this recipe are purely for heat conduction. You aren't "cooking" the chicken in oil; you're just using the oil to help the oven's heat penetrate the panko flakes more efficiently. It’s about science, not grease.

High in Sodium ⚠️
1050 mg mg of sodium per serving (46% % of daily value)
The American Heart Association recommends limiting sodium intake to no more than 2,300mg per day for most adults. Aiming for 1,500mg per day is even better for heart health.
Tips to Reduce Sodium in Your Fried Chicken
-
Reduce Added Salt-25%
Carefully measure and reduce the kosher salt by half (to 1 tsp). This is the most direct way to lower sodium. Taste and adjust after cooking. Estimated sodium reduction: 25%
-
DIY Buttermilk-10%
Make your own buttermilk by adding 1 tablespoon of lemon juice or white vinegar to 2 cups of regular milk. This way, you avoid any extra sodium found in some store-bought brands. Estimated sodium reduction: 10%
-
Low-Sodium Hot Sauce-5%
Check the label of your hot sauce and opt for a low-sodium version, if available, or use a smaller amount. The sodium content can vary significantly between brands. Estimated sodium reduction: 5%
-
Brine Carefully-5%
The recipe doesn't explicitly call for brining the chicken, but if you're brining it beforehand, be mindful of the salt concentration. Use a lower concentration than usual and reduce the added salt in the recipe accordingly. Estimated sodium reduction: 5% if applicable
-
Spice it Up!
Experiment with sodium free herbs and spices like oregano, thyme, rosemary, and freshly ground black pepper to enhance the flavor of your fried chicken without adding sodium.
Recipe FAQs
How do you make fried chicken in the oven?
Preheat oven to 400°F and set up a wire rack inside a baking sheet. Whisk buttermilk with hot sauce for a brine, then submerge seasoned chicken thighs. Dredge chicken firmly in a mixture of panko, flour, cornstarch, and spices, pressing to adhere.
Arrange on the wire rack, mist with oil, and bake for 40 minutes until golden brown and 165°F internal temperature.
How to make crispy chicken without deep frying?
Use a double coating of panko breadcrumbs combined with cornstarch. The panko provides the shatteringly crisp texture, while cornstarch helps create a moisture barrier, preventing sogginess. Baking on a wire rack is crucial to allow hot air circulation around the chicken.
What is the best breading for oven frying?
A blend of panko breadcrumbs and cornstarch offers the best crispiness. Panko, with its larger flakes, creates a more pronounced crunch than regular breadcrumbs, and cornstarch helps the coating adhere and achieve a golden, brittle texture during baking.
For a similar crispy coating technique, see how we achieve texture in our Crispy Oven Baked Chicken Tenders.
Is it better to pan fry or oven bake chicken?
Oven baking is generally better for making a large batch of crispy chicken with less mess. While pan-frying can yield fantastic results, it's often done in batches and can create significant splatter.
Oven baking, especially with a wire rack, allows for even cooking and crisping for multiple pieces simultaneously, offering a healthier alternative to deep frying.
Can I substitute the buttermilk brine for chicken?
Yes, you can substitute whole milk with lemon juice. Whisk 2 cups of whole milk with 2 tablespoons of lemon juice and let it sit for 5 minutes to curdle; this creates an acidic brine similar to buttermilk that tenderizes the chicken and helps the coating stick.
How do I prevent soggy breading in oven fried chicken?
Ensure proper airflow by using a wire rack and not overcrowding the baking sheet. The wire rack elevates the chicken, allowing hot air to circulate underneath, preventing it from steaming in its own rendered fat. Leaving space between pieces also ensures each piece crisps up evenly.
If you enjoy crispiness without deep frying, you might also like our Easy Air Fryer Teriyaki Chicken Thighs.
What internal temperature should oven fried chicken reach?
Chicken should reach an internal temperature of 165°F (74°C). Use an instant read thermometer inserted into the thickest part of the thigh, avoiding the bone. This temperature ensures the chicken is safely cooked while remaining juicy.
Oven Fried Chicken Recipe

Ingredients:
Instructions:
Nutrition Facts:
| Calories | 454 kcal |
|---|---|
| Protein | 21.2 g |
| Fat | 22.1 g |
| Carbs | 33.6 g |
| Fiber | 1.8 g |
| Sugar | 2.4 g |
| Sodium | 1050 mg |
