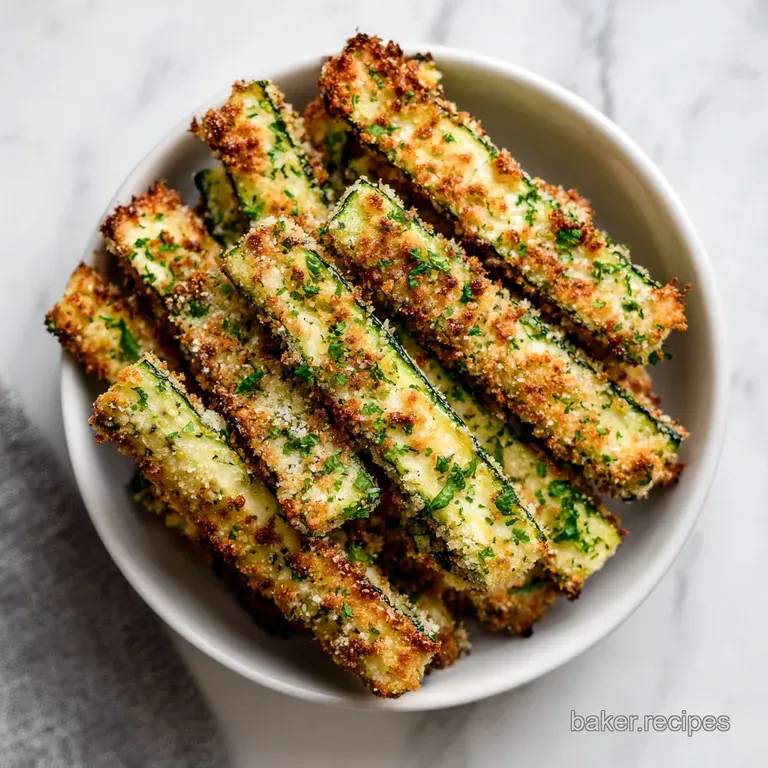
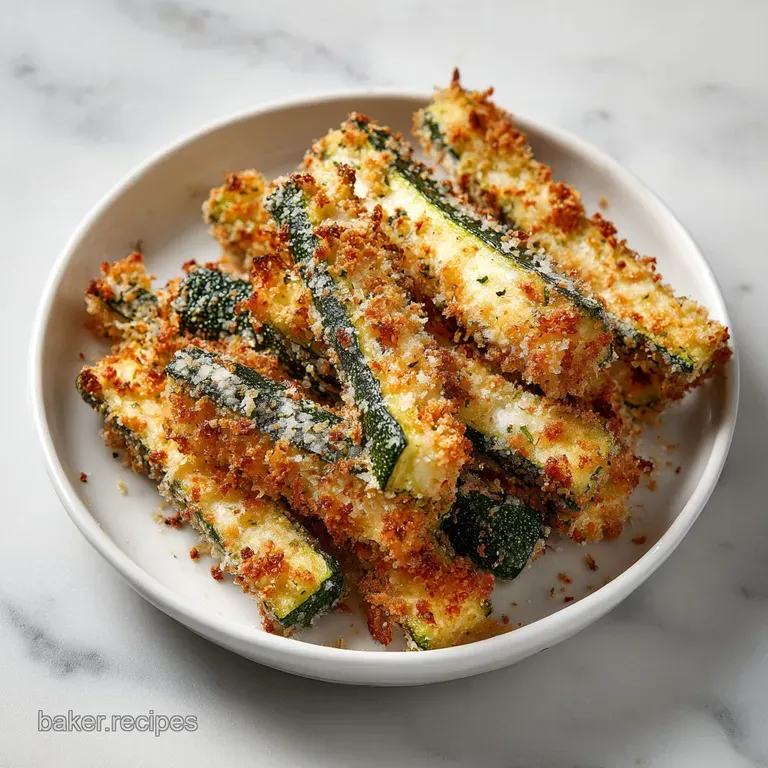
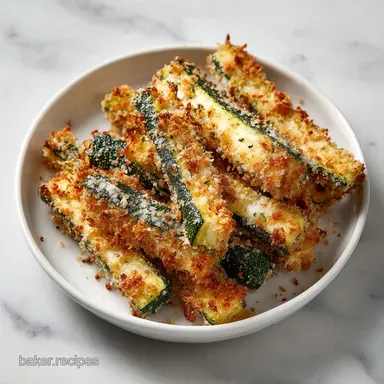
Parmesan Crusted Zucchini Sticks: Crispy and Savory
- Time: Active 15 minutes, Passive 20 minutes, Total 35 minutes
- Flavor/Texture Hook: Shatter crisp golden panko with a salty, savory Parmesan finish
- Perfect for: Healthy game day snacking or a kid friendly vegetable side dish
- Master the Parmesan Crusted Zucchini Sticks
- Essential Specs and Timing Metrics
- The Best Building Block Ingredients
- Necessary Tools for Crispy Results
- Detailed Prep and Cooking Steps
- Fixing Common Coating Texture Issues
- Scaling This Recipe Up or Down
- Common Myths About Oven Frying
- Safe Storage and Reheating Tips
- Dipping Sauces and Serving Suggestions
- Recipe FAQs
- 📝 Recipe Card
Master the Parmesan Crusted Zucchini Sticks
Picture this: it is Friday night, the sun is just starting to dip, and you have a house full of friends expecting something to munch on while the game starts. You want that satisfying crunch of a deep fried snack, but without the heavy, oily aftermath that leaves everyone sluggish.
I remember the first time I served these; the sound of the first bite that distinct, audible shatter was enough to stop the conversation. People could not believe they were eating zucchini.
This is the kind of dish that changes your relationship with vegetables. It is not just about "eating your greens," it is about enjoying a texture that rivals the best tavern fries.
We are talking about golden brown batons that stand up straight, coated in a salty, herb flecked crust that clings to the squash like a second skin. It is simple, modern, and honestly, a bit of a crowd pleaser that fits into any casual gathering.
The beauty of this recipe lies in its accessibility. You do not need a fancy deep fryer or a culinary degree to get professional results. Whether you are looking for a low glycemic side dish or just a way to use up that "day 157 parmesan crusted zucchini sticks" harvest from the garden, this method delivers.
We are moving away from the soggy, sad zucchini of the past and stepping into a world of over high heat perfection.
Essential Specs and Timing Metrics
Understanding the "how" and "when" is what separates a soggy mess from a crispy triumph. This recipe relies on a specific sequence of events that manages moisture while maximizing the contact between the heat and the crust.
We are aiming for a total time of 35 minutes, which is fast enough for a weeknight but yields results that feel far more intentional.
High Heat Moisture Dehydration
Zucchini is roughly 95% water. When you throw it in a hot oven, that water wants to escape. If it gets trapped under a heavy batter, it steams the vegetable from the inside out, leading to limp fries.
By using a 425°F (220°C) oven, we are forcing that moisture to evaporate quickly, while the panko provides a porous structure that lets the steam escape without ruining the crunch.
Strategic Airflow Management
Most people make the mistake of placing their veggies directly on a flat baking sheet. This creates a "hot spot" on the bottom and a "steam zone" on the top. By using a wire cooling rack inside the pan, we allow the hot air to circulate completely around each stick.
This is the secret to getting a uniform golden color without having to flip them midway through, which often knocks off the delicate breading.
The Role of Panko
Traditional breadcrumbs are fine and dense, which can lead to a sandy texture. Panko, however, is made from crustless bread and processed into large, airy flakes. These flakes act like little heat conductors, creating more surface area for the Parmesan to melt into.
This creates that signature "shatter" that makes these crusted zucchini sticks so much better than the standard version.
| Cook Method | Total Time | Texture | Best For |
|---|---|---|---|
| Oven Baked | 35 minutes | Shatter crisp | Large batches and hands off cooking |
| Air Fryer | 25 minutes | Ultra crunchy | Small batches and maximum speed |
| pan-fried | 20 minutes | Rich/Golden | When you want a decadent, buttery finish |
Choosing the right method depends on your guest list. If I am hosting a big group, the oven is my best friend because I can fit all 1.5 lb of zucchini on one large sheet. If it is just me and a movie, the air fryer is a quick win.
Either way, the preparation remains the same: high heat is non negotiable for these 157 parmesan crusted zucchini sticks.
| Ingredient | Science Role | Pro Secret |
|---|---|---|
| All Purpose Flour | Moisture Absorber | Acts as a "primer" so the egg has a dry surface to grab onto. |
| Large Eggs | Protein Binder | Creates a sticky glue that fuses the breading to the vegetable. |
| Grated Parmesan | Fat & Flavor | The cheese melts into the panko, creating a savory, structural "web." |
| Panko Crumbs | Texture Matrix | Provides the jagged edges that catch the heat for a lighter crunch. |
A quick tip from my kitchen to yours: always use the finely grated Parmesan the kind that looks like sand rather than the long shreds. The fine grains mix more evenly with the panko, ensuring every square millimeter of your crusted zucchini sticks has that punchy, salty kick. If you find yourself wanting a different texture profile, you might enjoy experimenting with other vegetable bases, much like the techniques found in this Sautéed Zucchini recipe which focuses on a softer, herb forward finish.
The Best Building Block Ingredients
For this recipe, we are keeping things straightforward but high-quality. You will need 1.5 lb medium zucchini, which is usually about 3 medium sized squash. Look for ones that are firm and heavy for their size; avoid the massive, "baseball bat" zucchinis as they tend to be seedy and watery.
We will also be using 1/2 tsp fine sea salt to season the flour.
The coating is where the magic happens. You will need 1 cup panko breadcrumbs and 1/2 cup grated Parmesan cheese. For the dredging station, have 1/2 cup all purpose flour and 2 large eggs ready.
To give it that signature "157 parmesan crusted zucchini sticks" flavor, we mix 1 tsp garlic powder, 1 tsp Italian seasoning, and 1/4 tsp smoked paprika into the crumbs.
- Zucchini: Medium size is best. Why this? They have fewer seeds and a tighter cell structure for better crunch.
- Panko: Use plain, unseasoned panko. Why this? It allows you to control the salt and herb levels perfectly.
- Parmesan: Grated (powder like) is preferred. Why this? It creates a more cohesive crust than long, melted shreds.
- Eggs: Room temperature eggs whisk more smoothly. Why this? It ensures a thinner, more even coating that doesn't get "cakey."
- Flour: Regular AP flour works perfectly as a base. Why this? It creates a dry interface on the slick zucchini surface.
| Original Ingredient | Substitute | Why It Works |
|---|---|---|
| All Purpose Flour | Almond Flour | High fat content creates a richer crust. Note: Browns faster, so watch the oven. |
| Panko Breadcrumbs | Crushed Pork Rinds | Zero carb alternative that stays incredibly crispy. |
| Parmesan Cheese | Pecorino Romano | A sharper, saltier sheep's milk cheese for a more aggressive flavor. |
If you are out of Italian seasoning, a mix of dried oregano and basil will do the trick. The smoked paprika is subtle, but it adds a tiny hint of "outdoor grill" flavor that makes these zucchini sticks feel more complex.
It's all about building layers of flavor that complement the mild, buttery taste of the cooked squash.
Necessary Tools for Crispy Results
You don't need a pantry full of gadgets, but two things are non negotiable: a large rimmed baking sheet and a wire cooling rack. The rack is the true MVP here. Without it, the side of the zucchini touching the pan will always be soggy.
We want heat hitting the sticks from every angle, and the rack is the only way to achieve that in a standard oven.
You will also need three shallow bowls for your dredging station. I like to use pie plates or wide pasta bowls because they give you plenty of room to move the zucchini around without making a mess.
A good, sharp chef's knife is essential for getting those uniform wedges, and a few sheets of paper towels are needed for the most important step: drying the zucchini.
Chef's Tip: Before you start dredging, set up your station in a clear line: Flour, then Egg, then Panko. Use one hand for the "dry" steps and the other for the "wet" egg dip. This prevents your fingers from becoming breaded "club hands" halfway through the process.
Detailed Prep and Cooking Steps
- Preheat your oven to 425°F (220°C). This high temperature is vital for a quick crisp. Place your wire cooling rack inside the large rimmed baking sheet.
- Prepare the 1.5 lb of zucchini by cutting off the ends. Halve them crosswise, then slice each half into 4-6 uniform wedges until they look like thick cut fries.
- Pat the wedges extremely dry with paper towels. Note: Any surface moisture will cause the flour to clump and the coating to slide off later.
- Set up the dredging station. In Bowl 1, mix 1/2 cup flour, 1/2 tsp salt, and a pinch of black pepper. In Bowl 2, whisk 2 large eggs. In Bowl 3, combine 1 cup panko, 1/2 cup Parmesan, 1 tsp garlic powder, 1 tsp Italian seasoning, and 1/4 tsp smoked paprika.
- Dredge a zucchini stick in the flour, shaking off every bit of excess until only a fine dust remains.
- Dip the floured stick into the beaten egg, ensuring total coverage.
- Press the stick firmly into the panko parmesan mixture. Note: Use your dry hand to heap crumbs over the stick and press down to make them stick.
- Arrange the sticks on the wire rack. Ensure they do not touch to allow for maximum airflow.
- Bake for 20 minutes until the coating is a deep golden brown and the zucchini is tender crisp.
- Remove from the oven and let them sit for 2 minutes on the rack before serving. This allows the crust to "set" so it doesn't fall off when you pick them up.
These crusted zucchini sticks should be served immediately. The window for maximum crunch is about 15 minutes. If you are making multiple batches, keep the first batch in a warm oven (around 200°F) while the second one cooks. The texture of these reminds me of my crispy roast potatoes, which also rely on that over high heat surface dehydration to get that perfect bite.
Fixing Common Coating Texture Issues
We have all been there: you follow the steps, but the breading just slides right off like a loose sweater. Or worse, the zucchini is mushy while the crust is still pale. Usually, this comes down to two things: moisture and heat.
If your zucchini wasn't dried properly before the flour hit it, the steam from the squash will push the crust away during baking.
Solving the Sliding Breading Problem
If the coating is falling off, your "glue" (the egg and flour) didn't bond correctly. This often happens if the flour layer was too thick. You want the flour to be a microscopic layer, just enough to dry out the surface of the vegetable.
If you see clumps of white flour after dredging, you need to shake it off more aggressively.
Fixing Pale and Soft Sticks
If they are 20 minutes in and still look white or soft, your oven might be running cold. Every oven is different, and 425°F in my kitchen might be 400°F in yours.
Don't be afraid to leave them in for an extra 3-5 minutes, or even flick on the broiler for the final 60 seconds. Just stay close Parmesan goes from golden to burnt in a heartbeat.
| Problem | Root Cause | Solution |
|---|---|---|
| Soggy Bottoms | No airflow under the sticks | Use a wire rack; never bake directly on the pan or parchment. |
| Coating Slides Off | Zucchini was too wet | Pat dry with paper towels multiple times before dredging. |
| Breading is Bland | Not enough salt in flour | Ensure the flour itself is seasoned, not just the panko. |
Common Mistakes Checklist:
- ✓ Pat the zucchini dry until the paper towel comes away clean.
- ✓ Shake off all excess flour it should look like a light dusting, not a cake.
- ✓ Use the "one hand wet, one hand dry" method to keep the coating on the sticks, not your fingers.
- ✓ Ensure the oven is fully preheated to 425°F before the tray goes in.
- ✓ Do not crowd the rack; leave at least half an inch between each stick.
Scaling This Recipe Up or Down
If you are cooking for a crowd and want to double the batch to 3 lbs of zucchini, you will need to be strategic. Do not try to crowd two racks onto one oven level. The steam from the bottom rack will soften the top rack.
Instead, bake them on two different levels and swap their positions halfway through the 20 minutes.
Scaling Down for Two
For a half batch (approx. 1.5 medium zucchini), you can easily use a smaller toaster oven or air fryer. When reducing the ingredients, you will only need 1 egg, but keep the seasoning levels (garlic powder, paprika) at about 75% of the original recipe to ensure the flavor remains "day 157 parmesan crusted zucchini sticks" bold.
Scaling Up for Parties
When doubling or tripling, increase your liquids (eggs) and solids (flour/panko) linearly, but keep your spices at 1.5x. Sometimes, doubling the salt can make the breading overwhelmingly salty because the Parmesan already brings a lot of sodium to the table.
Always work in batches to keep the zucchini from sitting in the egg wash for too long, which can make it rubbery.
Common Myths About Oven Frying
A common misconception is that you need a ton of oil to get a "fried" texture. In reality, the fat in the Parmesan cheese provides most of the "frying" medium. As the cheese melts at 425°F, it essentially shallow fries the panko from the inside out.
You do not need to spray these with oil, though a light misting of olive oil spray can help if you want an extra deep mahogany color.
Another myth is that zucchini must be peeled. Please, don't peel it! The skin provides the structural integrity that keeps the sticks from collapsing into mush. Plus, the dark green skin looks beautiful against the golden brown crust.
The skin is where the nutrients live, and it softens perfectly during that 20 minutes of cook time.
Safe Storage and Reheating Tips
Let's be honest: these are best the moment they leave the oven. However, if you have leftovers, they can be kept in an airtight container in the fridge for up to 3 days. Do not expect them to be crunchy when you take them out; the zucchini will continue to release moisture as it sits, which softens the crust.
To revive the crunch, avoid the microwave at all costs. The microwave will turn your Parmesan crusted zucchini into a soggy, rubbery shadow of its former self. Instead, pop them back onto a wire rack in a 400°F oven for 5-7 minutes.
This will re dehydrate the crust and bring back that satisfying "shatter."
For a zero waste tip, if you have leftover breading mixture, don't toss it! You can sprinkle it over a simple pasta dish or use it to top a Broccoli Casserole recipe for an extra hit of crunch and salt. Leftover zucchini ends can be tossed into a freezer bag for your next batch of vegetable stock.
Dipping Sauces and Serving Suggestions
While these 157 parmesan crusted zucchini sticks are incredible on their own, a good dip takes them to the next level. The classic choice is a cold, creamy marinara sauce. The acidity of the tomatoes cuts through the richness of the Parmesan perfectly.
If you want something a bit more modern, a lemon herb aioli or a spicy ranch dip works wonders.
If you are serving these as a side dish, they pair beautifully with grilled chicken or a light fish. They bring a punchy, savory element to the plate without being as heavy as traditional fries. I've even served them at brunch alongside a sharp cheddar omelet, and they disappeared faster than the bacon.
Ultimately, these crusted zucchini sticks are about celebrating the simple joy of a well executed vegetable. When you get that perfect balance of tender squash and a crust that stays put, you've mastered one of the best "healthy" snacks in the book.
Just remember: keep the heat high, keep the sticks dry, and always, always use the wire rack. Enjoy the crunch!

Recipe FAQs
How to prevent the zucchini from becoming soggy?
Pat the zucchini wedges extremely dry with paper towels before dredging. Removing surface moisture is the most important step to ensure the crust adheres properly and stays crisp during the 20-minute bake time at 425°F.
Is it true I should bake these directly on the baking sheet?
No, this is a common misconception. You must place a wire cooling rack inside a large rimmed baking sheet to allow for 360-degree airflow, which prevents the bottom of the sticks from steaming and turning soft.
How to get the coating to stick to the zucchini?
Press the zucchini firmly into the panko parmesan mixture after dipping it in the beaten eggs. Using a three step dredging station flour, then egg, then breadcrumb mixture creates a reliable "glue" for the crust.
Can I use a different vegetable with this crust?
Yes, this technique works well for other firm vegetables. If you enjoyed mastering the crispy crust technique here, you can apply the same dredging method to bell pepper strips or even cauliflower florets.
How to know when the zucchini sticks are finished baking?
Look for a deep golden brown color on the panko coating. At 425°F, this typically takes 20 minutes; at this point, the exterior will be shatter crisp and the interior will be tender crisp.
How to store leftovers and maintain the texture?
Store in an airtight container in the refrigerator for up to two days. To revive the crunch, reheat them in a 425°F oven on a wire rack until the coating is hot and crisp again; avoid the microwave, as it will make them soft.
How to ensure even cooking for all the sticks?
Arrange the coated sticks in a single layer without letting them touch. Giving each stick its own space ensures the hot air circulates evenly, preventing the edges from sticking together during the bake.
Parmesan Crusted Zucchini Sticks
Ingredients:
Instructions:
Nutrition Facts:
| Calories | 229 kcal |
|---|---|
| Protein | 13.1 g |
| Fat | 6.5 g |
| Carbs | 30.1 g |
| Fiber | 2.1 g |
| Sugar | 2.9 g |
| Sodium | 585 mg |
