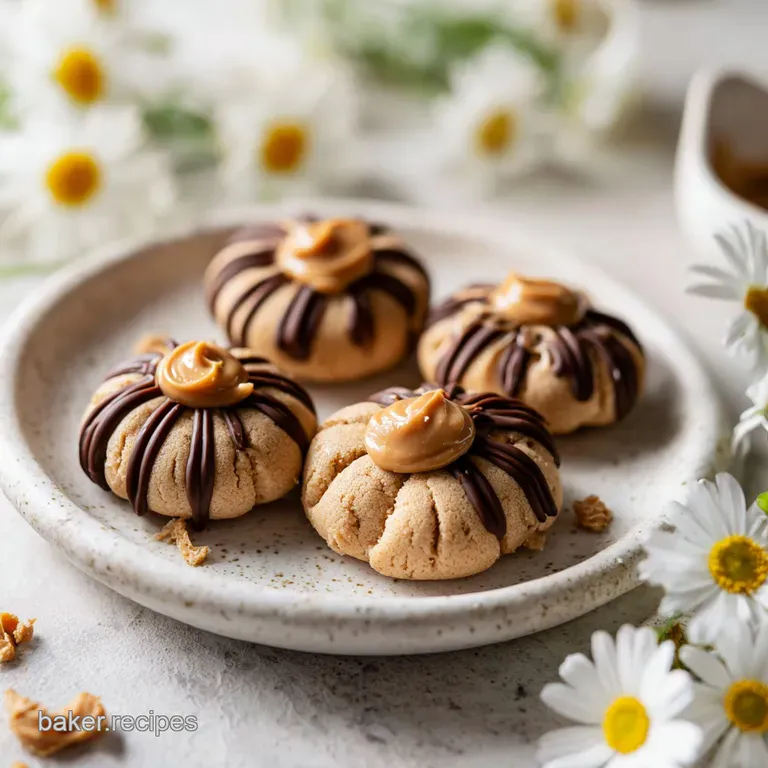
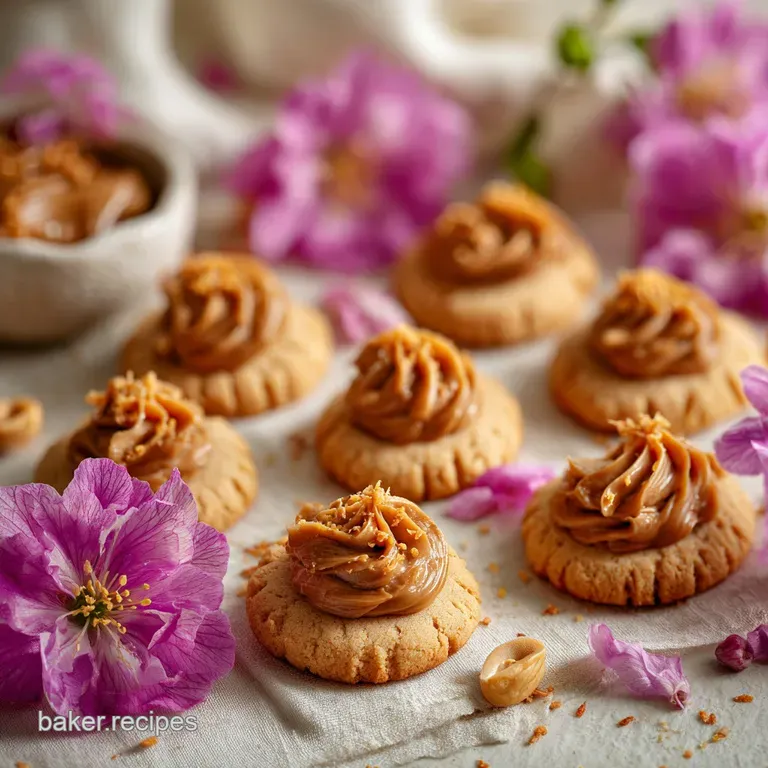
Classic Peanut Butter Blossoms Recipe: Tender Crumb
- Time: Active 20 minutes, Passive 10 minutes, Total 30 minutes
- Flavor/Texture Hook: Tender, sandy peanut butter crumb with a velvety chocolate core
- Perfect for: Holiday cookie exchanges or a quick weeknight baking project
- Why This Classic Peanut Butter Blossoms Recipe Always Wins
- Analyzing the Structural Dynamics of Cookie Dough Spread
- Deep Dive Into Each Critical Baking Component
- Essential Ingredients and Smart Substitution Strategies
- Simple Tools Required for Minimal Cleanup Success
- Mastering the Sequential Steps for Flawless Cookies
- Identifying and Fixing Common Baking Texture Errors
- Adjusting the Base for Various Dietary Requirements
- Storage Solutions and Zero Waste Kitchen Strategies
- Creative Serving Suggestions and Beverage Pairing Ideas
- Recipe FAQs
- 📝 Recipe Card
Why This Classic Peanut Butter Blossoms Recipe Always Wins
The smell of toasted peanuts hitting the oven heat is enough to bring anyone back to a childhood kitchen. I remember the first time I tried making a peanut butter blossoms recipe on my own.
I was so impatient that I pressed the chocolate kisses in while the cookies were blistering hot, only to watch the chocolate turn into a sad, brown puddle. It was a mess, but honestly, even a melted mess tastes pretty great when peanut butter is involved.
We’ve all seen these on holiday platters, but there’s a massive difference between a dry, crumbly version and one that actually melts in your mouth. This version relies on a specific fat ratio to ensure the edges stay soft while the center remains sturdy enough to hold that chocolate weight.
You don't need a fancy stand mixer or a culinary degree to nail this, just a few bowls and a bit of timing. Trust me, the way the sugar coating provides a tiny crunch before you hit the soft dough is pure magic.
We are going for that specific "shatter" on the outer sugar crust followed by a pillowy interior. It's a classic for a reason, but we're going to use a few modern tricks to make sure they look as good as they taste. No one wants a flat cookie or a chocolate kiss that falls off the second you pick it up.
We’re building something better here, focusing on the basics done right.
Analyzing the Structural Dynamics of Cookie Dough Spread
The Physics of the Press: Cold chocolate kisses act as a heat sink when pressed into the warm dough, which stabilizes the center and prevents the cookie from spreading further. This rapid temperature exchange creates a structural "lock" that keeps the chocolate upright as the cookie sets.
| Feature | Fresh From Scratch | store-bought Dough |
|---|---|---|
| Texture | Soft, sandy, and tender | Often rubbery or overly greasy |
| Peanut Flavor | Intense and toasted | Muted by artificial preservatives |
| Customization | Full control over sugar and salt | Fixed sweetness levels |
This comparison highlights why taking twenty minutes to mix your own dough is a total win. While pre made dough is fast, it lacks the specific fat to flour ratio needed to get that iconic domed shape that holds the kiss. If you're looking for other ways to use up your pantry staples, you might want to try this Peanut Butter Cookies recipe for a different take on the classic texture.
Deep Dive Into Each Critical Baking Component
Selecting the right ingredients for your butter blossoms recipe is about more than just grabbing what's in the pantry. Each piece of this puzzle plays a role in the final "snap" and "melt" of the cookie.
| Ingredient | Science Role | Pro Secret |
|---|---|---|
| Vegetable Shortening | Inhibits gluten and raises melting point | Use for a higher, softer dome that won't flatten |
| Creamy Peanut Butter | Adds fat, protein, and emulsifiers | Avoid "natural" oils on-top versions for consistent structure |
| Granulated Sugar | Absorbs moisture and creates crispy edges | Roll twice for a thicker, crunchier exterior coating |
| Large Egg | Provides lecithin for emulsification | Ensure it's room temp so the fats don't seize up |
It's tempting to use only butter, but the shortening is the secret to that classic, tall shape. Butter provides the flavor, while shortening provides the architecture. Together, they make the blossoms recipe truly reliable.
Essential Ingredients and Smart Substitution Strategies
For this peanut butter blossoms recipe, we are sticking to the measurements that have been tested for the best structural integrity. If you want to get creative with the base, you can even use techniques found in my How to Blend recipe to understand how different peanut textures affect the dough.
- 0.5 cup granulated white sugar: Provides sweetness and crispness.
- 0.5 cup packed light brown sugar: Adds moisture and a hint of molasses depth.
- 0.5 cup unsalted butter: Softened to room temperature for easier creaming.
- 0.5 cup vegetable shortening: This is non negotiable for the specific soft but-sturdy texture.
- 0.5 cup creamy peanut butter: Use a standard brand like Jif or Skippy for the best results.
- 1 large egg: The binder that keeps everything from falling apart.
- 1 tsp pure vanilla extract: For that aromatic background note.
- 1.75 cups all purpose flour: The skeleton of our cookie.
- 1 tsp baking soda: Our leavening agent for a light lift.
- 0.5 tsp fine sea salt: To balance the intense sugar levels.
- 0.33 cup extra sugar: Specifically for that sparkly rolling step.
- 36 Hershey’s Kisses: Unwrapped and ready to go.
| Original Ingredient | Substitute | Why It Works |
|---|---|---|
| Unsalted Butter | Salted Butter | Adds a savory kick; just omit the extra sea salt. |
| Vegetable Shortening | Coconut Oil (Solid) | Provides similar structure but adds a tropical note. |
| All Purpose Flour | Cup for-cup GF Blend | Works well for a gluten-free peanut butter blossoms recipe. |
Simple Tools Required for Minimal Cleanup Success
You don't need much to get these hershey kiss peanut butter blossoms into the oven. Keeping things simple is the best way to ensure you actually enjoy the process.
- Large mixing bowl: One big enough to hold the dough without flour flying everywhere.
- Whisk or fork: For combining the dry ingredients.
- Hand mixer: A standard electric mixer works perfectly; no need for the heavy stand mixer.
- Baking sheets: Preferably light colored to prevent the bottoms from burning.
- Parchment paper: Essential for a clean release and zero scrubbing later.
- Measuring cups and spoons: Precision matters when balancing the baking soda and flour.
- Wire cooling rack: This allows air to circulate so the bottoms don't get soggy.
Chef Tip: Freeze your chocolate kisses for 15 minutes before you start baking. This prevents them from losing their shape or melting too quickly when they hit the warm cookies.
Mastering the Sequential Steps for Flawless Cookies
- Heat the oven. Set your temperature to 375°F and line your pans with parchment. Note: A hot oven ensures the cookies set quickly before they can spread too much.
- Cream the fats. Beat the butter, shortening, peanut butter, and both sugars until the mixture looks pale and fluffy.
- Incorporate the liquids. Add the egg and vanilla extract to the creamed mixture. Mix until the yellow streaks of egg disappear.
- Whisk the dry items. In a separate small bowl, stir together the flour, baking soda, and salt.
- Combine the dough. Gradually add the flour mixture to the wet ingredients. Mix until a soft, non sticky dough forms.
- Shape the balls. Roll the dough into 1 inch rounds using your palms.
- Sugar coating. Toss each ball into the extra granulated sugar until completely encrusted and sparkling.
- Bake the base. Place the balls 2 inches apart and bake for 8 minutes to 10 minutes until the edges are just slightly firm.
- The final press. Remove the tray and immediately press a chocolate kiss into the center of each cookie. Press until the edges of the cookie crack slightly.
- Cool and set. Move the cookies to a wire rack. Wait at least 20 minutes for the chocolate to firm up again.
Identifying and Fixing Common Baking Texture Errors
Sometimes things go sideways in the oven. It happens to the best of us. If your classic peanut butter blossom cookies aren't looking quite right, the solution is usually a simple adjustment in temperature or timing.
Why Your Cookies Spread Too Much
If your blossoms recipe looks more like pancakes, the dough was likely too warm. This often happens if the butter was melted instead of softened, or if the kitchen is very hot. If this happens, chill the remaining dough for 15 minutes before rolling.
Why Your Cookies Are Crumbly
A dry, sandy cookie usually means too much flour was packed into the measuring cup. Always fluff your flour with a spoon before scooping it into the cup. If the dough feels like it's falling apart in your hands, add a teaspoon of milk to bring it back together.
| Problem | Root Cause | Solution |
|---|---|---|
| Kisses Melting | Cookies were too hot | Wait 1 minute after oven removal before pressing |
| Bottoms Burning | Dark baking sheet used | Reduce oven temp by 25°F or use parchment |
| No "Cracks" | Dough too wet | Add 1-2 tbsp of flour to the remaining batch |
Common Mistakes Checklist
- ✓ Use room temperature eggs to ensure proper emulsification with the fats.
- ✓ Don't skip the shortening; it's the key to the jif peanut butter blossoms recipe texture.
- ✓ Measure the flour using the "spoon and level" method rather than scooping directly.
- ✓ Unwrap all your chocolate kisses before the cookies come out of the oven.
- ✓ Let the cookies rest on the hot pan for 2 minutes before moving them to a rack.
Adjusting the Base for Various Dietary Requirements
Making a gluten-free peanut butter blossoms recipe is actually quite simple because the high fat content from the peanut butter helps maintain the structure. Use a high-quality gluten-free all purpose blend that includes xanthan gum. You might find the dough a bit more fragile, so handle it gently.
For a dairy-free version, swap the butter for a vegan butter stick and ensure your chocolate kisses are a dairy-free variety. Since shortening is already dairy-free, you are halfway there. The flavor will be slightly more "nut forward" without the butter, but it's still incredibly satisfying.
If you are looking for a shortcut, some people use a peanut butter blossoms betty crocker mix as a base. While it saves time, adding a splash of vanilla or a pinch of sea salt can help it taste more like the scratch version we've built here.
Storage Solutions and Zero Waste Kitchen Strategies
Storing these cookies correctly is the difference between a week of treats and a pile of hard rocks. Keep them in a single layer if possible, or use parchment paper between layers to prevent the kisses from sticking to the bottoms of the cookies above them.
- Fridge/Room Temp: Store in an airtight container at room temperature for up to 5 days.
- Freezer: These freeze beautifully! Freeze the naked cookies (without kisses) for up to 3 months. If freezing with the chocolate, be aware the chocolate might "bloom" (get white spots), but it’s still safe to eat.
- Zero Waste: If you have leftover dough that isn't enough for a full cookie, crumble it over vanilla ice cream. If you have extra chocolate kisses, chop them up and use them in my How to Bake recipe for a double chocolate hit.
Creative Serving Suggestions and Beverage Pairing Ideas
These cookies are rich, so they pair best with something that cuts through the fat. A cold glass of milk is the traditional choice, but a strong, dark roast coffee is my personal favorite. The bitterness of the coffee brings out the roasted notes in the peanut butter.
If you're making a full dessert spread, try serving these alongside something fruity. The contrast between the heavy chocolate peanut butter combo and something like a tart apple slice or a berry compote is fantastic. You could even use some of the same flavor profiles in a How to Bake recipe for a brunch themed gathering.
Scaling the Batch
- Downsizing: This recipe halves easily. Since it calls for one egg, whisk the egg in a bowl and use exactly half of it by weight or volume.
- Feeding a Crowd: If you double the recipe, don't double the baking soda exactly use 1.5 teaspoons instead to prevent a metallic aftertaste. Work in batches to keep the dough from getting too warm on the counter.
Kitchen Myths Debunked
One big myth is that you must use a fork to make a "criss cross" pattern on these. While classic peanut butter cookies use that, blossoms recipe cookies need to stay round and domed to support the chocolate. Another myth is that the "natural" peanut butter with the oil on top is better for baking.
In reality, that oil often separates in the oven, leading to a greasy, flat cookie that doesn't have the structural integrity we need. Stick to the creamy, emulsified stuff for this one.
Honestly, the best part of this peanut butter blossoms recipe is that it’s nearly impossible to mess up if you follow the "press and cool" timing. Just keep an eye on that golden edge, and you'll have a tray of nostalgic perfection every single time.

Recipe FAQs
When should I press the chocolate kiss into the cookie?
Immediately after removing them from the oven. You must press the chilled kiss into the warm cookie base within 30 seconds while the dough is still slightly soft.
Is it mandatory to use shortening in this peanut butter blossoms recipe?
Yes, this is highly recommended for structure. Shortening prevents excessive spreading, giving you that necessary tall, sturdy dome to hold the chocolate.
How long should I chill the dough before rolling and baking?
Do not chill the dough for this recipe. This dough relies on room temperature fats to cream properly; chilling will make the dough dense and prevent the desired crackle effect.
Can I substitute creamy peanut butter with natural style peanut butter?
No, it is strongly advised against. Natural peanut butter separates oil during baking, resulting in a greasy, flat cookie that won't hold its shape well.
How to prevent the bottoms of the cookies from burning while the tops look underdone?
Switch to a light colored baking sheet and use parchment paper. Using dark sheets absorbs too much direct heat; for precise temperature control across different bakes, review our guide on mastering texture controls in our How to Bake recipe.
What is the secret to getting that perfect, slightly cracked surface texture?
Roll the dough balls generously in granulated sugar before baking. The sugar coating dehydrates slightly in the oven, creating that signature crisp crust that cracks open as the interior dough rises.
How to properly store leftover peanut butter blossoms to keep them soft?
Store them airtight at room temperature for up to five days. Place parchment paper between layers to prevent the chocolate from sticking to the cookie above it.
Peanut Butter Blossoms Recipe

Ingredients:
Instructions:
Nutrition Facts:
| Calories | 143 kcal |
|---|---|
| Protein | 1.9 g |
| Fat | 8.5 g |
| Carbs | 15.3 g |
| Fiber | 0.4 g |
| Sugar | 10.1 g |
| Sodium | 82 mg |
