Peanut Butter Cup Cheesecake Fudge
- Time: Active 15 minutes, Passive 2 hours 10 mins, Total 2 hours 25 minutes
- Flavor/Texture Hook: A sultry mix of salty peanut butter and tangy cream cheese with a chocolate snap.
- Perfect for: Holiday gift tins, late night sugar cravings, or beginner friendly dessert platters.
- Crafting the Best Peanut Butter Cup Cheesecake Fudge
- The Logic Behind the Lush Texture
- Component Analysis for Peak Fudge Performance
- Selecting Your Essentials and Substitutes
- Minimal Tools for Maximum Results
- The Step by Step Execution
- Troubleshooting the Fudge Set
- Sizing Up the Batch
- Debunking Fudge Folklore
- Storage and Sustainable Kitchen Habits
- Presentation and Serving Styles
- Recipe FAQs
- 📝 Recipe Card
Crafting the Best Peanut Butter Cup Cheesecake Fudge
The first time I tried making this, the kitchen smelled like a dream that specific, heady aroma of warm peanut butter and melting sugar hitting the air. I remember standing over the counter with a bag of Reese's, listening to the crinkle of the wrappers and the rhythmic thud of the knife as I chopped them into uneven, chunky shards.
I wanted something that had the "shatter" of a cold chocolate bar but the lush, creamy heart of a New York cheesecake.
We’ve all been there: you want a decadent treat but the thought of a water bath and six hours of cooling for a real cheesecake feels like a chore. This fudge is the shortcut I swear by.
It’s dense, it’s salty, and honestly, the way the tangy cream cheese cuts through the heavy sweetness of the white chocolate is nothing short of brilliant. You don't need a thermometer or a degree in pastry arts; you just need a microwave and a bit of patience while it sets in the fridge.
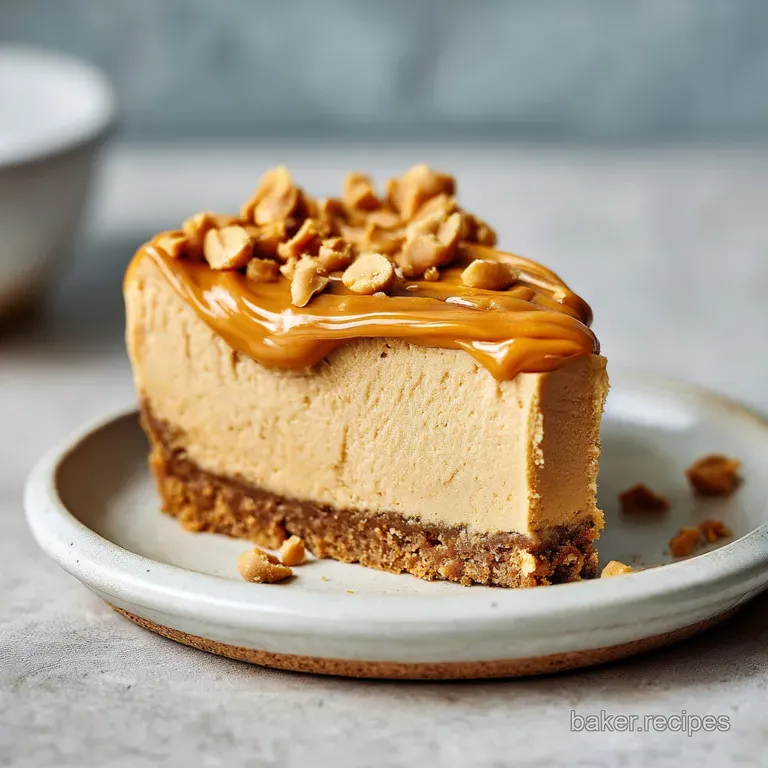
This isn't your grandma’s crumbly, crystalline fudge that sits in a tin for weeks. It’s a modern, silky hybrid. When you bite into it, your teeth sink through the velvety peanut butter layer before hitting the crunch of the chopped cups.
It’s a sensory experience that makes people stop talking mid sentence. Trust me, once you see how the layers swirl together, you'll never go back to the basic marshmallow fluff versions.
The Logic Behind the Lush Texture
Lactic Acid Balance: The cream cheese provides acidity that breaks up the sugar chains in the condensed milk, preventing the fudge from feeling cloyingly sweet.
Fat Based Stabilization: White chocolate chips act as the structural "skeleton," using cocoa butter to create a firm set that doesn't require boiling sugar to the soft ball stage.
Emulsification Synergy: The lecithin in the creamy peanut butter helps bind the dairy fats and the chocolate fats into one cohesive, smooth slab.
| Method | Prep Time | Texture | Best For |
|---|---|---|---|
| This Fast Method | 15 minutes | Silky, cheesecake like, soft bite | Quick cravings, beginner cooks |
| Classic Stovetop | 45 minutes | Grainy, traditional, very firm | long term gifting, purists |
| Slow Cooker | 1 hours | Very soft, spreadable | Large batches, hands off prep |
The beauty of this specific method is that it skips the temperamental boiling process. Traditional fudge can seize or turn into a sandy mess if you stir it at the wrong temperature, but this cheesecake based version is far more forgiving for the home cook.
Component Analysis for Peak Fudge Performance
| Ingredient | Science Role | Pro Secret |
|---|---|---|
| White Chocolate | Structural Binder | Use high-quality chips to ensure the fudge sets with a "snap" rather than a gummy finish. |
| Cream Cheese | Texture Modifier | Ensure it is fully room temperature (21°C) to prevent tiny white lumps in the finished slab. |
| Condensed Milk | Sugar & Moisture | This provides the concentrated sweetness and prevents the fat from separating during the melting phase. |
Choosing the right base is essential for that signature mouthfeel. While you might be tempted to use low-fat options, they contain more water and less fat, which can lead to a "weeping" fudge that never quite firms up properly.
Selecting Your Essentials and Substitutes
To get started, clear some space on your counter and grab these specific items. If you're missing something, don't panic I've tested plenty of swaps that keep the soul of the dish intact.
- 225g (8 oz) full fat cream cheese, softened: Why this? Provides the "cheesecake" tang and essential structure. (Sub: Mascarpone for a richer, less tangy vibe).
- 395g (14 oz) sweetened condensed milk: Why this? Acts as the sweetener and liquid base. (Sub: Coconut condensed milk for a dairy-free twist).
- 5ml (1 tsp) vanilla extract: Why this? Rounds out the sharp saltiness of the peanut butter.
- 1.5g (0.25 tsp) salt: Why this? Essential to balance the white chocolate sugar.
- 250g (1 cup) creamy peanut butter: Why this? For that smooth, iconic nutty flavor. (Sub: Almond butter, though it's less traditional).
- 340g (2 cups) white chocolate chips: Why this? The "glue" that holds the fudge together.
- 28g (2 tbsp) unsalted butter: Why this? Adds a glossy sheen and smoother melt.
- 225g (1.5 cups) Reese’s Peanut Butter Cups, chopped: Why this? Textural contrast and flavor punches.
- 85g (0.5 cup) semi sweet chocolate chips: Why this? For the decorative (and tasty) top drizzle.
If you’re a total peanut butter fanatic, you might want to try this technique in my Peanut Butter Cookies recipe which uses a similar salty sweet balance.
Minimal Tools for Maximum Results
You don't need a stand mixer for this, though a hand mixer makes the cream cheese step much faster. Grab a standard 20x20 cm (8x8 inch) square baking pan and line it with parchment paper leave an overhang on the sides so you can lift the fudge out like a "sling" later.
You'll also need two medium microwave safe glass bowls and a sturdy silicone spatula.
Using glass instead of plastic for melting chocolate is a trick I learned the hard way; plastic holds onto heat too long and can accidentally scorch your white chocolate. A sharp chef's knife is also non negotiable for those clean, professional looking squares at the end.
The step-by-step Execution

- Prep the pan. Line your square pan with parchment paper. Note: Greasing the pan first helps the paper stick to the corners.
- Whisk the dairy. Beat the 225g cream cheese in a bowl until completely smooth and airy.
- Incorporate the milk. Gradually pour in the 395g condensed milk, vanilla, and salt. Note: Adding it slowly prevents lumps.
- Melt the base. In a separate bowl, combine the 340g white chocolate chips and 28g butter. Microwave in 30 second intervals until the mixture is glossy and liquid.
- Merge the mixtures. Fold the melted chocolate into the cream cheese base until no white streaks remain.
- Add the peanut butter. Stir in the 250g creamy peanut butter. Note: Don't over mix if you want a marbled look.
- Fold the candy. Gently stir in 1 cup of the chopped peanut butter cups.
- Pour and level. Spread the mixture into the prepared pan. Smooth the top with your spatula.
- Top it off. Sprinkle the remaining chopped cups over the top and press down slightly.
- The final drizzle. Melt the semi sweet chips and zigzag them over the surface until it looks like a bakery display. Chill for at least 2 hours.
If you enjoy the process of layering these flavors, you might find the method for my How to Bake recipe equally satisfying, as it uses similar candy mix ins for a deeper chocolate profile.
Troubleshooting the Fudge Set
Why Your Fudge Is Too Soft
If your fudge feels more like a thick frosting than a solid block, it usually comes down to the temperature of the ingredients or the ratio of fat. If the cream cheese was too cold, it might not have emulsified with the warm chocolate, leaving "pockets" of moisture that prevent a firm set.
Why the Chocolate Seized
White chocolate is notoriously finicky. If a single drop of water hits the bowl, or if you overheat it by even ten seconds, it can turn into a gritty, clumpy mess. This is why we use short bursts in the microwave and stir vigorously between each one.
| Problem | Root Cause | Solution |
|---|---|---|
| Gritty Texture | Overheated white chocolate | Melt at 50% power and stir more than you heat. |
| Oily Surface | Peanut butter separated | Use a stabilized brand like Jif or Skippy rather than "natural" oil on-top versions. |
| Stuck to Paper | No overhang or grease | Use binder clips to hold parchment and lift straight up once chilled. |
Common Mistakes Checklist
- ✓ Ensure the cream cheese is truly "room temp" it should give no resistance when pressed.
- ✓ Use a dry metal spoon or silicone spatula; wooden spoons can hold hidden moisture that seizes chocolate.
- ✓ Resist the urge to cut the fudge early; the center needs the full 2 hours to stabilize.
- ✓ Don't use "natural" peanut butter with oil separation; the excess oil will prevent the fudge from setting firm.
- ✓ Wipe your knife clean between every single cut for those sharp, pristine edges.
Sizing Up the Batch
If you’re feeding a crowd, doubling this recipe is easy. Use a 23x33 cm (9x13 inch) pan. You won't need to double the chilling time, but make sure your mixing bowl is large enough to handle the volume without splashing.
When scaling down for just two people, you can halve the ingredients and use a small loaf pan. Just keep in mind that thinner fudge sets faster, so start checking it at the 1 hour mark.
If you’re halving it and the math for the condensed milk gets weird, just use half the can and save the rest for your morning coffee!
| Servings | Pan Size | White Chocolate | Chill Time |
|---|---|---|---|
| 12 (Half) | Loaf Pan | 170g | 1 hours 15 mins |
| 24 (Standard) | 20cm Square | 340g | 2 hours 10 mins |
| 48 (Double) | 23x33cm Rect | 680g | 2 hours 30 mins |
Debunking Fudge Folklore
One big misconception is that you need to "beat" the fudge until it loses its gloss to get it to set. While that's true for old-fashioned sugar syrup fudge, it's actually the opposite here. We want to keep that gloss!
Over beating this version can actually cause the fat in the peanut butter to separate, leaving you with a greasy mess.
Another myth is that you can't freeze fudge because it will ruin the texture. Because of the high fat content from the cream cheese and peanut butter, this specific recipe freezes beautifully. It doesn't get icy; it just stays dense and cold, which some people actually prefer for snacking.
Storage and Sustainable Kitchen Habits
Keep your peanut butter cup cheesecake fudge in an airtight container in the fridge for up to 7 days. If you leave it on the counter for a party, it will stay safe and delicious for about 4 hours, but it will soften significantly as the cream cheese warms up.
For long term storage, wrap the individual squares in wax paper and toss them in a freezer bag; they'll stay fresh for up to 3 months.
Don't throw away those leftover peanut butter cup crumbs at the bottom of the bag! I love tossing them into a jar of overnight oats or stirring them into a warm bowl of popcorn. If you have extra sweetened condensed milk, it keeps in a sealed jar in the fridge for two weeks it’s the perfect sweetener for a homemade iced latte.
Presentation and Serving Styles
When it comes to serving, less is often more. These squares are incredibly rich, so I usually cut them into small 2.5 cm (1 inch) cubes. If you want to get fancy for a dinner party, serve a single square alongside a tart raspberry coulis to cut through the salt.
For a "deconstructed" look, you can slightly warm the fudge and crumble it over high-quality vanilla bean ice cream. The cold ice cream makes the fudge chunks extra chewy, creating a fantastic contrast. If you're looking for more inspiration on how to use these flavors in a different format, my Bake Blueberry Cheesecake recipe shows how a fruit forward sauce can change the entire profile of a creamy base.

Recipe FAQs
Can I substitute low-fat cream cheese for the full fat version?
No, stick to full fat cream cheese. The higher fat content is crucial for emulsifying correctly with the melted white chocolate, ensuring a smooth, non-weeping set.
How to make the fudge stable enough to handle at room temperature?
Melt the white chocolate and butter completely until glossy before mixing. This cocoa butter acts as the structural binder, creating a firm backbone that holds the cheesecake tang without requiring a water bath or oven time.
How to ensure the white chocolate melts smoothly without seizing?
Microwave at 50% power in 30-second intervals, stirring well between each one. White chocolate scorches very easily; brief bursts prevent excessive heat buildup, mirroring the temperature control needed when making sauces like in my Homemade Southern Banana recipe.
Is it true that using natural peanut butter (oil on top) results in poor texture?
Yes, this is generally true for fudge consistency. Natural peanut butter releases oil that can cause the fudge to separate and fail to set firm; use stabilized, commercial creamy peanut butter for the best structure.
How to achieve perfectly clean, non-sticky cuts when slicing the finished fudge?
Chill the fudge for the full recommended time and use a hot, dry knife. Wipe the chef's knife clean and run it under very hot water, then dry it completely before making each cut for those sharp edges.
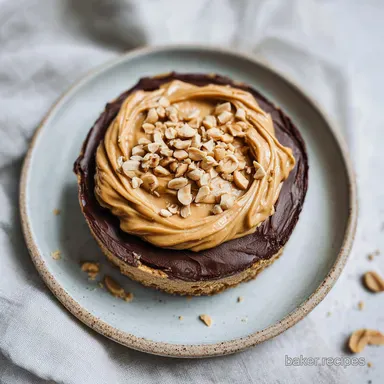
How to incorporate a swirl effect with the peanut butter cups?
Fold 2/3rds of the chopped cups into the base mix, then gently spoon the remaining 1/3rd on top before chilling. Do not mix the top layer in aggressively; this layered approach gives you both an interior texture and a visible top layer.
Can this fudge be frozen for later consumption?
Yes, this type of high fat fudge freezes exceptionally well. Wrap individual squares tightly in plastic wrap and then place them in an airtight bag; they maintain their silky texture without becoming icy.
Peanut Butter Cup Fudge
Ingredients:
Instructions:
Nutrition Facts:
| Calories | 292 calories |
|---|---|
| Protein | 6.0g |
| Fat | 18.4g |
| Carbs | 27.1g |
| Fiber | 1.0g |
| Sugar | 22.9g |
| Sodium | 120mg |
