Sugar Cookie: the Perfect Cut-Out Recipe
- Mastering the No-Spread Sugar Cookie: Your Definitive Guide
- The Science of Shape: How to Ensure Zero Spreading
- Essential Components for the Classic Sugar Cookie Dough
- Precise Steps for Mixing, Chilling, and Baking the Dough
- Troubleshooting Common Issues and Expert Baker's Tips
- Maximizing Shelf Life: Storage Solutions for Baked and Unbaked Cookies
- Beyond the Base: Presentation and Pairing Ideas
- Recipe FAQs
- 📝 Recipe Card
Mastering the No-Spread Sugar Cookie: Your Definitive Guide
That smell. It’s warm, vanilla laced, and reminds you instantly of childhood kitchens, signaling that everything is right in the world. This isn't just a recipe; it's a memory maker, and the classic taste of a perfect Sugar Cookie is unbeatable.
It is the absolute foundational recipe that every baker needs to nail. ( #1)
Honestly, I love complicated bakes, but sometimes you just need something fast, cheap, and utterly reliable. This base dough, using pantry staples, is exactly that simple ingredients, zero fuss, maximum payoff. They require a bit of patience (chilling is non-negotiable), but the active time is minimal.
Over the years, I've had every cookie melt, spread, or turn rock hard. But I finally cracked the code to the ultimate no-spread version that works every single time. Let’s dive into how to make the best cut-out Sugar Cookie dough you will ever use. ( #2)
The Science of Shape: How to Ensure Zero Spreading
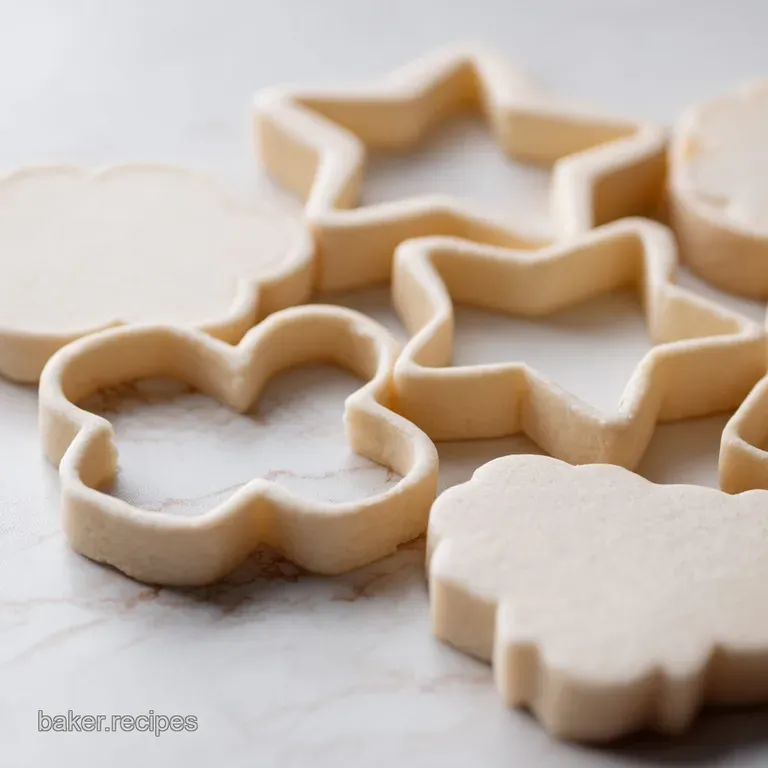
People always ask why their perfect shapes disappear in the oven, leaving behind sad, amorphous blobs. It usually comes down to two culprits: too much fat or not enough structure, often compounded by warm dough.
For the best Sugar Cookie shape retention, we are controlling the moisture and leveraging cold temperatures aggressively. ( #3)
Defining the Perfect Cookie Texture (Tender Interior, Crisp Edges)
I want a tender interior that still feels satisfyingly substantial, but the snap of the cookie edges is non-negotiable. Achieving that precise textural balance requires careful flour measurement and the right amount of chemical leavening.
If the dough is too soft, the Sugar Cookie collapses in the oven. A slight crisp on the edge provides the stability needed for holding up heavy royal icing later, making it the best cookie recipe for decorating. ( #4)
The Baker Street Promise: Why This Recipe Works Every Time
It’s all about minimizing the risk factors that cause runaway spreading. We cream the butter long enough to incorporate air, which is the physical leavening agent keeping our cookies light, rather than relying solely on chemical leavening that often causes excessive side spread.
This method stabilizes the dough before the flour even enters the picture.
Equipment Check: Must Haves for Flawless Cut-Outs
Do yourself a favor and invest in a quality rolling pin with adjustable guides. Seriously, I used to eyeball it, and inevitably, half my batch would be burned while the other half was raw because of uneven thickness.
Parchment paper is also mandatory for easy transfer of the delicate Sugar Cookie shapes. ( #5) I also find baking mats incredibly helpful for ensuring the base of the cookie doesn't brown too quickly.
The Role of Chill Time in Gluten Development
Chilling isn't just about hardening the butter (though that is absolutely vital). It gives the flour a chance to fully hydrate without overworking the gluten strands. This hydration time makes the dough incredibly stable and limits spread when the butter melts upon hitting the heat. Never, ever skip the chill time.
Creaming Technique: Why Air Incorporation Matters
We are beating butter and sugar until it turns fluffy and pale yellow, right? This seemingly simple process incorporates microscopic air pockets into the fat. When these air pockets heat up during baking, they expand, giving the Sugar Cookie a gentle lift upwards instead of sideways, which is the key mechanism in preventing that dreadful spreading.
( #6)
Balancing Flour and Fat for Structural Integrity
If you look at my Chocolate Chip Cookies: Ultimate Chewy Brown Butter Recipe , we use a high fat-to-flour ratio for that incredible chew. Here, we flip the script completely. This classic cut-out Sugar Cookie uses a higher proportion of flour to fat, giving us the necessary structural framework and dry density required for those beautiful, sharp edges that define perfect decorated sugar cookies. ( #7)
Essential Components for the Classic Sugar Cookie Dough
Simple ingredients are truly the backbone of a spectacular vanilla Sugar Cookie . Don't be fooled by the brevity of the list; quality matters profoundly here, especially when you consider how few flavor agents are involved.
The Best Fats: Butter Temperature and Quality Notes
Use unsalted butter, full stop. Salted butter introduces variability, and half your batch might taste aggressively salty depending on the brand. The butter must be truly softened to room temperature before creaming; it should yield instantly if you press it, but not be melting or greasy.
The temperature of your butter is the single biggest factor in the resulting texture.
Flour Power: Choosing the Right Type for Minimal Spread
All-purpose flour is perfect for this best Sugar Cookie recipe, but you must measure it correctly. I cannot stress this enough: Always spoon your flour lightly into the measuring cup and level it off with a flat edge.
Scooping directly from the bag compacts the flour, adding too much weight, and results in a dry, crumbly dough that is difficult to roll.
Pure Vanilla Extract: Elevating the Flavor Profile
Vanilla is the absolute star in a classic Sugar Cookie . Skip the imitation stuff; it tastes flat and cheap. If you want something truly special that justifies the effort of cut-outs, try scraping the seeds from half a vanilla bean into the butter/sugar mixture.
It adds tiny black flecks that look artisanal and taste incredible.
Necessary Swaps: Making Simple Substitutions Work
We all run out of things sometimes, or we are baking for specific dietary needs. It happens! Here are my trusted workarounds that won't totally ruin your beautiful, buttery Sugar Cookie : ( #8)
| Ingredient | Viable Substitute | Notes |
|---|---|---|
| Unsalted Butter | high-quality Vegan Butter Sticks | Needs high fat content (80%+). Use the same amount. |
| All-Purpose Flour | 1:1 gluten-free Blend | Ensure the blend contains xanthan gum for structure. |
| Large Egg | 1/4 cup Applesauce + 1/2 tsp Baking Powder | Use as a binding agent, may slightly reduce richness. |
Precise Steps for Mixing, Chilling, and Baking the Dough

This section is where we transition from theory to practice. Follow these steps meticulously, and your beautiful Sugar Cookie shapes will survive the oven and be ready for decoration.
( #9) Remember, the key to success here is paying attention to consistency and temperature at every single stage.
Stage 1: Creaming the Wet Ingredients to Perfection
In your stand mixer bowl, combine the softened butter and granulated sugar. Beat them together on medium speed for a full four minutes set a timer, don't guess! The mixture must be pale yellow and look airy and fluffy.
This step is critical; it determines the final lift and tenderness of the baked vanilla Sugar Cookie . Once the egg and vanilla go in, mix only for about 30 seconds, just until incorporated.
Stage 2: Mixing and Forming the Dough Disc
Incorporate the dry mix (flour, salt, baking powder) gradually on the absolute lowest mixer speed. Stop the mixer the second the flour streaks disappear. You might think it looks shaggy and slightly dry, but resist the urge to add more liquid!
Use your hands briefly on the counter to bring the shaggy mass together into one cohesive ball. Divide it, wrap it TIGHTLY into two discs, and chill for 90 minutes minimum.
This cold phase is essential for a beautiful Sugar Cookie outcome, as it hardens the butter and relaxes the gluten. ( #10)
Stage 3: Rolling, Cutting, and Transferring Techniques
Remove one dough disc from the fridge. Roll the dough out immediately between two large sheets of parchment paper. This prevents sticking and keeps you from incorporating excess flour. Roll to a uniform 1/4 inch thickness no thinner! Use a thin offset spatula to lift the cut shapes gently onto the sheet.
If the dough starts sticking to the counter or feeling warm, stop immediately and put the loaded baking sheet back into the freezer for 10 minutes. This second, rapid chill is the secret weapon for preventing misshapen cookies.
Stage 4: Achieving the Ideal Golden Bake
Preheat the oven fully to 350°F (175°C), ensuring it has been held at that temperature for at least 15 minutes. Bake the cookies for 10– 12 minutes, rotating the trays halfway through for even color.
The cookies are done when the edges just start turning gold; the centers will still look a bit soft but will firm up as they cool. This slight under baking yields the tender, classic Sugar Cookie texture we are aiming for. ( #11)
Troubleshooting Common Issues and Expert Baker's Tips
Let's talk about the pitfalls. Every baker faces challenges, but knowing the fixes is what separates the novices from the pros when crafting a beautiful Sugar Cookie . ( #12)
Why Your Dough is Crumbly (And How to Fix It)
This almost always means you added too much flour (by scooping instead of leveling) or you overworked the dough once the flour was added. If it's too crumbly to roll, add 1 teaspoon of milk or cream, mixing gently just until the dough comes together.
Do this carefully, as adding too much moisture risks major spread in the oven.
The “Soft Hands” Approach to Rolling Thickness
Consistency is key for a uniform batch of these delicious vanilla Sugar Cookie treats. If one side of your sheet is 1/8 inch thick and the other is 1/4 inch thick, the thin ones will burn long before the others are baked through.
Use rolling guides if you have them, and always flip the dough (still between the parchment sheets) halfway through rolling to ensure even pressure is applied across the entire surface.
Chef's Note: If your cutouts are sticking to the cutter, dip the edge of the cutter lightly into a bowl of flour before each press. But, if the dough itself is sticky and hard to handle, it absolutely needs more chill time. Do not add more flour to sticky dough; cold temperature fixes sticky dough.
Maximizing Shelf Life: Storage Solutions for Baked and Unbaked Cookies
The amazing thing about this recipe is how perfectly suited it is for planning ahead. You can literally keep batches of perfect cut-out Sugar Cookie dough ready to go in your freezer, which is a massive time saver for busy seasons. ( #13)
How to Safely Freeze Cookie Dough (Short and Long Term)
The dough disc keeps beautifully, wrapped tightly in two layers of plastic wrap and a layer of heavy duty foil, for up to 3 months. When ready to use, thaw the disc in the fridge overnight before rolling. You can also freeze the raw cut-out shapes! Place them on a baking sheet until rock hard, then transfer them to a freezer bag. Bake them directly from frozen, adding only 2– 3 minutes to the total bake time. This freezing technique works great for my Peanut Butter Cookies: The Ultimate Chewy, Classic Criss Cross Recipe too.
Maintaining Freshness: Storing Decorated and Plain Cookies
Plain, baked Sugar Cookie pieces are best kept in an airtight container at room temperature for up to 5 days. I usually add a small slice of bread to the container the cookie draws moisture from the bread, keeping the cookies softer for longer!
If they are decorated with Royal Icing, store them in a single layer (if possible) or stack them only once the icing is completely hard (often 8– 12 hours). Keep decorated cookies away from moisture and direct sunlight.
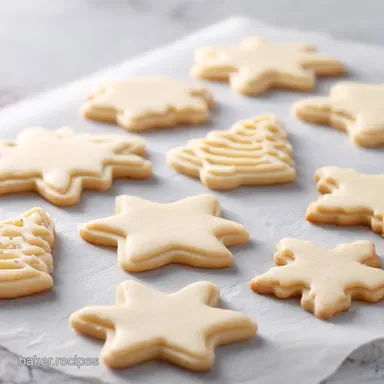
Beyond the Base: Presentation and Pairing Ideas
Once you master the base dough, the fun begins. This classic Sugar Cookie is your edible masterpiece waiting to happen, whether you top it with a simple glaze or elaborate designs. ( #14)
The Royal Icing Foundation: Decoration Basics
Royal Icing is the gold standard for beautifully decorated cookies, providing that hard, professional finish that makes cookies stackable and shippable. If you need a comprehensive guide to achieving zero spread results for your detailed designs, check out my deep dive on Sugar Cookies: The No-Spread Recipe for Perfect Cut-Out Shapes — it shares all my favorite royal icing consistency tips. ( #15)
Simple Dusting: Using Caster or Powdered Sugar
Not every cookie needs intense, vibrant decoration, sometimes the buttery flavor of the soft Sugar Cookie should shine through. A light dusting of powdered sugar immediately after they cool provides an elegant finish.
Another great trick for making your baked cut-out Sugar Cookie look polished is brushing the dough with milk or egg wash and sprinkling with sanding sugar before baking. ( #16, #17)
Tea Time Pairings: What to Serve Alongside These Treats
This vanilla Sugar Cookie is sturdy enough to stand up to robust flavors but delicate enough to enjoy with a light infusion. Try serving them with warm spiced cider in the winter or alongside a bright, citrusy drink like iced tea in the summer. They are also heavenly paired with the rich, zesty glaze often used in my Orange Cookies: The Best Zesty Glazed Shortbread Recipe — a perfect flavor contrast! I also love these simple vanilla Sugar Cookie cut-outs served with a scoop of good vanilla bean ice cream. ( #18)
Making the perfect Sugar Cookie is not about having a secret ingredient; it's about perfect technique, especially chilling the dough repeatedly. Master this base recipe, and you’ll never have another baking disaster again.
( #19) Seriously, this dough handles everything you throw at it, making it the best Sugar Cookie recipe for decorating and for simple, satisfying snacking. ( #20) Now go bake!

Recipe FAQs
Why did my cut-out cookies spread out instead of holding their shape?
Cookies typically spread because the butter was too warm when mixed, or the dough wasn't chilled long enough. Ensure your butter is only softened (not melted) before creaming, and always chill the cut-out shapes on the baking sheet for a final 10-15 minutes before they enter the oven.
Additionally, using too little flour or substituting a liquid sweetener can also contribute to spreading.
My finished sugar cookies are tough or hard; what went wrong?
Tough cookies usually result from overmixing the dough once the flour is incorporated, which overdevelops the gluten strands. Mix only until the flour streaks disappear, and avoid excessive kneading when gathering scraps or rolling the dough.
Using too much added flour during the rolling process can also dry out the final cookie, leading to a hard texture.
How critical is the chilling step for this cut-out recipe?
Chilling is absolutely essential; it is the non-negotiable step for achieving crisp, shapely cut-out cookies. The cold temperature solidifies the butter, ensuring it melts slower in the oven and prevents the cookie edges from spreading before the flour structure sets.
Aim for a minimum of two hours of refrigeration for the initial dough block.
What is the best way to roll the dough to ensure even thickness?
The most reliable method is to roll the dough between two sheets of parchment paper or silicone baking mats, minimizing the need for dusting flour. Use rolling pin guides or rulers (typically set to 1/4 inch thickness) alongside your rolling pin to maintain a uniform height across the entire sheet.
Even thickness is crucial for consistent baking time and coloration.
Can I make this sugar cookie recipe gluten-free?
Yes, this recipe adapts very well to gluten-free alternatives, provided you use a good quality 1:1 gluten-free flour blend that already contains xanthan gum. You might need to let the dough rest for an extra 30 minutes after mixing to fully hydrate the starches before rolling.
If the dough seems crumbly, add a teaspoon of milk until it comes together easily.
How long can I store the raw dough or the baked cookies?
Raw dough, wrapped tightly in plastic film, can be stored in the refrigerator for up to 5 days, or frozen for up to 6 months; thaw it overnight in the fridge before rolling. Baked and undecorated cookies keep well in an airtight container at room temperature for up to two weeks, or they can be frozen for up to three months.
Can I use brown sugar instead of granulated sugar for a different flavor?
Substituting brown sugar will change the texture and color significantly, making them chewier and slightly darker rather than crisp cut-outs. Brown sugar contains molasses, which adds moisture and acidity, causing the cookies to spread more readily.
For optimal shape and crispness, stick strictly to granulated sugar in this classic recipe.
Perfect Cut Out Sugar Cookie Recipe
Ingredients:
Instructions:
Nutrition Facts:
| Calories | 144 kcal |
|---|---|
| Protein | 2.0 g |
| Fat | 8.0 g |
| Carbs | 16.0 g |
