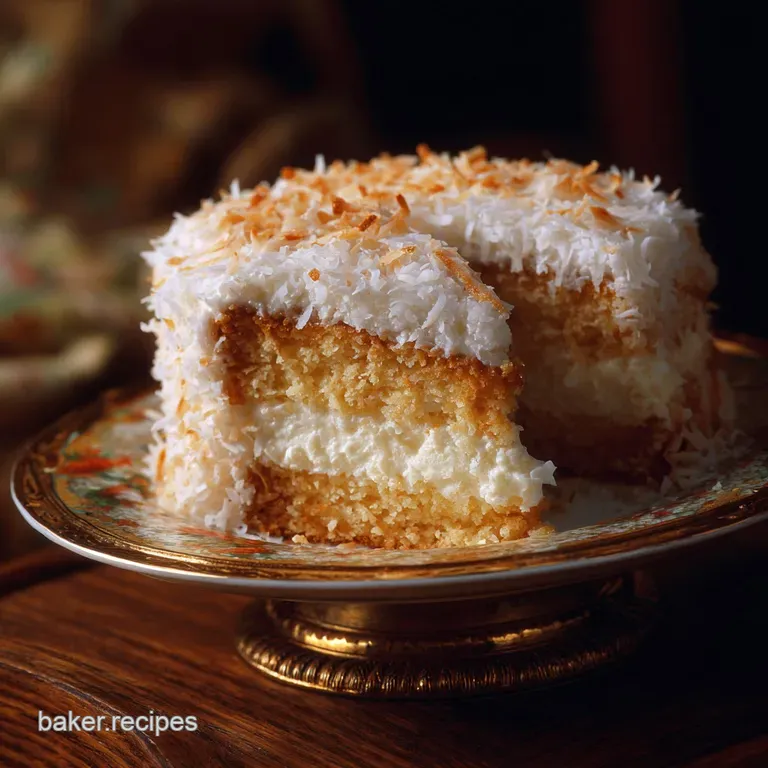
Coconut Cake the Proper Job Moist Layered Dream with Cream Cheese Frosting
- Why This Is the Last Coconut Cake Recipe You'll Ever Need
- Setting Up For Success: What Makes This Recipe 'Medium' Difficulty
- Gathering Your Baking Essentials: Complete Shopping Checklist
- Decoding Coconut Forms: Shredded, Flaked, Desiccated — Which to Use?
- Step and by-Step Guide to the Perfect Coconut Cake Layers
- Crafting the Stable Mascarpone Cream Cheese Frosting
- Troubleshooting Your Bake: Common Pitfalls and Solutions
- Adapting the Recipe: Variations, Preparation, and Storage of Coconut Cake
- Recipe FAQs
- 📝 Recipe Card
Why This Is the Last Coconut Cake Recipe You'll Ever Need
Okay, let's be honest. How many times have you tasted a coconut cake that was utterly beautiful on the outside, only to find the inside was dry? Like, Sahara Desert dry? Me too. It’s the worst kind of betrayal in baking.
I spent years messing with different coconut cake recipes trying to find the perfect one. Most were either aggressively sweet or structurally unsound. And almost all of them ended up tasting faintly of coconut but mostly just... sugar and sadness.
This recipe is the culmination of those mistakes. It is the real deal. We’re using a triple punch of coconut flavor milk, extract, and flakes plus a crucial syrup soak that ensures every single bite of this moist coconut cake is tender, fragrant, and never, ever dry.
It’s a proper job, layered coconut cake that will make people ask for the recipe immediately. Trust me, you can throw out all the others once you try this one.
Setting Up For Success: What Makes This Recipe 'Medium' Difficulty
Don't let the word "layer cake" scare you off. If you can follow instructions, you can make this. The medium rating isn't because the steps are hard; it's because there are several distinct stages (cake, soak, frosting, assembly). You can't rush room temperature ingredients, and you can't skip the chilling step.
This is baking precision, not baking difficulty. If you weigh your ingredients and make sure your butter and eggs are actually at room temperature (a key mistake I used to make), you’re already halfway there. Just commit to the timing.
The Buttermilk and Coconut Milk Secret to a Feather and Light Crumb
This is where the magic happens for truly homemade coconut cake. Most coconut cakes rely solely on plain milk or water, which just doesn't cut it. We need fat, and we need acid.
Buttermilk (the acid) reacts beautifully with the baking powder, giving us a magnificent lift and a softer, finer crumb structure. Meanwhile, the full and fat coconut milk adds richness and moisture that plain dairy milk can't match. It’s a dynamic duo.
You get that intense coconut flavor infused right into the sponge, all while keeping the texture incredibly tender.
Mastering the Triple and Coconut Flavor Profile
You want a coconut cake that actually tastes like coconut, right? We’re not leaving anything to chance.
- Coconut Milk: Provides fat and flavor in the batter.
- Coconut Extract: This is the hidden weapon. A teaspoon of extract really amplifies the natural taste.
- Toasted Flakes: We use these on the outside. Toasting them brings out a nutty depth that transforms the cake from "nice" to "wow."
That combination ensures the flavor is layered and intense, not flat or fake.
Moving Beyond Dry Cake: The Essential Syrup Soak
If you take only one piece of advice from this entire post, let it be this: Do not skip the syrup soak.
When you bake a cake, moisture evaporates. That’s just science. The coconut syrup soak (just a simple mix of sugar, water, and coconut milk simmered together) reintroduces moisture after baking. You brush it onto the warm layers, and the liquid sinks right into the cells.
This guarantees the moist coconut cake texture everyone dreams about, even days later. It's the difference between a sad, crumbly slice and a lush, dreamy one.
Gathering Your Baking Essentials: Complete Shopping Checklist
I know, I know, the full list is down in the printout area, but let me hit you with the key takeaways you might forget when running to the store:
- Mascarpone: We use this instead of just cream cheese because it’s much firmer and has a higher fat content, making the frosting incredibly stable for stacking heavy layers. Worth the price tag, absolutely.
- Coconut Extract: Check the baking aisle, not the liquor store!
- Full and Fat Buttermilk: Don't buy the low and fat stuff. We are making a celebratory cake, not diet food.
- Three Cake Tins: If you only have two, you’ll have to bake in batches. I recommend three 8 inch tins to keep your oven temperature stable and your layers consistent.
Decoding Coconut Forms: Shredded, Flaked, Desiccated Which to Use?
This is where ingredient reading comprehension comes into play. It gets confusing fast, but here’s the breakdown for this specific recipe:
- Shredded Coconut (Sweetened): We use this for the decoration. Sweetened flakes stay softer and don't dry out as much as unsweetened while toasting. Look for medium shreds.
- Coconut Milk: The liquid component in the cake batter and the soak. Use the unsweetened, canned, full and fat kind. Shake the can before opening.
- Desiccated Coconut: This is super dry, finely ground coconut. We aren't using this at all. It tends to absorb too much moisture from the batter and make the cake tough. Stick to the milk and flakes.
Choosing the Right Dairy: Full and Fat Coconut Milk vs. Cream
Go for the full and fat, unsweetened coconut milk in the can. Not the carton you put in cereal (it’s too thin). Not the 'cream of coconut' (that’s a sugary cocktail mix, too thick and too sweet). The fat content in the full and fat milk is vital for the structure and richness of the homemade coconut cake.
Skimp on the fat, and you risk a rubbery cake.
Cake Flour Versus All and Purpose: Does It Truly Matter?
Cake flour has a lower protein content, which results in an unbelievably soft, tender cake. If you have it, use it! But most of us just have all and purpose flour (AP) hanging around.
I wrote this layered coconut cake recipe using AP flour because it's what's accessible. The secret to making AP work is two and fold: Sifting and Not Overmixing. Sifting helps aerate the flour, mimicking some of the softness of cake flour.
And once that flour hits the wet ingredients, stop mixing the second it’s combined. Seriously, stop. A few small lumps are better than activating too much gluten.
Essential Kitchen Tools for Layer Cake Construction
You absolutely need a good mixer (stand or hand) for this frosting. Whipping together cold cheese and butter effectively is tough by hand.
Crucial Tool Note: An offset palette knife is not optional. It’s the cheapest thing in the baking aisle, and it makes frosting a cake so much cleaner and easier. If you want those smooth, bakery and quality sides, grab one.
Related Recipes Worth Trying
- Old Bay Seasoning Crab Cakes Minimal Binder Perfect Crisp Sear — Master the perfect crab cake using Old Bay Seasoning This Chesapeakestyle recipe guarantees lump crab flavor a savory seasoning punch and an ultracrisp...
- Chocolate Mint Icebox Cake Easy NoBake Showstopper Fridge Cake — This Chocolate Mint Icebox Cake is the ultimate nobake chocolate mint dessert Layer chocolate wafers with rich mint cream for an easy chocolate mint cake...
- Cone Cupcakes The Ultimate Birthday Party Treat Cleanup Hack — Cone Cupcakes are the genius party treat that eliminates washing up Learn how to make sturdy professional Birthday Party Cone Cupcakes using flatbottomed...
Step and by-Step Guide to the Perfect Coconut Cake Layers
The cake itself is fundamentally a standard butter cake, but we are being meticulous.
- Creaming: Don't treat butter and sugar like a quick mix. We are beating them for 3 to 5 minutes until pale and fluffy. This step incorporates air that we need for lift.
- Alternating: Once the eggs are in, start adding the dry mixture and the coconut/buttermilk mixture in alternating batches (dry, wet, dry, wet, dry). This prevents the batter from curdling and ensures smooth, even blending.
- Baking: Bake those three layers at 350°F (175°C) until golden. Test them with a toothpick. Then and this is key let them cool slightly before removing them to the rack.
Crafting the Stable Mascarpone Cream Cheese Frosting
Cream cheese frosting is notoriously delicious but often too soft for a proper layered coconut cake. It just squishes out the sides. My solution? Mascarpone. It’s like Italian cream cheese, but higher fat and much denser.
We are combining room and temperature butter with cold cream cheese and cold mascarpone. This temperature shock keeps the frosting stiff and prevents it from turning into soup when you whip it.
Achieving the Silkiest Batter: Creaming Butter and Sugar Properly
I already mentioned it, but I’m going to say it again because it’s the number one amateur mistake: you must cream the butter and sugar until it looks like fluffy pale yellow clouds. When you think you’ve creamed it enough, give it 30 more seconds.
This traps air bubbles which expand in the oven, giving you a beautiful rise and that signature tender crumb.
Baking Times and The Golden Crumb Test
My oven is probably lying to me, and yours is probably lying to you. Ovens are like politicians you just can't trust them.
The 32 35 minute time is a guideline. Start checking around 30 minutes. You know the cake is done when:
- The sides are beginning to pull away from the pan.
- The top springs back lightly when pressed.
- A wooden skewer inserted in the center comes out clean, with maybe one or two moist crumbs attached.
If the tops are browning too fast, you can tent the tins with foil for the last 10 minutes.
Preparing and Applying the Flavor and Boosting Coconut Syrup Soak
As soon as the cakes come out and cool for 10 minutes in the pan, poke them gently all over with a skewer or fork. Then, while they are still slightly warm (but not hot!), brush that coconut syrup liberally across the tops. Don’t be shy! This is what ensures you have a moist coconut cake.
You can flip the layers over once cooled and brush the bottoms too, if you're really committed to maximal moisture.
Whipping for Stability: Preventing Runny Frosting
Remember the cold cheese rule? It’s your defense against runny frosting. When you are whipping the mascarpone, cream cheese, and butter, keep it on medium speed. The second it looks smooth and fluffy, STOP.
Over and whipping introduces too much air and friction, which actually breaks down the dairy fats and makes the frosting collapse.
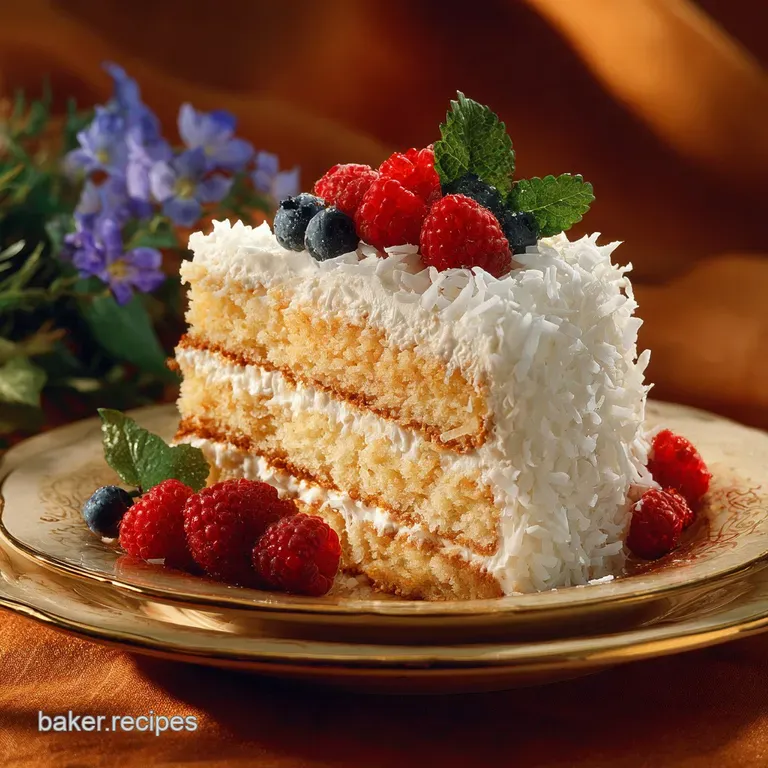
Stacking and Finishing Your Proper Job Coconut Dream Cake
- Level: If your layers are domed, use a serrated knife to carefully level the tops once cooled.
- Fill and Crumb Coat: Stack your layers, spreading frosting between each. Then, apply a very thin layer of frosting all over the outside. This traps all the loose crumbs.
- Chill: Put the crumb and coated cake in the fridge for 15 minutes. This sets the first thin layer rock and hard.
- Final Coat: Now you can apply the remaining frosting nice and thick, knowing you won't drag crumbs through that beautiful white finish.
- Decorate: Gently cup handfuls of the toasted shredded coconut and press it lightly onto the sides and top.
Troubleshooting Your Bake: Common Pitfalls and Solutions
| Problem | Likely Cause | Quick Fix/Prevention |
|---|---|---|
| Cake is tough/dense | Overmixing the batter. | Mix only until flour streaks disappear. |
| Frosting is too runny | Cream cheese/butter was too warm. | Chill frosting for 30 min, then whip briefly again. |
| Cake tastes flat | Skipped the coconut extract or the syrup soak. | Add more extract next time; brush heavily with soak. |
| Dry edges, soft center | Oven heat is too high or tins are too dark. | Lower temp by 25°F; use lighter aluminum tins. |
Adapting the Recipe: Variations, Preparation, and Storage of Coconut Cake
This recipe is robust enough to handle a few tweaks. Need a slightly different vibe? Try some of these easy variations.
Why Did My Cake Sink in the Middle?
This usually happens for one of three reasons:
- The oven door was opened too soon. The internal structure hadn't set yet, and the sudden temperature drop collapsed the lift. Keep the door shut until 30 minutes.
- Too much leavening. Did you accidentally double the baking powder?
- The cake wasn’t fully cooked. If it looks good but isn't quite done, it will often sink upon cooling.
How to Correctly Measure Cake Flour by Weight vs. Volume
If you decide to splurge on cake flour next time, please, please weigh it. A cup of AP flour weighs about 120 grams. A cup of cake flour weighs about 110 grams. If you don't have a scale, you must use the 'spoon and level' method: spoon the flour lightly into your measuring cup, then level off the top with a straight edge.
Never scoop directly from the bag; you'll pack in too much.
Best Practices for Freezing Cake Layers
This is a phenomenal way to break up the labor. Once the baked layers are completely cool, wrap them tightly in plastic wrap (two layers is best) and then again in foil. Freeze them flat. When you are ready to assemble, pull them out and let them defrost still wrapped on the counter.
The wrapper traps any condensation, keeping the cake perfectly moist.
Converting This Recipe into Perfect Coconut Cupcakes
Easy coconut dessert alert! This batter makes about 24 standard cupcakes. Line your muffin tins, fill them about two and thirds full, and bake at the same temperature (350°F / 175°C) for 20 to 22 minutes.
Skip the soak on these, but pipe that delicious frosting on top and cover with toasted coconut.
Make and Ahead Strategy: Storing Layers and Frosting
You can bake the cake layers up to a month in advance (frozen, see above) or 2 days ahead (wrapped tightly at room temperature).
The frosting can be made 3 days ahead and stored in the fridge. Before using, let it come back to a cool room temperature, and give it a quick 30 second whip in the mixer. This just restores its smooth, creamy texture.
Nutritional Snapshot (Estimated Calorie and Serving Data)
Look, this is a celebration cake. It’s rich. It’s creamy. It’s worth every single bite. Below is a rough estimate, but honestly, just enjoy the experience of this beautiful, layered coconut cake!
| Per Serving (1 slice) | Estimate |
|---|---|
| Calories | 610 650 kcal |
| Protein | 7 g |
| Fat | 35 40 g (Yes, it’s rich!) |
| Carbohydrates | 70 g |
| Sugar | 55 g |
| Fiber | 2 g |
| Sodium | 200 mg |

Recipe FAQs
Oh blimey, my cake came out a bit dry! What went wrong?
This recipe uses buttermilk and the coconut syrup soak to combat dryness; ensure you didn't over bake the layers, and definitely don't skip giving those layers a good drenching with the soak it’s the absolute secret weapon for a truly moist crumb.
I’m having a proper bash on Saturday. Can I bake the Coconut Cake layers ahead of time?
Absolutely, you can be a clever clogs! Bake and cool the layers, wrap them tightly in cling film, and freeze them for up to a month, or keep them chilled for two days; the finished cake, owing to the dairy frosting, must be kept refrigerated for up to four days.
My cream cheese and mascarpone frosting turned out runny. How do I fix it without a total disaster?
The trick here is using cold cream cheese and mascarpone alongside room temp butter, which stabilises the mixture; if it goes floppy, pop the whole bowl into the fridge for 20 minutes to firm up before whipping again that usually sorts it right out.
I want the maximum flavour punch. What is the best type of coconut to use for this recipe?
For the cake crumb, full fat canned coconut milk is key for moisture and depth; for decoration, sweetened shredded coconut is the proper choice, especially when lightly toasted until golden brown for that lovely nutty crunch and intense aroma.
I don't keep buttermilk handy. Does using it significantly change the fat content, and can I substitute it?
Buttermilk adds essential acid, reacting with the baking powder to create a tender, high rising crumb, but doesn't add much fat; if you're stuck, a splash of lemon juice or vinegar in regular milk will do the job in a pinch, though the overall richness comes from the butter and frosting.
Proper Job Creamy Coconut Cake

Ingredients:
Instructions:
Nutrition Facts:
| Calories | 640 kcal |
|---|---|
| Protein | 5.0 g |
| Fat | 35.0 g |
| Carbs | 79.0 g |
