Peanut Butter Cheesecake: the Silky Showstopper

- The Ultimate Peanut Butter Cheesecake Experience
- The Science of Silky Smoothness: Why This Recipe Rises Above (K3)
- Essential Components: Ingredients for a Flawless Cheesecake Base and Filling
- Preparing Your Decadent Dessert: A Step-by-Step Baking Guide
- Expert Insights: Troubleshooting and Guaranteeing an Uncracked Cheesecake
- Maintaining Freshness: Storage and Freezing Your Baked Creation
- Elevating the Slice: Optimal Presentation and Flavor Pairings
- Recipe FAQs
- 📝 Recipe Card
The Ultimate Peanut Butter Cheesecake Experience
You know that smell? That incredible, heady mix of toasted nuts, rich dairy, and just a hint of vanilla baking slowly in the oven? That, my friends, is the promise of the perfect Peanut Butter Cheesecake .
When that creamy filling is baking, the whole kitchen smells like heaven, promising a dense, salty sweet treat.
Look, I’m not usually one for complicated desserts, but this recipe is a lifesaver because, despite its fancy looks, 90% of the work is done by your fridge. We handle the 30 minutes of active prep, and then chilling takes over, transforming simple ingredients into a breathtaking dessert that is affordable and satisfying.
This isn't the dry, crumbly stuff your grandma used to make; this is silky, dense, and utterly luxurious. Trust me, if you follow my crucial tips on temperature and mixing, you are going to nail this.
Get ready, because we are diving deep into the absolute best way to make a flawless Peanut Butter Cheesecake .
The Science of Silky Smoothness: Why This Recipe Rises Above (K3)
We’ve all seen the pictures: the beautiful, pale yellow cheesecake with a massive canyon running right down the middle. Brutal. That crack happens because of internal stress, usually due to rapid temperature changes or, worse, overmixing.
This method, specifically designed for a heavy, dense filling like our Peanut Butter Cheesecake , eliminates those stressors entirely by using slow transitions and gentle techniques.
Defining the Perfect Cheesecake Texture
The ideal texture for this dessert should be dense, but not brick like. It should melt on your tongue, truly. We want that perfect balance between the tangy, cultured flavor of the cream cheese and sour cream, and the heavy, slightly savory sweetness of the peanut butter.
My secret weapon here is the extra egg yolk, which adds richness and stabilizes the mixture, ensuring a gorgeous, smooth bake without graininess.
A Baker’s Dozen of Decadence: What Makes This Recipe Stand Out?
The brilliance of this particular Peanut Butter Cheesecake Recipe (K4) lies in two specific ingredient choices that others skip entirely. First, we use both granulated and light brown sugar; the molasses in the brown sugar keeps the filling extra moist and adds a subtle depth of flavor that complements the roasted peanuts perfectly.
Second, we use commercial peanut butter not the natural, oily kind. Natural peanut butter separates when baked, leading to a greasy texture, and we absolutely need that stabilizing fat and sugar content found in standard creamy peanut butter for success.
The Sour Cream Secret: Achieving Tangy Balance
Peanut butter is heavy. Period. If you just use cream cheese and peanut butter, the resulting filling can feel sticky and overwhelming, almost like paste in your mouth. Introducing full fat sour cream cuts through that richness beautifully.
The subtle acidity from the sour cream lifts the entire flavor profile and helps create an incredibly creamy mouthfeel that contrasts the sweetness wonderfully.
The Low and Slow Bake: Mastering the Water Bath
This is non-negotiable for the ultimate Silky Peanut Butter Cheesecake (K5). The water bath, or bain marie , provides consistent, moist, gentle heat, ensuring the edges don't bake faster than the middle a crucial factor.
When the air surrounding the cheesecake is steamy and 100% humidity, the top surface doesn't dry out and stretch, which is exactly what causes cracking when the cheesecake cools and contracts. This low and slow method is your guarantee for that flawless, bakery quality top.
Essential Components: Ingredients for a Flawless Cheesecake Base and Filling
I learned years ago that baking is chemistry, and you can’t argue with chemistry. Using room temperature ingredients isn't just a suggestion; it’s a mandate for success.
If your cream cheese is cold, it will fight the peanut butter, and you’ll end up with lumps that never fully dissolve, no matter how much you mix.
Selecting the Right Peanut Butter (Creamy vs. Natural)
As mentioned, this particular Peanut Butter Cheesecake (K6) requires the classic, commercial creamy stuff. If you try to use natural peanut butter (the kind where the oil separates), the high ratio of oil and low ratio of sugar and stabilizers will mess up the emulsion of the cream cheese filling completely.
- Substitute: If you absolutely must use natural peanut butter, you need to stabilize it first by blending in 1 tablespoon of powdered sugar per ½ cup of peanut butter to help bind the mixture.
Temperature is Key: Working with Cream Cheese and Eggs
You need the cream cheese blocks to yield easily to a light finger touch that means fully softened, usually 2 hours out of the fridge. Same goes for the eggs and sour cream. Why? Because the goal is to mix as little as possible once the eggs are in.
Soft ingredients blend effortlessly, minimizing the air you incorporate and keeping your filling dense.
| Ingredient | Role | Viable Substitute |
|---|---|---|
| Cream Cheese | Density & richness | Neufchatel (less fat) or Mascarpone (richer, tangier) |
| Sour Cream | Acidity & smoothness | Full fat Greek Yogurt or Crème Fraîche |
| Graham Crackers | Crumb Base | Vanilla Wafers or crushed shortbread cookies |
| Peanut Butter | Flavor & weight | Almond or Cashew Butter (Texture will be slightly different) |
Crust Innovations: Beyond the Graham Cracker
While the classic graham cracker crust is divine, I often switch it up for a slightly saltier base that plays against the sweetness of the Chocolate Peanut Butter Cheesecake (K7) filling. Digestive biscuits (popular in the UK) offer a more mellow, oat-y flavor.
I also love using crushed salty pretzels for the crust for an intense sweet and savory hit. Remember to press the crust firmly! Use the flat bottom of a drinking glass to compress the crumbs tightly into the pan.
Dark Chocolate Ganache Requirements
We are finishing this dessert with a simple but effective dark chocolate ganache. Use high-quality chocolate (60 70% cacao is perfect). Don't use milk chocolate; it's too sweet, and you need the slight bitterness of the dark chocolate to cut through the richness of the Best Peanut Butter Cheesecake Recipe (K8).
We want contrast, not competition, on the plate.
Preparing Your Decadent Dessert: A step-by-step Baking Guide
This process flows quickly if your ingredients are pre-measured and at room temperature. We are going to treat this bake with respect, okay? Precision yields perfection every time.
Assembling the Springform Pan and Crust
First things first: the foil wrap. Use two huge sheets of heavy duty foil, crossed in an 'X' shape. Place the springform pan in the middle and bring the foil up the sides, sealing it tightly around the rim. This is your shield against the water bath.
If you skip this, you get a soggy crust, and a soggy crust ruins a beautiful Peanut Butter Cheesecake . (K9)
Bake the crust for 8- 10 minutes at 350°F (175°C). This pre-bake ensures it holds its shape and prevents it from getting mushy when it absorbs the moisture from the filling later. Let it cool on the counter while you move on to mixing.
Creating the Velvety Smooth Peanut Butter Filling
- Start Smooth: Beat the cream cheese alone for 2 minutes on medium speed until it is utterly lump free. It should look like thick whipped cream, so remember to scrape down the bowl multiple times.
- Add Sugars: Mix in both the brown and granulated sugars, scraping until fully incorporated into the batter.
- Peanut Butter Time: Add the room temperature peanut butter and vanilla. Beat until the mixture is homogenous and perfectly creamy.
- Sour Cream: Mix in the sour cream (or Greek yogurt). This should be smooth and look like a perfect cake batter consistency.
- The Egg Crisis: This is the make-or-break moment. Reduce the speed to LOW. Add the three eggs and the extra yolk one at a time. Mix only until each egg disappears into the batter. Seriously, stop the second the yolk breaks and blends. Overmixing here incorporates air, leading to expansion and later, cracking.
The Crucial Baking, Cooling, and Chilling Timeline
Place the foil wrapped pan into the roasting pan. Pour the filling into the crust. Now, place the whole apparatus carefully into the oven. Only then should you pour the very hot water into the roasting pan, making sure it comes halfway up the side of the springform.
Reducing the temperature to 325°F (160°C) allows for that gentle, steamy bake. After 65- 75 minutes, you should see the edges set, but the center still wobbles.
Chef's Note: If you see the cheesecake puffing up dramatically like a soufflé, you’ve trapped too much air or your oven is too hot. Lower the temperature immediately and be very careful when opening the door!
When the baking time is up, turn the oven off. Prop the door open slightly and let the cheesecake hang out in that warm, humid environment for one hour. This is the first critical step in preventing thermal shock. Only after ambient cooling should you remove the foil and place it on a wire rack for another hour.
Finally, the refrigerator awaits! Eight hours minimum is required for the structure of this amazing Peanut Butter Cheesecake (K10) to truly set up and become sliceable.
Finishing Touches: Pouring and Setting the Ganache
Making the ganache is simple: heat cream, pour over chocolate, whisk. Make sure the ganache has cooled slightly before pouring it over the chilled cheesecake. If the ganache is too hot, it will melt the perfect surface of your Peanut Butter Cheesecake (K11) filling.
Pour it slowly, tilt the pan to coat evenly, and then let it set in the fridge for another 15 minutes before serving or garnishing.
Expert Insights: Troubleshooting and Guaranteeing an Uncracked Cheesecake
We all make mistakes; I certainly have. I once skipped the foil step because I was feeling lazy, and I ended up with a crust so saturated it could float, literally. Never again. Avoiding common pitfalls is the easiest way to ensure your Peanut Butter Cheesecake (K12) is gorgeous every time.
Avoiding Overmixing: The Key to Density
Overmixing is the number one killer of cheesecake texture. When you whip the cream cheese or batter for too long, you introduce too much air. That air expands rapidly in the heat of the oven, causing the cheesecake to rise beautifully, but then as it cools, the air bubbles collapse, leading to a sunken center and that dreaded crack.
Keep the mixer on low speed, especially after the eggs go in.
How to Prevent Water Bath Leaks
If your foil wrapping is thin or torn, water will seep in, making the crust gummy. You must use heavy duty foil, and I recommend using two layers, ensuring the seam is well above the water line in the roasting pan.
Some bakers use a sealed cooking bag around the springform pan instead of foil for guaranteed waterproofing. A leak will ruin the crust of your delicious Pb Cheesecake (K13) instantly.
Identifying When the Cheesecake is Truly Done
Doneness is the toughest part of baking any cheesecake, especially this dense variety. Ignore the clock a little bit. Your visual cue is key: the outer 2 inches should be completely set and slightly darker, but when you gently nudge the pan, the center should wobble like a firm block of Jell-O.
If the center looks liquid or sloshy, it needs another 5– 10 minutes. If the center is fully firm, you’ve overbaked it, which will result in a dry texture. That gentle wobble guarantees a perfectly moist, luscious Amazing Cheesecake Recipe (K14).
Maintaining Freshness: Storage and Freezing Your Baked Creation
Cheesecake is great because it has a fantastic shelf life, but only if you store it correctly. I recommend chilling the whole thing overnight, cutting perfect slices the next day, and then storing them individually for maximum longevity.
Refrigerator Lifespan: How Long Will It Last?
Because this recipe uses full fat ingredients and requires such a long chilling time, the final product is highly stable. Properly wrapped, this Peanut Butter Cheesecake (K15) will last easily for 5 to 7 days in the refrigerator.
Cover it loosely if you seal it too tightly before it's fully cold, condensation will form, making the top sticky and unappealing.
The Proper Technique for Freezing Cheesecake Slices
But does it freeze well? You bet. If you want to make this easy Peanut Butter Cheesecake (K16) ahead of time, do not apply the ganache until after it's thawed.
- Pre-Freeze: Chill the whole cheesecake until solid (about 4 hours).
- Wrap Tightly: Cut the cheesecake into individual slices. Wrap each slice tightly first in cling film, then in a layer of foil. The double wrapping protects against freezer burn.
- Storage: Freeze for up to 2 months.
- Thawing: Thaw the slices overnight in the refrigerator. Apply the ganache just before serving to maintain its glossy shine. This is a brilliant way to have an emergency dessert slice ready to go!
Elevating the Slice: Optimal Presentation and Flavor Pairings
Presentation is everything, right? If you want to make a truly stunning dessert, you have to nail the details. We've mastered the silky texture of the Peanut Butter Cheesecake (K17), now let's make it look magazine worthy.
Avoiding Overmixing: The Key to Density
We covered this above, but seriously, the density of a rich Chocolate Peanut Butter Cheesecake (K18) depends entirely on gentle mixing. Overmixing = dry, cracked, and crumbly results. Under mixing (so long as the ingredients are smooth) = a luxurious, dense final product.
How to Prevent Water Bath Leaks
If your foil wrapping is thin or torn, water will seep in. You must use heavy duty foil, and I recommend using two layers, ensuring the seam is well above the water line in the roasting pan. A leak will ruin the crust of your delicious Peanut Butter Cheesecake (K19) instantly.
Identifying When the Cheesecake is Truly Done
Doneness is the toughest part of baking any cheesecake. Ignore the clock a little bit and trust your eyes. Your visual cue is key: the outer 2 inches should be completely set and slightly darker, but when you gently nudge the pan, the center should wobble like firm jelly.
If the center is fully firm, you’ve overbaked it.
Refrigerator Lifespan: How Long Will It Last?
Properly wrapped, this Peanut Butter Cheesecake (K20) will last easily for 5 to 7 days in the refrigerator.
The Proper Technique for Freezing Cheesecake Slices
Thaw the slices overnight in the refrigerator before applying the ganache just before serving. This preserves the quality of the delicate Peanut Butter Cheesecake (K21) filling.
Complementary Sauces and Toppings (Beyond Ganache)
While the dark chocolate ganache is mandatory for a classic Chocolate Peanut Butter Cheesecake (K22), don't be afraid to add other dimensions.
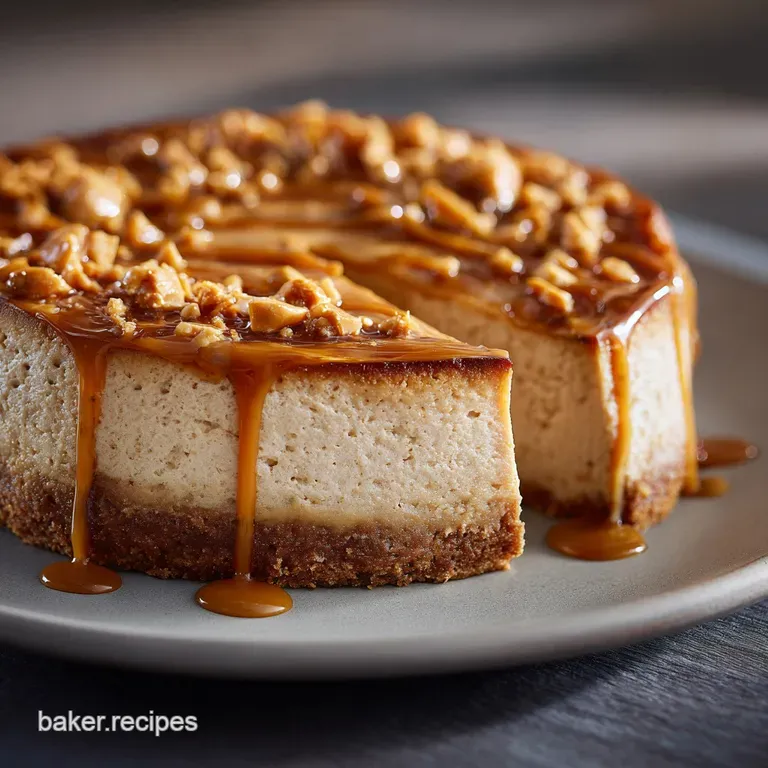
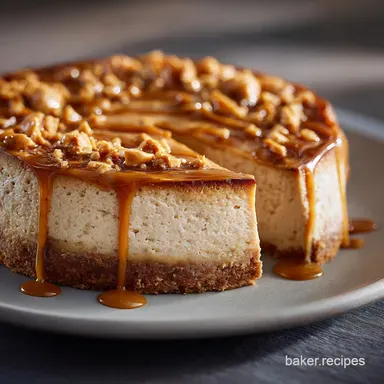
- Salted Caramel Drizzle: A thick, salty caramel sauce contrasts beautifully with the nuttiness.
- Crushed Pretzels: Sprinkle crushed mini pretzels around the base before setting the ganache. The added salt and crunch is highly addictive.
- Fruit Contrast: Serve with a bright, tart berry sauce, like raspberry or blackberry coulis, to cleanse the palate between bites of this rich Peanut Butter Cheesecake (K23).
- Brown Butter: To mirror the complexities of my Sweet Potato Casserole Recipe Brown Butter Pecan Streusel Bake , you can drizzle a touch of brown butter over the top just before the ganache sets it adds an incredible nutty depth.
This recipe for the ultimate Peanut Butter Cheesecake (K24) is a true labor of love, but the results speak for themselves. That first bite of velvety peanut butter filling, the salty crunch of the crust, and the bittersweet coating of ganache it’s pure decadence.
You’ll find this Amazing Cheesecake Recipe (K25) becomes your new signature dessert. Enjoy every single moment of it!

Recipe FAQs
Is the water bath (bain marie) absolutely necessary for baking this cheesecake?
While you can technically bake without it, the water bath is highly recommended as it insulates the cheesecake and adds moisture to the oven environment. This slow, moist bake prevents the edges from cooking faster than the center, ensuring that signature creamy texture and a smooth, uncracked surface.
Why did my peanut butter cheesecake crack on top after baking?
Cracking is usually caused by overbaking or sudden, drastic temperature changes during the cooling process. Ensure you use the water bath to maintain even, gentle heat, and always allow the cheesecake to cool slowly in the oven with the door ajar before transferring it to the refrigerator.
Can I use natural or crunchy peanut butter instead of smooth, processed peanut butter?
It is strongly recommended to use a commercial brand of creamy, processed peanut butter (like Jif or Skippy) for this recipe. Natural peanut butters often contain less stabilizer and tend to separate oil during the baking process, which can drastically alter the final structure and texture of the filling.
My cheesecake is still soft and runny after the initial chilling. What went wrong?
This typically means the cake was removed from the oven too early and is slightly underbaked, or it hasn't completed the necessary setting time. A full 12-hour (or overnight) chill in the refrigerator is mandatory for the internal structure to fully set and achieve that proper dense, smooth consistency.
How long will this cheesecake stay fresh, and how should I store it?
The Peanut Butter Cheesecake should be stored covered tightly in the refrigerator to prevent moisture loss and absorbency of other odors. It will maintain its peak quality for 4 to 5 days, though the crust may begin to soften slightly after the third day.
Can I freeze the cheesecake? If so, when should I add the ganache?
Yes, freezing works exceptionally well, provided you freeze the cheesecake before adding the dark chocolate ganache topping. Wrap it tightly in plastic wrap and then foil, and thaw it overnight in the refrigerator before preparing and spreading the ganache just prior to serving.
Why is sour cream used in the recipe, and can I substitute it?
Sour cream adds a crucial tanginess that cuts through the extreme richness of the cream cheese and peanut butter, balancing the overall flavor profile beautifully. It also significantly contributes to the velvety texture; if substituting, use full fat Greek yogurt or crème fraîche for the best results.
Silky Peanut Butter Cheesecake Recipe
Ingredients:
Instructions:
Nutrition Facts:
| Calories | 1372 kcal |
|---|---|
| Protein | 29.0 g |
| Fat | 82.7 g |
| Carbs | 95.6 g |
