Authentic Tres Leches Cake
- Time: Active 25 minutes, Passive 30 minutes, Total 55 minutes
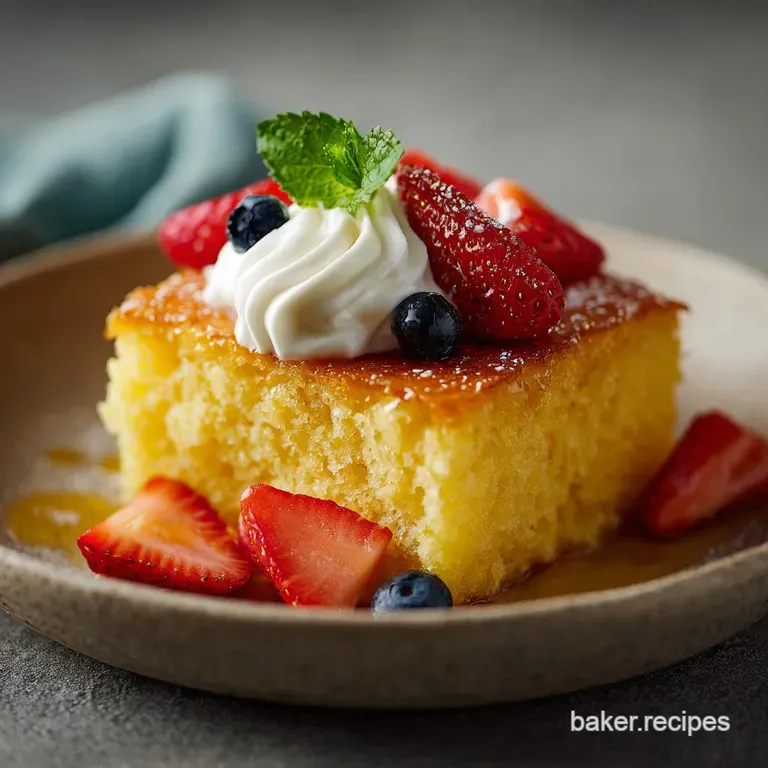
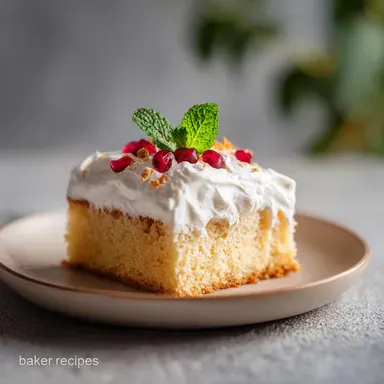
- Flavor/Texture Hook: A silky, custard like crumb topped with cloud like whipped cream and a hint of warm cinnamon.
- Perfect for: Large family gatherings, summer potlucks, or when you need a reliable Make-ahead showstopper.
- Mastering The Ultimate Authentic Tres Leches Cake
- Why This Works
- Component Analysis
- The Elements of the Perfect Sponge
- Essential Tools For Pastry Success
- Executing The Multi Step Baking Process
- Solving Common Textural Cake Issues
- Adjusting Portions For Any Crowd
- Clarifying Traditional Baking Misconceptions
- Preserving Freshness And Reducing Waste
- Pairing Your Dessert With Perfect Sides
- Recipe FAQs
- 📝 Recipe Card
Mastering The Ultimate Authentic Tres Leches Cake
Imagine walking into a buzzing family kitchen in Mexico City or Managua during a birthday celebration. The air is thick with the scent of simmering vanilla and the sharp, bright aroma of freshly whipped cream. There, sitting in the center of the table, is the Tres Leches Cake.
It doesn't look like a typical birthday cake with stiff buttercream or dry crumbs; it looks humble until that first slice is lifted. You see the milk gently weeping from the sides of the sponge, a shimmering testament to the hours it spent soaking up a rich, sweet elixir.
I remember the first time I tried to make this at home. I thought I could just poke a few holes in a boxed yellow cake and call it a day. The result? A soggy, pathetic mess that fell apart the moment the fork touched it.
That’s when I realized this dish isn’t just a cake with milk poured on top; it’s a specific architectural feat. The sponge must be rugged yet porous, sturdy enough to hold its weight in gold or in this case, three distinct types of dairy.
It is a dessert of beautiful contrasts: the dry, hot oven baked base meeting the cold, silky embrace of the "leches."
We are going to walk through how to create that iconic "thirsty" sponge using a traditional chiffon style method. We’ll beat the life into those egg whites until they stand like snowy mountain peaks, then fold them into a yolk rich batter that smells like pure comfort.
This is about honoring a tradition that has traveled through centuries, evolving from 19th-century soaked bread puddings into the elegant, cream topped masterpiece we crave today. Trust me, once you see that mahogany crust absorb the milk like a dry desert floor, you'll never go back to dry cake again.
Why This Works
To get that legendary texture, we have to move beyond standard baking and look at how proteins and liquids interact in the pan. This isn't just about mixing ingredients; it's about structural engineering.
- Structural Aeration: By whipping the egg whites to stiff peaks, we create millions of tiny air bubbles trapped in a protein web, which allows the cake to rise without the density of butter.
- Capillary Action: The absence of fat (butter or oil) in the sponge makes the crumb "thirsty," allowing the milk mixture to travel through the pores rather than sliding off a greasy surface.
- Protein Denaturation: Baking the cake until it reaches a deep mahogany color reinforces the cell walls of the sponge, ensuring it doesn't dissolve into a puddle once saturated.
- Osmotic Saturation: Using three milks with varying sugar and fat contents creates a high viscosity soak that clings to the flour particles instead of just making them wet.
| Servings | Ingredient Adjustments | Pan Size | Chill Time |
|---|---|---|---|
| 6 people | Use 0.5x all ingredients (3 small eggs) | 8x8 inch square | 3 hours |
| 12 people | Standard recipe (as written) | 9x13 inch rectangle | 4 hours |
| 24 people | Double recipe (work in batches) | Two 9x13 inch pans | 6 hours |
When you are deciding on the scale for your gathering, remember that the depth of the cake matters as much as the surface area. A 9x13 inch pan provides the ideal height to soak ratio, ensuring every bite has a consistent distribution of the milk mixture.
If you try to bake this in a deeper, smaller pan, you might find the center struggles to absorb the liquid effectively, leaving you with a dry core and overly wet edges.
Component Analysis
Selecting the right ingredients for this cake is the difference between a grocery store tray and a bakery level masterpiece. We aren't just looking for sweetness; we are looking for a specific mouthfeel that lingers.
| Ingredient | Science Role | Pro Secret |
|---|---|---|
| Large Eggs | Provides structural aeration | Use room temp for 20% more volume |
| Evaporated Milk | Adds protein density | Don't swap for regular milk; it's too thin |
| Sweetened Condensed Milk | Acts as the primary sweetener | Pour while cake is slightly warm for suction |
| All Purpose Flour | Builds the gluten "skeleton" | Sift twice to ensure no clumps interfere with air bubbles |
The choice of dairy is where the magic happens. While some modern twists try to use almond or soy, the traditional trio of evaporated, condensed, and heavy cream provides a fat to sugar ratio that is nearly impossible to replicate with substitutes.
The evaporated milk brings a toasted, concentrated dairy flavor, while the condensed milk provides the thick, syrupy body that gives the cake its "custard" feel.
The Elements of the Perfect Sponge
To get started, gather your ingredients. Make sure your eggs are at room temperature; cold eggs won't trap nearly as much air, and you'll end up with a flat, rubbery disc instead of a lofty cloud.
- 1.5 cups (190g) all purpose flour Why this? Provides the necessary gluten structure to hold the heavy milk soak.
- Substitute: Cake flour (1.75 cups) for a more tender, delicate crumb.
- 1 tsp baking powder Why this? Provides an extra lift to supplement the whipped egg whites.
- Substitute: 1/4 tsp baking soda + 1/2 tsp cream of tartar.
- 0.5 tsp fine sea salt Why this? Cuts through the intense sweetness of the condensed milk.
- Substitute: Standard table salt (use slightly less).
- 5 large eggs, separated Why this? The whites provide lift while the yolks provide richness.
- Substitute: 1 cup liquid egg substitute (note: cake will be much denser).
- 0.75 cup (150g) granulated sugar, divided Why this? Stabilizes the egg proteins and sweetens the base.
- Substitute: Caster sugar for faster dissolving.
- 0.33 cup (80ml) whole milk Why this? Thins the yolk mixture for easier folding.
- Substitute: 2% milk or unsweetened oat milk.
- 1.5 tsp pure vanilla extract Why this? Rounds out the dairy flavors with floral notes.
- Substitute: Vanilla bean paste for those beautiful black specks.
- 12 oz (354ml) evaporated milk Why this? Adds a caramelized depth without the water of regular milk.
- Substitute: Whole milk simmered down by half.
- 14 oz (397g) sweetened condensed milk Why this? The primary sweetener and thickener for the soak.
- Substitute: Coconut condensed milk for a tropical twist.
- 0.25 cup (60ml) heavy whipping cream for soak Why this? Adds fat to emulsify the three milks together.
- Substitute: Half and half for a slightly lighter feel.
- 1.5 cups (355ml) heavy whipping cream for topping Why this? Creates a stable, billowy finish.
- Substitute: Stabilized whipped topping (Cool Whip) if serving in high heat.
- 3 tbsp powdered sugar Why this? Sweetens the topping without a gritty texture.
- Substitute: Granulated sugar (blitzed in a blender).
- 0.5 tsp ground cinnamon Why this? The traditional aromatic finish that balances the cream.
- Substitute: Freshly grated nutmeg or cocoa powder.
Essential Tools For Pastry Success
You don't need a professional bakery setup, but a few specific tools will make the process much smoother. A stand mixer is your best friend here because whipping egg whites to stiff peaks by hand is a workout most of us aren't looking for on a Sunday afternoon.
If you don't have a 9x13 inch glass baking dish, a ceramic one works just as well. Avoid dark metal pans if possible, as they can cause the edges to brown too quickly before the center is set. You’ll also need two clean, grease free bowls.
This is vital: if there is even a speck of fat or yolk in the bowl where you're whipping the whites, they will never reach their full potential. I always wipe my whisk and bowl with a little lemon juice or white vinegar before starting just to be safe.
Finally,, make sure you have a sturdy skewer or a large fork. You're going to be poking a lot of holes hundreds of them. A thin toothpick won't create large enough channels for the thick condensed milk mixture to travel down to the bottom of the pan. We want "highways," not "footpaths" for that milk.
Executing The Multi Step Baking Process

- Preheat your oven to 350°F (175°C) and generously grease a 9x13 inch baking dish with butter or non stick spray. Note: Greasing ensures the edges don't stick as the cake shrinks slightly during cooling.
- Sift the all purpose flour, baking powder, and sea salt into a medium bowl and whisk briefly to combine. until no lumps remain.
- Place egg yolks in a large bowl with 0.5 cup of sugar and beat on high speed until the mixture is pale yellow and falls in thick ribbons.
- Stir the 0.33 cup of whole milk and vanilla extract into the yolk mixture by hand. Note: Adding the liquid now prevents the flour from clumping later.
- In a separate, perfectly clean bowl, beat the egg whites on medium high until soft, foamy peaks form.
- Gradually rain in the remaining 0.25 cup of sugar while continuing to beat the whites until they are stiff, glossy, and hold their shape.
- Gently fold the dry flour mixture into the yolk base, then fold in the whipped egg whites in three separate batches using a rubber spatula. until no white streaks are visible.
- Pour the airy batter into your prepared dish and bake for 28-32 minutes until the top is a deep mahogany and a toothpick comes out clean.
- Allow the cake to cool for exactly 10 minutes, then use a skewer to pierce the surface every half inch. until the cake looks like a honeycomb.
- Whisk the evaporated milk, condensed milk, and 0.25 cup heavy cream together, then pour slowly over the warm cake. until all liquid is absorbed.
Chef's Note: When folding the egg whites, use a "cut and fold" motion. Cut through the center with your spatula, scrape the bottom, and lift over the top. Don't stir in circles, or you'll pop all those beautiful air bubbles you worked so hard to create.
Solving Common Textural Cake Issues
The most common complaint with this recipe is a cake that ends up "leaking" too much or one that feels like a brick. Usually, this comes down to the temperature of the cake when the milk is added. If the cake is stone cold, the pores are closed, and the milk just sits on top.
If it's screaming hot, it can turn the starch into a gummy paste.
The Problem of the Soggy Bottom
If your cake feels like a wet sponge that’s falling apart, you likely didn't bake it long enough. The "Tres Leches Cake" needs a very sturdy crust. That mahogany color I mentioned isn't just for looks; it's a sign that the exterior proteins have hardened enough to provide a "shell" for the soaked interior.
If the cake is pale when it comes out, it lacks the structural integrity to hold the milk.
Fixing The Pool Of Milk
Sometimes you'll pour the milk and it seems to just sit there like a lake. Don't panic. This often happens if the holes aren't deep enough. Take your skewer and poke a few more holes right through the liquid. Then, give it time.
The refrigeration step isn't just for chilling; it’s for the science of absorption to take place.
| Problem | Root Cause | Solution |
|---|---|---|
| Dense, flat cake | Deflated egg whites | Fold whites gently; do not stir or whisk them in. |
| Dry center | Not enough holes | Use a thick skewer and poke all the way to the bottom. |
| Rubbery texture | Overmixing flour | Mix until just combined; do not use a stand mixer for the flour step. |
Common Mistakes Checklist
- ✓ Ensure your mixing bowl is 100% grease free before beating egg whites.
- ✓ Don't skip sifting the flour; clumps will weigh down the airy batter.
- ✓ Pour the milk soak while the cake is still warm (but not hot) to maximize suction.
- ✓ Let the cake rest for at least 4 hours (overnight is even better) to stabilize the dairy.
- ✓ Use full fat milks; low-fat versions lack the viscosity to "cling" to the crumb.
Adjusting Portions For Any Crowd
Scaling a sponge cake can be tricky because the ratio of egg volume to pan size is sensitive. If you want to double the recipe, I highly recommend using two separate 9x13 pans rather than one massive deep dish.
This ensures the heat penetrates the center of both cakes evenly and allows for more surface area for the milk soak.
When halving the recipe for a smaller family dinner, an 8x8 inch square pan is your best bet. You might find that using 2.5 eggs is difficult; in this case, use 3 small eggs or 2 extra large eggs to keep the moisture levels balanced. If you're looking for a different flavor profile while scaling, you might consider trying my Orange Creamsicle Cake which uses a similar citrus milk layering technique.
For those who want to prepare this in a commercial or catering setting, remember that once the cake is soaked, it becomes very heavy. Use sturdy glass or ceramic dishes that can handle the weight without flexing.
If you're doubling the soak, reduce the heavy cream by 10% to ensure the mixture stays thick enough to stay inside the cake rather than pooling at the bottom of the transport container.
Clarifying Traditional Baking Misconceptions
There is a loud contingent of bakers who claim that "authentic" Tres Leches must be made with a pound cake base. Honestly, don't even bother with that. A pound cake is far too dense and fatty; the butter in the batter coats the flour particles, preventing them from absorbing the milk mixture.
A true Tres Leches is almost always a sponge or chiffon base precisely because it lacks fat, making it the perfect vessel for the dairy.
Another myth is that you can't freeze a Tres Leches Cake. While you shouldn't freeze it after it’s been soaked (the ice crystals will destroy the delicate milk emulsion), you can absolutely freeze the dry sponge. Wrap it tightly in plastic wrap and foil, and it will stay fresh for up to three months.
When you're ready to serve, thaw it at room temperature, poke your holes, and proceed with the warm milk soak. It’s a fantastic trick for holiday prep.
Finally,, some people think you need to "boil" the milks together. This is unnecessary and can actually change the flavor of the sweetened condensed milk, making it taste metallic. Simply whisking them together at room temperature is sufficient.
The warmth of the cake itself will provide all the energy needed for the liquid to penetrate the crumb.
Preserving Freshness And Reducing Waste
This cake is the ultimate "leftover" dessert because the flavor actually improves on day two. The milks continue to mingle with the vanilla and egg, creating a more cohesive, custard like profile. Keep it covered with plastic wrap or a fitted lid in the refrigerator for up to 4 days.
After that, the whipped cream may start to weep or absorb "fridge smells," so it's best enjoyed early.
- Leftover Milk Soak
- If you find you have a half cup of the milk mixture left over, don't toss it! Use it as a creamer for your morning coffee or pour it over a bowl of oatmeal. It’s essentially a homemade "coffee mate" that is ten times better.
- Egg Shells
- Since we're using 5 large eggs, you'll have a lot of shells. Crush them up and add them to your garden soil; they are a fantastic calcium boost for tomato plants.
- Leftover Whipped Cream
- If you over whipped your topping, you can freeze dollops of it on a parchment lined sheet. Once frozen, pop them into a bag and drop one into a cup of hot cocoa for an instant treat.
Pairing Your Dessert With Perfect Sides
Because this cake is intensely sweet and rich, you want to pair it with things that offer high acidity or a bit of bitterness to cleanse the palate. A strong cup of black coffee or a dark roast espresso is the traditional partner, as the tannins in the coffee cut right through the dairy fat.
If you’re looking for more inspiration on rich, layered desserts, you might enjoy my Chocolate Layer Cake, which offers a similar decadence but with a deep cocoa focus. For a fruitier accompaniment, serve the Tres Leches with a side of tart macerated berries think raspberries or blackberries tossed in a little lime juice and mint. The zing of the lime acts like a spotlight, making the creamy sweetness of the cake shine even brighter.
| Method | Time | Texture | Best For |
|---|---|---|---|
| Traditional Oven | 30 minutes | Golden, sturdy crust | Classic texture and structural integrity |
| Stovetop Steam | 45 minutes | Pale, ultra soft | Moist, pudding like consistency (Mexican style) |
| Slow Cooker | 2 hours | Dense, moist | Set and forget for busy holidays |
Whatever method you choose, the goal is always the same: a cake that feels like a celebration in every spoonful. It’s a dish that demands you slow down, grab a big spoon, and enjoy the beautiful, milky mess of it all. Right then, let's get that oven preheated and start whisking those eggs!

Recipe FAQs
Is tres leches cake soggy?
No, it is intentionally moist. The cake is designed to absorb a significant amount of liquid, resulting in a rich, pudding like crumb that holds together without turning into mush.
Is tres leches cake Spanish or Mexican?
It is a Latin American creation. While its exact origins are debated across Central and South America, it is widely considered a staple of Mexican cuisine and is beloved across many Spanish speaking countries.
How long should tres leches cake soak in the fridge?
Refrigerate for at least 4 hours. Allowing the cake to rest for this duration is essential for the crumb to fully stabilize and absorb the milk mixture, though letting it sit overnight yields even better results.
What are the ingredients in tres leches?
The cake relies on a base of flour, baking powder, salt, eggs, sugar, milk, and vanilla. The signature soak is composed of evaporated milk, sweetened condensed milk, and heavy cream, topped with a whipped cream layer dusted with cinnamon.
How to ensure the egg whites reach stiff peaks?
Start with a 100% grease free mixing bowl. Even a trace of oil will prevent the proteins from bonding. If you enjoyed mastering this airy structural technique, see how we apply similar aeration logic in our velvet cake for a light crumb.
How to pour the milk soak correctly?
Pour the mixture while the cake is still warm. Piercing the surface thoroughly with a skewer beforehand creates channels that allow the liquid to penetrate the center rather than pooling only on the surface.
Is it true that I should use low-fat milk to keep the cake lighter?
No, this is a common misconception. You must use full fat dairy products, as the higher fat content provides the necessary viscosity to cling to the cake's crumb; low-fat alternatives are too thin and will simply drain to the bottom of the pan.
Authentic Tres Leches Cake
Ingredients:
Instructions:
Nutrition Facts:
| Calories | 414 kcal |
|---|---|
| Protein | 10.3 g |
| Fat | 19.7 g |
| Carbs | 47.3 g |
| Fiber | 0.5 g |
| Sugar | 37.8 g |
| Sodium | 133 mg |
