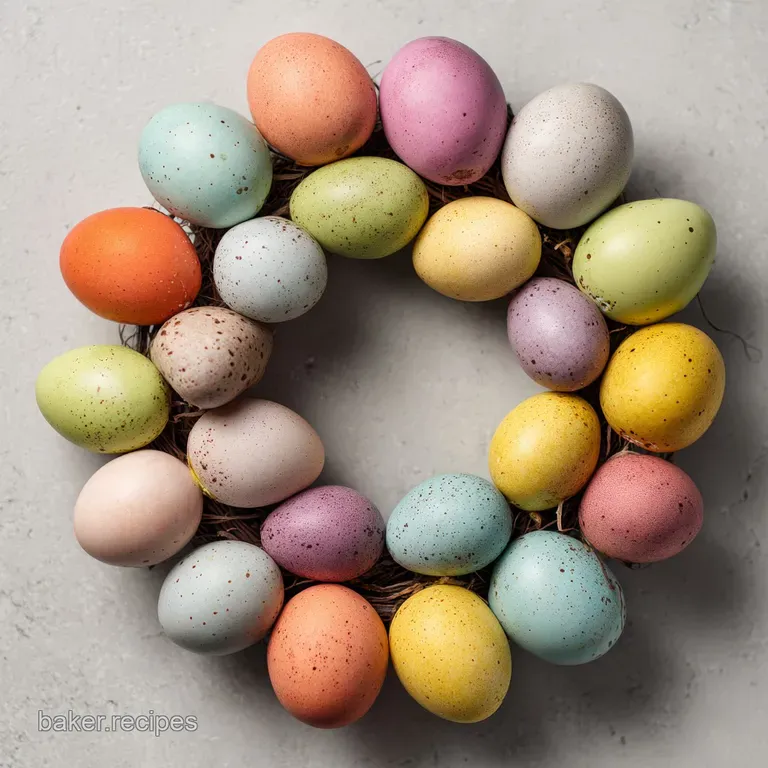
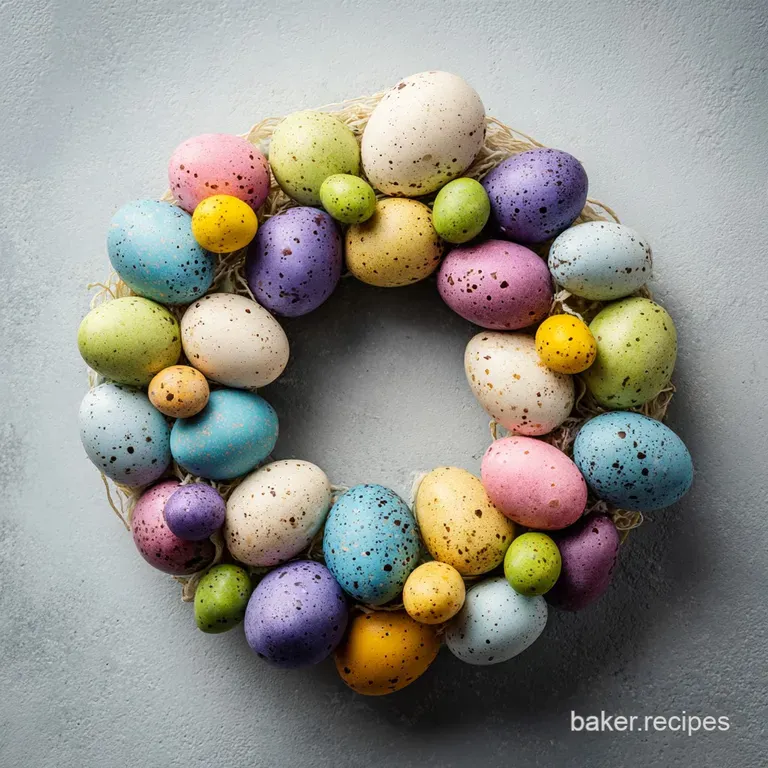
Easter Egg Wreath: Braided Holiday Bread
- Time: Active 110 minutes, Passive 25 minutes, Total 135 minutes
- Flavor/Texture Hook: Sweet, buttery brioche style crumb with a mahogany, crisp exterior.
- Perfect for: Festive family brunches or a seasonal orchard gathering.
- Mastering Your Homemade Easter Egg Wreath
- How the Braid Stays Strong
- Essential Specs for Holiday Baking
- Selecting Your Seasonal Elements
- Necessary Tools for Bread Success
- Detailed Steps for the Wreath
- Common Mistakes and Quick Fixes
- Simple Swaps for Unique Flavors
- Kitchen Myths About Enriched Dough
- Storage and Zero Waste Tips
- Stunning Holiday Table Presentation
- Recipe FAQs
- 📝 Recipe Card
Mastering Your Homemade Easter Egg Wreath
There is something truly grounding about the smell of a yeasty dough rising in a warm kitchen while the spring rain taps against the window. I remember my first attempt at this festive bread years ago.
I thought I could just use regular all purpose flour from the back of the pantry, and while it tasted fine, the whole thing collapsed into a flat, sad pancake under the weight of the decorative eggs.
It was a lesson in the hidden power of bread flour, which has become my absolute hero for any shaped loaf that needs to hold its own on a platter.
When you pull this wreath out of the oven, the aroma of toasted butter and sweet vanilla hits you like a warm hug. It is the kind of scent that brings people into the kitchen before the timer even goes off.
The bread flour provides that essential structure, ensuring the braids stay tight and the eggs stay nestled exactly where you put them. Without that extra protein, you just don't get that iconic lift and the "shatter" of the crust that makes the first bite so memorable.
We are making something that is as much a craft as it is a meal. Whether you are aiming for a classic spring look or something more vibrant like an easter egg wreath craft, this recipe is your foundation.
It's about patience, the feel of the dough under your palms, and the joy of seeing those bright pops of color peeking out from a mahogany brown braid. Let's get into why this specific method works so well for your holiday table.
How the Braid Stays Strong
Understanding the "why" behind the bake helps you adjust on the fly if things look a little different in your kitchen. This bread is an enriched dough, meaning we have added fat and sugar, which normally makes bread soft and floppy. Here is how we keep it structural:
- Protein Skeleton: Bread flour contains more gluten forming proteins than all purpose. This creates a stronger network that can support the heavy eggs without the braid sagging or spreading too wide.
- Enzymatic Browning: The combination of sugar, milk, and an egg yolk wash creates a deep color through a specific browning process. This gives you that professional mahogany finish without overbaking the interior.
- Thermal Regulation: By nesting raw eggs into the dough, we allow them to cook gently in the oven's ambient heat. The dough acts as an insulator, ensuring the eggs reach a safe temperature while the bread reaches its 190°F finish.
- Fat Emulsification: Gradually adding softened butter piece by-piece ensures it incorporates into the gluten rather than coating it. This results in a velvet crumb rather than a greasy or crumbly one.
| Thickness of Strand | Internal Temp | Rest Time | Visual Cue |
|---|---|---|---|
| 1.5 inches | 190°F | 15 minutes | Deep mahogany, hollow sound when tapped |
| 1.0 inch | 190°F | 10 minutes | Golden brown, firm to the touch |
| 2.0 inches | 190°F | 20 minutes | Dark brown, eggs are set firmly |
Providing enough rest time is the most overlooked part of this process. If you cut into the wreath too early, the steam escapes and the crumb can turn gummy. Let those starches set so every slice is airy and light.
Essential Specs for Holiday Baking
The weight and quality of your ingredients dictate the final texture of your Easter Egg Wreath. I always use farm fresh eggs when I can find them because the yolks are richer, giving the dough a more beautiful golden hue. Here is a look at the heavy hitters in this recipe:
| Ingredient | Role | Pro Secret |
|---|---|---|
| Bread Flour (500g) | Structural Base | Sift it first to ensure no clumps disrupt the gluten strands. |
| Active Dry Yeast (7g) | Leavening Agent | Bloom it in 110°F milk; anything hotter will kill the lift. |
| Unsalted Butter (75g) | Flavor & Softness | Use high-quality European butter for a higher fat content and better aroma. |
| Whole Milk (180ml) | Hydration | The fats in whole milk create a more tender "shred" when you pull the bread apart. |
Choosing the right flour is non negotiable here. I once tried to swap in cake flour because I wanted a "delicate" crumb, but the wreath looked like it had been through a rainstorm by the time it finished baking. Stick to the bread flour for that "skeleton" we talked about.
Selecting Your Seasonal Elements
For the most vibrant results, your eggs need to be stark white before dyeing. Brown eggs are beautiful for a rustic look, but they won't give you those neon or pastel pops that make this dish a centerpiece.
- 500g bread flour: Essential for the high protein count. Why this? Provides the strength to hold heavy eggs without collapsing.
- 180ml whole milk: Warm this to exactly 110°F. Why this? High fat content yields a softer, more luxurious crumb.
- 7g active dry yeast: Ensure it's fresh. Why this? The primary engine for the bread's rise and airy texture.
- 65g granulated sugar: Adds just enough sweetness. Why this? Feeds the yeast and aids in the mahogany crust browning.
- 75g unsalted butter: Softened to room temperature. Why this? Creates the velvety, rich mouthfeel of a classic brioche.
- 2 large eggs: Room temperature is best for mixing. Why this? Adds structure and a rich, golden color to the interior.
- 8g fine sea salt: Don't skip this. Why this? Controls yeast activity and prevents the bread from being bland.
- 5ml vanilla extract: Pure extract is always better. Why this? Adds a subtle floral aroma that balances the yeasty scent.
- 6 raw white eggs: For the "jewels" in the braid. Why this? They cook perfectly in the 25 minutes of oven time.
- Assorted Gel Coloring: Much more concentrated than liquid. Why this? Provides deep, saturated colors that won't fade as much during baking.
| Original Ingredient | Substitute | Why It Works |
|---|---|---|
| Whole Milk | Oat Milk (Full Fat) | Similar fat and sugar levels. Note: Crumb may be slightly less rich. |
| Bread Flour | All Purpose Flour | Add 1 tbsp vital wheat gluten to mimic bread flour protein. |
| Granulated Sugar | Honey | Adds moisture and floral notes. Note: Crust will brown much faster. |
Necessary Tools for Bread Success
You don't need a professional bakery setup, but a few key items make this much easier. A stand mixer such as a KitchenAid is a lifesaver for the 8 minute kneading process. If you don't have one, you can knead by hand, but be prepared for a workout. The dough is sticky at first, and it's tempting to add more flour.
Don't do it! Just keep kneading until it becomes smooth and elastic.
A digital thermometer is also vital. You need to know the milk is at 110°F so you don't kill the yeast, and you need to check that the bread is at 190°F so you don't end up with a raw middle.
If you are going for a diy easter egg wreath look, having a large, flat baking sheet is much better than a round pizza stone, as it gives the braid room to expand without touching the sides.
Detailed Steps for the Wreath
1. Preparing the Colorful Eggs
In small deep bowls, combine 500ml boiling water, 30ml white vinegar, and your gel food coloring. Submerge the 6 raw white eggs for 5 minutes until they are deeply pigmented. Remove them and pat them dry thoroughly with a paper towel.
Note: They will finish cooking later in the oven, so do not boil them beforehand.
2. Blooming the Yeast
Combine the 180ml warm milk (110°F), 7g active dry yeast, and 65g granulated sugar in your stand mixer bowl. Allow this to sit for about 5 minutes until it is foamy and smells like a brewery.
Note: If it doesn't foam, your yeast is likely dead and you need to start over.
3. Mixing the Dough
Add the 500g bread flour, 2 large eggs, 5ml vanilla extract, and 8g fine sea salt to the foamy yeast mixture. Use the dough hook on low speed and mix until a shaggy, messy mass forms.
4. Incorporating the Butter
Gradually add the 75g of softened unsalted butter piece by-piece while the mixer is running. Once the butter is in, increase the speed to medium and knead for exactly 8 minutes. Wait until the dough is smooth, elastic, and pulls away from the sides.
5. The First Rise
Place the dough in a greased bowl and cover it with a damp cloth. Let it rise in a warm, draft free spot for 90 minutes. Wait until it has doubled in size before moving to the next step.
6. Shaping the Wreath
Punch the dough down to release the air and divide it into three equal strands, each about 20 inches long. Braid the strands together loosely and join the ends to form a circular wreath on your parchment lined sheet.
7. Decorating and Glazing
Gently nestle the dyed raw eggs into the folds of your braid, spacing them out evenly. Whisk the egg yolk with 15ml heavy cream and brush this mixture generously over the dough. Sprinkle with your pearl sugar or sprinkles.
8. The Final Bake
Bake at 350°F (175°C) for 25 minutes. Bake until the crust is a deep mahogany brown and smells like a sweet pastry shop. Check the internal temperature to ensure it has reached 190°F.
9. Cooling Down
Transfer the wreath to a wire rack. Let it cool for at least 15 minutes before serving. This allows the internal structure to set so it doesn't collapse when sliced.
Common Mistakes and Quick Fixes
Why Your Dough Didn't Rise
If your wreath stays flat and dense, it usually comes back to the yeast or the temperature of the room. Yeast is a living thing, and it needs warmth but not heat. If your milk was too hot (over 120°F), you likely scorched the yeast.
Conversely, if your kitchen is chilly, the rise might take 2 hours instead of 90 minutes.
| Problem | Root Cause | Solution |
|---|---|---|
| Exploding Eggs | Trapped air in egg shell | Use a tiny pin to prick the fat end of the egg before dyeing. |
| Doughy Center | Underbaked interior | Use a thermometer; don't pull it until the center hits 190°F. |
| Colors Bleeding | Wet egg shells | Pat eggs completely dry after dyeing before nesting them in dough. |
Common Mistakes Checklist
- ✓ Ensure milk is 110°F (use a thermometer, don't guess with your finger)
- ✓ Knead for the full 8 minutes until the dough "cleans" the bowl
- ✓ Pat dyed eggs completely dry to prevent neon stains on the dough
- ✓ Don't skip the 15 minute rest period after baking
- ✓ Preheat your oven for at least 20 minutes to ensure even heat
Simple Swaps for Unique Flavors
If you want to move away from the traditional vanilla profile, there are plenty of ways to mix things up. You could add 1/2 teaspoon of ground cardamom for a Scandinavian twist, or even some lemon zest for a brighter, spring forward flavor.
For those looking for a simple easter egg wreath style that is more savory, you can omit the vanilla and pearl sugar and top the wreath with flaky sea salt and rosemary instead.
For a great brunch pairing, this sweet bread goes beautifully alongside a Broccoli Casserole recipe. The saltiness of the cheese and the freshness of the greens balance the rich, buttery crumb of the loaf.
The Dollar Tree Hack
If you are on a budget, you can find many of the decorative elements for your table, like the ribbons or even the food coloring, at a discount store. Just make sure your food coloring is food grade gel.
Using "plastic easter egg wreath" decorations around the base of your serving platter can also fill out the look without costing a fortune in extra ingredients.
| Method | Time | Texture | Best For |
|---|---|---|---|
| Stand Mixer | 8 mins kneading | Ultra smooth, consistent | Busy bakers who want perfection |
| Hand Kneading | 15 mins kneading | Rustic, slightly denser | Traditionalists who like the process |
| Bread Machine | Dough cycle | Soft, very uniform | Ease and convenience |
Kitchen Myths About Enriched Dough
One of the biggest misconceptions I hear is that you can't over knead dough by hand. While it is hard to do, you can actually break down the gluten structure if you are too aggressive for too long, leading to a bread that feels more like a brick.
Another myth is that the eggs in the wreath will be "rubbery" because they are baked. Actually, because they are cushioned by the dough, they steam gently, resulting in a texture very similar to a hard boiled egg.
People also often think that salt kills yeast on contact. While high concentrations of salt aren't great for yeast, mixing them into the flour first prevents any issues. Salt is actually necessary to slow the yeast down so the bread doesn't over proof and collapse.
Storage and Zero Waste Tips
This bread is best on the day it is made, but it will stay fresh in an airtight container at room temperature for up to 3 days. Because of the eggs, I usually recommend removing them from the wreath and storing them in the fridge if you aren't eating the whole loaf within a few hours.
To reheat, just pop a slice in the toaster or a 300°F oven for 5 minutes to bring back that "shatter" to the crust.
For a zero waste approach, don't throw away the leftover egg whites if you used extra yolks for the wash. You can make a Poached Eggs Benedict for breakfast the next morning. If the bread does go stale, it makes the most incredible French toast or bread pudding because the high fat content holds up so well to a custard soak. Even the eggshells from the decorative eggs can be crushed and added to your garden compost to provide calcium for your spring flowers.
Stunning Holiday Table Presentation
When it comes to serving your Easter Egg Wreath, the presentation is half the fun. I love placing the wreath on a large wooden board or a white ceramic cake stand to let the mahogany crust pop.
If you have any spring flowers from your orchard or garden, like pansies or apple blossoms, you can tuck them around the edges for a truly farm fresh aesthetic.
Avoid using a plastic easter egg wreath as a base for the hot bread, as it might melt; instead, use a linen napkin in a soft pastel color. If you want to go the extra mile, tie a small ribbon around the base of each dyed egg once the bread has cooled. It adds a level of "craft" that makes guests feel extra special.
Just remember to tell everyone the eggs are edible! There is nothing like the sound of that first slice being cut the "shatter" of the crust followed by the reveal of the soft, yellow velvet crumb inside. It is holiday magic on a plate.

Recipe FAQs
How to attach Easter eggs to a wreath?
Nestle the raw eggs directly into the folds of the braided dough before the final bake. The dough expands around the eggs as it rises, securing them firmly in place once baked.
Can I use real eggs for an Easter wreath?
Yes, you must use raw white eggs for the decoration. You will first dye them in a mixture of boiling water, vinegar, and gel food coloring for 5 minutes, pat them dry, and then bake them alongside the dough.
How to make egg wreaths?
Divide your prepared dough into three equal strands and braid them together. Join the ends to form a circle on your baking sheet, tuck the dyed raw eggs into the braids, and bake at 350°F for 25 minutes.
How much does it cost to make an egg wreath?
Costs vary based on your local pantry staples, but the recipe requires basic ingredients like bread flour, milk, yeast, butter, and eggs. If you enjoy the process of braiding and shaping dough here, you will find similar satisfaction in our no-bake holiday treats.
Is it true the eggs will cook through while the bread is baking?
Yes, the eggs hard boil during the 25-minute oven session. Because the internal temperature of the bread reaches 190°F, the eggs nestled inside will safely cook to a hard boiled consistency.
How to prevent the bread crust from getting too dark?
Monitor the oven closely as you reach the 25-minute mark. You are aiming for a deep mahogany brown, but if it browns too quickly, ensure your oven rack is in the center position to promote even heat distribution.
How should I store the wreath if I have leftovers?
Remove the eggs and store them in the refrigerator, then keep the bread in an airtight container at room temperature for up to 3 days. To restore the crust texture, reheat slices in a 300°F oven for 5 minutes.
Braided Easter Egg Wreath

Ingredients:
Instructions:
Nutrition Facts:
| Calories | 342 kcal |
|---|---|
| Protein | 11.1 g |
| Fat | 12.4 g |
| Carbs | 44.3 g |
| Fiber | 1.4 g |
| Sugar | 6.9 g |
| Sodium | 315 mg |
