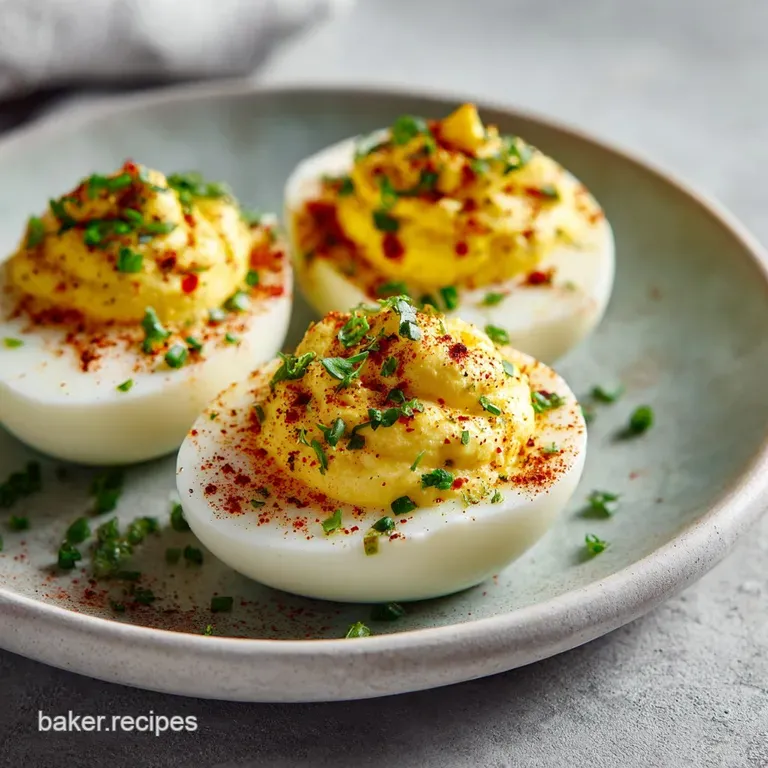
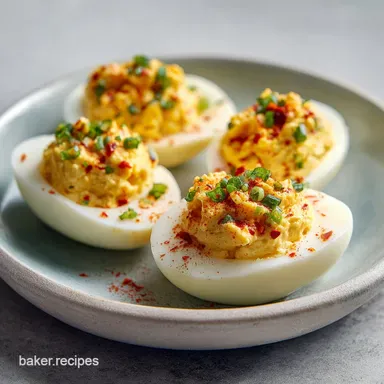
Deviled Eggs: Creamy and Silky
- Time: Active 15 minutes, Passive 12 minutes, Total 27 minutes
- Flavor/Texture Hook: Silky, tangy, and velvety filling
- Perfect for: Last minute potlucks, meal prep, or budget-friendly appetizers
- Why You’ll Love These Deviled Eggs
- Vital Recipe Specs and Times
- Selecting Your Smart Budget Ingredients
- Essential Gear for Perfect Eggs
- Step-By-Step Cooking Guide
- Fix Your Common Egg Problems
- Smart Swaps and Scaling Tips
- Storing and Using Every Scrap
- Serving Tips and Debunking Myths
- Recipe FAQs
- 📝 Recipe Card
Why You’ll Love These Deviled Eggs
There is nothing quite like the sound of a perfectly steamed eggshell giving way under your thumb. It’s that crisp, clean crackle that tells you the next twenty minutes of your life won't be spent picking tiny fragments of calcium off a mangled egg white.
I remember the first time I brought a tray of these to a neighborhood barbecue. I hadn't even finished setting the tray down before three people had already swooped in. They were gone in less than five minutes, and the most common question wasn't about the spices, but how on earth the texture was so much smoother than the heavy, mayo laden versions everyone else makes.
That’s the beauty of this version. It’s light, it’s punchy, and it doesn’t sit like a lead weight in your stomach. We’ve all been there, standing over a sink, frustrated because the shells are sticking to the whites like glue. This recipe fixes that frustration permanently.
It’s about taking a humble, inexpensive carton of eggs and turning it into something that feels like a treat. Plus, by using a mix of Greek yogurt and avocado oil mayo, we’re keeping things creamy while saving a few pennies and adding a nice hit of protein.
The payoff here is a tray of appetizers that look polished but cost almost nothing to produce. Whether you are hosting a formal brunch or just want a high protein snack to keep in the fridge, this method is the one you will come back to.
It’s reliable, it’s fast, and honestly, peeling the eggs becomes strangely therapeutic when the shells just slide off. You’ll never go back to the old way of boiling them in a chaotic pot of water again.
The Secret to That Clean Peel Most of us were taught to put eggs in cold water and bring it to a boil, but that’s exactly why the shells stick.
- Thermal Shock: Placing cold eggs directly into hot steam causes the egg white to shrink away from the membrane instantly. This creates a physical gap between the egg and the shell, making it "shatter" and peel away in large, clean pieces.
- Gentle Convection: Steam cooks the egg at a consistent temperature without the physical agitation of boiling water, which prevents the eggs from cracking against each other and keeps the yolks perfectly centered.
- Starch and Fat Stability: Using Greek yogurt adds lactic acid, which brightens the flavor profile and helps stabilize the emulsion of the yolks without needing excessive amounts of expensive oils.
| Method | Time | Texture | Best For |
|---|---|---|---|
| Steaming | 12 minutes | Tender whites, centered yolks | Easy peeling and presentation |
| Traditional Boil | 10-14 mins | Firm, sometimes rubbery | Chopped egg salad |
| Pressure Cooker | 5 minutes | Very firm | Large batches (24+ eggs) |
Choosing the right method is the difference between a messy kitchen and a beautiful platter. Steaming is the middle ground that offers the best texture with the least amount of effort. It’s a trick I learned after years of wasting egg whites that were too torn up to fill. If you're looking for how to make deviled eggs with absolute consistency, this thermal shock technique is the "aha!" moment you've been waiting for.
Vital Recipe Specs and Times
When it comes to eggs, precision is your best friend. A single minute can be the difference between a yolk that is still slightly jammy and one that has developed that unappealing gray green ring around the edge. For this recipe, we are aiming for the "goldilocks" zone: fully set but still buttery and bright yellow.
We are working with 6 large eggs, which gives us exactly 12 servings. This is the perfect amount for a standard egg carton half, making it easy to transport.
The temperature of your water is the first checkpoint. You aren't looking for a timid simmer; you want a rolling, vigorous boil before the eggs ever touch the steamer basket. This ensures the 12 minute timer starts the moment the eggs hit that over high heat environment.
If you start the timer while the water is still heating up, your results will be inconsistent every single time. Consistency is what turns a good cook into a great one, especially with something as temperamental as an egg.
| Component | Role | Pro Secret |
|---|---|---|
| Large Eggs | Structure and Base | Use eggs that have been in the fridge for a week; they peel better than farm fresh ones. |
| Greek Yogurt | Creaminess and Tang | Use full fat for the best mouthfeel; it mimics the richness of mayo at a lower cost. |
| Dijon Mustard | Emulsifier and Kick | It helps the oil and water in the yolk mixture stay bonded so the filling doesn't weep. |
The cooling phase is just as important as the cooking phase. An ice bath isn't a suggestion; it’s a requirement. You need to stop the carryover cooking immediately. If you leave those eggs on the counter to cool, they will keep cooking from the inside out, leading to a dry yolk that tastes like sulfur.
Ten minutes in a 50/50 mix of ice and water is the magic number to ensure the yolks stay vibrant and the texture remains velvety rather than chalky.
Selecting Your Smart Budget Ingredients
One of the best things about this dish is that you probably already have everything you need in your pantry. We are focusing on "budget smart" choices here, which means we aren't buying specialized oils or expensive "artisanal" vinegars. We are using what works.
The avocado oil mayonnaise is a great choice for those looking for heart healthy fats, but if you have standard mayo on hand, that works perfectly too. The key is the balance of fat and acid.
The Greek yogurt is our secret weapon for stretching the filling and adding a modern tang without the heavy price tag of premium spreads. It provides a thick, luscious body to the mixture that allows us to use less mayo. When you're shopping, look for plain, unsweetened yogurt.
If you only have sour cream, it’s a fantastic 1:1 substitute that offers a similar richness. This flexibility is what makes this recipe so accessible for a Tuesday night snack or a Sunday brunch.
- 6 Large Eggs: The foundation. Why this? They provide the perfect vessel for filling and consistent cook times.
- 2 tbsp Avocado Oil Mayonnaise: The creamy base. (Substitute: Standard Mayonnaise)
- 2 tbsp Plain Greek Yogurt: The tangy lightener. (Substitute: Sour Cream) Why this? Adds protein and body without extra grease.
- 1 tsp Dijon Mustard: The flavor sharpener. (Substitute: Yellow Mustard)
- 1 tsp Apple Cider Vinegar: The acid. (Substitute: White Vinegar or Lemon Juice)
- 1 tbsp Sweet Pickle Relish: The texture and sweetness. (Substitute: Finely chopped dill pickles)
- 1/4 tsp Fine Sea Salt: The flavor enhancer. (Substitute: Table salt)
- 1/8 tsp Black Pepper: The subtle heat. Why this? Freshly cracked provides a floral aroma that pre ground lacks.
- 1/2 tsp Smoked Paprika: The classic finish. (Substitute: Cayenne pepper for heat)
- 1 tbsp Fresh Chives: The aromatic garnish. (Substitute: Scallion tops)
The apple cider vinegar provides a softer, fruitier acidity than standard white vinegar, which can sometimes be a bit harsh. However, if you're on a tight budget, don't go out and buy a whole bottle of ACV just for one teaspoon.
White vinegar or even a squeeze of lemon will do the job of cutting through the fat of the yolk and mayo. The goal is to wake up the palate, not overwhelm it with one specific flavor.
Essential Gear for Perfect Eggs
You don't need a high end kitchen to pull this off, but a few specific tools will make your life significantly easier. The most important is a pot with a tight fitting lid. If the steam escapes, the temperature drops, and your 12 minute timer becomes useless.
A basic steamer basket the kind that folds up like a silver flower is a worth it investment that costs very little and ensures the eggs never touch the boiling water, preventing them from bouncing and cracking.
Another tool that changes the game is a fine mesh sieve. If you want that ultra smooth, "how did they do that?" texture in your filling, you have to push the cooked yolks through the sieve with the back of a spoon.
It breaks up every single lump and creates a fine yolk "dust" that incorporates perfectly with the wet ingredients. It takes an extra two minutes, but the results are velvety and professional. It’s the difference between a homemade snack and a restaurant quality appetizer.
| Premium Tool | Budget Alternative | Flavor/Texture Impact |
|---|---|---|
| Piping Bag & Tip | Zip top bag with cut corner | Same taste, slightly less decorative appearance. |
| Fine Mesh Sieve | Thorough mashing with a fork | Slightly more rustic, textured filling. |
| Mandoline (for chives) | Sharp chef's knife | Knife works fine if you take your time with thin slices. |
Finally,, a simple zip top bag is all you need for the "piping." You don't need fancy plastic tips or pastry bags. Just snip the corner off a sandwich bag and you’re in business. This keeps the process clean and allows you to distribute the filling evenly without making a mess of the egg whites.
It’s these little efficiencies that keep cooking fun rather than a chore.
step-by-step Cooking Guide

Now we get into the actual rhythm of the kitchen. Cooking is about timing and sensory cues. You want to hear the water boiling, feel the cold of the ice bath, and see the texture of the yolks change as you mix them. Follow these steps exactly, and you'll have a perfect tray every time.
- Bring 1 inch of water to a rolling boil in a pot. Note: Using only an inch allows the water to reach temperature quickly and provides plenty of steam.
- Place cold eggs into a steamer basket and lower into the pot. Cover tightly and steam for 12 minutes. Wait until you see steady steam escaping the lid before you start your timer.
- Prepare an ice bath with 50% ice and 50% cold water. Note: This rapid cooling prevents the green ring and makes the egg shrink for easier peeling.
- Immediately transfer the steamed eggs to the ice bath for at least 10 minutes. Touch the eggs to ensure they feel cold to the core.
- Gently crack eggshells and peel under cold running water. Listen for the 'shatter' sound as you tap the shell against the counter.
- Slice eggs in half lengthwise using a damp knife. Note: Wiping the knife between cuts keeps the whites clean and prevents yolk buildup.
- Remove the yolks and push them through a fine mesh sieve into a bowl. Look for a fine, sandy texture that is free of large lumps.
- Combine yolks with mayo, Greek yogurt, mustard, vinegar, relish, salt, and pepper. Mix until velvety and smooth with no visible streaks of yogurt.
- Transfer the yolk mixture to a piping bag. Pipe the filling evenly into the centers of the egg whites until they are mounded and full.
- Garnish with a dusting of smoked paprika and minced fresh chives. Serve immediately or chill until needed.
When you are peeling, I find it's best to start at the wider end of the egg. There is usually a small air pocket there that gives you a "foothold" to get under the membrane. Once you get under that thin skin, the whole shell usually comes off in two or three large pieces.
If you're struggling, keep the egg submerged in the water while you peel; the water helps lubricate the space between the shell and the white, making it even easier.
Fix Your Common Egg Problems
Even with a perfect recipe, things can go sideways. Maybe your eggs were too fresh, or maybe your stove runs a bit hot. Don't panic. Most "egg disasters" are easily fixable if you know what to look for. One of the most common issues is a lumpy filling.
This usually happens if the yolks weren't mashed thoroughly before adding the liquids. If you didn't use a sieve, you can still save it by using a small whisk or even a hand mixer to whip the filling until it's aerated and smooth.
To Fix a Lumpy Filling
If you've already mixed everything together and you see little yellow "pebbles" in your filling, the best way to fix it is to pass the entire mixture through that fine mesh sieve. It’s a bit messy, but it’s the only way to get that silky texture back once the liquids are in.
Another trick is to add just a teaspoon more of the Greek yogurt; the extra moisture and acidity help break down the yolk proteins and smooth things out.
For Off Center Yolks
This is purely a visual issue, but it can be annoying. If your yolks are hugging one side of the white, it usually means the eggs sat in one position in the fridge for too long. To prevent this next time, try storing your egg carton on its side for 24 hours before cooking.
If it’s already happened, just use a small spoon to slightly enlarge the hole in the white to make the filling look centered. No one will notice once the paprika is on!
| Problem | Root Cause | Solution |
|---|---|---|
| Green Ring on Yolk | Overcooking or slow cooling | Reduce cook time by 1 min and use more ice in the bath. |
| Shells Sticking | Eggs were too fresh or water wasn't hot enough | Use "older" eggs and ensure water is at a rolling boil before adding eggs. |
| Rubbery Whites | Boiling too vigorously | Switch to the steaming method to keep the heat gentle. |
If you find that your filling is too runny, it’s likely because of the relish or the vinegar. To avoid this, always drain your relish in a small paper towel before adding it to the bowl. You want the flavor of the pickle, not the extra brine.
If it's already too thin, add one extra hard boiled yolk (if you have one) or a tiny pinch of instant mashed potato flakes. It sounds crazy, but it’s a budget friendly thickener that won't change the flavor profile!
Common Mistakes Checklist
- ✓ Never start your eggs in cold water; the "hot start" is the key to peeling.
- ✓ Don't skip the ice bath; 10 minutes is the minimum for a perfect texture.
- ✓ Avoid using "farm fresh" eggs for deviling; supermarket eggs that are a week old are much easier to work with.
- ✓ Pat the egg whites completely dry before filling; any moisture on the surface will make the filling slide around.
- ✓ Wipe your knife with a damp cloth after every single cut for those clean, professional edges.
Smart Swaps and Scaling Tips
Scaling this recipe is incredibly easy because eggs are naturally modular. If you're cooking for a crowd, you can easily double or triple the recipe. However, be careful not to overcrowd your steamer basket.
If the eggs are piled three layers deep, the steam won't circulate evenly, and the ones in the middle will be undercooked. Work in batches of 12 for the best results.
If you are looking for easy deviled eggs that cater to different tastes, this base recipe is your canvas. You can swap the sweet relish for spicy jalapeños if you want a "devil" that actually bites back. For a budget friendly umami boost, a drop of Worcestershire sauce or even a tiny bit of soy sauce can replace the salt and add a deep, savory layer that keeps people guessing what the secret ingredient is.
- Scaling Down (3 eggs): Use a smaller pot but keep the water at 1 inch. All ingredient measurements are simply halved.
- Scaling Up (18-24 eggs): Increase spices to only 1.5x the original amount first, then taste. Liquids (mayo/yogurt) should be doubled exactly.
- dairy-free: Replace the Greek yogurt with an equal amount of additional avocado oil mayo or a dairy-free sour cream alternative.
If you are doubling the recipe, remember that the 12 minute steam time stays the same as long as the eggs are in a single layer. If you have to stack them, add 2 minutes to the timer and rotate the eggs halfway through. When it comes to seasoning, salt is powerful.
When scaling up, I always suggest adding the salt in small increments. You can always add more, but you can't take it out once it’s in that delicate yolk mixture!
Storing and Using Every Scrap
Deviled eggs are best enjoyed fresh, but they can certainly be made ahead of time. The secret to a "make-ahead" egg is keeping the components separate. Store the empty, cleaned whites in a sealed container with a damp paper towel to keep them from drying out.
Put the filling in a zip top bag with all the air squeezed out. This prevents the filling from developing a crust or oxidizing. When you're ready to serve, just snip the corner and pipe!
Storage GuidelinesFridge: Assembled eggs last 2 days. Separate components last 3 days. Freezer: Do not freeze. The whites will become watery and tough, and the emulsion in the filling will break.
Zero Waste Tips Don't throw away those eggshells! If you have a garden, crushed eggshells are a fantastic source of calcium for your soil, especially for tomato plants. You can also save any "mangled" egg whites that didn't make the beauty pageant cut.
Chop them up and mix them with a bit of the leftover filling to make a quick egg salad sandwich for lunch the next day. Even the herb stems from your chives can be tossed into a freezer bag for your next batch of vegetable stock.
Serving Tips and Debunking Myths
When it comes to serving, temperature is everything. These should be served chilled. If they sit out at room temperature for more than two hours, the mayo and yogurt can start to lose their structure, and from a food safety standpoint, you're entering the danger zone. I like to serve mine on a chilled ceramic platter.
If it’s a hot day, you can even set your serving plate on top of a larger tray filled with crushed ice to keep them snappy and fresh.
There are so many myths surrounding the humble deviled egg. You've probably heard that adding vinegar to the boiling water makes them easier to peel. Honestly, in my experience, it does almost nothing. The "hot start" steaming method is ten times more effective than any additive in the water.
Another myth is that the "green ring" is a sign of an old egg. It’s actually just a chemical reaction between the iron in the yolk and the sulfur in the white, caused entirely by overcooking. If you follow the 12 minute rule and the ice bath, you'll never see that ring again.
| Feature | Freshly Steamed | Pre Cooked (store-bought) |
|---|---|---|
| Flavor | Bright, clean, and customizable | Often has a chemical preservative aftertaste |
| Texture | Velvety and soft | Can be rubbery or overly firm |
| Cost | ~$0.20 per egg | ~$1.00+ per egg |
The term "deviled" originally referred to food that was highly seasoned or spicy. While our classic version is more tangy than spicy, you can lean into that history by adding a dash of hot sauce or a pinch of cayenne. It’s a fun conversation starter at parties.
Whether you stick to the budget smart classic or branch out into spicy territory, these eggs are a testament to the fact that you don't need expensive ingredients to make something truly memorable. Just a little bit of science, a timer, and a carton of eggs.
Frequently Asked Questions
Why are my deviled egg yolks gray or green?
This is caused by overcooking. When an egg is heated too long, the sulfur in the whites reacts with the iron in the yolks, creating a green gray film. To prevent this, stick strictly to the 12 minute steam time and immediately submerge the eggs in an ice bath to stop the cooking process.
Can I make deviled eggs a day in advance?
Yes! For the best results, store the whites and the filling separately. Place the whites in an airtight container and keep the filling in a sealed piping bag. Assemble them just before serving to ensure the filling stays moist and the whites stay crisp.
What is the best way to peel hard boiled eggs?
The "hot start" method is the most effective. By placing cold eggs into hot steam (or boiling water), the membrane pulls away from the shell. After cooling in an ice bath for 10 minutes, crack the shell all over and peel under cold running water.
Is it okay to use Greek yogurt instead of mayonnaise?
Absolutely. This recipe uses a 50/50 split of Greek yogurt and mayonnaise to provide a tangy, creamy texture with more protein and less fat. You can even use 100% yogurt, though the filling will be much tangier and slightly less rich.
How long can deviled eggs sit out at a party?
For food safety, deviled eggs should not sit at room temperature for more than 2 hours. If the temperature is above 90°F (32°C), that time drops to 1 hour. Keep them on a bed of ice if they need to be out longer.

Recipe FAQs
What are the ingredients in deviled eggs?
This recipe requires 6 large eggs, 2 cups of water, 2 tablespoons each of avocado oil mayonnaise and plain Greek yogurt. You will also need 1 teaspoon each of Dijon mustard and apple cider vinegar, 1 tablespoon of sweet pickle relish, 1/4 teaspoon sea salt, 1/8 teaspoon black pepper, 1/2 teaspoon
smoked paprika, and 1 tablespoon fresh minced chives.
What is the secret to the best deviled eggs?
Pushing your cooked yolks through a fine mesh sieve is the ultimate trick for a silky, velvety filling. If you enjoyed mastering that sieve technique, notice how the same attention to ingredient texture is required for a silky custard.
What are the five golden rules of deviled eggs?
Steam the eggs for exactly 12 minutes, use a 50/50 ice bath for 10 minutes, peel under cold running water, pass yolks through a sieve, and store components separately. Following these steps ensures your egg whites stay tender and your yolk mixture remains perfectly smooth until serving.
What is the secret ingredient in deviled eggs?
Greek yogurt is the secret to balancing the richness of the mayonnaise. It adds a subtle tang and keeps the filling light, preventing the mixture from becoming overly greasy or heavy.
How to keep deviled eggs from drying out when made in advance?
Store your empty egg white halves in a sealed container lined with a damp paper towel. Keep your yolk filling in a zip-top bag with all the air squeezed out to prevent it from oxidizing or forming a crust before you are ready to pipe.
Is it true I must boil my eggs in a full pot of water?
No, this is a common misconception. You only need 1 inch of water to create the steam necessary to cook your eggs effectively, which allows the water to reach a boil much faster than a full pot.
How to get the yolks perfectly smooth?
Force the cooked yolks through a fine mesh sieve using the back of a spoon or spatula. This removes any stubborn lumps and aerates the mixture, creating the ideal consistency for piping through a bag.
Creamy Deviled Eggs
Ingredients:
Instructions:
Nutrition Facts:
| Calories | 57 calories |
|---|---|
| Protein | 3.2 g |
| Fat | 4.5 g |
| Carbs | 0.7 g |
| Fiber | 0.1 g |
| Sugar | 0.5 g |
| Sodium | 85 mg |
