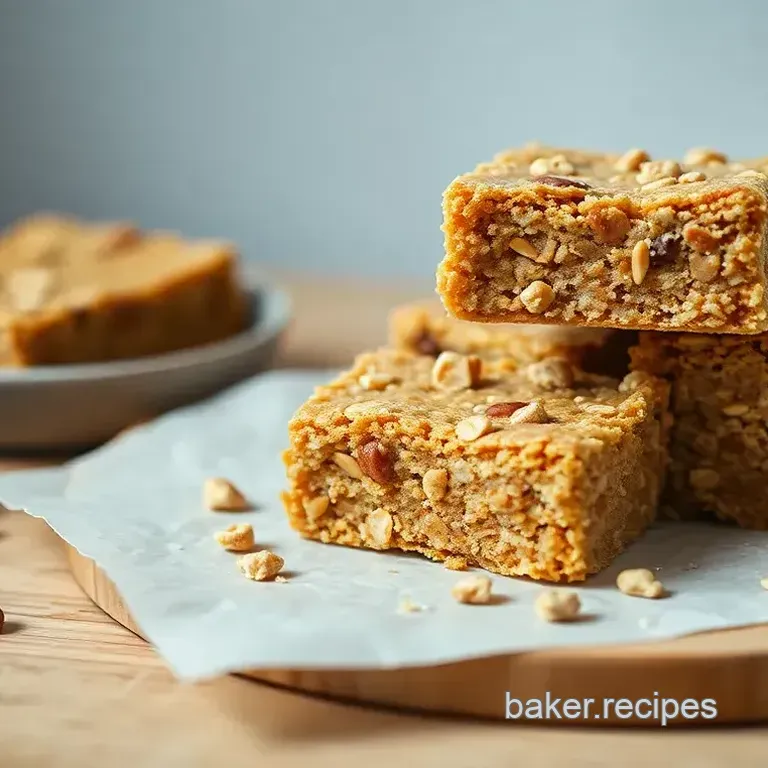
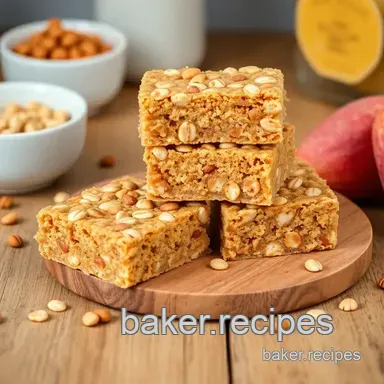
Delicious Peanut Butter Oatmeal Bars Ready in Just 30 Minutes
- Start Your Day Right: Bake Peanut Butter Oatmeal Bars in 30 Minutes
- A Little History: How Did We Get Here?
- What's the Time Commitment?
- Why You’ll Love These Chewy Oat Bars
- Your Essential Ingredients Guide to Bake Peanut Butter Oatmeal Bars in 30 Minutes
- The Art of Professional Cooking: Getting Ready and Cooking Smart!
- Pro Tips & Secrets
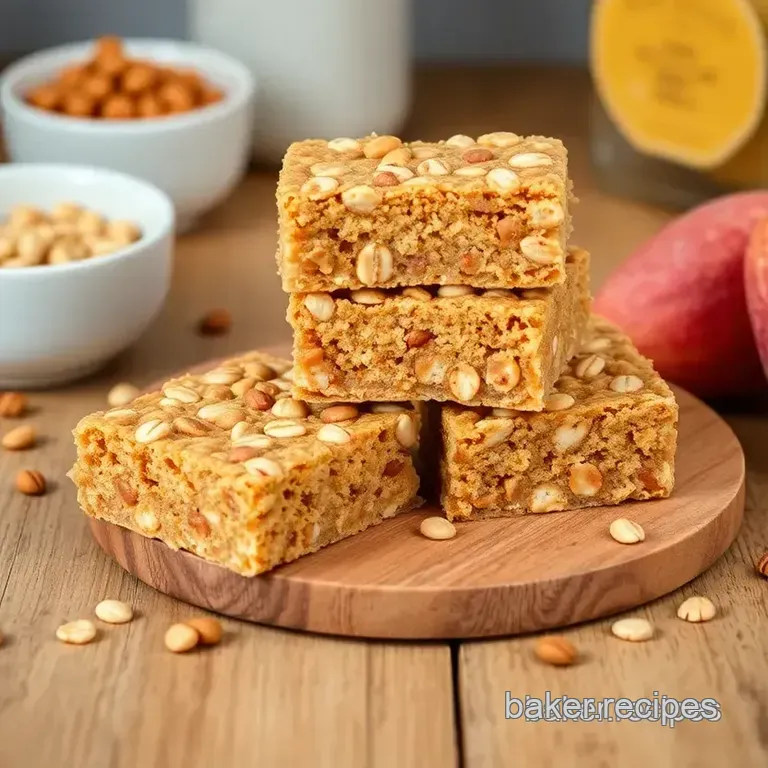
- Perfect Presentation
- Storage & Make-Ahead
- Creative Variations
- Complete Nutrition Guide
- Wrapping It Up
- Frequently Asked Questions
- 📝 Recipe Card
Start Your Day Right: Bake Peanut Butter Oatmeal Bars in 30 Minutes
You know those mornings when your alarm goes off, and you realize you've got barely any time to whip up breakfast? we've all been there, right? i used to scramble to find something nutritious before rushing out the door.
But then i discovered this magical recipe: bake peanut butter oatmeal bars in 30 minutes . seriously, they saved my mornings! not only are these bars a deliciously nutty treat, but they also keep me fueled until lunch.
Can we talk about how life changing that was?
Quick oatmeal bars recipe is a lifesaver. these bars blend creamy peanut butter with hearty oats for a sweet fix without the guilt.
Trust me, once you take a bite, you're gonna feel like you've hit the snack jackpot! these bars are perfect for busy folks, kids, or anyone who just loves a good snack.
Plus, you can customize them easily.
A Little History: How Did We Get Here?
It turns out, oatmeal bars have a bit of a backstory, just like your favorite family recipe. oats have been a staple food for centuries, dating back to ancient times when people initially used them for sustenance.
Fast forward to today, and oatmeal bars are everywhere: biting into one feels like you're carrying a piece of history right in your hand!
Nowadays, they’re a hit for good reason. life is fast, and who has time to bake complicated things? we need 30-minute recipes that get us through the day, and these bars get the job done with ease.
They’re not just for breakfast; you can enjoy them for lunch or an afternoon snack when that 3 pm crash hits.
What's the Time Commitment?
You won't believe how quick this is! in just 30 minutes , you’ll whip these up from prep to oven to munching bliss.
The prep only takes about 10 minutes , and then you pop ‘em in the oven for 20 minutes .
Easy peasy, right? and the cost? so wallet friendly! you probably have most of the ingredients chilling in your pantry, which means a delicious treat that won't break the bank.
Why You’ll Love These Chewy Oat Bars
So, why should you make these bars? Well, let’s break it down :
Health benefits galore : these bars pack some serious nutrition. you get fiber from the oats and a protein punch from the peanut butter.
Plus, they’re filled with healthy fats that keep you feeling full.
Unique Selling Points : Unlike store-bought bars, these are homemade oatmeal bars made with love, packed with wholesome ingredients, and you control the sweetness. That’s right, no hidden sugars here!
Any occasion : need a quick snack for the kids? perfect! want something to bring to the office? yep, these are great too.
They make excellent energy boosting snacks for pre-workout fuel or post yoga snacks!
Better than store-bought : Seriously, these healthy dessert options beat those packaged granola bars any day. No random ingredients or weird preservatives just good old-fashioned baking with oats and nuts .
Now you’re probably itching to know what goes into these little squares of joy. stick with me! we’re diving right into the ingredients next, and i promise it’ll be as simple as pie, or.
..um, bars!
Your Essential Ingredients Guide to Bake Peanut Butter Oatmeal Bars in 30 Minutes
Let’s dive right into the heart of baking! before those delicious peanut butter oatmeal bars can emerge from your oven, you need to know about the essential ingredients that make them shine.
Trust me, this will make your baking adventure way smoother!
Premium Core Components
Alright, time for a little break down on what you need. Here’s the scoop:
- 2 cups rolled oats (180g): Think of them as the base of your bars, giving them that chewy texture we all love.
- 1 cup creamy peanut butter (240g): Oh my gosh, I can already smell it. This gives that rich, nutty flavor and helps bind everything together.
- ½ cup honey or maple syrup (120ml): The sweetness factor! You can totally swap this out if you’re feeling adventurous, but I’m a honey fan all the way!
- 1 large egg, beaten: This adds some fluffiness. If you're baking vegan, sub it out with a flax egg.
- 1 tsp vanilla extract (5ml): It’s the magic touch that elevates the flavor.
- ½ tsp baking powder (2g): Just a pinch to help your bars rise.
- ½ tsp salt (3g): Salt’s your friend here. It enhances all those sweet flavors.
Now, here’s the fun part: Quality indicators . Check if your oats look fresh and not stale, and give that peanut butter a good stir to make sure it's nice and creamy!
Storage guidelines? Keep those bars in an airtight container at room temperature, and they’ll last about a week. Want ‘em for longer? Store in the fridge for a couple of weeks!
Signature Seasoning Blend
Now let’s sprinkle a little pizzazz. While these bars are pretty perfect as-is, you can totally amp it up.
- Optional add-ins: A ½ cup of chocolate chips? Heck yes! Or toss in some chopped nuts for extra crunch!
- Herbs and spices: True, it's not the usual approach with a sweet bar, but consider adding a hint of cinnamon for a warm touch.
You can also play with flavor enhancers. Maybe vanilla beans instead of extract? Fancy!
Smart Substitutions
Speaking of swapping things out, let’s say you’re in a pinch:
- Can’t find honey? Agave or good ol' sugar can do the trick.
- No oats? You could use quick cook oats, but just know they’ll change the texture a bit.
And if you’re all about those dietary modifications —no problem! You can make gluten-free oatmeal bars by picking certified gluten-free oats.
Kitchen Equipment Essentials
Here’s what you’ll need to whip this up:
- 8x8-inch (20x20cm) baking pan: Perfect for these bars.
- Mixing bowls & spatula: Gotta mix things up and spread that deliciousness!
- Measuring cups/spoons: Don’t skimp on measuring. It really impacts your final product.
For quick meal prep ideas, make sure to organize your kitchen before you start. Trust me, it saves you from panic mode halfway through mixing!
Why These Bars are Your Best Baker Friend
Not only are these bars quick and easy , but they also make for the absolute perfect pre-workout snack . packed with protein, they’re great as nutritious breakfast bars too! plus, if you’ve got kiddos running around, they can help with the mixing.
It’s a fun way to spend an afternoon!
So, there you have it! with the knowledge of essential ingredients and how to handle them, you’re ready to dive into the next section.
Get your oven prepped, and let’s learn the step-by-step instructions to bake peanut butter oatmeal bars in just 30 minutes! your new favorite snack is about to happen.
The Art of Professional Cooking: Getting Ready and Cooking Smart!
Okay, let’s be real for a sec. cooking isn’t always a walk in the park, especially if you’re trying to whip something up that’ll impress.
I’ve definitely been in those predicaments fumbling around the kitchen, flour flying everywhere! but trust me, learning a professional cooking method can really up your game.
Let’s break it down, starting with some essential preparation steps.
Essential Preparation Steps
First things first: mise en place it’s a fancy french term that basically means getting everything ready before you start cooking.
Chop, measure, and have your ingredients lined up. you’ll be amazed at how much smoother it goes when you’re not scrambling for the peanut butter while the oven’s screaming at you.
Time management is key, too. set a timer for each step, so you don’t find yourself lost in thought and over cooked your beautiful peanut butter oatmeal bars.
Seriously, i once left cookies in the oven too long and had to toss them. lesson learned!
Now, let’s get organized. keep your workspace tidy. stash away anything you’re not using; trust me, it’ll make a world of difference.
And as much as we love to multitask, safety should always come first. be mindful of hot surfaces and sharp knives.
I can’t tell you how many times i’ve had a close call hot ovens and me don’t get along sometimes!
step-by-step Process
Alright, now that we are prepped up, let’s jump into the step-by-step process to get those bars baked up!
- Preheat Oven: Preheat your oven to 350° F ( 175° C) .
- Prepare Baking Pan: Line an 8x8-inch pan with parchment paper or give it a good grease.
- Mix Dry Ingredients: In one bowl, combine 2 cups of rolled oats, ½ tsp baking powder, and ½ tsp salt.
- Combine Wet Ingredients: In another bowl, mix 1 cup of creamy peanut butter, ½ cup honey (or maple syrup), 1 beaten egg, and 1 tsp vanilla until smooth.
- Combine Mixtures: Mix the dry and wet ingredients together until it’s all well combined.
- Add Extras: If you’re feeling fancy, fold in ½ cup chocolate chips or nuts at this point.
- Transfer Mixture: Spoon it into the prepared baking pan. Spread it out nicely; it should be even.
- Bake: Pop it in the oven for 20 minutes or until the edges turn golden.
- Cool & Cut: Let it cool for about 10 minutes , then cut into bars.
When checking for doneness, a toothpick in the middle should come out clean. What a satisfying little ritual, right?
Expert Techniques
This is where you can show off those expert techniques . remember to keep an eye on temperature control ; always trust your thermometer (or your nose!).
If things start to smell a little burnt, it might be time to take a peek.
Watch for timing precision. those bars are usually done in about 20 minutes , but ovens can be sneaky.
And hey, if you see them puffing up, you're on the right track!
Success Strategies
Now, let’s cover those success strategies . One common mistake is not measuring your ingredients accurately. Use a kitchen scale or measuring cups. It really does matter!
For quality assurance, always give your bars a look over before pulling them out. and if you are feeling proactive, make a double batch! these peanut butter oatmeal bars are not just a simple baking recipe ; they’re perfect for meal prepping those healthy quick treats.
Fun fact: you can even personalize these homemade oatmeal bars with what’s in your pantry! Nuts, seeds, or even dried fruit just mix it up!
Final Thoughts
As you relax with your freshly baked peanut butter oatmeal bars , remember that baking can be creative and fulfilling, especially for those busy days when you need filling snacks .
You can make these bars ahead of time and freeze them for later, or enjoy them fresh out of the oven!
Baking your way doesn’t have to be all serious and complicated. it’s about finding joy in the kitchen and enjoying each bite of your nutritious breakfast bars .
And as you continue your culinary journey, keep an eye out for more tips and tricks in the next section: additional information.
Happy baking, my friends!
Pro Tips & Secrets
Alright, let’s kick things off with some pro tips to make those Peanut Butter Oatmeal Bars shine!
First, have you ever tried toasting the oats before mixing? it honestly elevates the flavor, giving you that delicious toasted goodness in every bite.
Just pop them in the oven for a few minutes until they’re lightly golden. it’s a time saver , too, since you can do it while gathering the other ingredients.
Multi tasking is the name of the game here!
Speaking of flavors, think about adding spices like cinnamon or nutmeg. seriously, a pinch of these can turn your bars into a cozy dessert experience! also, if you’re like me and adore a hint of sweetness , don’t hesitate to toss a few chocolate chips or chopped nuts in there.
It’s a no-brainer.
Now, for that gorgeous presentation : cut the bars into perfectly even squares or rectangles for that professional look. You want your friends to drool when they see them!
Perfect Presentation
When it comes to plating , don’t skimp on the fun! grab a colorful plate and arrange your bars neatly, maybe with a dusting of powdered sugar on top for flair.
Add a few slices of fresh fruit on the side for a pop of color. seriously, those little touches make all the difference.
For garnish ideas , think about drizzling a bit of melted chocolate over the bars. it’s like giving them a little chocolatey hug.
And trust me, the kids will go nuts for it!
Oh, and if you're feeling a little extra, scoop some Greek yogurt on the side. It not only adds creaminess but also gives your bars a wholesome vibe.
Storage & make-ahead
Let’s chat about storage . you can keep your peanut butter oatmeal bars in an airtight container at room temperature for about a week.
But if you want to extend that life a bit, toss them in the fridge. they’ll stay fresh for over a week there!
If you’re into meal prep snacks , make a big batch on a weekend and freeze individual portions. just wrap them in plastic wrap and pop them in a freezer bag.
Easy peasy! when you're ready to snack, let them thaw for a bit, and they’ll be just as tasty as fresh.
And hey, for reheating ? Just pop one in the microwave for a few seconds. Warm peanut buttery goodness? Yes, please!
Creative Variations
Feeling adventurous? Let’s explore some creative variations . You can turn your bars into gluten-free oatmeal bars by using certified gluten-free oats. This simple switch ensures everyone can munch happily!
You could also swap out the peanut butter for almond butter or even go nut-free with sunflower seed butter . and if you wanna really spice things up, try adding some dried fruits like cranberries or apricots for a chewy twist.
For a seasonal touch, how about a little pumpkin spice in the fall? Or coconut flakes for a tropical vibe in the summer? The options are endless, my friend!
Complete Nutrition Guide
Now, onto the nitty gritty of nutrition. each bar packs a punch with about 180 calories , 5 grams of protein, and healthy fats from the peanut butter.
You’re getting a wholesome snack that keeps you energized, making these bars a perfect pre-workout snack . who needs those expensive protein bars when you can whip these up?
Consider your portions too. Cutting them into 12 bars means you’re keeping it controlled, which is always a good idea when it’s that delicious!
Wrapping It Up
So, there you have it! making your peanut butter oatmeal bars in just 30 minutes is not only simple but super satisfying.
They make for a killer snack or breakfast option that is nutritious yet indulgent. and whether you're a busy parent looking for kids’ snack ideas or someone who just loves easy meal prep ideas , these bars have got your back!
Remember, don’t hesitate to experiment and make it your own! cooking is all about having fun, experimenting, and maybe even getting a little messy in the process.
So grab those ingredients and start baking! happy snacking!
Frequently Asked Questions
How do I Bake Peanut Butter Oatmeal Bars in 30 Minutes without making a mess?
To minimize mess, gather all your ingredients and tools before you start cooking. Use mixing bowls that fit well inside your baking pan for easier cleanup and lining the pan with parchment paper will help you easily lift the bars out once they’re baked, preventing sticking and messy cutting.
Can I make Bake Peanut Butter Oatmeal Bars in 30 Minutes without eggs?
Yes! You can substitute the egg with a flax egg (1 tablespoon flaxseed meal mixed with 2.5 tablespoons water) for a vegan option. This will help bind the ingredients together just like the egg would and keep your bars moist.
What’s the best way to store my baked peanut butter oatmeal bars?
Store your baked bars in an airtight container at room temperature for up to a week. For longer freshness, you can refrigerate them or even freeze them individually. Just make sure to wrap each bar tightly if freezing, so they don't get freezer burn.
Can I customize the recipe for Bake Peanut Butter Oatmeal Bars in 30 Minutes?
Absolutely! You can add ingredients like chocolate chips, dried fruits, or nuts to enhance flavor and texture. Additionally, feel free to modify sweeteners or substitute peanut butter with almond or sunflower seed butter for nut-free options.
How can I tell when my peanut butter oatmeal bars are done baking?
Check for doneness by looking for a golden brown edge around the bars. You can also insert a toothpick into the center; if it comes out clean, your bars are ready. Just be careful not to overbake them, as they can become dry.
What are some healthy additions to my Peanut Butter Oatmeal Bars?
You can boost the nutritional content by adding seeds like chia or flaxseeds, which add fiber and omega-3 fatty acids. Spices like cinnamon or vanilla can also enhance flavor without adding calories, ensuring your bars are both tasty and wholesome.
Delicious Peanut Butter Oatmeal Bars
Ingredients:
Instructions:
Nutrition Facts:
| Calories | 180 |
|---|---|
| Protein | 5g |
| Fat | 9g |
| Carbs | 22g |
| Fiber | 3g |
| Sugar | 5g |
| Sodium | 120mg |
