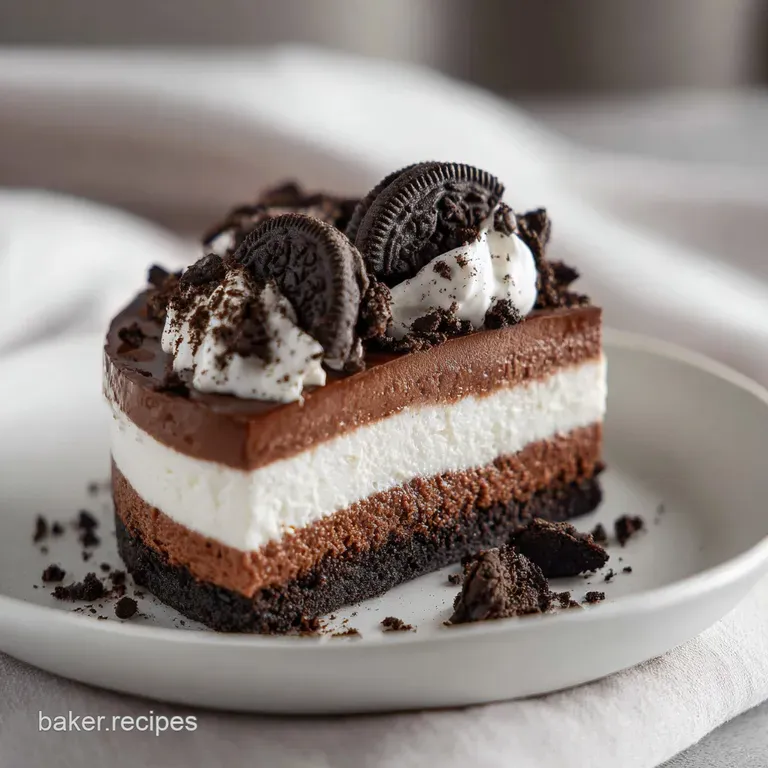
No Bake Oreo Cheesecake
- Time: Active 25 minutes, Passive 360 minutes, Total 385 minutes
- Flavor/Texture Hook: Velvety cream cheese filling packed with shattered chocolate cookie chunks
- Perfect for: Stress free summer hosting, kid friendly birthday parties, or a weekend indulgence
- Making the Perfect No Bake Oreo Cheesecake
- Summer Parties and Late Night Cravings
- Why This Works
- Selecting the Best Possible Components
- Tools for Success in the Kitchen
- Step by Step Construction Method
- Solving Texture and Stability Issues
- Flavor Variations and Creative Swaps
- Temperature Control and Longevity Tips
- Side Dish Pairing Ideas
- Recipe FAQs
- 📝 Recipe Card
Making the Perfect No Bake Oreo Cheesecake
There is a specific sound that happens when you press a heavy glass onto a pile of buttery cookie crumbs. It is a dull, satisfying thud that promises a crust thick enough to hold up a mountain of cream.
Last July, I was putting together this exact dessert for a backyard barbecue while the humidity was hovering somewhere around ninety percent. I knew that if I turned the oven on for even ten minutes, my kitchen would become an uninhabitable sauna.
That was the moment I realized a stovetop or baked version couldn't compete with the cooling relief of a chilled dessert.
The first time I served this, I watched my friend Sarah take a bite, her eyes widening as she hit one of those huge, hidden chunks of chocolate cookie. It is the contrast that gets you. You have this incredibly smooth, almost cloud like filling, and then snap you hit the crunch.
We ended up eating nearly the whole thing right off the counter, laughing about how something so simple could feel so sophisticated. It’s a staple in my house now because it doesn’t ask for much, but it gives back everything in terms of pure, nostalgic joy.
We are going to walk through the exact steps to ensure your filling doesn't turn into a puddle and your crust doesn't crumble into dust. It is all about the temperature of your ingredients and the patience of the chill. If you've ever struggled with a runny no bake filling, trust me, we are going to fix that today.
Let's get into why this specific ratio of cream cheese to heavy cream is the secret to that sliceable, professional finish you see in high end bakeries.
Summer Parties and Late Night Cravings
You want this recipe because it is the ultimate low effort, high reward treat. There is no water bath to worry about, no cracks across the surface to hide with fruit, and certainly no hovering by the oven light. It is a "set it and forget it" masterpiece that actually tastes better the longer it sits in the fridge.
The flavors have time to meld, and those cookie bits soften just enough to become cake like while still retaining a bit of their cocoa bite.
This is the dish you bring when you want to be the hero of the potluck without actually spending four hours in the kitchen. It looks impressive, especially once we add those whipped cream dollops and mini cookies on top. But more than that, it’s a reliable crowd pleaser.
I’ve never met a person who turned down an Oreo based dessert. It hits that perfect sweet spot of childhood comfort and adult indulgence.
Why This Works
- Fat Based Stability: Using full fat cream cheese provides a dense, structural base that holds its shape at room temperature without the need for chemical stabilizers or gelatin.
- Aeration Equilibrium: Beating the heavy cream to stiff peaks introduces tiny air bubbles that lighten the heavy cheese, creating a mousse like texture that remains firm enough to slice.
- Sugar Binding Force: Sifted powdered sugar contains a small amount of cornstarch, which acts as a secondary thickening agent, helping to absorb excess moisture from the cream.
- Thermal Setting: A long, six hour cold rest allows the saturated fats in the butter and cream cheese to re solidify, creating a cohesive, "shatter proof" crust and a velvety core.
| Servings | Ingredient Adjustments | Pan Size | Chill Time |
|---|---|---|---|
| 6 people | Use 14 cookies, 12oz cheese, 0.75 cup cream | 6 inch Springform | 4 hours |
| 12 people | 28 cookies, 24oz cheese, 1.5 cups cream | 9 inch Springform | 6 hours |
| 24 people | 56 cookies, 48oz cheese, 3 cups cream | Two 9 inch Pans | 8 hours |
The chilling process is where the real magic happens. As the mixture sits in the cold, the fats in the heavy cream and the cream cheese begin to interlock. If you try to cut this too early, you'll end up with a delicious mess, but those extra few hours in the fridge transform the filling from a thick pudding into a legitimate cheesecake.
This structural integrity is why we insist on full fat products; the lower fat versions simply don't have the molecular "glue" to hold everything together.
Selecting the Best Possible Components
| Ingredient | Science Role | Pro Secret |
|---|---|---|
| Full Fat Cream Cheese | Provides the structural framework and lactic tang. | Use blocks, not the "whipped" tub version, for better density. |
| Heavy Whipping Cream | Introduces air and lightness to prevent a dense "brick" feel. | Ensure it has at least 36% milkfat for a stable, stiff peak. |
| Oreo Cookies | Act as both the structural base and the primary flavor profile. | Pulse the crust crumbs until they look like wet sand for the best bind. |
When it comes to the filling, the quality of your vanilla extract makes a surprising difference. Since we aren't cooking the filling, the alcohol in the vanilla doesn't evaporate, leaving a bright, floral note that cuts through the richness of the cheese. I often suggest checking out my Oreo Cheesecake Bites if you're looking for a smaller scale version of this flavor profile for a party.
The Main Ingredients
- 28 whole Oreo Cookies (approx. 300g)
- Sub: Chocolate graham crackers. Why this? Provides the signature dark cocoa flavor and structural base.
- 5 tbsp Unsalted Butter, melted (70g)
- Sub: Salted butter (omit extra salt). Why this? Acts as the "glue" that hardens in the cold.
- 1 pinch Fine Sea Salt
- Sub: Table salt. Why this? Balances the high sugar content and intensifies the chocolate.
- 24 oz Full Fat Cream Cheese, room temperature (680g)
- Sub: Neufchâtel cheese (though it will be slightly softer). Why this? Provides density and the essential cheesecake tang.
- 1.25 cups Powdered Sugar, sifted (150g)
- Sub: Granulated sugar (must be processed until fine). Why this? Dissolves instantly for a grit free, velvety mouthfeel.
- 1 tbsp Pure Vanilla Extract
- Sub: Vanilla bean paste. Why this? Rounds out the flavors and mimics a traditional baked profile.
- 1.5 cups Heavy Whipping Cream, cold (360ml)
- Sub: Full fat coconut cream (chilled). Why this? Creates the aerated structure needed for a "no bake" lift.
- 12 Oreo Cookies, coarsely chopped (approx. 130g)
- Sub: Chocolate chips or chunks. Why this? Adds essential texture and flavor bursts in every bite.
- 0.5 cup Heavy Whipping Cream for garnish (120ml)
- 12 Mini Oreos
- 1 tbsp Oreo crumbs for dusting
Tools for Success in the Kitchen
You really don't need a professional kitchen for this, but a few specific tools make the process much smoother. A 9 inch springform pan is non negotiable here. Because this isn't a baked cake that shrinks away from the sides, you need to be able to pop that outer ring off without disturbing the delicate edges of the filling.
If you try to use a regular pie dish, the first slice is going to be a struggle.
A food processor is your best friend for the crust. You want those 28 cookies to reach a fine, uniform crumb. If the pieces are too big, the crust will fall apart when you try to slice it.
If you don't have a processor, put the cookies in a heavy duty freezer bag and go to town with a rolling pin just make sure there are no large chunks left. For the filling, an electric hand mixer or a stand mixer (like a KitchenAid) is essential for getting the cream cheese smooth and the heavy cream into stiff peaks.
step-by-step Construction Method
- Pulse 28 cookies in a food processor until they resemble fine, dark sand. Note: Uniform crumbs ensure a sturdy base.
- Mix with melted butter and a pinch of salt until the mixture looks like wet earth.
- Press the mixture firmly into the bottom and 1 inch up the sides of a 9 inch springform pan. Freeze for 15 minutes to set the butter "glue."
- Beat 1.5 cups of cold heavy cream in a chilled bowl until stiff peaks form. Note: Stiff peaks mean the cream stands straight up when you lift the beater.
- Beat the softened cream cheese, powdered sugar, and vanilla in a separate large bowl until completely smooth and emulsified.
- Gently fold the whipped cream into the cream cheese mixture using a rubber spatula. Note: Go slow to keep the air in the mixture.
- Fold in the 12 chopped cookies until they are evenly distributed through the velveteen filling.
- Spread the filling over the chilled crust, smoothing the top with an offset spatula until it looks perfectly level.
- Refrigerate for at least 6 hours or overnight to allow the fats to fully lock and stabilize.
- Whip the remaining cream and pipe dollops around the edge, topping each with a mini Oreo and a final dusting of crumbs before serving.
Chef's Note: When folding the cream into the cheese, use a "cut and turn" motion. Cut through the center with your spatula, scrape the bottom, and flip the mixture over. This preserves the air you worked so hard to beat into the cream.
Solving Texture and Stability Issues
Filling won't set firmly
The most common culprit for a runny No Bake Oreo Cheesecake is the temperature of the ingredients or the whipping of the cream. If the heavy cream was only whipped to "soft peaks" (where the tip curls over), it won't have enough structure to hold up the heavy cream cheese.
Plus,, if the cream cheese wasn't full fat, it lacks the necessary saturated fat to firm up in the fridge.
Lumpy cream cheese mixture
This usually happens when the cream cheese is too cold when you start mixing. It needs to be truly room temperature soft enough that you can easily press a finger through the block.
If you try to beat cold cream cheese, it will break into tiny "beads" that are nearly impossible to smooth out once you've added the liquid cream.
| Problem | Root Cause | Solution |
|---|---|---|
| Soggy Crust | Butter wasn't fully incorporated or cookies weren't fine enough. | Pulse cookies to a fine dust and freeze the crust before filling. |
| Filling is Grainy | Powdered sugar wasn't sifted or was added too fast. | Sift the sugar and beat on medium low until fully dissolved. |
| Crumbled Edges | Slicing the cake while it's still too warm. | Use a hot, thin knife and wipe it clean between every single slice. |
If you ever find yourself struggling with fruit based cheesecakes, the logic is very similar. For instance, my Blueberry Cheesecake uses a different stabilization method, but the importance of ingredient temperature remains the same.
Common Mistakes Checklist
- ✓ Ensure heavy cream is "cold from the fridge" before whipping (warm cream won't hold air).
- ✓ Soften cream cheese for at least 2 hours on the counter (prevents lumps).
- ✓ Sift the powdered sugar to remove any hard clumps (ensures smoothness).
- ✓ Press the crust with the bottom of a flat measuring cup (packs it tightly).
- ✓ Clean your knife with hot water between slices (gives you those sharp, clean edges).
Flavor Variations and Creative Swaps
If you want to change things up, the "Golden Oreo" version is a fantastic twist. Simply swap the chocolate cookies for the vanilla flavored ones and use a white chocolate drizzle on top instead of cookie crumbs. It creates a much more "birthday cake" vibe that kids absolutely adore.
Another option is to lean into the chocolate side by adding 2 tablespoons of high-quality cocoa powder to the cream cheese mixture.
For those who want a bit of a salty sweet kick, try adding a half cup of crushed pretzels to the crust mixture. You'll need to add an extra tablespoon of melted butter to ensure it still binds, but the salty crunch against the sweet cream is incredible.
You can also experiment with different extract flavors; a touch of peppermint extract in the filling during the holidays turns this into a festive "Grasshopper" style cheesecake.
Temperature Control and Longevity Tips
Storage Guidelines Keep this cheesecake in the refrigerator at all times when not serving. Because of the high dairy content and the lack of stabilizers like gelatin or eggs, it will soften significantly if left at room temperature for more than 30-45 minutes.
It can stay fresh in the fridge, tightly covered, for up to 5 days. I actually think it tastes best on day two, as the cookies in the filling have had time to soften into a texture that mimics a fudgy brownie.
Freezing Instructions This recipe freezes beautifully! If you want to make it way in advance, wrap the entire springform pan (after the initial 6 hour fridge set) in a double layer of plastic wrap and then aluminum foil. It will keep for up to 2 months. To serve, thaw it in the refrigerator overnight.
Do not thaw it on the counter, or the condensation will make the crust soggy.
Zero Waste Tip If you have leftover cookie crumbs or broken mini Oreos, don't toss them. Store them in a small jar in the pantry. They make an excellent topping for morning yogurt or can be folded into a batch of vanilla ice cream for a quick homemade cookies and cream treat.
Even the "dust" at the bottom of the Oreo bag is gold save it for garnishing your next latte or hot cocoa.
Side Dish Pairing Ideas
| Stovetop Method | Oven Method (Baked) | Texture Difference |
|---|---|---|
| No heat used, preserves airy bubbles. | High heat sets egg proteins for a dense finish. | Mousse like vs. Custard like |
| Ready after 6 hours of chilling. | Ready after baking plus 12 hours of chilling. | Light and fluffy vs. Heavy and rich |
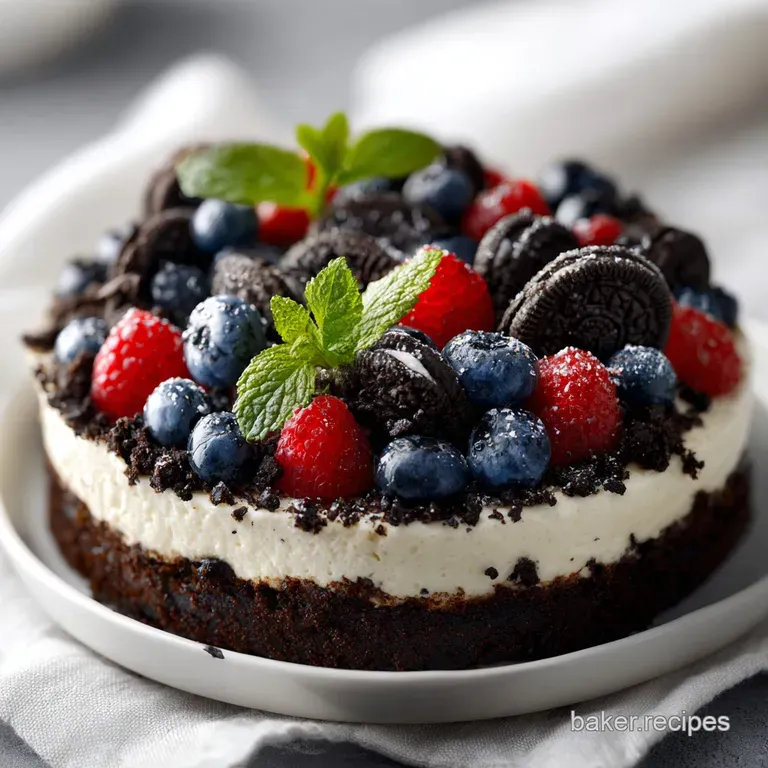
While this cheesecake is a star on its own, I love serving it with a side of fresh raspberries or a tart strawberry coulis. The acidity of the berries cuts right through the heavy fat of the cream cheese and the sweetness of the cookies.
If you're hosting a big dinner, this pairs naturally after a savory, salty main course. It provides that cool, refreshing finish that a warm pie sometimes lacks.
If you want a firmer slice, do this: Add 2 ounces of melted and slightly cooled white chocolate to the cream cheese mixture. The cocoa butter in the chocolate will harden in the fridge, providing extra structural support.
Ensure you fold it in quickly so it doesn't create hard flecks in the cold batter.
This recipe is all about the balance of textures. From the "shatter" of the cold crust to the "velvety" smooth filling, it hits every sensory note you want in a dessert. It's the kind of recipe that makes you feel like a pro without the stress of a complicated technique.
Just remember: keep your cream cold, your cheese soft, and your patience high during that 6 hour chill!

Recipe FAQs
Is it necessary to freeze the crust before adding the filling?
Yes, freezing for 15 minutes is essential. It hardens the butter, which acts as the glue to keep your base firm and prevents it from crumbling when you slice the cheesecake.
How to achieve the perfect cheesecake consistency without eggs?
Beat your heavy whipping cream until stiff peaks form separately. Once you master this light whipped folding technique, you can create stable, airy desserts that set perfectly in the refrigerator without any need for heat or eggs.
Is it true that I can use light cream cheese for this recipe?
No, this is a common misconception. You must use full fat cream cheese because it provides the necessary structure and density to hold the cheesecake together after it sets.
How to ensure the filling is perfectly smooth?
Sift your powdered sugar before beating it with the room temperature cream cheese. This eliminates lumps immediately, ensuring your base is completely emulsified before you fold in the whipped cream.
Can I rush the 6-hour refrigeration time?
No, skip the shortcut. The cheesecake needs at least 6 hours or overnight for the fats to fully solidify and the flavors to meld, otherwise the slices will not hold their shape on a plate.
How to prevent the whipped cream garnish from deflating?
Whip the additional 0.5 cup of cream only right before serving. Freshly whipped cream looks best and maintains its structure significantly better than cream that has been sitting in the fridge.
Is there a trick to getting clean slices every time?
Run your knife under hot water and wipe it clean between every single cut. The residual heat melts the fat just enough to glide through the crust and filling without dragging or tearing the edges.
No Bake Oreo Cheesecake

Ingredients:
Instructions:
Nutrition Facts:
| Calories | 610 kcal |
|---|---|
| Protein | 5.8 g |
| Fat | 46.2 g |
| Carbs | 42.3 g |
| Fiber | 1.1 g |
| Sugar | 31.2 g |
| Sodium | 292 mg |
