Creamed Peas: the Ultimate Comfort Side Dish
- Proper Creamed Peas: The Ultimate Comfort Side Dish
- Elevating the Humble Side Dish: A Creamed Peas Revival
- The Science of Silky Texture: Why Béchamel Beats Cornstarch
- Essential Components for Luxurious Peas
- Ingredient Swaps for Dietary Needs and Flavor Adjustments
- Master the Method: How to Cook Perfect Creamed Peas
- Troubleshooting and Expert Tips for Success
- Storing Leftovers and Reheating Guidance
- Elegant Pairings: What to Serve Alongside This Dish
- Recipe FAQs
- 📝 Recipe Card
Proper Creamed Peas: The Ultimate Comfort Side Dish
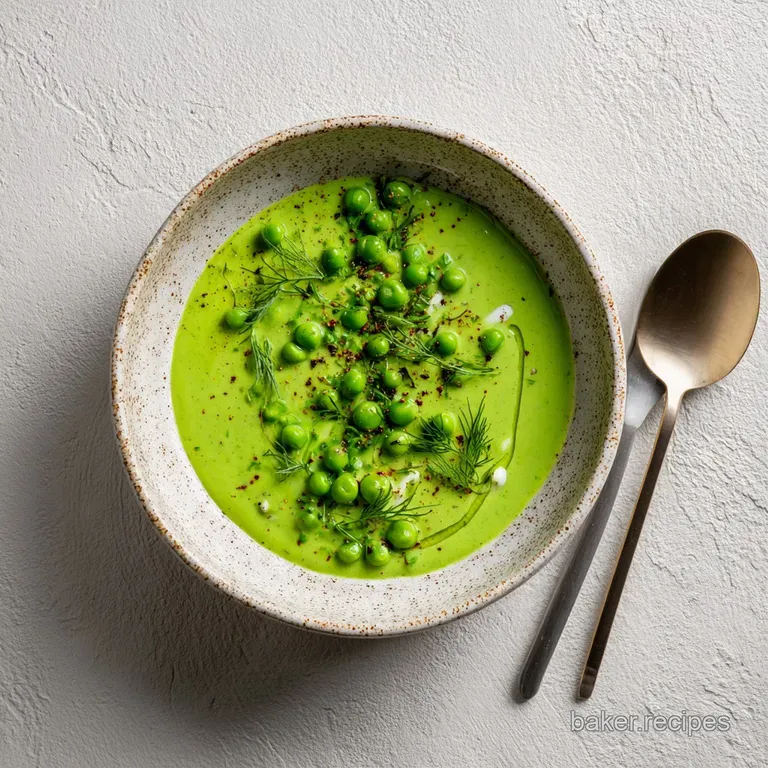
Have you ever smelled something that instantly transports you back to childhood, but in the best possible way? For me, that’s the subtle, comforting aroma of melting butter, shallots, and the deep, milky richness that makes truly Creamed Peas .
Forget everything you think you know about this humble side dish. We are aiming for velvety, silky, intensely green perfection.
This isn’t a complicated, all-day project. Seriously. It’s a lifesaver on busy weeknights because it requires practically zero prep, uses ingredients you probably already have, and tastes like a million bucks.
If you need a side dish that delivers maximum comfort with minimum fuss, this Creamed Peas recipe is your new MVP. It’s cheap, cheerful, and absolutely essential for any proper Sunday lunch.
We’re going to ditch the sadness of watery canned versions and embrace the true, proper béchamel technique. Trust me, learning this foundation is the key to unlocking the perfect side dish. Let’s get stuck into making the very best Creamed Peas you will ever taste.
Elevating the Humble Side Dish: A Creamed Peas Revival
I’m convinced that almost everyone who hates peas only hates the tragically boiled, gray, mushy kind they were forced to eat as a kid. This recipe, however, is a full blown revival.
We treat the peas like the sweet little jewels they are, pairing them with a savory sauce that is creamy, decadent, and deeply flavorful.
The fundamental genius here lies in the fact that we don't just dump cream over peas. That sounds good, but it often splits or becomes greasy. Instead, we build a stable, French inspired sauce foundation that holds everything together beautifully. This Creamed Peas method relies on technique, not just rich ingredients.
The Science of Silky Texture: Why Béchamel Beats Cornstarch
Moving Beyond Watery School Dinners
The secret weapon for flawless texture in Creamed Peas is the roux. A roux is simply cooked flour and fat in our case, butter. By cooking the flour first, we eliminate that terrible raw, starchy taste and start building the complex flavor profile.
This stable base, the roux, is what allows the milk to thicken into a luxurious, uniform sauce that clings perfectly to every single pea.
What Makes This Recipe Truly "Proper"
This is not a gloopy, sticky sauce. A proper béchamel, the backbone of perfect Creamed Peas , should be pourable yet substantial, coating the spoon without feeling heavy. It's the ratio of fat to flour to liquid that matters most, and we nail it here.
When you master this balance, you’ll never settle for thin, watery sides again. Making Creamed Peas this way means they reheat better and the sauce doesn't separate.
A Quick Look at the Nutritional Perks of Peas (Hidden Fiber)
Yes, this is comfort food, but peas are actually nutritional powerhouses! They are packed with fiber and a surprising amount of plant based protein. So, while you're enjoying the rich, luxurious sauce, remember you are also sneaking in some genuine health benefits. It’s all about balance, right?
Achieving the Perfect Consistency (The Roux Ratio)
We use equal parts butter and flour, cooked until lightly nutty. This light colored roux, known as a blanc roux, ensures our final sauce stays white and creamy, which is exactly what you want for bright, fresh looking Creamed Peas .
If you cook the roux too long and it turns brown, you'll have a darker sauce suitable for gravies, but not for this delicate dish.
The Aromatic Base: Shallot vs. Garlic
I prefer a finely minced shallot here over standard onion or garlic. Why? Shallots offer a much gentler, sweeter, and more complex aromatic profile that supports the delicate sweetness of the peas without overpowering them.
We sauté the shallot first to infuse the butter, making sure every drop of fat is swimming in flavor before the flour even hits the pan.
Balancing Sweetness and Savory (The Nutmeg Factor)
Never skip the nutmeg when making a béchamel sauce. I mean it. A tiny pinch of freshly grated nutmeg (and it must be fresh, please!) lifts the entire dish. It provides a warm, savory note that somehow manages to highlight the inherent sweetness of the peas, taking your Creamed Peas from good to absolutely glorious.
Essential Components for Luxurious Peas
| Ingredient | Role | Why We Need It |
|---|---|---|
| Shallots | Aromatic Base | Sweeter and milder than onion or garlic. |
| Butter/Flour | The Roux Foundation | Creates the stable, thick béchamel sauce. |
| Whole Milk/Cream | Richness | Adds depth and prevents the sauce from feeling sticky. |
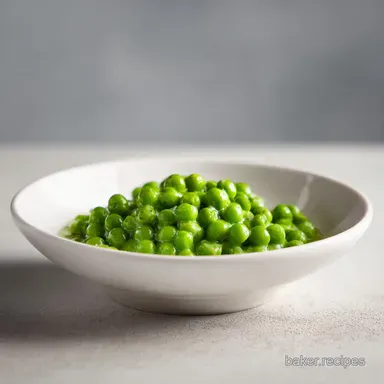
| Frozen Peas | Texture & Color | Flash frozen at peak sweetness for the best results. |
| Nutmeg | Flavor Uplifter | Essential savory balancer for the dairy. |
Ingredient Swaps for Dietary Needs and Flavor Adjustments

Life happens. Sometimes you run out of milk, or maybe you are hosting someone who avoids dairy. Here are the necessary pivots to still create fantastic Creamed Peas without compromising on that luxurious texture.
Selecting the Best Peas: Fresh vs. Frozen Quality
Unless you just picked them from your garden, stick to high-quality frozen sweet peas. They are consistently harvested at their sweetest and immediately flash frozen. Seriously, stop buying those pale, dried looking 'fresh' peas in the produce section during the winter. They are tough and tasteless.
Frozen is far superior for easy Creamed Peas .
Dairy Choices: Whole Milk vs. Half and Half
I recommend whole milk for a rich mouthfeel, but 2% works fine if you are watching fat content. However, don't skimp on the final touch of heavy cream (or double cream). That little bit of extra fat at the end ensures the final sauce is silken, rather than just thick.
If you only have half and half, skip the extra cream and use 1 ¾ cups of the half and half instead of the milk/cream combo.
Building Depth: The Role of Shallots and Butter
The butter needs to be high-quality because its flavor is foundational to the sauce. If you don't have shallots, you can substitute a tablespoon of very finely minced white onion, but cook it even more slowly to remove any sharp, harsh flavor.
Don’t add raw shallots at the end, that texture is too sharp for Creamed Peas.
Making dairy-free Creamed Dishes
It’s completely possible to make magnificent dairy-free Creamed Peas ! Swap the butter for a good plant based butter alternative or even a neutral oil like avocado oil. For the milk, unsweetened oat milk or soy milk provides the best creamy thickness.
Avoid low-fat alternatives, as the fat content is what helps create stability in the sauce.
Substituting Fresh Herbs for Garnish
Fresh herbs are optional but highly recommended. Mint is the classic British pairing; it’s bright and surprising. If mint feels too adventurous, fresh chives or finely chopped parsley work perfectly, adding necessary color and freshness to cut through the richness of the Creamed Peas.
Adjusting the Final Seasoning
Remember to season your sauce before adding the peas and again after the cream is incorporated. Salt dulls as it cooks, so tasting and adjusting at the end is absolutely vital.
A pinch of white pepper can be used instead of black if you prefer a cleaner aesthetic, but freshly ground black pepper gives the best flavor to your Creamed Peas .
Master the Method: How to Cook Perfect Creamed Peas
Getting this right is all about temperature control and patience. You have to be aggressive with the whisking, but gentle with the heat.
Step 1: Preparing the Shallot Infusion
Start by melting 1 tablespoon of butter in your heavy bottomed saucepan over medium low heat. Add the finely minced shallot and cook it slowly for about four minutes. You want them completely soft and translucent, almost disappearing into the fat. This infusion is critical for the flavor of our Creamed Peas.
Step 2: Creating the Velvety Roux Foundation
Add the remaining butter and let it melt completely. Sprinkle in the flour immediately and grab your whisk. Cook this mixture the roux for about 60 to 90 seconds, stirring constantly. This cooking time removes the raw flour taste. The roux should look light blonde and smell slightly like toasted nuts.
Step 3: Integrating the Milk Slowly for Smoothness
Take the pan off the heat! This is the pro move that stops lumps. Pour in the cold whole milk slowly while whisking like a maniac. The temperature difference helps shock the roux, dissolving the flour paste immediately. Once smooth, put the pan back on medium heat.
Continue stirring until the sauce thickens and coats the back of a spoon. This beautiful béchamel is the base for our creamy peas recipe.
Step 4: Finishing Touches and Folding the Peas
Season the sauce generously now with salt, pepper, and that precious nutmeg. Add the frozen peas directly into the hot sauce. Stir them gently to coat. The residual heat will warm them through perfectly without boiling them into oblivion.
Stir in the heavy cream, heat through for just one minute (do not boil!), and then fold in your fresh herbs. Serve your proper Creamed Peas immediately.
Troubleshooting and Expert Tips for Success
Every home cook has had a kitchen catastrophe (I once forgot to put the lid on the blender while making a soup, it was a horror show). Here are the common failures people face when making Creamed Peas and how we fix them.
Preventing a Lumpy Béchamel Sauce
Lumps happen when the flour absorbs the liquid unevenly. The solution, as mentioned, is using cold milk in a hot roux and whisking immediately and aggressively off the heat. If you still get a few stubborn lumps, don't throw away the Creamed Peas!
Just push the sauce through a fine mesh sieve before you add the peas. Nobody will ever know.
Why Overcooking Peas is a Culinary Crime
Peas contain chlorophyll, and prolonged heat exposure turns that vibrant green color into a dull, depressing olive color. Overcooked peas are also mealy. By using frozen peas and just heating them through in the already cooked sauce, we maximize their sweetness and keep their color absolutely brilliant.
This makes all the difference in delicious Creamed Peas .
Seasoning Mid-Cook vs. At the End
Seasoning is not a one-time thing. You season the roux base, you season the béchamel, and you season the final Creamed Peas after the dairy and peas are added. If you only season at the start, the flavor will be flat. Tasting and adjusting before serving is the mark of a great cook.
Chef’s Note: If you want a fun spin, try adding a tablespoon of finely grated Parmesan cheese right before serving. It adds a salty, savory kick to the Creamed Peas that is surprisingly excellent.
Storing Leftovers and Reheating Guidance
Refrigeration Best Practices
Leftover Creamed Peas will keep beautifully in an airtight container in the fridge for up to 3 days. Because the sauce is stabilized by the roux, it tends to hold up better than simple cream sauces.
However, the herbs will lose their vibrancy, so if you know you’ll have leftovers, add fresh herbs only to the portion you plan to eat immediately.
Can You Freeze Creamed Dishes?
Béchamel sauces are notorious for sometimes separating or becoming grainy when frozen and thawed, especially if they contain high fat cream. While you can freeze Creamed Peas , the texture might be slightly less smooth upon reheating.
If you must freeze them, do so in a freezer safe bag or container for up to 2 months. Make sure you leave very little air to prevent freezer burn.
Reviving Thickened Sauce (Adding Moisture Back)
When you pull your leftovers out of the fridge, the sauce will have thickened significantly. This is normal! Reheat the Creamed Peas in a saucepan over low heat, stirring occasionally. As it warms, add a splash or two of extra milk or water until it reaches your desired consistency.
Don't worry if it looks split at first; constant, gentle stirring will usually bring it back together into a smooth, satisfying dish.
Elegant Pairings: What to Serve Alongside This Dish
Creamed Peas are the perfect supporting actor. They are sophisticated enough to accompany delicate fish, yet comforting enough for hearty family meals.
I love serving these alongside something robust, like my famous Cabbage Roll Skillet Unstuffed Comfort Easy Peasy . The savory meat and tomato flavors are absolutely brilliant next to the sweetness and creaminess of the peas.
For a lighter weeknight meal, these easy Creamed Peas are fantastic beside a piece of simply prepared fish, like my quick Honey Glazed Salmon My Easy Peasy Weeknight Winner . The creamy texture contrasts wonderfully with the glazed fish. Honestly, you might just find yourself eating them right out of the pot with a big spoon they are that good. This truly is the ultimate Creamed Peas recipe.

Recipe FAQs
Why is my cream sauce too thick, or sometimes too thin?
The thickness of the béchamel depends entirely on the initial ratio of the roux (butter and flour) to the milk. If the sauce is too thick, whisk in a tablespoon of warm milk or stock at a time until you achieve the desired velvety consistency.
If it's too thin, simmer it gently over low heat to reduce it, or whisk in a small cornstarch slurry (1 tsp cornstarch mixed with 1 tsp cold water) to thicken it quickly.
How can I prevent the peas from turning mushy or losing their bright green color?
The secret to vibrant, firm peas is minimal cooking time. Add the peas right at the very end, folding them into the warm sauce and only cooking until they are heated through about 3 to 5 minutes. If using frozen peas, do not thaw them; adding them frozen preserves their integrity and beautiful bright green hue.
Can I make this creamed pea recipe entirely vegan or dairy-free?
Absolutely, this recipe adapts beautifully to dairy-free substitutions. Use a high-quality vegan butter substitute for the roux and choose an unflavored, full fat plant based milk, such as oat or cashew milk, which provides the best creaminess.
Ensure you check that your chosen milk alternative does not separate when heated.
Should I use fresh peas or are frozen peas acceptable for this recipe?
Frozen peas are highly recommended as they are flash frozen immediately after harvest, locking in their maximum sweetness and nutrients. While fresh garden peas are delicious, they often require a quick 60-second blanching beforehand to ensure they are tender enough to match the sauce's texture.
Always prioritize the quality and sweetness of the pea source, whether fresh or frozen.
Besides nutmeg, what other flavor additions work well with creamed peas?
Fresh herbs provide wonderful complexity and lift the dish; finely chopped mint, tarragon, or chives are excellent options to fold in just before serving. For a richer, savory flavor, add a small squeeze of lemon juice and a tablespoon of grated Parmesan or Pecorino Romano cheese alongside the nutmeg.
How should I store leftover creamed peas, and how should I reheat them?
Store leftovers in an airtight container in the refrigerator for up to 3 days. To reheat, warm the peas gently on the stovetop over low heat, adding a small splash of additional milk or water to loosen the sauce, which will have tightened considerably overnight.
Avoid high heat or vigorous stirring, which can cause the sauce to split.
Can I freeze creamed peas for later use?
Freezing is generally discouraged for any dish centered around a béchamel sauce. Upon thawing, dairy based sauces tend to separate, becoming grainy and watery, significantly compromising the luxurious mouthfeel of the dish.
It is best to enjoy this recipe fresh or within the three day refrigerated storage window.
Proper Creamed Peas Recipe
Ingredients:
Instructions:
Nutrition Facts:
| Calories | 305 kcal |
|---|---|
| Protein | 9.9 g |
| Fat | 17.6 g |
| Carbs | 21.5 g |
