Rainbow Bright Lemon Meringue Pie a Zesty Spectacle
- Elevating the Classic: Our Showstopping Rainbow Lemon Meringue Pie
- Gathering Your Culinary Palette for the Ultimate Pie
- Essential Tools for Meringue Mastery and Precision Baking
- Stage One: Preparing the Golden Shortbread Crust
- Stage Two: Mastering the Smooth Lemon Curd Filling
- Stage Three: Creating the Swirls of Colour for Your Rainbow Lemon Meringue Pie
- The Final Act: Baking and Browning the Finished Pie
- Troubleshooting and Perfecting Your Rainbow Lemon Meringue Pie
- Variations on the Theme: Other Citrus Delights
- Recipe FAQs
- 📝 Recipe Card
Elevating the Classic: Our Showstopping Rainbow Lemon Meringue Pie
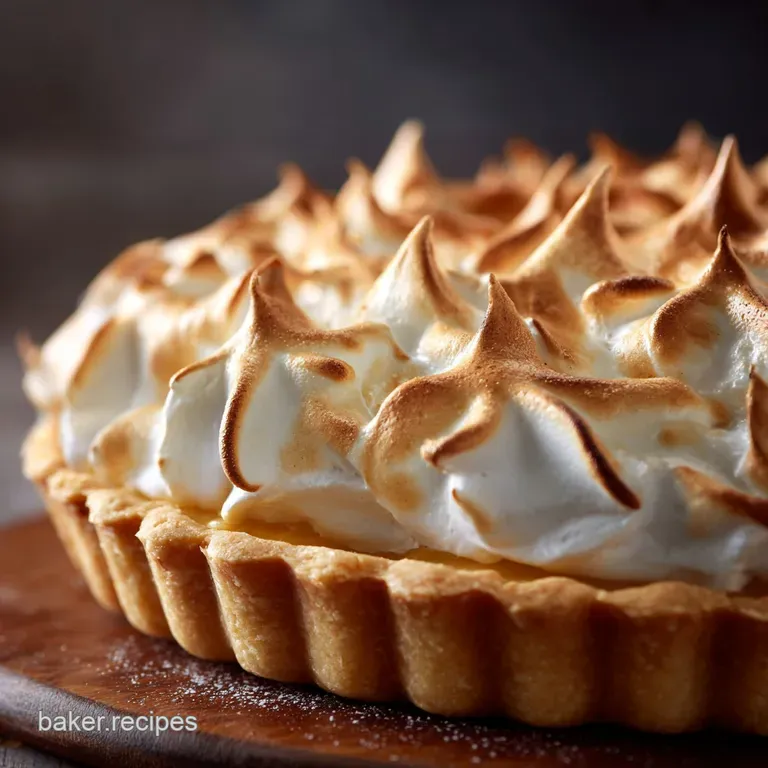
The classic Lemon Meringue Pie is a testament to perfect harmony: the buttery bite of the shortcrust, the mouth puckering zing of the citrus filling, and the gentle sweetness of the cloud like topping. It is a dessert already perfected by generations of bakers.
However, in our kitchen, we believe even masterpieces can benefit from a fresh, dramatic perspective. We are transforming the simple white crown into a theatrical masterpiece by adding a full spectrum of colour.
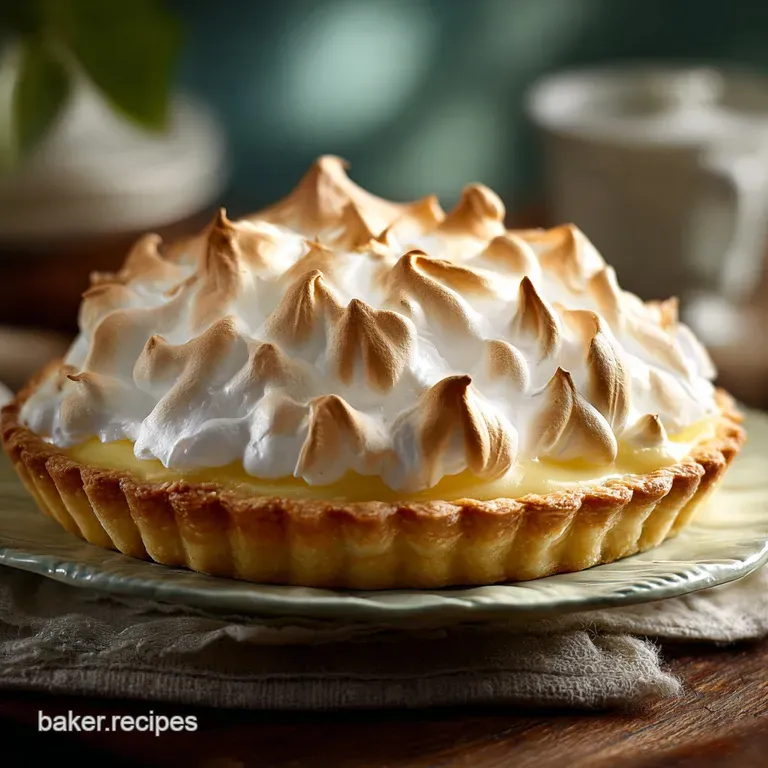
This Rainbow Lemon Meringue Pie is not just a dessert; it’s an edible celebration, guaranteed to stop traffic at any gathering.
Why We Need a Zesty Colour Explosion Now
While the flavour profile remains true to tradition intensely sharp and wonderfully balanced the visual upgrade elevates this humble pie from comfort food staple to true spectacle. The addition of vibrant, swirling colour within the meringue peaks transforms the look entirely.
Imagine cutting into a sunny yellow filling, only to reveal a magnificent, caramelized rainbow swirl above it. This zesty colour explosion provides the unexpected theatrical flair we love, turning a medium difficulty baking challenge into a rewarding work of art.
The Perfect Balance: Sharp Citrus Meets Cloud Like Sweetness
Achieving the perfect lemon meringue pie hinges entirely on textural and flavour balance. We seek that crucial counterpoint: the intense acidity derived from a generous half cup (120ml) of fresh lemon juice, bolstered by finely grated zest (from two lemons), cutting sharply through the sweetness of the meringue.
Our filling uses egg yolks and cornstarch to achieve a silky, glossy consistency that is intensely flavourful. This foundation is crucial because it provides the necessary robust flavour structure to stand up against the substantial, stable sweetness of the Swiss meringue crown.
Gathering Your Culinary Palette for the Ultimate Pie
A showstopping dessert requires high-quality, measured components. Success in baking, especially when working with technical elements like meringue, comes down to precision. Before starting, ensure all your dairy ingredients specifically the 115g of unsalted butter for the crust and the 30g for the filling are perfectly chilled, while your egg whites for the meringue should be at room temperature.
Essential Tools for Meringue Mastery and Precision Baking
The Foundation: Flaky Crust Components Checklist
We are using a classic pâte sucrée (sweet shortcrust pastry) as the base for this dessert. You will need 1 ½ cups (180g) of all-purpose flour combined with just 2 Tbsp of granulated sugar and a touch of salt. The fat comes from ½ cup of super cold, cubed unsalted butter.
To bind this mix and add richness, we incorporate one large egg yolk and just 3 to 4 tablespoons of ice water, ensuring the dough remains flaky and tender rather than tough.
Zest and Zing: Essential Ingredients for the Silky Lemon Curd
The heart of the pie requires meticulous attention. Key ingredients for the glossy filling include 1 cup (200g) of granulated sugar paired with ⅓ cup (40g) of cornstarch acting as the primary thickener. The essential flavour is derived from the aforementioned fresh lemon juice and zest.
The filling gains its richness and smooth texture from four large egg yolks, which must be carefully tempered to prevent curdling, and a final addition of 2 Tbsp of chilled butter, which gives the curd its luxurious finish.
Creating the Canvas: Everything Needed for the Vibrant Meringue
For maximum stability and shine, we rely on the Swiss meringue method. This topping requires 6 large egg whites, preferably aged and at room temperature (about 180g), combined with 1 ½ cups (300g) of caster or superfine sugar. We add ½ tsp of cream of tartar for guaranteed stability.
The vibrant visual appeal depends entirely on assorted, concentrated gel food colourings liquid colours should be avoided as they introduce unnecessary moisture that can compromise the foam.
Getting Equipped: Must Have Baking Gadgets
While a sturdy 9 inch (23 cm) pie dish and rolling pin are standard, the technical elements of this recipe necessitate specific gadgets. A medium saucepan and a large, heatproof metal bowl are needed to create the bain marie for the Swiss meringue.
Crucially, a stand mixer fitted with the whisk attachment is non-negotiable for achieving the necessary stiff, glossy peaks. Finally, for the professional finish, a piping bag with a large star tip (like a Wilton 1M) and a kitchen blow torch (or a high heat broiler) are required.
Stage One: Preparing the Golden Shortbread Crust
The journey to the perfect Rainbow Lemon Meringue Pie begins with the crust. To start, quickly pulse the flour, sugar, and salt together. Add the chilled, cubed butter, using a food processor or pastry blender to cut it in until the mixture resembles coarse crumbs.
This technique ensures the butter remains cold, which translates to flakiness. Incorporate the egg yolk and ice water, mixing minimally until the dough just comes together. Once formed into a disc, wrap it tightly and chill it for at least 30 minutes to relax the gluten.
When ready, roll the dough, fit it into the pie dish, and pierce the base thoroughly. Blind bake at 375°F (190°C) for 15 minutes filled with weights and parchment, then remove the weights and bake for a final 8– 10 minutes until lightly golden brown.
It is vital that this crust cools completely before filling.
Related Recipes Worth Trying
- Proper Comfort Easy Chicken Pot Pie Casserole with Fluffy Biscuits — This easy Chicken Pot Pie Casserole recipe skips the fuss of pastry and uses fluffy drop biscuits Creamy filling tender chicken and garden veg A proper hug...
- Buttermilk Glaze Magic The Best Lemon Blueberry Bread Recipe — The Best Lemon Blueberry Bread Recipe Buttermilk is the secret to this incredibly moist quick loaf Finished with a shimmering glaze its perfect for...
- Creamy Lemon Chicken and Asparagus Recipe Easy Weeknight Supper — Say hello to your new favourite Chicken and Asparagus Dinner This panseared recipe features a bright easy shallot cream sauce Perfect for spring suppers
Stage Two: Mastering the Smooth Lemon Curd Filling
Creating the perfectly smooth, intensely zesty filling requires patience and proper temperature management. Begin by whisking the sugar, cornstarch, and salt in a non-reactive saucepan, then integrate the cold water until smooth.
Cook this mixture over medium heat, stirring continuously until it comes to a rolling boil and thickens significantly letting it bubble for 60 seconds guarantees the cornstarch is fully cooked. Immediately remove the pan from the heat. In a separate bowl, whisk the four egg yolks vigorously.
Now comes the crucial step: slowly drizzle about 1 cup of the hot cornstarch mixture into the yolks while constantly whisking. This action tempers the yolks, preventing them from scrambling.
Pour the tempered mixture back into the saucepan and cook over low heat, stirring continually for just 1 to 2 minutes until the filling thickens to a glossy pudding consistency. Remove from heat and stir in the lemon juice, zest, and chilled butter until the fat is fully emulsified.
Pour the warm filling directly into the prepared, cooled crust.
Stage Three: Creating the Swirls of Colour for Your Rainbow Lemon Meringue Pie
This is where the magic happens. We stabilize the egg whites and sugar over a bain marie, combining the 6 egg whites, caster sugar, and cream of tartar in the metal mixing bowl. Whisking continuously over simmering water, heat the mixture until it reaches 160°F (71°C) and the sugar crystals are completely dissolved; test this by rubbing a small amount between your fingers it should feel perfectly smooth.
Transfer the bowl to the stand mixer and whisk on medium high speed until the meringue is glossy, pure white, and holds stiff, sharp peaks. The bowl should feel completely cool to the touch. Once achieved, divide the meringue base equally into four separate bowls.
Now, gently fold the concentrated gel food colours (Red, Blue, Green, Yellow) into each portion, taking care not to overmix and deflate the foam. To assemble the rainbow effect, lay out a piece of cling film and spoon stripes of each colour side-by-side onto the film.
Roll the film tightly into a sausage shape, twisting the ends, and place this roll into the piping bag fitted with the large star tip.
The Final Act: Baking and Browning the Finished Pie
Blind Baking Techniques for a Perfect Base
To reiterate, a flawless shortcrust base is essential. Blind baking, using parchment and pie weights to support the edges, prevents the dough from slumping and ensures the crust is fully cooked and ready to receive the moist filling.
Brushing the inside of the baked shell with a thin egg white wash before the final bake can create an essential moisture barrier, safeguarding against the dreaded soggy bottom.
Chilling and Setting Up the Pie Shell
After removing the baked shell from the oven, it must be completely cooled on a rack. This ensures thermal contrast and prevents the warm crust from sweating or destabilizing the delicate lemon filling.
Achieving That Ideal Silky Consistency
The careful tempering of the egg yolks in Stage Two is the secret to the filling's silky texture. Avoid vigorous boiling when the yolks are added back to the mixture; the heat should be low and the stirring constant to achieve a homogeneous, thick, glossy custard that sets beautifully when chilled.
Cooling the Curd Before Assembly
Unlike many pie recipes, for optimal adhesion and to help prevent weeping, the lemon filling should be poured into the shell and allowed to rest briefly while the meringue is prepared and piped. The meringue must be applied while the curd is still warm, allowing the two layers to fuse slightly.
The Science of Stiff Peaks: Whisking the Perfect Meringue Base
The stability of this rainbow crown is thanks to the Swiss method. Heating the whites and sugar to 160°F pasteurizes the egg and begins dissolving the sugar outside the protein structure.
Whipping this warm mixture rapidly creates a dense, incredibly stable foam that holds its structure, gloss, and colour far better than a standard French meringue.
Gently Folding in the Vibrant Gel Colours
The key to bright, distinct colour swirls is using gel colourings and employing a light, swift hand when folding. Introduce the colour at the end, folding just enough to streak the white meringue.
Overmixing will result in a uniform, muddy colour rather than the intended vibrant stripes that define the Rainbow Lemon Meringue Pie . Once piped edge-to-edge over the warm filling, use the kitchen torch to toast the meringue peaks until gorgeously golden brown.
Troubleshooting and Perfecting Your Rainbow Lemon Meringue Pie
Avoiding the Weeping Meringue Dilemma
Weeping when sugary liquid leaks from the meringue base is a common frustration. To prevent this, ensure two conditions are met: first, use the Swiss method to fully dissolve and stabilize the sugar at 160°F.
Second, and crucially, pipe the meringue edge-to-edge over the lemon filling while the filling is still warm . This heat seals the layers together, creating a barrier that discourages moisture migration.
Storage and Serving Suggestions
After torching, allow the pie to cool completely at room temperature, then place it in the refrigerator for a minimum of 2 hours. This setting time is non-negotiable; it allows the cornstarch and egg yolks in the filling to fully firm up, ensuring clean slices.
The pie is best enjoyed within two days. We recommend serving chilled alongside fresh summer berries, or perhaps a dollop of tangy crème fraîche, whose slight sourness perfectly complements the sharp citrus.
Variations on the Theme: Other Citrus Delights
Making a Lime or Orange Meringue Twist
If you love this recipe but want a slightly different flavour profile, a simple substitution transforms the pie. By replacing half of the fresh lemon juice with fresh lime juice, you introduce an exotic, tart element that pairs beautifully with a buttery crust.
For a more tropical version, consider swapping the shortcrust entirely for a quick Graham cracker or coconut crust, providing a delightful textural contrast to the silky filling.
gluten-free Crust Alternatives
To easily adapt this spectacular dessert for dietary needs, you can substitute the all-purpose flour in the pâte sucrée with a high-quality 1:1 gluten-free baking blend.
Alternatively, for a quick, no-bake solution that eliminates blind baking entirely, use 1 ½ cups of crushed vanilla wafers mixed with 6 tablespoons of melted butter and press that mixture firmly into the pie dish before filling.

Recipe FAQs
How do I make sure I don't get a soggy bottom on this pie?
A soggy bottom is the bane of every baker! The key to avoiding this classic culinary catastrophe is a proper blind bake. Ensure you line your pastry shell with baking paper and use pie weights (or dry beans) for the first stage, then crucially, remove the weights and bake the crust until it is truly golden brown.
For extra insurance, brush the warm baked crust with a thin layer of egg white right before the final bake to create a moisture barrier before adding the filling.
I’ve heard meringue sometimes “weeps” or shrinks. How do I stop that on my Rainbow Lemon Meringue Pie?
Meringue weeping is a disaster, often happening when the sugar hasn't fully dissolved or if moisture seeps in. To prevent this, ensure your Swiss Meringue is heated exactly to 160°F (71°C) so the protein is stable and the sugar is dissolved.
More importantly, always apply the meringue crown directly onto the lemon filling while it is still warm; this step effectively "welds" the two layers together and drastically reduces the chances of that sticky, sugary liquid seeping out.
Do I really need gel food colouring for the rainbow effect, or will the liquid stuff from the cupboard do?
For vibrant colour and a stable meringue, gel colours are absolutely essential. Liquid food colouring introduces unwanted water into your delicate meringue foam, which causes it to collapse, deflate, and lose its stiffness all the opposite of what we want for those beautiful, towering peaks!
A tiny dab of gel goes a long way and keeps the structure intact, giving you that brilliant, traffic stopping rainbow finish.
This pie is massive! Can I make the Rainbow Lemon Meringue Pie ahead of time, and how long will it keep?
Like many meringue topped desserts, this pie is always best served on the day it's finished. While the crust and lemon filling can easily be made a day in advance and chilled, the meringue topping hates the fridge and will start to weep or become sticky after about 48 hours.
If you must store leftovers, keep them loosely covered in the fridge, but definitely enjoy it within two days for optimal freshness and texture.
Tempering egg yolks sounds like a right faff. Is there an easier way to ensure a thick lemon filling?
Tempering (slowly warming the yolks with the hot cornstarch mixture) is key for that intensely rich, glossy lemon flavour and texture. While it can feel a bit fiddly, it guarantees you won't end up with scrambled eggs in your pie!
Just remember the golden rule: pour the hot liquid into the yolks slowly, whisking continuously and vigorously. If you are really pressed for time, ensure you use the full measure of cornstarch, as it does the bulk of the thickening work.
Rainbow Lemon Meringue Showstopper Pie

Ingredients:
Instructions:
Nutrition Facts:
| Calories | 878 kcal |
|---|---|
| Protein | 6.8 g |
| Fat | 40.4 g |
| Carbs | 69.1 g |
| Fiber | 0.2 g |
| Sodium | 10012 mg |
