The Nostalgic Vanilla Sponge Cupcake Cones
Ditching the Dishes: Why Cupcake Cones are the Ultimate Party Hack
Do you ever look back at old birthday parties and cringe at the mountain of washing up? Honestly, juggling flimsy paper liners and finding matching cake stands is a total pain.
That’s exactly why I became obsessed with making Cupcake cones . They are the perfect solution for fuss free fun!
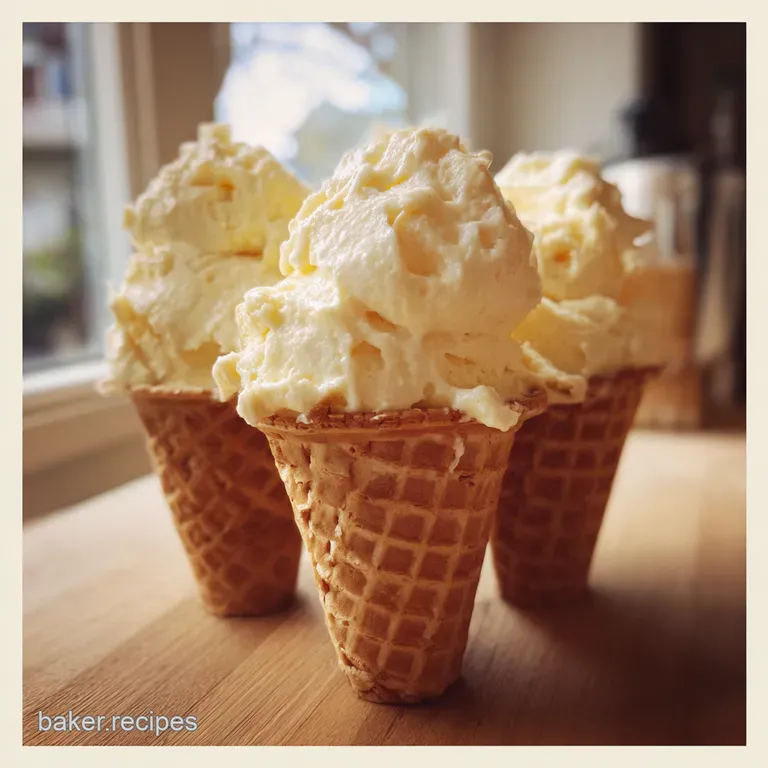
Forget messy wrappers and sticky fingers. We are diving deep into some proper nostalgic childhood baking today. These delightful ice cream cone cupcakes are pure genius because the container is edible.
I remember the very first time I tried to figure out how to bake cake in cones . Spoiler alert: I totally scorched the bottoms the first time around!
This specific recipe uses sturdy flat bottom wafer cones . They stand up straight in your muffin tin, making filling so easy.
We rely on an incredibly reliable and easy vanilla sponge recipe here. It cooks beautifully inside the cone without getting dry.
Learning how to prevent cupcake cones from burning requires just one little trick, which I will share later!
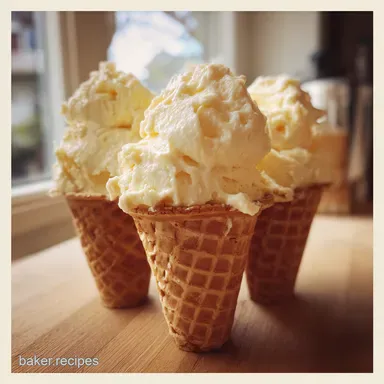
These playful treats are an absolute must for any birthday party dessert ideas list. They look incredible, especially when topped with glorious, colourful cake cones with sprinkles .
Plus, this is truly no paper liner baking . Less washing up after hosting is a huge win for me, you know?
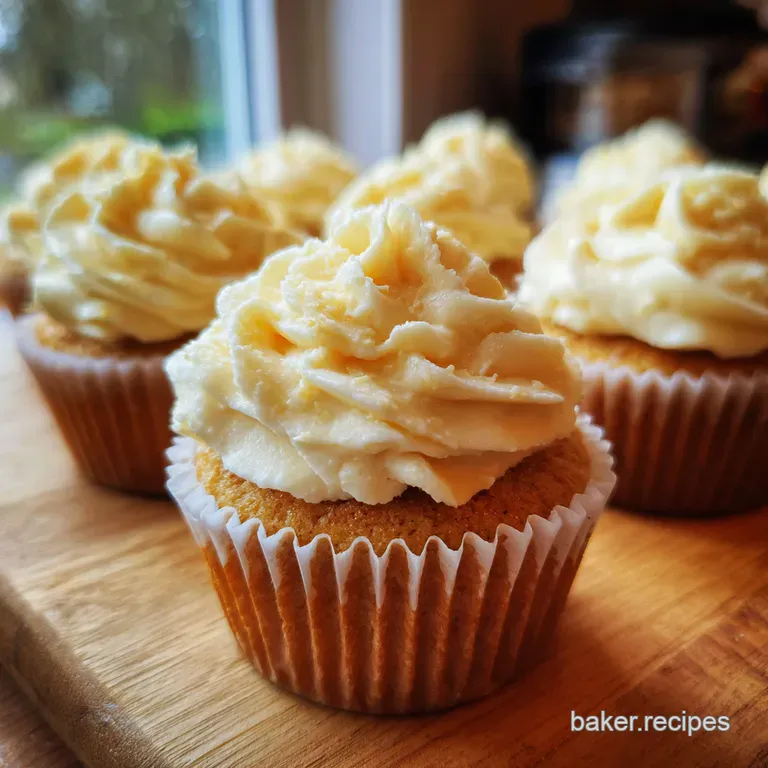
We are finishing these treats with a proper, cloud like American buttercream frosting recipe . It’s super stable for piping those mile high swirls that look just like soft serve.
Think classic British seaside holidays meeting your nan’s best sponge cake. Honestly, the crunch of the cone mixed with the soft cake is divine.
The whole thing takes just over an hour and you get a whopping 18 sturdy Cupcake cones from this batch.
Fun Fact: One study showed that people are psychologically happier with food that is served upright it makes it seem more generous! Right then, let’s get stuck into the prep.
These ingredients are simple, delicious, and utterly fabulous.
Gathering the Gear for Nostalgic Childhood Baking
Right, let’s get the shopping list sorted. We are making these awesome Cupcake cones ! This whole thing is pure nostalgic childhood baking magic.
It’s simple, but the quality really counts. Especially if you want that perfect texture, you know?
Essential Ingredients for the Perfect Treat
For the actual cake part that glorious easy vanilla sponge recipe we need the basics. Seriously, grab a good quality vanilla extract.
It makes all the difference here, trust me. We need 1 ½ cups (180 g) of flour and 1 cup (200 g) of sugar.
Make sure your butter is super soft; it should practically collapse when you poke it. That’s the secret to a fluffy bake!
For the frosting, which is essential for any great birthday party dessert ideas , we are making a robust American buttercream frosting recipe .
Don’t skip the salt! That pinch of salt, about ¼ tsp (1 ml) , cuts through the sweetness beautifully. Honestly, frosting is mostly sugar and butter, but that salt is the chef’s kiss.
We need 4 cups (480 g) of sifted confectioners' sugar.
Choosing Your Cone and Flavour Boosts
Okay, let’s talk about the stars of the show: the cones. You absolutely want those sturdy, reliable flat bottom wafer cones .
Avoid the cheap, pointy ones that always tip over. They will cause chaos in your oven. You need 18 of them.
When baking, I always add just a splash extra vanilla maybe an extra half teaspoon to the batter. It really amps up the flavour.
If you want to make these ice cream cone cupcakes zesty, grate in the zest of half a lemon instead of the extra vanilla.
Total game changer!
Tools of the Trade: How to Bake Cake in Cones Safely
Since we are doing no paper liner baking , the setup is crucial. The absolute must have is a standard 12-cup muffin tin.
This holds the cones perfectly upright. If you don't have enough muffin tins for all 18, just use crumpled tin foil in a casserole dish to create sturdy supports.
That’s my secret hack for how to bake cake in cones without them falling over!
We also need a good quality scoop. This is key to prevent cupcake cones from burning . You must fill them precisely.
I use a standard ice cream scoop it helps keep the batter level low. Too much batter, and you’ll get a messy dome or spillage.
A piping bag and a large star tip (like a Wilton 1M) are needed for the finishing touch those beautiful swirls that turn them into perfect cake cones with sprinkles .
Once we’ve got these ingredients and the gear, the hardest part is over. These are going to be brilliant!
Let’s Get This Party Started: Prep & Baking Secrets
Honestly, this recipe brings back all the best nostalgic childhood baking memories. Forget boring sheet cakes. We are making ice cream cone cupcakes ! They are pure genius for birthday party dessert ideas .
Why use a messy paper liner when you can eat the whole thing? We are conquering the no paper liner baking challenge today.
Prepping for Perfect Cupcake Cones
Before you switch on that mixer, let's get organized. This part is your secret weapon. It saves so much stress later, you know?
First, get your ingredients ready. Room temperature is key for that fluffy easy vanilla sponge recipe . Trust me on this.
Now, the genius hack: securing the cones. Grab your standard 12-cup muffin tin. To keep the cones stable and prevent them from burning, we need support.
Line your tin with some crumpled foil or parchment. Poke holes just big enough for the points of your flat bottom wafer cones to sit securely.
This makes sure they stand straight while we how to bake cake in cones . Oh my gosh, that stability is vital!
Next, the ultimate prevention tip. Cut 18 small 3x3-inch squares of parchment or wax paper. Press one square right into the bottom of each cone.
This acts as a moisture shield. It stops the cake batter from making the cones soggy during baking. Essential for that satisfying crunch!
Finally, preheat the oven to 350° F ( 175° C) .
Baking Brilliance in 5 Steps
This is where the magic happens. We want a perfect little dome of cake, not a mushroom top, right?
- Fill Gently: Use an ice cream scoop for easy filling. This keeps everything tidy.
- The Golden Rule: Only fill the cones 1/2 to 2/3 full maximum. Seriously, don’t overfill. The cake rises straight up. If you put too much batter in, it will spill over the rim and make a huge mess.
- Bake Time: Pop the prepared tray into the preheated oven. Bake for 18– 20 minutes .
- Check for Doneness: The cakes are done when the tops look nicely golden. Stick a toothpick right into the centre. It must come out clean.
- Cooling Crisis Averted: Take them out right away. Transfer them to a wire rack to cool completely. Do not even think about frosting them yet! The cones must be completely cool about 30 minutes minimum.
Pro Tips for Cake Cones with Sprinkles
Want that perfect bakery look? Here are my top three tips.
Prevent Cupcake Cones from Burning: If your oven runs hot, you might notice the cone edges browning quickly. If this happens around the 10-minute mark, loosely tent the cones with a sheet of aluminium foil.
That small tweak stops the wafer edges from crisping too fast.
Buttercream Basics: Use your softest butter for the American buttercream frosting recipe . Seriously soft. Whip it for at least three minutes before adding the sugar.
This incorporates air, making the buttercream light, smooth, and easy to pipe.
make-ahead Option: Bake the cones up to one day ahead. Store them unfrosted in an airtight container at room temperature. Frost just before serving. That crunch needs to be fresh!
Real Talk: Serving, Storing, and Snacking Secrets
Making the Display Pop! (Serving Suggestions)
Honestly, these are the ultimate birthday party dessert ideas . They are already standing up, ready to go! Since these ice cream cone cupcakes don't have that messy paper liner, the presentation is effortless.
I like to arrange them on a tiered cake stand for maximum impact. You could even stick them upright into a big box filled with some green shredded paper to make them look like a garden of treats.
Always finish with a flourish of cake cones with sprinkles right after piping. That vibrant colour instantly amps up the nostalgic childhood baking vibe.
And please, serve these with proper chilled milk. It’s mandatory.
Keep the Crunch: Essential Storage Tips
The main challenge when you how to bake cake in cones is keeping the cone crisp! You worked hard to prevent cupcake cones from burning while baking, so don't let them get soggy afterward.
If you used my crucial parchment square trick, you're halfway there.
Once they are frosted with that creamy American buttercream frosting recipe , they really need to be eaten within a day.
If you must store them, place them in an airtight container. If you find your flat bottom wafer cones have gone a bit soft the next day, try popping them into a 300° F ( 150° C) oven for 2- 3 minutes to crisp them up again before frosting them.
Do not fridge them, as the cold environment is enemy number one to the cone structure!
Seasonal Swaps & Adaptations
The brilliant thing about having such an amazing easy vanilla sponge recipe as your base is that you can adapt it to any season.
I once made a batch in November and swapped the vanilla for a bit of maple extract huge hit!
If you’re catering for allergies, remember this recipe is easily adapted. I often use a 1:1 gluten-free flour blend, and honestly, you'd barely taste the difference.
If you want to skip the piping entirely for even easier no paper liner baking , just dunk the cooled cake tops in a chocolate ganache.
These glorious Cupcake cones are supposed to be fun, not fussy!
Simple Nutrition Check
Look, we aren't pretending this is a salad. These treats are pure joy! Each one clocks in around 340 calories, depending on how generous you are with the frosting.
But here’s the thing: they offer total satisfaction. Life is too short to skip dessert, especially when it involves such fantastic nostalgic childhood baking .
The key health benefit of these cones is the serotonin boost you get from eating something truly delicious and homemade.
Go on, treat yourself! Baking these is a memory maker, and biting into that perfectly crisp cone beneath that fluffy sponge is simply the best. Get baking!

Frequently Asked Questions
Why did my ice cream cones go floppy or soft after baking, even with the parchment barrier?
Ah, the dreaded soggy bottom! This usually happens if the cones aren't cooled properly or if there's too much ambient moisture. Firstly, ensure you absolutely use that small square of parchment paper inside the cone it's your frontline defence against moisture seeping from the batter.
Secondly, transferring the cones immediately to a wire rack after baking is crucial; leaving them in the muffin tin allows steam to collect, making them go completely soft. Keep them uncovered while cooling to let that steam escape and keep things shipshape!
How do I ensure my Cupcake cones rise properly without spilling everywhere?
This is where precision is key, like measuring out tea for a perfect brew! The golden rule for baking these Cupcake cones is to only fill them 1/2 to 2/3 full. Unlike traditional cupcakes, the batter rises straight up rather than spreading out, so overfilling results in a mushroom cloud of cake overflowing the cone and creating a right mess.
Using a standard ice cream scoop is your best bet for consistent, even portions, ensuring a neat dome every time.
Can I make these ahead of time, and how long do they stay fresh and crisp?
While the sponge itself is best enjoyed within 2 days, the cones are prone to going stale quickly, so baking them the day before is ideal for maximum crispness. If you absolutely need to prepare them ahead, bake and cool the cones completely, then store them unfrosted in an airtight container at room temperature for up to 24 hours.
Only add the buttercream right before serving, as the moisture from the frosting will soften the cone over time.
Help! The wafer cones are starting to brown or burn before the cake is cooked through. What should I do?
If you're finding yourself in a right pickle with scorched cones, your oven may be running a tad hot, or you might be placing them too high. Try moving the muffin tin down to the middle rack, which provides more even heat distribution away from the top element.
For extreme cases, you can gently wrap a small strip of aluminium foil around the very top rim of the cones (above the batter line) for the last 5-7 minutes of baking this acts as a heat shield.
I prefer a sturdier texture; can I use waffle or sugar cones instead of standard wafer cones?
Absolutely, but you need to choose the flat bottomed variety for stability; pointed cones won't sit properly in the muffin tin and are a safety hazard. Sugar cones tend to be thicker and hold up exceptionally well to the baking process, offering a richer, crunchier texture that complements the soft vanilla sponge beautifully.
Avoid very flimsy, pointed wafer cones as they lack the necessary structural integrity for this type of bake.
The Nostalgic Vanilla Sponge Cupcake Cones
Ingredients:
Instructions:
Nutrition Facts:
| Calories | 350 kcal |
|---|---|
| Protein | 4 g |
| Fat | 15 g |
| Carbs | 45 g |
| Fiber | 0.5 g |
| Sugar | 35 g |
| Sodium | 100 mg |
