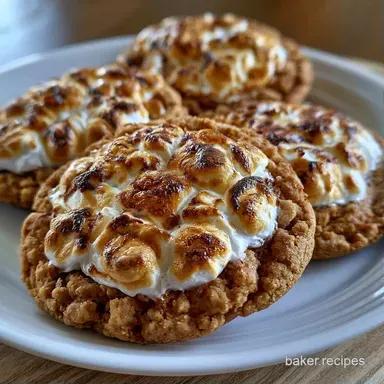
Toasted Marshmallow Cookies in 32 Minutes
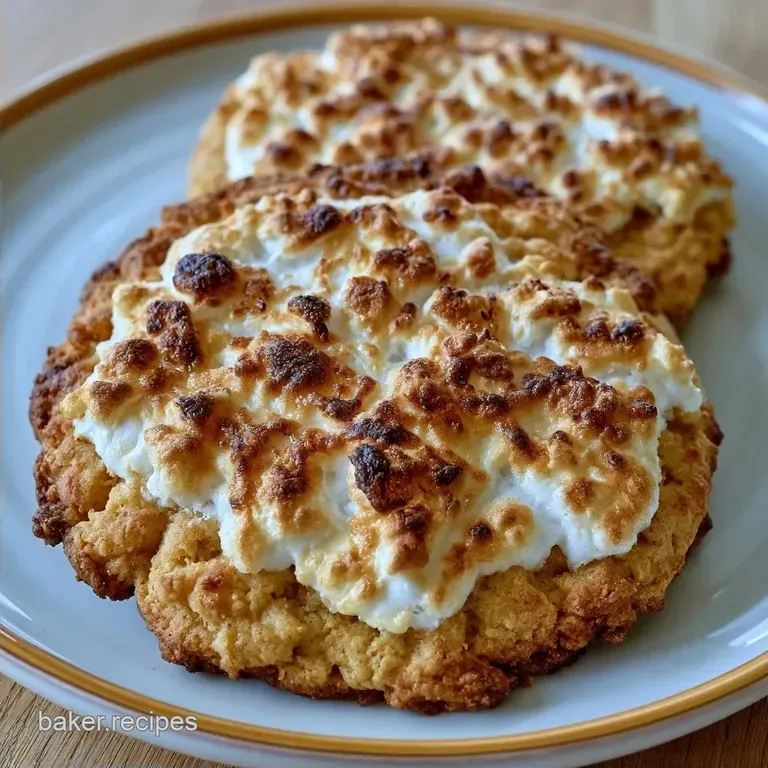
- Time: 20 min active + 12 min baking
- Flavor/Texture Hook: Gooey molten center with crisp buttery edges
- Perfect for: Late night cravings or a cozy dessert party
The scent of burnt sugar and warm vanilla always reminds me of August nights in the mountains. I remember the focused silence of waiting for a marshmallow to turn that specific shade of mahogany over a cedar fire. Trying to bring that same vibe into the kitchen was a mess at first.
My first few attempts ended with the marshmallows simply melting into a sticky puddle that disappeared into the dough.
But after playing with the dough's structure, I figured it out. You need a physical barrier to keep the marshmallow perched high. These Toasted Marshmallow Cookies give you that exact campfire contrast, combining a salty sweet base with a scorched, gooey crown.
It's a quick win because you don't need to chill the dough for hours. You can go from craving to eating in about 32 minutes. The result is a pastry that feels fancy but takes very little effort to pull off.
The Logic Behind the Gooeyness
- The Thumbprint Nest: Pressing a deep well into the dough stops the marshmallow from sliding. It creates a "cup" that holds the sugar as it melts, keeping the center gooey.
- Sugar Ratio: Using granulated sugar instead of brown sugar keeps the base lighter. This ensures the cookie doesn't overpower the marshmallow's toasted flavor.
- Heat Timing: Baking at 350°F for exactly 10-12 minutes sets the edges. This prevents the cookies from spreading too far, which would flatten the marshmallow.
If you like this kind of texture, you'll probably love my Chocolate Crinkle Cookies recipe, which also relies on a specific sugar to fat balance to get that cracked look.
Recipe Specs
Now, let's explore the different ways to prepare these. While some prefer a slow bake, the fast method is far more effective here.
| Method | Time | Texture | Best For |
|---|---|---|---|
| Fast Bake (This) | 32 mins | Crisp edges, molten top | Weeknight treats |
| Slow Chill | 2 hours | Chewier, denser base | Professional look |
| Torch Only | 20 mins | Soft base, charred top | Rapid serving |
To achieve the perfect result, aim for the 12-minute mark. Removing them too early leaves the dough raw, but waiting until 15 minutes will cause the marshmallow to melt into the cookie.
The Core Ingredient List
I've found that using room temperature butter is non negotiable here. If it's too cold, you'll get lumps. If it's melted, the cookies will turn into pancakes.
| Ingredient | What It Does | Best Swap |
|---|---|---|
| Unsalted Butter | Provides richness and lift | Salted butter (reduce added salt) |
| Granulated Sugar | Creates crisp edges | Coconut sugar (adds nuttiness) |
| All Purpose Flour | Builds the structure | 1:1 gluten-free blend |
| Large Marshmallows | The gooey, toasted crown | Mini marshmallows (use 5-6 per cookie) |
Getting the Tools Ready
No high end equipment is required for this recipe. While a standard stand mixer like a KitchenAid is ideal, a hand mixer or even a sturdy whisk and some effort will work just as well.
- Baking sheet (standard size)
- Parchment paper (to prevent sticking)
- Mixing bowls (one for wet ingredients, one for dry)
- Kitchen torch or oven broiler (for the char)
- Measuring cups and spoons
Chef Note: If you're using the broiler, watch the cookies closely. They can turn from "golden" to "burnt" in about 10 seconds.
Step-by-step Baking Guide
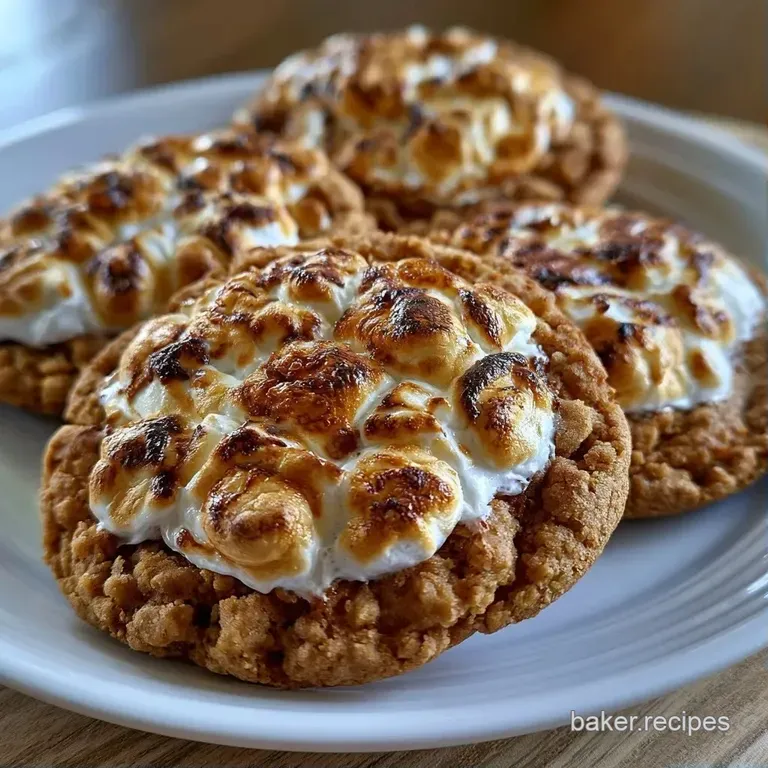
Let's get started with the process. Use these instructions to give your Toasted Marshmallow Cookies their signature look.
Phase 1: Preparing the Base
- Beat the softened butter and granulated sugar together on medium high speed. Continue for 2-3 minutes until the mixture is pale and airy.Tip: This adds air for a lighter result.
- Mix in the egg and vanilla extract. Beat until the batter is smooth and the egg is fully incorporated.
- Whisk the flour, baking soda, and salt in a separate bowl.
- Slowly fold the dry mixture into the wet ingredients. Stop as soon as the flour streaks disappear to avoid a tough, bready texture.
Phase 2: Shaping and Baking
- Scoop the dough into 16 equal balls, about 2 tablespoons each. Place them 2 inches apart on your parchment lined sheet.
- Press your thumb deep into the center of each ball to create a small, sturdy well.
- Press one large marshmallow firmly into the indentation.
- Set the oven to 350°F (175°C) and bake for 10-12 minutes until the outer ring is firm but the middle remains soft.
- Remove from the oven and lightly brush the tops with 1 tbsp of melted butter.
- Use a kitchen torch or the oven broiler to brown the tops until they bubble and turn a deep mahogany color.
Fixing Common Baking Glitches
Even straightforward recipes can run into trouble. Temperature is usually the main culprit; if your kitchen is too warm, the butter in the dough may soften too much before baking.
Preventing Marshmallow Sinkage
If your marshmallows melt completely into the dough, the "well" wasn't deep enough. They need a wall of dough for support. Next time, press further into the ball.
Controlling the Spread
When cookies spread too much, it's typically because the butter was too soft. You can prevent this by popping the scooped dough balls into the freezer for 5 minutes before adding the marshmallow.
Avoiding Burnt Bottoms
If the bottoms are dark but the tops aren't toasted, your oven rack is too low. Shift the rack to the middle for the initial bake and to the top for the broiler phase.
| Problem | Root Cause | Solution |
|---|---|---|
| Flat Cookies | Butter too warm | Freeze dough balls for 5 mins |
| Pale Topping | Insufficient heat | Use a kitchen torch for 30 seconds |
| Gummy Center | Underbaked | Add 2 more minutes to bake time |
Fun Twists and Swaps
After mastering the original Toasted Marshmallow Cookies, feel free to experiment with different tastes. I enjoy introducing some balance to the sugary profile.
- The S'mores Version: Push a small piece of dark chocolate into the base of the indentation before placing the marshmallow to create a molten chocolate center.
- Salty Crunch: Add a light dusting of sea salt flakes right after torching to balance the sweetness.
- Cinnamon Twist: Fold 1/2 tsp of cinnamon into the flour. This adds a cozy, fall like quality to the cookie that complements the toasted topping.
- For a firmer set
- refrigerate the dough for 15 minutes before scooping.
- For a softer center
- remove the cookies from the oven at precisely 10 minutes.
- For extra char
- opt for a kitchen torch over the broiler.
Keeping Cookies Fresh
For the best experience, enjoy these Toasted Marshmallow Cookies the day you bake them, as the marshmallow is gooiest right after torching.
Keep them in an airtight box on your counter for no more than 2 days. Avoid refrigerating them, since the butter in the base can harden and make the cookies seem stale. If you prefer to freeze them, wrap each one individually in foil for up to a month.
To restore their texture, microwave a cookie for 10 seconds to soften the marshmallow and make it taste fresh again.
To prevent waste, roll any leftover dough into small spheres and bake them as "cookie bites." These are a wonderful addition to any dessert platter.
The Best Pairing Ideas
Because these are quite sweet, I typically serve them with something that offers a bit of acidity or a sharp contrast. A chilled glass of milk is a timeless pairing, but a tangy raspberry coulis also works beautifully.
If you're hosting a gathering, these go perfectly with a scoop of Rocky Road Ice Cream. The contrast of the frozen ice cream against the warm, toasted marshmallow is delightful.
Another great option is to pair them with a bold, unsweetened coffee or an espresso. The coffee's bitterness balances the caramelized sugar of the Toasted Marshmallow Cookies, making the experience feel like a well rounded dessert rather than just a sugar rush.
Final Baking Tips
According to Serious Eats' research on sugar stability, the secret to a tender crumb is avoiding overmixing the dough. If you work the flour too much, you'll develop excess gluten, resulting in a tough cookie.
Trust the process, stop mixing once the flour is incorporated, and bring that campfire glow into your own kitchen.
Recipe FAQs
How to brown the marshmallows?
Use a kitchen torch or the oven broiler to toast the tops until they are mahogany colored and bubbling. This step happens after the cookies have finished baking.
Which marshmallows work best?
Use large marshmallows for the best visual impact and texture. These fit perfectly into the thumb pressed indentations.
Does the dough need chilling?
Chilling is not required for this recipe. You can scoop and bake the dough immediately after mixing.
Why do marshmallows melt away?
This usually happens if the marshmallows aren't pressed firmly into a deep enough well. Ensure you create a significant indentation in the dough before adding the candy.
Can I freeze the dough?
Yes, you can freeze the scooped dough balls. If you enjoy prepping dough ahead of time, you might also like our edible cookie dough.
What common mistakes should I avoid?
Overbaking the cookie base is the most frequent error. Pull them out when the edges are set but the center is still soft.
Is it true that you must bake these for 20 minutes?
This one's false: These only need 10-12 minutes at 350°F. Baking them longer will make the cookies too hard.
Toasted Marshmallow Cookies