Baked Chocolate Donuts: Velvety and Rich
- Time: 10 min active + 10 min bake + 35 min cool = Total 55 minutes
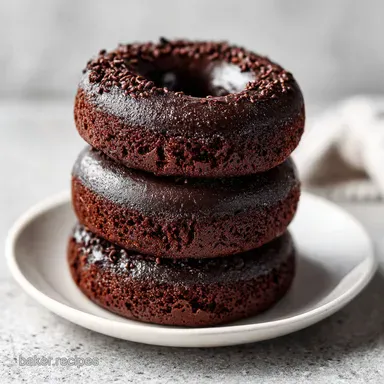
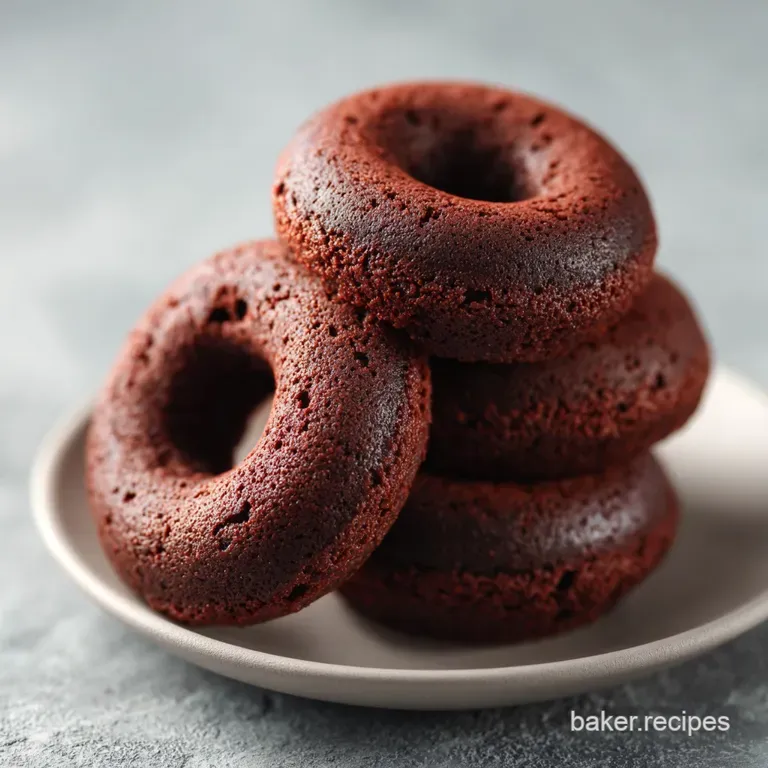
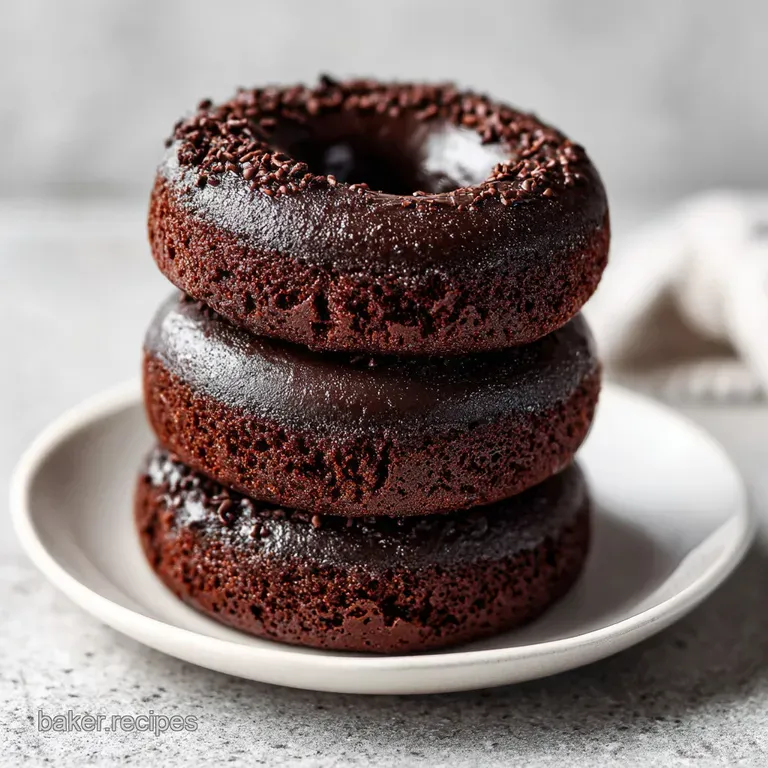
- Flavor/Texture Hook: Velvety, cake like interior with a glossy, shatter thin chocolate shell
- Perfect for: Weekend brunches, kid friendly baking, or a decadent dessert craving
- Making the Best Baked Chocolate Donuts
- The Secret to Velvety Texture
- Component Analysis
- Pantry Essentials for Chocolate
- Essential Tools for Success
- Step by Step Baking Guide
- Fixing Common Baking Glitches
- Troubleshooting Common Issues
- Flavor Variations and Substitutions
- Preserving Your Chocolate Treats
- The Best Drink Pairings
- Recipe FAQs
- 📝 Recipe Card
Making the Best Baked Chocolate Donuts
The smell of Dutch processed cocoa hitting a hot oven is, honestly, one of my favorite things in the world. It's that heavy, dark aroma that fills every corner of the kitchen, making the whole house feel like a professional pastry shop. I remember the first time I tried to swap frying for baking with donuts.
I was terrified they'd just be "cupcakes with holes," but once I found the right balance of fats, the game shifted completely.
The magic is in the contrast. You have the intense, rich chocolate of the batter meeting the tangy brightness of sour cream, all wrapped up in a glaze that's sweet but doesn't overpower the cocoa. These Baked Chocolate Donuts aren't trying to pretend they're from a deep fryer, and that's why they work.
They're a refined, soft, and deeply satisfying treat that feels indulgent but doesn't leave you feeling like you swallowed a sponge of oil.
Trust me, once you see that glossy glaze set on a warm donut, you'll never go back to the store-bought versions. It's about that specific moment when you bite through the thin chocolate shell and hit the tender, springy center. We're going for a texture that's almost like a high end truffle but in donut form.
Let's get into how to actually make this happen without any of the usual baking stress.
The Secret to Velvety Texture
To get a texture that doesn't feel like a dry muffin, we have to play with how the fats and acids interact. It's not about fancy equipment, just understanding how a few ingredients behave under heat.
Acidic Tenderizing: Sour cream introduces lactic acid, which breaks down gluten strands to keep the crumb soft. This prevents the donuts from becoming rubbery or too bread like.
Cocoa Alkalization: Using Dutch processed cocoa removes the natural acidity of the bean. This results in a darker color and a smoother, more mellow chocolate flavor that blends seamlessly with the fats.
Fat Suspension: The combination of melted butter and whole milk creates a stable emulsion. This ensures the moisture is distributed evenly, preventing those annoying dry spots in the center.
Leavening Balance: Baking powder provides an immediate lift in the oven. Because these are baked, we rely on this chemical reaction rather than yeast to get that airy, springy feel.
If you're curious about the difference between cocoa types, [Serious Eats](https://www.seriouseats.com) has a great breakdown of how alkalized cocoa changes the flavor profile of desserts.
| Method | Time | Texture | Best For |
|---|---|---|---|
| Oven Baked | 10 min | Velvety, cake like | Easy prep, cleaner taste |
| Deep Fried | 3 min | Crispy, oily exterior | Traditional indulgence |
Choosing the oven method means you avoid the mess of oil splatter and get a more consistent, tender interior that holds up better to heavy glazes.
Component Analysis
Not every ingredient is just a filler. Each one has a job to do in creating the structure and mouthfeel of these treats.
| Ingredient | Science Role | Pro Secret |
|---|---|---|
| Sour Cream | Moisture & Tenderness | Use full fat for a silkier crumb |
| Dutch Cocoa | Color & Flavor | Sift it to avoid dark clumps |
| Melted Butter | Richness & Stability | Don't let it boil; just melt |
| Whole Milk | Hydration | Room temp prevents batter splitting |
Pantry Essentials for Chocolate
Right then, let's look at what you actually need. I've listed the exact amounts from my tried and true method. Don't be tempted to eyeball the flour, as too much will make these feel like bricks.
For the Batter:
- 1.5 cups (190g) all purpose flourWhy this? Provides the necessary structure for the rise
- 0.5 cup (45g) Dutch processed cocoa powderWhy this? For that deep, dark, professional color
- 0.75 cup (150g) granulated sugarWhy this? Sweetens without adding too much bulk
- 1 tsp (5g) baking powderWhy this? Essential for the springy lift
- 0.25 tsp (1.5g) saltWhy this? Balances the sugar and enhances chocolate
- 1 large (50g) eggWhy this? Binds the ingredients and adds richness
- 0.5 cup (120g) sour creamWhy this? The secret to a moist, velvety texture
- 0.5 cup (120ml) whole milkWhy this? Thins the batter for easy piping
- 4 tbsp (55g) unsalted butter, meltedWhy this? Adds a classic pastry richness
For the Glossy Glaze:
- 1 cup (120g) powdered sugar
- 3 tbsp (15g) cocoa powder
- 2 tbsp (30ml) whole milk
- 2 tbsp (28g) melted butter
| Original Ingredient | Substitute | Why It Works |
|---|---|---|
| Sour Cream (0.5 cup) | Greek Yogurt (plain, full fat) | Similar acidity and fat. Note: Slightly tangier finish |
| Whole Milk (0.5 cup) | Almond Milk (unsweetened) | Provides liquid. Note: Slightly less richness in crumb |
| All Purpose Flour | 1:1 gluten-free Blend | Mimics wheat structure. Note: May be slightly denser |
If you love the chocolate intensity here, you might also enjoy my [German Chocolate Cake](https://baker.recipes/recipes/bake classic-german chocolate-cake delightfully/) for a more complex flavor profile.
Essential Tools for Success
You don't need a commercial kitchen, but a few specific tools make this way easier. Honestly, trying to spoon batter into a donut pan is a nightmare and usually leads to messy edges.
- 12 slot donut pan: The only way to get that classic shape.
- Piping bag (or a Ziploc bag): Essential for filling the cavities cleanly.
- Wire cooling rack: Prevents the bottoms from getting soggy.
- Fine mesh sieve: For sifting the cocoa powder.
- Whisk and medium bowls: For mixing wet and dry components separately.
Step by step Baking Guide
Let's crack on with the actual process. Remember, the goal is to avoid overmixing. Once the flour disappears, stop. Overmixing develops too much gluten, which turns your velvety donut into a tough piece of bread.
Phase 1: Preparing the Batter
- Whisk together the flour, cocoa powder, sugar, baking powder, and salt in a large bowl until no lumps remain. Note: Sifting the cocoa first is a lifesaver here.
- In a separate medium bowl, beat the egg, sour cream, milk, and melted butter until smooth.
- Pour the wet ingredients into the dry bowl and whisk until just combined; stop as soon as the streaks of flour disappear.
Phase 2: The Baking Process
- Grease a 12 slot donut pan thoroughly. Transfer the batter into a piping bag and fill each cavity about 3/4 full. Note: Overfilling will cause them to merge into one giant chocolate cake.
- Bake at 350°F (175°C) for 8–10 minutes until the tops spring back lightly when touched.
- Allow donuts to cool in the pan for 5 minutes before flipping them onto a wire rack to cool completely.
Phase 3: Finishing and Glazing
- Whisk together powdered sugar, cocoa powder, milk, and melted butter until glossy.
- Dip the top of each cooled donut into the glaze and lift straight up for a smooth finish.
Chef Tip: To get that professional "mirror" look on your glaze, make sure your butter is melted but not hot. If the glaze is too thick, add milk a teaspoon at a time until it flows like heavy cream.
Fixing Common Baking Glitches
Even the best of us have a bad batch. Most issues with Baked Chocolate Donuts come down to temperature or timing. If they aren't coming out right, it's usually a quick fix.
Troubleshooting Common Issues
| Issue | Solution |
|---|---|
| Why Your Donuts Stick to the Pan | This usually happens because the pan wasn't greased enough or the donuts were flipped too early. If you use a non stick spray, make sure it's the kind with flour in it. Give them those full 5 minutes |
| Why the Batter is Too Thick | If you're struggling to pipe the batter, you might have used a heavier hand with the flour. Don't just add more milk, or you'll throw off the leavening. Instead, give the batter a few more vigorous wh |
| Why Your Glaze is Runny | This is almost always due to adding too much milk or the butter being too hot. The fix is simple: whisk in more powdered sugar one tablespoon at a time. You want a consistency that coats the back of a |
Flavor Variations and Substitutions
Once you've nailed the base recipe, you can start playing with the flavors. I love treating this as a canvas. If you're in the mood for something different, try these tweaks.
For Chocolate Donut Holes Instead of filling the donut pan, pipe small mounds of batter onto a parchment lined baking sheet. Bake them for about 6-8 minutes. They're essentially little chocolate bombs that are even faster to eat.
Using a Cake Mix Shortcut If you're in a massive rush, you can use a chocolate cake mix. Replace the flour, sugar, and cocoa with the mix, but keep the sour cream and egg. For a similar vibe, you might like my Chocolate Cake Mix Cookies.
For a Vegan Version Swap the butter for coconut oil and the milk for soy or oat milk. Use a commercial egg replacer (like Just Egg) or a flax egg. Note that the texture will be slightly denser and less springy, but still rich.
Decision Shortcut: If you want a richer taste → Use dark chocolate chunks in the batter. If you want a lighter feel → Swap sour cream for Greek yogurt. If you want a nutty twist → Add 1/2 tsp of almond extract to the glaze.
Preserving Your Chocolate Treats
Baked goods with sour cream actually stay moist longer than those made with just butter, but you still need to be smart about storage to keep that velvety texture.
Fridge and Counter Storage These can sit on the counter in an airtight container for about 2 days. However, because of the dairy in the glaze and batter, the fridge is safer for longer storage. In the fridge, they'll last up to 5 days. Just be aware that the glaze might soften slightly.
Freezing for Later You can absolutely freeze these! I recommend freezing them before glazing. Wrap the plain donuts tightly in plastic wrap and store them in a freezer bag for up to 3 months. When you're ready to eat, thaw them at room temperature and then apply a fresh batch of glaze.
Zero Waste Tips If you have leftover glaze, don't toss it. It's incredible drizzled over a bowl of fresh strawberries or used as a dip for apple slices. If you have a bit of batter left in the piping bag, just drop it into a muffin tin for a single "tester" cupcake.
The Best Drink Pairings
Because these are so rich, you need something to cut through the chocolate. The contrast between the sweet donut and a bitter or acidic drink is what makes the experience feel like a real treat.
The Coffee Classic A strong black coffee or a double espresso is the gold standard here. The bitterness of the coffee enhances the notes of the Dutch cocoa. If you prefer milk, a flat white adds a creamy layer that mirrors the sour cream in the batter.
The Tea Twist Earl Grey tea is a sleeper hit with Baked Chocolate Donuts. The bergamot (citrus) notes in the tea provide a bright contrast to the heavy chocolate, cleaning your palate between bites.
The Cold Option A glass of cold oat milk or a tart raspberry smoothie works wonders. The fruitiness of a berry drink cuts through the richness of the melted butter and cocoa, preventing the dessert from feeling too heavy.
- Richness
- Dutch cocoa + melted butter
- Tang
- Sour cream + Greek yogurt (if substituted)
- Sweetness
- Powdered sugar glaze
- Contrast
- Bitter coffee or citrus tea
Right then, you're all set. These Baked Chocolate Donuts are a total crowd pleaser because they hit that sweet spot between a sophisticated pastry and a comforting childhood snack. Just remember: don't overmix, grease your pan like your life depends on it, and enjoy that first, velvety bite. Happy baking!
Recipe FAQs
How to prevent baked chocolate donuts from sticking to the pan?
Grease the 12-slot donut pan thoroughly and allow the donuts to cool in the pan for exactly 5 minutes before flipping. This allows the structure to set so they release cleanly.
Is it true that whisking the batter until it is perfectly smooth is necessary?
No, this is a common misconception. Stop whisking as soon as the streaks of flour disappear to avoid overdeveloping gluten, which makes the donuts tough.
How to get a smooth finish on the chocolate glaze?
Dip the top of each completely cooled donut into the glossy glaze and lift straight up. This prevents drips and ensures an even coating.
How to tell when the baked donuts are finished?
Touch the tops lightly to see if they spring back. They are done after baking at 350°F (175°C) for 8 10 minutes.
Can I use a different fruit flavored glaze instead of chocolate?
Yes, you can customize the topping. If you want a fruity alternative, try the glazing method used for our strawberry donuts for a bright contrast.
How to fix chocolate donut batter that is too thick to pipe?
Whisk the batter more vigorously rather than adding more milk. This helps smooth out the consistency without disrupting the leavening balance.
Do I have to use sour cream in the batter?
Yes, it is highly recommended. Sour cream provides the necessary acidity and fat to keep the crumb tender and velvety.
Baked Chocolate Donuts