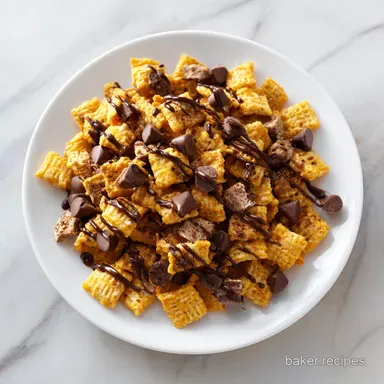
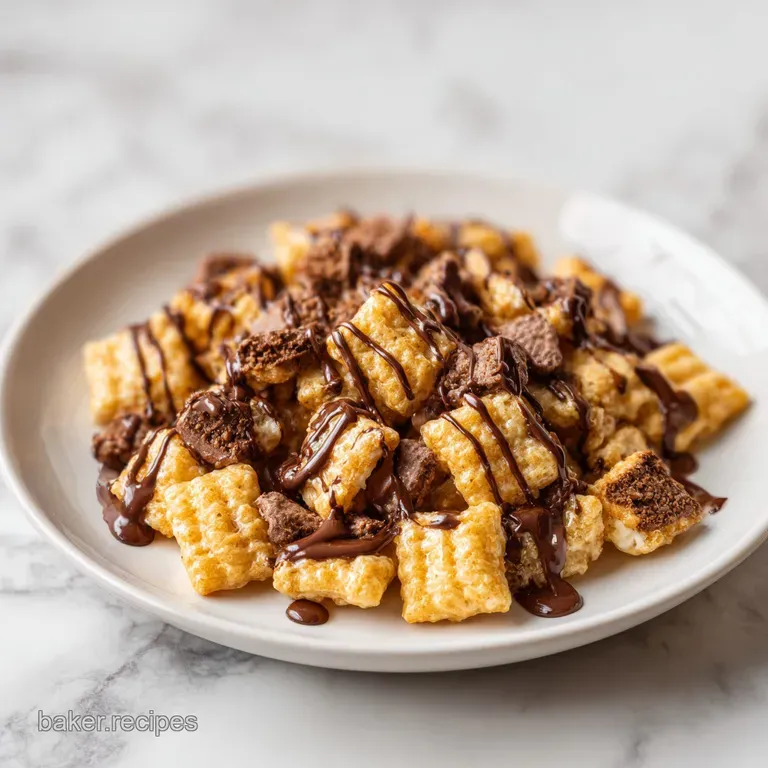
Butterfinger Rice Krispie Treat with Chocolate Drizzle
- Time:15 minutes active + 15 minutes cooking = Total 30 minutes
- Flavor/Texture Hook: Salty sweet crunch with a glossy, silky chocolate finish
- Perfect for: Quick parties, kids' lunches, or a late night sugar craving
- Butterfinger Rice Krispie Treat with Chocolate Drizzle
- The Logic of Chewy Treats
- Component Analysis
- The Essential Ingredient List
- Required Baking Gear
- Step-by-Step Preparation
- Fixing Common Texture Issues
- Flexible Dietary Substitutes
- Dispelling Common Kitchen Myths
- Storage and Zero Waste
- Professional Plating Ideas
- Recipe FAQs
- 📝 Recipe Card
Butterfinger Rice Krispie Treat with Chocolate Drizzle
The smell of melting marshmallows always takes me back to my grandmother's kitchen, where the air felt thick with sugar and warmth. I remember watching her stir a huge pot of goo, the way it would stretch in long, iridescent ribbons before the cereal hit the pan.
Back then, they were plain, but as I grew up, I started wondering why we didn't treat these treats like actual candy bars. I wanted that specific, jagged crunch of a Butterfinger and the richness of a professional pastry shop.
Here is the perfect Butterfinger Rice Krispie Treat with Chocolate Drizzle recipe. It's not just a childhood snack anymore, it's a full blown dessert. We're layering the saltiness of peanut butter against the snap of chocolate and the airy crunch of the cereal.
Trust me on this, once you add the peanut butter into the marshmallow base, you can't go back to the basic version.
The goal here is a balance of textures. You want a base that gives slightly when you bite into it, followed by the sudden shatter of the candy bars, and finished with a velvety chocolate coating.
It's a simple process, but a few small tweaks in how you handle the heat make the difference between a treat that's too hard to chew and one that stays soft for days.
The Logic of Chewy Treats
The reason most homemade cereal treats turn into bricks is that the sugar in the marshmallows is overheated. When you cook them too long, the sugar crystallizes, and you end up with something more like a jawbreaker than a snack.
- Fat Buffer
- Adding peanut butter introduces extra fats that interfere with the sugar crystals, keeping the base soft.
- Moisture Control
- Low heat prevents the marshmallows from evaporating their moisture too quickly.
- Chocolate Fluidity
- Coconut oil breaks down the thickness of the chocolate chips, creating a glossy drizzle that doesn't crack when you cut the bars.
- Air Incorporation
- Pressing the mixture lightly instead of packing it down preserves the air pockets in the cereal.
| Servings | Ingredient Adjustments | Pan Size | Cook Time |
|---|---|---|---|
| 12 people | Use 1/2 of all ingredients | 8x8 inch pan | 12 minutes |
| 24 people | Use full recipe amounts | 9x13 inch pan | 15 minutes |
| 48 people | Double all ingredients | Two 9x13 pans | 20 minutes |
Right then, let's look at what the individual components actually do for the final result. It's not just about flavor, it's about how these things react in the pot.
Component Analysis
| Ingredient | Science Role | Pro Secret |
|---|---|---|
| Mini Marshmallows | Binding Agent | Use fresh bags to ensure a better stretch |
| Creamy Peanut Butter | Texture Softener | Stir in after heat to keep it creamy |
| Coconut Oil | Viscosity Modifier | Makes the chocolate drizzle pour easily |
| Butterfinger Bars | Textural Contrast | Chop into irregular sizes for better bite |
When you're gathering your supplies, don't be tempted to use low-fat butter or substitute the peanut butter for something like almond butter without knowing it'll change the flavor profile. We want that classic, salty peanut punch.
The Essential Ingredient List
For the base, you'll need: - 6 tbsp (85g) unsalted butter Why this? Provides the richness and prevents sticking - 10 oz (285g) mini marshmallows Why this? Melts faster and more evenly than large ones - 6 cups (140g) Rice Krispies cereal Why this? The classic, airy crunch - 1/3 cup (80g) creamy peanut butter Why this? Adds depth and maintains chewiness - 3 Butterfinger candy bars (approx.
125g), roughly chopped Why this? The signature salty crunchy element
For the topping: - 1 cup (170g) semi sweet chocolate chips Why this? Balances the sweetness of the marshmallows - 1 tbsp (15ml) coconut oil Why this? Ensures a smooth, glossy finish
| Original Ingredient | Substitute | Why It Works |
|---|---|---|
| Unsalted Butter | Salted Butter | Works fine. Note: Reduce added salt if using |
| Semi sweet Chips | Dark Chocolate | More intense cocoa. Note: Less sweet overall |
| Coconut Oil | Vegetable Oil | Similar fluidity. Note: Lacks the slight coconut aroma |
| Rice Krispies | Corn Flakes | Heavier crunch. Note: Denser final texture |
Now, before we jump into the pan, make sure you've got your gear ready. There is nothing worse than having the marshmallows melt and then realizing you can't find your parchment paper.
Required Baking Gear
You don't need a professional kitchen for this, but a few tools make it way easier. A large non stick pot is a must, otherwise, you'll spend an hour scrubbing marshmallow glue off the bottom of your pan. I usually use a heavy bottomed pot to distribute the heat evenly.
You'll also need a greased spatula. I've made the mistake of using a dry spatula, and let me tell you, it's a nightmare. The marshmallow mixture will cling to it like it's alive. A little bit of butter or non stick spray on the tool saves you from a sticky mess.
Finally, a 9x13 inch baking pan. I always recommend lining it with parchment paper. If you just grease the pan, you'll end up fighting with the treats to get them out, and they'll lose that clean, squared off look.
Step-by-step Preparation

- Line a 9x13 inch baking pan with parchment paper, leaving an overhang on the sides for easy removal.
- Roughly chop the Butterfinger bars into irregular, peanut sized pieces. Note: Keep some tiny crumbs for the garnish
- Melt the butter over low heat in a large non stick pot until bubbling.
- Stir in the mini marshmallows, stirring constantly until they become a smooth, velvety pool.
- Remove the pot from heat immediately and whisk in the creamy peanut butter until the mixture is a uniform mahogany gold. Note: Removing from heat prevents the sugar from overcooking
- Gently fold in the Rice Krispies cereal and 3/4 of the chopped Butterfinger pieces until just coated.
- Press the mixture into the prepared baking pan using a greased spatula; press lightly to keep the treats airy.
- Microwave the semi sweet chocolate chips and coconut oil in 20 second intervals, stirring between each, until the mixture is glossy and fluid.
- Using a fork or a piping bag, drizzle the chocolate in thin, diagonal lines across the top of the treats.
- Sprinkle the remaining Butterfinger crumbs over the wet chocolate for garnish.
Chef's Note: If you're feeling adventurous, try adding a pinch of flaky sea salt over the wet chocolate. It cuts through the sugar and makes the peanut butter flavor pop.
Fixing Common Texture Issues
One of the most common complaints with these cereal treats is that they can become too hard. This usually happens because the marshmallow mixture was cooked for too long or pressed too firmly into the pan.
If you pack them down like you're building a brick wall, you lose all the air, and the treat becomes dense and chewy in a bad way.
Hard Base Fixes
If your treats are too hard, it's likely due to over heating the marshmallows. Next time, pull the pot off the stove the second the marshmallows look melted, even if a few lumps remain. The residual heat will finish the job.
Chocolate Separation Fix
Sometimes chocolate can "seize" or look grainy. This happens if a drop of water gets into the bowl or if you overheat it in the microwave. Use the 20 second interval method and stir well each time to keep the emulsion stable.
| Problem | Root Cause | Solution |
|---|---|---|
| Rock hard treats | Overcooked marshmallows | Remove from heat sooner |
| Cereal is crushed | Pressed too hard in pan | Use a light touch with spatula |
| Chocolate is dull | Not enough coconut oil | Stir in 1/2 tsp more oil |
To make sure your next batch is spot on, keep this checklist in mind while you're cooking.
- ✓ Use a non stick pot to prevent marshmallow burning
- ✓ Grease your spatula before pressing the mixture
- ✓ Remove the pot from heat before adding peanut butter
- ✓ Stir chocolate every 20 seconds to avoid burning
- ✓ Let the chocolate set for 15 minutes before slicing
Flexible Dietary Substitutes
If you're making these for a crowd with different needs, you can tweak a few things. For a nut free version, you can swap the peanut butter for sunflower seed butter and use crushed pretzels or corn nuts instead of Butterfingers. The salt sweet contrast remains the same, but it's safer for allergies.
If you want a different flavor profile entirely, you could try my S'mores Rice Krispies approach by adding graham cracker pieces and mini chocolate chips into the mix. It's a similar vibe but leans more into that campfire nostalgia.
For those wanting a slightly more "grown up" version, try using a 70% cocoa dark chocolate for the drizzle. The bitterness of the dark chocolate plays incredibly well with the saltiness of the peanut butter, making the whole thing feel less like a kid's snack and more like a pastry.
| Method | Time | Texture | Best For |
|---|---|---|---|
| Stovetop | 30 min | Classic Chew | Every day treats |
| Microwave | 20 min | Softer/Gooier | Last minute cravings |
Before we move on to storage, let's clear up a few things. You'll often hear people say that you need to "sear" the butter or use a specific type of marshmallow, but most of that is just noise.
Dispelling Common Kitchen Myths
Some people claim that using a slow cooker to melt the marshmallows makes them softer. While it's a convenient way to keep them warm, it doesn't actually change the molecular structure of the sugar. The key is just avoiding high heat.
Another myth is that you have to let these set in the fridge for hours. Actually, chilling them for too long can make the butter in the base too hard, which takes away from that velvety mouthfeel. A quick 15-30 minutes is all you need for the chocolate to set.
Storage and Zero Waste
Store these treats in an airtight container at room temperature for up to 3 days. If you keep them in the fridge, they'll stay fresh longer, but you'll lose some of that softness. I prefer room temperature because it keeps the peanut butter base more supple.
For long term storage, you can freeze these for up to 2 months. Wrap each square individually in parchment paper and then place them in a freezer bag. When you're ready to eat, let them thaw for 10 minutes, or pop them in the microwave for 5 seconds to get that gooey texture back.
Regarding zero waste, don't throw away the leftover chocolate in the bowl. You can stir in a few more Butterfinger crumbs and dip some pretzels or apple slices into it. If you have leftover Rice Krispies, they make a great crunchy topping for yogurt or smoothies. If you're looking for other festive ideas, check out my Candy Corn Rice Krispie Treats for your next holiday bash.
Professional Plating Ideas
To get those clean, sharp edges, use a large sharp kitchen knife and wipe the blade with a damp cloth between every single cut. This prevents the sticky marshmallow from dragging and tearing the treats.
Instead of just cutting them into squares, try using a circular cookie cutter for a "truffle" look. You can stack two thin circles and put a dollop of peanut butter in the middle for a fancy dessert sandwich.
For a party platter, arrange the squares in a staggered pattern on a wooden board. Garnish the board with a few whole Butterfinger pieces and some fresh raspberries. The tartness of the berries cuts through the richness of the chocolate and peanut butter, making the whole presentation feel more balanced.
Recipe FAQs
Why is Butterfinger discontinued?
It is not discontinued. While the recipe was updated and distribution changed, the candy remains available in most grocery stores.
How far in advance can I make rice krispie treats dipped in chocolate?
Prepare them up to 3 days before serving. Store them in an airtight container at room temperature to ensure the peanut butter base stays supple.
What is the new Butterfinger flavor?
The core flavor remains a peanut butter and crispy center. Most "new" versions are simply limited edition varieties or updated packaging.
Why do bodybuilders eat rice krispie squares?
They provide a fast source of simple carbohydrates. This gives them a quick energy boost to replenish glycogen stores before or after intense workouts.
How to prevent the marshmallow mixture from becoming hard?
Remove the pot from heat immediately after the marshmallows melt. Overheating the sugars causes the treats to become tough and hard rather than gooey.
Can I use a different chocolate for the drizzle?
Yes, you can use milk or white chocolate chips. If you enjoy the salty sweet combination found in our peanut butter blondies, any chocolate variety will pair well with the Butterfinger pieces.
Is it true that I should pack the mixture tightly into the pan for better slices?
No, this is a common misconception. Press the mixture lightly to keep the treats airy; packing them too tightly results in a dense, chewy texture.
Butterfinger Rice Krispie Treats