Classic Apple Pie: Flaky and Golden
- Time:30 minutes active + 60 minutes chilling + 50 minutes bake = 140 minutes total
- Flavor/Texture Hook: A shatteringly flaky, buttery crust surrounding a velvety, spiced apple center.
- Perfect for: Holiday gatherings, Sunday family dinners, or celebrating the autumn harvest.
- Mastering the Secrets of a Perfect Classic Apple Pie
- Essential Timing and Yield for Success
- Flour and Butter for Flaky Crusts
- Best Tools for Better Pie Baking
- Step-by-Step Guide for Golden Crusts
- Pro Fixes for Every Baking Mistake
- Creative Filling Swaps for Better Flavor
- Proper Storage for Long Lasting Freshness
- Perfect Pairings for Every Warm Slice
- Recipe FAQs
- 📝 Recipe Card
Mastering the Secrets of a Perfect Classic Apple Pie
Have you ever wondered why some pies have that massive, hollow cavern between the top crust and the apples? It is one of those kitchen mysteries that used to drive me absolutely wild.
I remember standing in my farm fresh kitchen, pulling out a beautiful, mahogany domed pie, only to slice into it and find the fruit had slumped into a sad little puddle at the bottom, leaving a "roof" of pastry suspended in mid air. It felt like a betrayal of all that hard work.
But that gap isn't just bad luck it's actually a fascinating bit of kitchen physics that we can totally control with a few simple tweaks to how we handle our fruit.
When you walk into a house where a classic apple pie is bubbling away in the oven, the aroma is unmistakable. It’s that deep, caramelized scent of brown sugar meeting warm cinnamon, mixed with the buttery, toasted notes of a crust that is browning to perfection.
For me, this dish is the ultimate celebration of the orchard. Using seasonal, crisp apples like Granny Smiths mixed with Honeycrisps provides that perfect contrast of tart and sweet that makes every bite interesting.
We aren't looking for a mushy interior; we want apples that hold their shape but yield softly to the tooth, surrounded by a sauce that is thick enough to coat a spoon without being gummy.
This recipe is the result of years spent in the kitchen, leaning into the rhythms of the harvest. I’ve learned that the secret to a truly impressive pie isn't just the ingredients it’s the temperature of your hands and the patience you have for the dough.
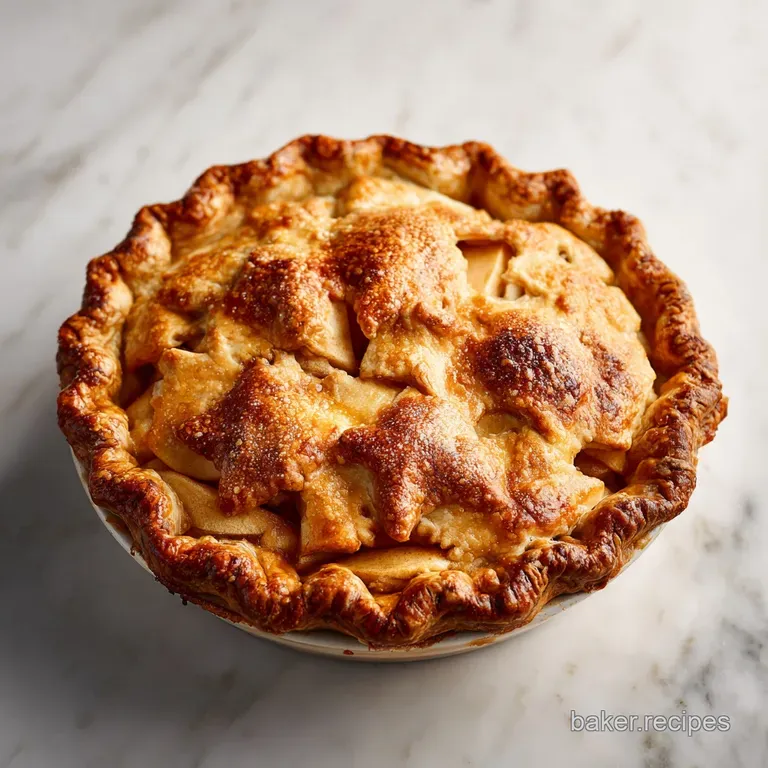
We are going to walk through exactly how to get that "shatter crisp" texture that makes people stop talking the moment they take a bite. Trust me, once you see how the butter creates those visible layers in the pastry, you'll never go back to the store-bought stuff again.
Essential Timing and Yield for Success
Before we start rolling out dough and peeling fruit, let's look at the logistics. This recipe is designed to serve a crowd, yielding 10 generous slices. Timing is everything when it comes to pastry.
You cannot rush the chilling process; it’s what prevents the crust from shrinking and ensures the butter doesn't melt before it hits the hot oven. If you try to skip the hour in the fridge, you'll end up with a greasy mess instead of those coveted flakes.
Steam Lift: When those pea sized bits of cold butter hit the high heat of the oven, the water in the butter evaporates instantly. This creates tiny pockets of steam that puff up the layers of flour, resulting in a crust that is light and airy rather than dense and biscuit like.
Enzymatic Control: By tossing the apples with lemon juice and sugars for 10 minutes before baking, we draw out the excess moisture. This maceration process ensures that the juices thicken properly with the cornstarch, preventing the "soggy bottom" syndrome that ruins many otherwise lovely pies.
Starch Gelatinization: The cornstarch needs to reach a specific temperature (the bubbling point) to fully thicken. This is why we wait until the filling is visibly bubbling through the vents before we pull the pie out.
| Servings | Ingredient Adjustments | Pan Size | Cook Time |
|---|---|---|---|
| 5 people | Halve all ingredients; use 1 egg yolk for wash | 15cm (6 inch) deep dish | 40 minutes |
| 10 people | Standard recipe as listed in Schema | 23cm (9 inch) deep dish | 50 minutes |
| 20 people | Double all ingredients; work in batches | Two 23cm (9 inch) plates | 55 minutes |
When you're scaling this up for a big harvest party, remember that doubling the dough can be a workout. I usually find it easier to make two separate batches of dough rather than one massive lump. It keeps the butter colder and more manageable.
If you are baking two pies at once, make sure to rotate them halfway through the 50 minutes to ensure they both achieve that beautiful mahogany finish.
Flour and Butter for Flaky Crusts
The foundation of any classic apple pie is the relationship between the fat and the flour. We are using 225g of unsalted butter here. It must be ice cold I'm talking "just came out of the back of the fridge" cold.
If the butter softens while you are working it into the 320g of all purpose flour, it will emulsify into the flour rather than staying in distinct clumps. This leads to a mealy crust rather than a flaky one.
| Ingredient | Role | Pro Secret |
|---|---|---|
| All Purpose Flour | Provides the structural framework | Weigh your flour (320g) to avoid a dry, tough crust |
| Unsalted Butter | Creates flakes and rich flavor | Keep 2 tablespoons separate to "dot" the fruit for extra silkiness |
| Cornstarch | Thickens the apple juices | Mix it thoroughly with the sugars to prevent any chalky clumps |
It is also vital to use a mix of apples. Using only one variety can lead to a one dimensional flavor. The Granny Smiths provide the necessary acidity and structure, while the Honeycrisps bring a honey like sweetness and a juice that creates a velvety sauce when combined with the cinnamon and nutmeg.
Best Tools for Better Pie Baking
You don't need a professional kitchen to make a world class pie, but a few specific tools make the process much smoother. A pastry cutter is my favorite way to incorporate the butter because it keeps your warm hands away from the dough.
If you don't have one, two knives or even a sturdy fork will work, but it takes a bit more elbow grease.
A deep dish pie plate is essential for this recipe because we are using 8 large apples. A shallow plate simply won't hold the volume, and you'll end up with filling spilling over the sides and burning on the bottom of your oven.
I also highly recommend a solid rolling pin preferably a heavy marble or a French tapered one to get the dough to that perfect 3mm thickness without sticking.
| Method | Time | Texture | Best For |
|---|---|---|---|
| Fresh Homemade | 140 minutes | Shatteringly flaky | Special occasions and holidays |
| Premade Crust | 70 minutes | Consistent but less rich | Quick weeknight cravings |
| Frozen Apples | 150 minutes | Softer, more jam like | Baking in the off season |
If you decide to take a shortcut, the outcome will change slightly. A premade crust is often thinner and more uniform, which means it won't have the same "puff" as our butter heavy homemade version. It’s a trade off between time and that authentic, farm fresh texture. For another seasonal favorite, you might enjoy my creamy pumpkin pie which uses a similar chilling technique for the base.
step-by-step Guide for Golden Crusts
- Whisk the base. In a large bowl, combine 320g flour, 1 tablespoon granulated sugar, and 1 teaspoon sea salt. Note: Whisking ensures the salt and sugar are evenly distributed before the fat is added.
- Cut the butter. Work the 225g of ice cold, cubed butter into the flour using a pastry cutter. Stop when you see pea sized clumps.
- Hydrate the dough. Drizzle in 8 tablespoons of ice water, one at a time. Note: Only add enough water so the dough holds together when squeezed; too much leads to a tough crust.
- Chill the discs. Divide the dough into two even portions, wrap tightly in plastic, and refrigerate for 60 minutes.
- Prep the apples. Peel, core, and slice 8 large apples, then toss with 100g brown sugar, 50g granulated sugar, lemon juice, 1.5 teaspoons cinnamon, 0.25 teaspoons nutmeg, and 3 tablespoons cornstarch. Let sit for 10 minutes to macerate.
- Roll and line. Roll out the first disc to 30cm and drape into your 23cm deep dish plate. Handle gently to avoid stretching.
- Fill the center. Pour the apple mixture and all its juices into the crust, then dot with the remaining 2 tablespoons of cubed butter.
- Seal and vent. Roll the second disc, place it on top, and crimp the edges tightly. Cut four large vents to let steam escape.
- Wash and sparkle. Brush with the egg wash (1 egg + 1 tablespoon water) and sprinkle with 1 tablespoon coarse sanding sugar.
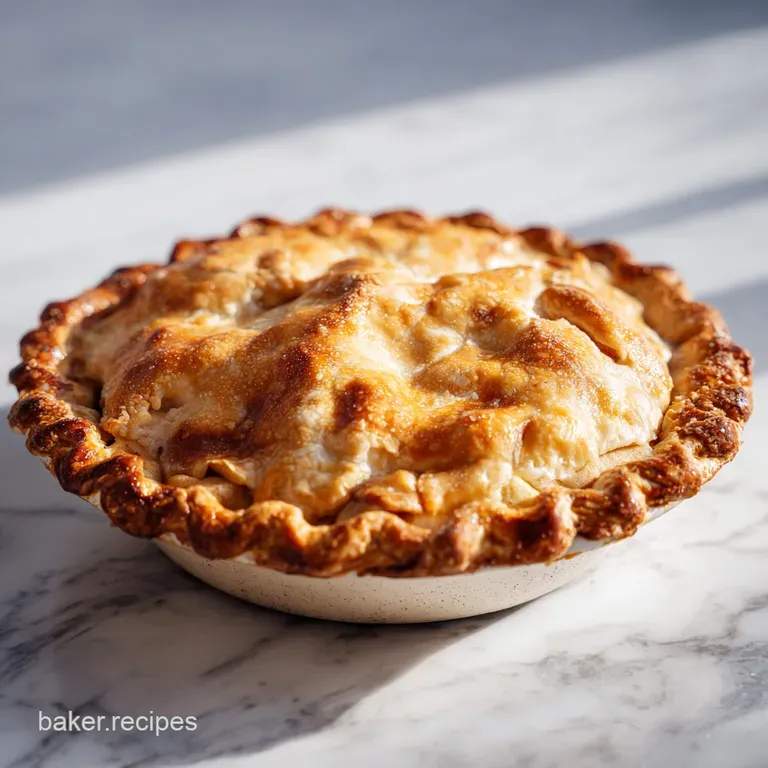
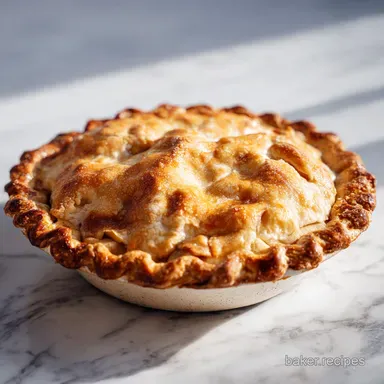
- Bake until mahogany. Place on a baking sheet and bake for 50 minutes. Wait for the filling to bubble through the vents.
Chef's Tip: If you notice the edges of your crust are browning too quickly at the 30 minute mark, wrap them loosely with a strip of aluminum foil. This allows the center of the pie to continue cooking without burning the delicate crimped edges.
Pro Fixes for Every Baking Mistake
One of the most common issues people face when making a classic apple pie is the dreaded "soggy bottom." This happens when the juice from the apples soaks into the bottom crust before it has a chance to bake.
To prevent this, make sure your oven is fully preheated and use a metal pie pan if possible, as it conducts heat faster than glass or ceramic. If you've already started and are worried about the moisture, placing the pie on a preheated baking sheet can give the bottom crust an extra boost of direct heat.
Another frustration is a runny filling. If you cut into the pie while it is still warm, the starches haven't had time to set, and the filling will spill out like a soup. Patience is a key ingredient here you really need to let the pie cool for at least two hours (ideally four) before slicing.
This allows the cornstarch to complete its thickening magic.
Solving the Falling Crust
If your crust is sliding down the sides of the pan, the dough was likely too warm when it went into the oven. Always ensure the dough feels cold to the touch before baking. If you've spent a lot of time crimping and the dough has softened, pop the whole assembled pie into the freezer for 10 minutes before it goes into the oven.
This resets the fat and ensures the structure holds.
Fixing a Pale Top
A pale, anaemic looking crust is usually the result of skipping the egg wash or an oven temperature that is too low. The egg wash provides protein and fat that brown beautifully under heat.
If the 50 minutes are up and it’s still pale, increase the heat by 10°C for the last 5 minutes, but watch it like a hawk.
| Problem | Root Cause | Solution |
|---|---|---|
| Large gap under crust | Apples shrank too much during baking | Macerate apples for 10 minutes and pack them tightly |
| Tough, rubbery pastry | Overworking the dough/too much water | Mix until just combined; keep butter chunks visible |
| Burnt edges, raw center | Oven rack too high or heat too intense | Move to lower rack; cover edges with foil |
Common Mistakes Checklist
- ✓ Never use room temperature butter; it must be hard and cold.
- ✓ Don't skip the vents; steam needs an exit or the crust will get soggy.
- ✓ Avoid "sweet only" apples; you need the acidity of a Granny Smith for balance.
- ✓ Let the pie rest; cutting early results in a liquid mess.
- ✓ Use a baking sheet underneath to catch any sugary drips.
Creative Filling Swaps for Better Flavor
While the traditional recipe is a masterpiece on its own, I love experimenting with seasonal variations. If you're looking for a deeper, more rustic flavor, you can swap half of the granulated sugar for dark muscovado sugar. It adds a hint of molasses that pairs beautifully with the cinnamon.
For a truly professional touch, some bakers like to add a teaspoon of vanilla bean paste to the apple mixture.
If you want a different texture for your pastry, you can check out my homemade flaky crust guide which focuses on using a mix of shortening and butter. Shortening has a higher melting point, which can make the dough even easier to handle for beginners.
The Salted Caramel Twist
To turn this into a gourmet dessert, drizzle 60ml of salted caramel sauce over the apples before putting on the top crust. The salt cuts through the sweetness and elevates the "classic apple pie" profile into something truly decadent.
Just be careful not to add too much liquid, or you'll need to increase the cornstarch by another tablespoon.
The "Shortcut" Version
If you are in a rush, you can use a high-quality store-bought dough. Just make sure to still follow the maceration step for the fruit. Using premade crust with a scratch made filling is still miles better than anything from a box.
It’s the "apple pie recipe with premade crust" that many busy families swear by during the holidays.
Proper Storage for Long Lasting Freshness
Classic apple pie is one of those rare dishes that actually tastes better the next day. The flavors have time to meld, and the crust softens just slightly while maintaining its buttery richness. You can keep it on the counter, covered loosely, for up to 2 days.
For longer storage, move it to the fridge for up to 5 days.
Freezing a baked pie is totally possible. Wrap it tightly in several layers of plastic wrap and then foil. It will stay fresh for up to 3 months. When you're ready to eat, don't thaw it at room temperature put it straight back into a 180°C oven for 20 minutes to crisp up the crust. You can also freeze and bake a frozen pie if you want to prep your holiday desserts weeks in advance.
To avoid waste, I always save my apple peels. You can toss them with a little sugar and cinnamon and bake them at a low temperature for "apple chips," or simmer them with water and a cinnamon stick to make a quick stovetop potpourri that makes the whole house smell like an orchard.
Perfect Pairings for Every Warm Slice
Nothing beats a warm slice of pie with a scoop of high-quality vanilla bean ice cream. The way the cold cream melts into the spiced apple sauce is pure magic. If you want to be a bit more traditional (especially in the Midwest or New England), try serving a sharp slice of aged cheddar cheese on the side.
The salty, savory hit of the cheese perfectly balances the sweet fruit.
If you are hosting a brunch, this pie pairs wonderfully with a strong, dark roast coffee or a glass of chilled sparkling cider. For a more formal dessert presentation, a dollop of bourbon infused whipped cream adds a sophisticated edge. Since you're already in the baking spirit, you might also find that this traditional pecan pie makes a great companion on a holiday dessert table, offering a different kind of nutty sweetness to round out the spread.
- Myth
- You must peel apples perfectly. Truth: A little bit of skin left on adds color and texture to the filling.
- Myth
- The dough must be perfectly smooth. Truth: Marbled streaks of butter are actually the sign of a superior, flakier crust.
- Myth
- Glass pans are better. Truth: Metal pans conduct heat more efficiently, leading to a crispier bottom.
At the end of the day, a classic apple pie is about comfort. It doesn't have to look like a photo from a magazine to be the best thing your family eats all week. Those little cracks in the crust and the sticky juices bubbling over the side are just signs of a pie that was made with heart and a love for the harvest.
Keep your butter cold, your oven hot, and your patience steady you've got this!

Recipe FAQs
Is this apple pie recipe suitable for diabetics?
No, this recipe contains significant amounts of sugar. With 100g of brown sugar and 50g of granulated sugar, it is high in carbohydrates and not designed for diabetic dietary needs.
What is the secret to a good apple pie?
The secret is keeping the butter ice-cold during preparation. By ensuring the 225g of butter remains in pea-sized clumps before baking, you create steam pockets that result in a perfectly flaky, golden crust.
What is the secret ingredient in this apple pie?
The secret is the combination of lemon juice and cornstarch. The lemon juice balances the sweetness, while the cornstarch thickens the apple juices during the 50-minute bake time to prevent a soggy bottom.
Is this considered Oprah's favorite apple pie?
No, this is a common misconception. There is no official record or recipe documentation linking this specific ingredient list or method to that public figure.
How to ensure the bottom crust does not become soggy?
Bake the pie on a preheated baking sheet. Placing the pie dish directly onto a hot metal surface helps the bottom crust set faster; if you enjoyed this method of heat transfer, see how we apply similar thermal principles in our Apple Scones with Rich Caramel Sauce.
How to achieve a deep mahogany crust color?
Brush the top crust thoroughly with an egg wash before baking. Whisking one egg with a tablespoon of water and applying it evenly ensures a deep, glossy mahogany finish that looks professional.
How to tell when the pie is finished baking?
Look for a mahogany colored crust and bubbling filling. Once the filling is actively bubbling through the vents and the pastry is deep golden brown, the pie is fully cooked after its 50-minute bake time.
Classic Apple Pie
Ingredients:
Instructions:
Nutrition Facts:
| Calories | 452 kcal |
|---|---|
| Protein | 4.1 g |
| Fat | 21.5 g |
| Carbs | 63.1 g |
| Fiber | 4.2 g |
| Sugar | 34.8 g |
| Sodium | 235 mg |
