Savory Herb & Garlic Buttermilk Biscuits with Cheddar
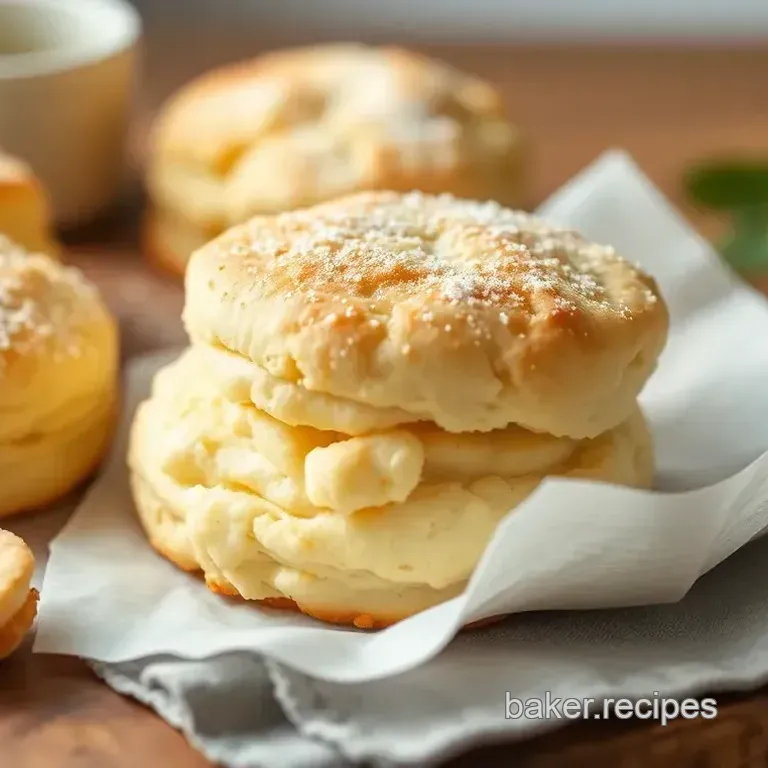
Bake Buttermilk Biscuits with Unique Flavors
Oh my gosh! let me tell you about the first time i ever made biscuits. i’ll never forget it. i was in my tiny kitchen, trying to impress my friends with a southern biscuit recipe i’d found online.
The dough was everywhere, and i think at one point i even flicked some flour onto the ceiling. but guess what? those little pillows of goodness turned out fluffy and golden, and everyone inhaled them! since then, i've been on a mission to explore and bake buttermilk biscuits with unique flavors .
It's like a delicious canvas just waiting for your personal touch.
The Biscuit Journey - A Little History
Biscuits are a big deal, especially in southern cuisine. they come from humble beginnings, originally serving as a way to stretch meals in tough times.
Today, these little guys have evolved into something delicious and comforting perfect for brunch or a cozy dinner. honestly, biscuits can sometimes spark more debate than anything else.
Are they meant to be sweet or savory? do real southerners prefer them flaky or fluffy? one thing's for sure: they’re downright comfort food , and they deserve some love!
So how easy are they to whip up? real easy! you’re looking at about 15 minutes of prep time followed by a quick bake of 15- 20 minutes.
In no time, you'll have 12 savory biscuits waiting for you. plus, it won’t break the bank to make these.
Just a few pantry staples will cover it!
Health and Happiness
Let’s talk benefits. first off, buttermilk adds a tangy flavor and moisture that keeps these biscuits from being dry trust me! plus, buttermilk is a great source of calcium and probiotics .
Got family gatherings or brunches coming up? these biscuits shine during special occasions. pair them with some creamy dips or serve them as little sandwiches your guests will be thanking you left and right!
One of the coolest things about these biscuits? you can totally customize them! whether you want to whip up herb biscuits, garlic biscuits, or even green onion biscuits , the options are endless.
Play around with spices, herbs, and different cheeses. want to elevate your breakfast game? add some sharp cheddar cheese to that dough.
Or mix in some spicy jalapeños for that punch of flavor. your taste buds will be doing a happy dance!
Time to Get Cooking!
Alright, so you’re all set. time to gather your ingredients and think about how you want to flavor your biscuits.
Remember, the world is your oyster when it comes to biscuit variations . while you’re at it, keep in mind some biscuit baking tips i’ve learned.
Use chilled butter and don’t overmix the dough. this helps create those lovely flaky layers we all crave.
Thinking about making these savory biscuits a family tradition? i believe you should! imagine the stories and laughter shared around the table over freshly baked treats.
So, let’s get into what you need to make this gourmet recipe. here’s a quick list of all the goodies we'll need:
- Flour
- Baking powder and soda
- Salt
- Unsalted butter
- Buttermilk
- Sharp cheddar cheese
- Fresh chives
- Garlic
And there you have it! get ready to impress your friends and family with these delicious biscuit dips and serving ideas.
Your kitchen is about to smell amazing! now let's roll up those sleeves and get baking !
Essential Ingredients Guide
When you’re all set to bake buttermilk biscuits with unique flavors , knowing your ingredients like a pro can seriously elevate your game.
Seriously! let’s dive into the must have core components that’ll make your biscuits not just good, but amazing .
Premium Core Components
First up, let's talk measurements. for the perfect batch of biscuits, 2 cups (250g) of all-purpose flour is your base.
That’s not just a suggestion, folks. it’s crucial! add a tablespoon of baking powder to get that fluffy lift we all crave.
Don’t forget 1 teaspoon of salt to balance those flavors.
Wanna keep it fresh? store your flour and baking soda in a cool, dry place. they’re best used within 6-12 months for peak potency.
One quick tip: go for the freshest ingredients you can find. i usually check the packaging date and opt for the brands that seem to have a quick turnover.
Signature Seasoning Blend
Now let’s jazz things up with seasoning! for this biscuit recipe, you can’t go wrong with the right spices. i love using a combination of garlic powder, black pepper, and fresh herbs think chives , rosemary , and parsley .
Trust me; they bring that comfort food vibe right home!
If you want to go gourmet, try adding a little smoked paprika or even some spicy red pepper flakes for an unexpected kick.
And remember, flavor enhancers like fresh garlic or onion powder can make a massive difference!
Smart Substitutions
Life happens, right? sometimes you don’t have exactly what you need on hand. here’s where smart substitutions come in! got no buttermilk? no problem! just mix regular milk with a tablespoon of vinegar.
Bam! diy buttermilk.
If you’re working with dietary restrictions, swap out that butter for coconut oil or use a dairy-free milk alternative. not to mention, if you’re out of chives, fresh oregano or thyme can do the trick just stick to what’s available in your kitchen.
Kitchen Equipment Essentials
Now, let’s get something straight: you don’t need fancy gadgets to whip up these easy biscuit recipes . a mixing bowl and a baking sheet are your best friends here.
A pastry cutter or just two forks works fine for mixing in your cubed butter. and, let’s not forget the star player a sharp biscuit cutter or even just a glass will work for shaping those delicious biscuit dough circles.
Keep your workspace organized, too. a clean counter is a blissful counter. i usually prep everything before starting, so i don’t have to run around mid-bake.
A little setup goes a long way!
Why This All Matters
So why is all this important? well, when you’re ready to bake buttermilk biscuits with unique flavors , knowing these essentials makes cooking zen.
You won’t be stressed about what to grab from the pantry or if you’ve got the right tools. plus, when you get it right? oh my gosh, it’s the best feeling ever.
Imagine biting into a hot, flaky savory biscuit that fills your home with that irresistible aroma of garlic and fresh herbs .
Seriously, it’s like a warm hug, and not to mention, it’s made from your own kitchen!
Ready to Get Cooking?
Now, having the right ingredients and tools is the first step. but if you think that’s all there is, you’re mistaken! next up, we’ll tackle the step-by-step process to get your biscuits rising and shining! you don’t wanna miss this; i promise they’ll be the best batch you ever made.
Let’s dive in and make some mouthwatering, fluffy buttermilk biscuits from scratch!
Mastering Professional Cooking: Your Guide to Making Irresistible Savory Herb & Garlic Buttermilk Biscuits
Oh my gosh, if you're like me, nothing beats the aroma of freshly baked biscuits wafting through your kitchen. seriously, it’s like a warm hug from southern cuisine.
Today, i’m diving into how to bake buttermilk biscuits with unique flavors, particularly savory herb & garlic biscuits with cheddar.
These little gems are often the highlight of brunch. so, whether you’re a seasoned chef or whipping up your first batch, let’s get started!
Essential Preparation Steps
First things first mise en place , my friends! it’s a fancy term, but it just means having all your ingredients ready to go.
That way, you won’t be scrambling to find stuff mid-recipe. grab your 2 cups of flour , 1 cup of buttermilk , and the rest of your tasty ingredients like garlic and cheddar cheese.
Next up, time management is crucial here. budget your time like you’re on a cooking show. you’ll need about 15 minutes for active prep and around 20 minutes for baking .
Set a timer; your kitchen might get a little chaotic if you’re not careful.
Now, organization strategies! Keep your counter clean and arrange everything in the order you’ll use it. A clutter free space equals a clear mind, trust me.
And don’t forget safety considerations ! When using sharp tools like knife or pastry cutters, always be cautious. Safety first, y’all!
step-by-step Process
Now for the fun part! Here's how to bake those delicious biscuits:
- Preheat Oven: Get that oven going at 425° F ( 220° C) , so it’s nice and hot when your dough is ready.
- Combine Dry Ingredients: In a mixing bowl, whisk together 2 cups of flour , 1 tablespoon of baking powder , 1 teaspoon of baking soda , and 1 teaspoon of salt until well mixed.
- Cut in Butter: Toss in 1/4 cup of chilled butter , and using a fork or pastry cutter, blend until it’s crumbly think coarse crumbs, not a smoothie.
- Mix in Flavors: Stir in that tasty 1/2 cup of grated cheddar , 1/4 cup of chopped chives , and 1 clove of minced garlic . It’s like a flavor party in your bowl!
- Add Buttermilk: Pour that 1 cup of buttermilk in gently; if you overmix, your biscuits will be flat as a pancake. We want FLUFFY biscuits!
- Chill Dough (Optional): If you’ve got 10 minutes, cover the dough and chill it trust me, it’s worth it for easier handling.
- Shape Biscuits: Roll out the dough on a floured surface, about an inch thick, and cut using a biscuit cutter. If you don’t have one, a glass works just fine.
- Bake: Place those beauties on a parchment lined baking sheet, giving them a little space to puff up. Bake for 15- 20 minutes until they turn golden brown.
- Cool: Let them cool on a rack. And if you're feeling extra, brush a little melted butter on top!
Expert Techniques
Listen, nobody’s perfect. I’ve had my share of baking disasters. Here are some expert techniques to keep your biscuits golden and fluffy:
- Critical Steps Explained: Make sure your butter is super cold; it makes those layers so flaky, you'll wonder if you’re a professional.
- Quality Checkpoints: Peek at your biscuits around the 15-minute mark . They should be rising and turning golden.
- Troubleshooting Tips: If they’re too dense, maybe you added too much flour. Can’t go back now, but remember it for next time!
Success Strategies
We all mess up sometimes, right? Here are some success strategies to avoid common pitfalls:
- Common Mistakes to Avoid: Don’t squish your dough! Handle it gently, or you’ll end up with tough biscuits.
- Quality Assurance Tips: Use fresh ingredients; they make a world of difference in flavor.
- Perfect Results Guide: Keep an eye on that baking time. Ovens vary, and you don’t want charred biscuits.
- make-ahead Options: You can prep these biscuits in the evening and bake them fresh the next morning. How awesome is that?
Those warm, flaky, savory biscuits will impress your family and friends. I promise, baking biscuits is not just a chore; it’s comfort food that warms the heart.
So, if you’re itching to bake buttermilk biscuits with unique flavors try these savory herb & garlic varieties! they nail perfectly with cheese biscuits or even gourmet variations.
Stay tuned for our next segment where we explore additional information to make your biscuit journey even more rewarding!
Unlocking the Secrets to Savory Herb & Garlic Buttermilk Biscuits
Oh my gosh, let’s get real! if you’re looking to bake buttermilk biscuits with unique flavors , you’ve come to the right place.
These savory biscuits are the ultimate comfort food, and i could honestly eat them all day! there’s something so special about the combination of fresh herbs , pungent garlic , and sharp cheddar that makes this buttermilk biscuit recipe stand out.
Trust me, once you try them, you’ll be hooked! so let’s dive into some pro tips that’ll make your baking game strong.
Pro Tips & Secrets
First up, let’s talk about time saving techniques . chilling your butter and buttermilk is key! you don’t want to melt them just get them nice and cold.
This helps create those beloved flaky layers . you can also prep ahead: mix the dry ingredients the night before, and you’ll save yourself some serious time the next day.
Now, for flavor enhancement, don’t be shy ! add garlic powder if you're a fan and consider mixing in other cheeses like feta or even a bit of blue cheese if you're feeling adventurous.
Your taste buds will thank you!
When it comes to presentation, let’s be real; we eat with our eyes first. so, that parchment paper trick? it’s a game changer! your biscuits will lift right off and look stunning on the plate.
Brush them with some melted butter and sprinkle a pinch of sea salt for that gourmet touch.
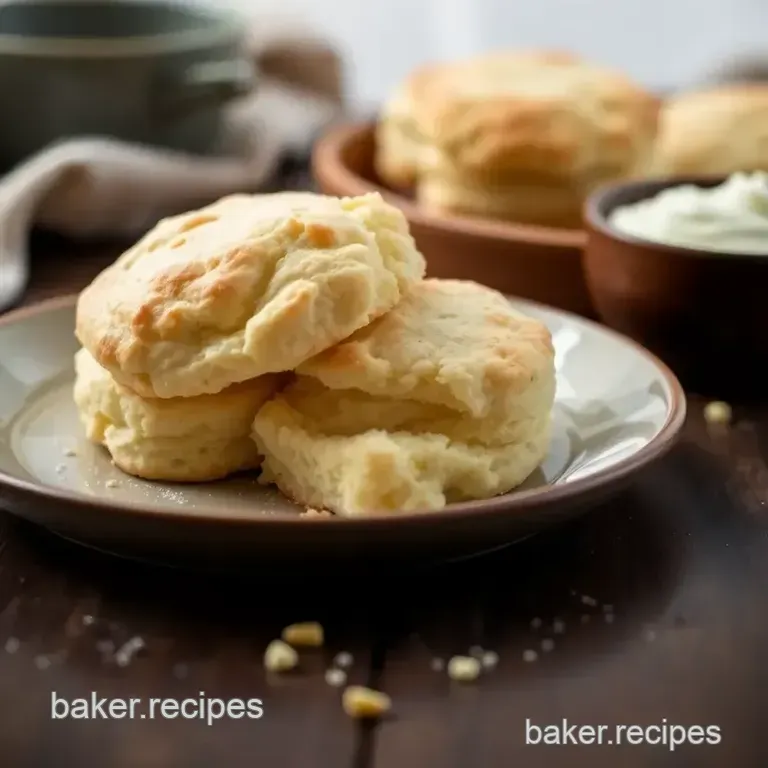
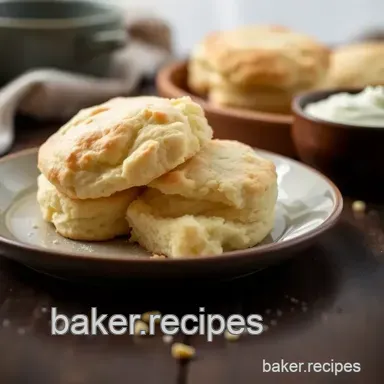
Perfect Presentation
Speaking of presentation, here’s a little tip: plating techniques matter! Instead of stacking them, arrange your biscuits in a neat circle on a wooden board. This way, everyone can grab and munch!
Garnish ideas? a sprinkle of chopped chives or even a drizzle of honey adds a pop of color and it’s delish! color combinations are also crucial.
The golden tops of your baked treats contrasted with the greens of fresh herbs? that’s instagram gold!
Storage & make-ahead
Alright, here’s the scoop on storage. these biscuits? they’re best consumed fresh , but you can store leftovers in an airtight container for about two days .
If you want to extend their life, freeze them! just pop them in a freezer bag, and they’ll last up to a month.
When you’re ready to reheat, do it in a toaster oven if you have one. you want that crunchy exterior back! you can make the dough ahead of time, too.
Just keep it in the fridge for up to 12 hours before baking.
Creative Variations
Let’s talk biscuit variations ! these biscuits are so versatile. you could easily swap the cheddar for a mix of green onion and garlic for an added zing.
Or try chives and garlic flavor for a twist that feels super gourmet!
Got any dietary considerations? these biscuits can be gluten-free too! use a 1:1 flour substitute. trust me; no one will even notice the difference.
You can also go full vegan by subbing buttermilk for a plant based milk with a splash of vinegar.
Complete Nutrition Guide
Now let’s break it down. each biscuit packs around 180 calories , but there’s so much more. they offer a decent amount of protein (4 grams, yay), and the cheddar brings in some healthy fats.
Just be mindful of the sodium it can creep up if you’re not careful.
And hey, let’s not forget portion guidance. if you’re serving these at brunch, i say 2-3 biscuits per person is just right, especially if you’ve got delicious dips on the side.
Delicious biscuit dips like honey butter can elevate your experience to gourmet status!
In conclusion, baking these savory herb & garlic buttermilk biscuits with cheddar isn’t just about the biscuits; it’s about the experience! whether it’s a weekend brunch or a cozy night in, these little beauties are bound to steal the show.
So fire up that oven, invite your friends over, and get ready to impress. enjoy the process, and don’t worry; even if they come out a little imperfect, they’ll still be delicious .
Happy baking!
Frequently Asked Questions
What makes the "Bake Buttermilk Biscuits with Unique Flavors" stand out from regular biscuits?
The unique flavors come from fresh herbs, minced garlic, and sharp cheddar cheese incorporated into the traditional biscuit dough. These additions elevate the taste, turning a classic recipe into a savory delight that pairs beautifully with various meals.
Can I make these biscuits gluten-free?
Yes, you can easily make these biscuits gluten-free! Simply substitute the all-purpose flour with a 1:1 gluten-free baking blend. Just be sure to check that your other ingredients, especially baking powder, are also gluten-free.
What are some tips for baking the best buttermilk biscuits?
For the flakiest biscuits, use cold butter and buttermilk, and avoid overworking the dough. Additionally, use a sharp biscuit cutter for clean edges, which helps the biscuits rise properly. Keep an eye on the baking time to prevent them from getting too brown.
How should I store leftover biscuits?
Store any leftover biscuits in an airtight container at room temperature for up to 2 days. For longer storage, you can freeze them by wrapping each biscuit tightly in plastic wrap and placing them in a freezer bag, where they can last up to 3 months. Reheat in the oven or microwave before serving.
Can I customize the flavors in this biscuit recipe?
Absolutely! Feel free to experiment with different cheeses, herbs, or spices according to your taste. Some delicious variations include adding crumbled bacon and jalapeños for a spicy kick or swapping out cheddar for feta and spinach for a Mediterranean touch.
Are these biscuits suitable for a quick breakfast or brunch?
Yes! These buttermilk biscuits make a perfect addition to any breakfast or brunch spread. They're delicious served on their own, with butter, or as a base for sandwiches. Pair them with eggs, soups, or salads for a complete meal.
Deliciously Unique Buttermilk Biscuit Creations
Ingredients:
Instructions:
Nutrition Facts:
| Calories | 180 |
|---|---|
| Fat | 7g |
| Fiber | 0.5g |
