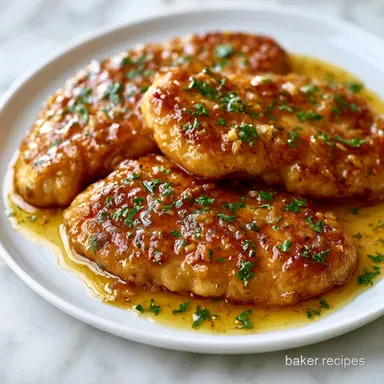
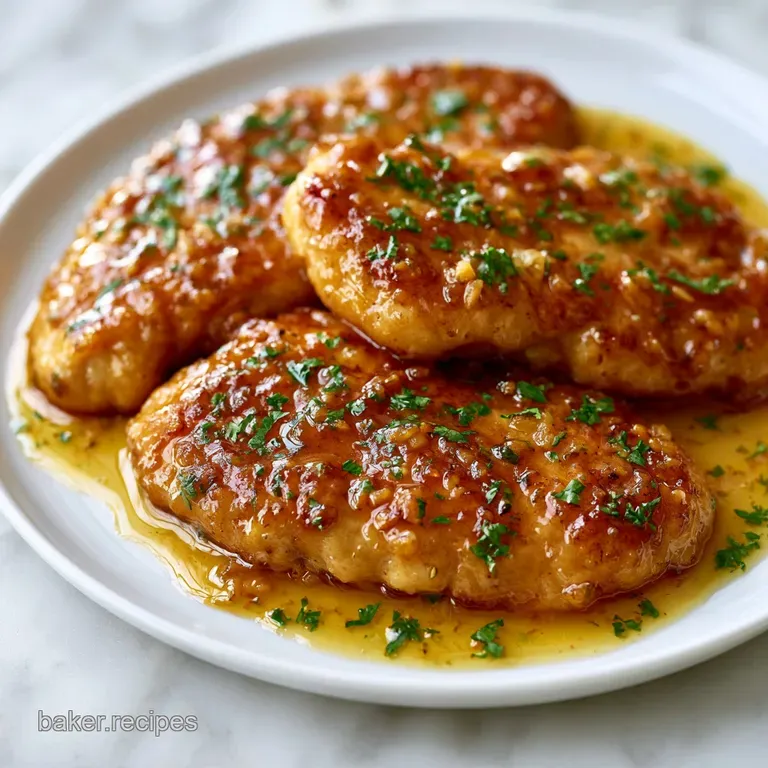
Sticky Honey Garlic Chicken Breasts: Pan-Seared
- Time: 10 min active + 20 min cook = Total 30 mins
- Flavor/Texture Hook: Sticky, savory glaze with a slight sear
- Perfect for: Quick weeknight dinners or meal prep
Easy honey garlic chicken breasts
The sound of butter foaming in a hot skillet is my favorite part of this whole process. There's that exact moment when the garlic hits the pan and the aroma fills the kitchen, instantly making the house smell like a bistro.
It's the kind of smell that makes everyone in the room suddenly very interested in what's for dinner.
I used to make the mistake of cooking chicken breasts whole, which usually ended in a tragedy: burnt on the outside and raw in the middle. Then I started slicing them into thinner cutlets. Now, they cook in a fraction of the time and get way more surface area for that sticky glaze to cling to.
This recipe is all about that balance of sweet and salty. You get a velvety sauce that coats every inch of the meat without being cloying. It's a straightforward meal that feels a bit more special than your average Tuesday night stir fry.
The Secret to the Glaze
Let's talk about what's actually happening in the pan so you can tweak this on the fly.
- Surface Grip: Dusting the meat in cornstarch creates a tiny layer of starch that absorbs juices and helps the sauce stick.
- Sugar Caramelization: The honey and soy sauce reduce quickly, turning into a thick syrup that hugs the chicken.
- Acid Balance: Lemon juice cuts through the heavy sweetness of the honey, keeping the flavor bright.
- Thickening Power: A slurry prevents clumps, ensuring the glaze is silky rather than lumpy.
| Method | Time | Texture | Best For |
|---|---|---|---|
| Pan Seared | 30 mins | Golden & Sticky | Quick dinners |
| Oven Baked | 45 mins | Tender & Uniform | Larger crowds |
| Air Fryer | 25 mins | Extra Crispy | Small portions |
Component Analysis
Understanding the role of each part helps when you're missing an ingredient.
| Ingredient | Science Role | Pro Secret |
|---|---|---|
| Cornstarch | Thickening agent | Use cold water for the slurry to avoid lumps |
| Honey | Natural sweetener | Use a runny honey for easier mixing |
| Soy Sauce | Salt & Umami | Low sodium version prevents the dish from being too salty |
| Lemon Juice | pH Balancer | Freshly squeezed is always better than bottled |
Ingredients and Substitutions
Here is everything you'll need. I've listed a few swaps in case your pantry is looking bare.
- 1.5 lb boneless skinless chicken breasts Why this? Lean protein that absorbs flavors well
- 1/2 tsp salt (Substitute: Sea salt)
- 1/2 tsp black pepper (Substitute: White pepper)
- 1 tbsp cornstarch Why this? Creates the golden crust (Substitute: Flour - note: less crispy)
- 2 tbsp unsalted butter (Substitute: Ghee for higher smoke point)
- 1 tbsp olive oil (Substitute: Avocado oil)
- 1/3 cup honey Why this? Provides the sticky glaze (Substitute: Maple syrup - note: adds woody notes)
- 2 tbsp soy sauce (Substitute: Tamari for gluten-free)
- 3 cloves minced garlic Why this? Sharp, savory base (Substitute: Garlic powder, 1 tsp)
- 1 tbsp lemon juice (Substitute: Rice vinegar)
- 1 tsp cornstarch (Substitute: Arrowroot powder)
- 1 tbsp cold water Why this? Activates the slurry
From Prep to Plate
Right then, let's get into the flow. I like to break this down into a timeline so you aren't rushing while the butter is burning.
Phase 1: The Setup
First, get your workspace ready. Slice the chicken breasts in half horizontally to create four thinner cutlets. Season both sides with salt and pepper, then lightly dust them with 1 tablespoon of cornstarch. While the chicken rests, whisk together the honey, soy sauce, lemon juice, and minced garlic in a small bowl.
In a separate container, mix 1 teaspoon of cornstarch with 1 tablespoon of cold water to create your slurry.
Phase 2: The Golden Sear
Heat olive oil and butter in a large skillet over medium high heat. Once the butter is foaming, add the chicken cutlets. Sear the chicken for 3-5 minutes per side until a deep golden brown color is achieved. Trust me, don't move them around too much or you'll lose that crust.
Once they're cooked through, move the chicken to a plate.
Phase 3: The Glaze Finish
Pour the honey garlic mixture into the same skillet. Use a wooden spoon to scrape up those brown bits from the bottom- that's where all the flavor lives. Simmer for 2 minutes. Stir in the cornstarch slurry and whisk constantly until the sauce thickens into a glossy glaze.
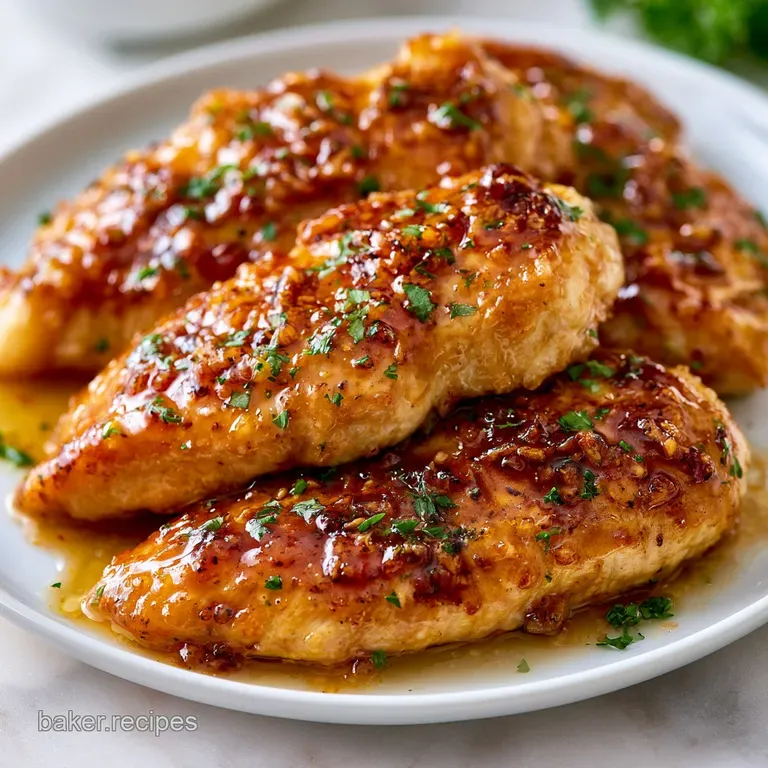
Return the chicken to the pan and toss to coat thoroughly.
Chef Note: If you're feeling fancy, toss in some sesame seeds or chopped green onions right at the end for a bit of crunch and color.
Fixing Common Problems
Cooking chicken can be tricky, especially when you're dealing with sugar heavy sauces that like to burn. If your sauce is too thin, you probably didn't let the slurry simmer long enough. According to Serious Eats, controlling the heat is the most important part of any glaze based dish.
Sauce Won't Thicken
This usually happens if the pan isn't hot enough or the cornstarch ratio is off. Give it another minute of simmering, or add a tiny pinch more slurry.
Garlic Tastes Bitter
If the garlic burns during the chicken sear, it will taste acrid. Make sure your heat is medium high, not screaming hot, and if the pan looks too dry, add a splash more oil.
Chicken is Dry
Overcooking is the enemy here. Use a meat thermometer to hit exactly 165°F (74°C). If you're not sure, the meat should feel firm but have a slight spring when pressed.
| Problem | Root Cause | Solution |
|---|---|---|
| Sauce is too salty | Too much soy sauce | Add a teaspoon of honey or water |
| Chicken stuck to pan | Pan wasn't hot enough | Wait for butter to foam before adding meat |
| Glaze is lumpy | Slurry wasn't mixed well | Whisk vigorously or strain the sauce |
Success Checklist:
- ✓ Chicken sliced horizontally for even cooking
- ✓ Pan is foaming before meat hits the surface
- ✓ Brown bits (fond) scraped into the sauce
- ✓ Sauce simmered until glossy, not watery
Creative Twists and Swaps
Once you've got the basics down, you can start playing with the flavor profile. If you want a spicy kick, add a teaspoon of sriracha or red pepper flakes to the honey mixture. It turns this into a honey sriracha chicken that's absolutely addictive.
For those who want a different cooking method, you could try air fryer chicken for an even crispier exterior, then toss the cooked pieces in the sauce at the end. If you're looking for a completely different vibe, my chicken croquettes recipe is great for when you have leftover chicken breasts from this meal.
Decision Shortcut: If you want it spicy → Add red pepper flakes If you want it nuttier → Swap honey for maple syrup If you want it zingier → Double the lemon juice
Adjustment Guidelines
When you're cooking for a crowd or just yourself, you can't always just double everything.
Scaling Down (1-2 people): Use a smaller 8 inch skillet. You can halve the ingredients, but keep the butter and oil at about 75% of the half measure; you still need enough fat to coat the pan. Reduce the searing time by about 1 minute per side since the pan will heat up faster.
Scaling Up (6-8 people): Do not crowd the pan. If you put 8 cutlets in one skillet, they will steam instead of sear, and you'll lose that golden crust. Work in batches. For the sauce, increase salt and spices to 1.5x instead of 2x to avoid over seasoning.
Reduce the total liquid by about 10% as less moisture evaporates when making larger batches.
Kitchen Truths
There are a few things people say about chicken that just aren't true.
The "Sealing" Myth: You'll often hear that searing meat "seals in the juices." It doesn't. Moisture loss happens regardless. The sear is actually about flavor and texture, creating a crust that tastes way better than plain boiled meat.
The "Resting" Myth: While big steaks need a long rest, these thin cutlets only need 2-3 minutes. If you let them sit too long, the glaze will start to set and lose that glossy, velvety look.
Storage Guidelines
Keep your leftovers in an airtight container in the fridge for up to 4 days. The sauce will thicken significantly as it cools, which is normal.
For the freezer, this dish is okay but not ideal. The honey soy glaze can change texture slightly. If you must freeze it, do so for up to 2 months. To reheat, I recommend a skillet over a microwave.
Add a tablespoon of water or chicken broth to the pan to loosen the sauce, then heat over medium until the chicken is warmed through. This brings back that sizzle and prevents the meat from getting rubbery.
To avoid waste, save any leftover sauce in a small jar. It makes a killer marinade for tofu or a quick glaze for roasted carrots.
Presentation Tips
To make this look like it came from a restaurant, avoid just dumping the chicken on a plate. Instead, place a bed of steamed broccoli or jasmine rice on the plate first. Lean the chicken cutlets against each other at an angle to create height.
Drizzle any extra sauce from the pan directly over the top of the meat to ensure it looks glossy and inviting. Garnish with a sprinkle of toasted sesame seeds and thinly sliced scallions. The contrast of the green onions against the deep amber glaze makes the dish pop.
Finish with a tiny wedge of fresh lemon on the side for a professional touch.
Recipe FAQs
Why should I slice the chicken breasts in half horizontally?
It ensures even cooking and faster results. Thinner cutlets cook through in 3 5 minutes per side without drying out the exterior.
How to prevent the honey garlic sauce from being too thin?
Stir in a cornstarch slurry. Mix 1 teaspoon of cornstarch with 1 tablespoon of cold water and whisk into the simmering sauce until it becomes a glossy glaze.
Is it true that I need to move the chicken frequently in the pan to brown it?
No, this is a common misconception. Leave the chicken undisturbed for 3 5 minutes per side to achieve a deep golden brown sear.
How to reheat leftovers without the meat becoming rubbery?
Heat in a skillet over medium heat. Add a tablespoon of water to loosen the thickened sauce and warm until the chicken is heated through.
How long can I store this chicken in the refrigerator?
Up to 4 days in an airtight container. The sauce will thicken significantly as it cools, which is normal.
Why do I need to dust the chicken with cornstarch before searing?
It creates a better crust and helps the sauce adhere. This light coating absorbs excess moisture, allowing the butter and oil to brown the meat more effectively.
What side dishes pair best with this sweet and savory chicken?
Light, crisp vegetables balance the heavy glaze. This pairs perfectly with a refreshing snap pea watermelon salad to cut through the sweetness.
Honey Garlic Chicken Breasts