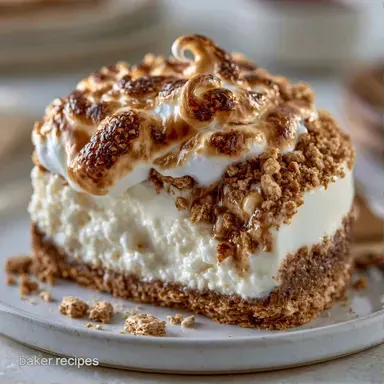
No Bake Smores Cheesecake with Graham Cracker Crust
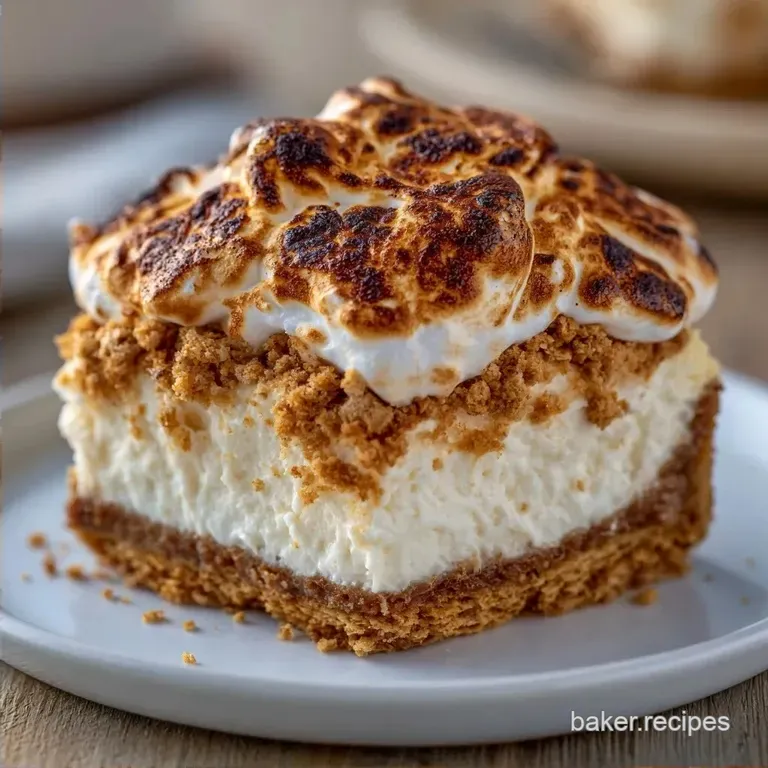
- Time: 30 min active + 6 hrs chilling
- Flavor/Texture Hook: Gooey toasted topping meets a crisp, salty crust
- Perfect for: Summer parties or anyone who hates scrubbing baking pans
No Bake Smores Cheesecake
Ever wonder why a s'more tastes so much better when it's made over an actual fire? There's something about that charred sugar and the way the chocolate barely melts that just hits different. I spent one summer trying to recreate that specific vibe in my kitchen, but without the smoke alarms going off.
The trick is the contrast. You need the crunch of the graham cracker, the richness of the chocolate, and the gooeyness of the marshmallow. This No Bake Smores Cheesecake brings all those elements together in a chilled, creamy format.
It's basically a party in a pan. You get the nostalgic campfire flavors but a smooth, cool finish that makes it way easier to eat in a crowd.
Why This Recipe Works
- Whipped Stabilization: Instead of relying on eggs and heat to set the cake, we use whipped heavy cream. This creates a light, mousse like feel that stays firm in the fridge, similar to how a Classic No Bake Cheesecake holds its shape.
- Flash Setting: Putting the crust in the freezer for 10 minutes locks the butter and crumbs together. This prevents the base from turning into a pile of rubble when you slice into it.
| Goal | What to Change |
|---|---|
| Extra Rich | Use dark chocolate chips |
| Lighter Texture | Add 1/4 cup more whipped cream |
| Mini Portions | Use a muffin tin |
Recipe Specs
This dessert is all about the wait. While the active work is fast, the chilling time is non negotiable. If you cut into it too early, the center will be too soft to hold a clean line.
The flavor map is simple: salty sweet graham base, deep mahogany chocolate center, and a caramelized sugar top. It's a heavy hitter, so the 12 servings are quite generous.
What You'll Need
| Ingredient | What It Does | Best Swap |
|---|---|---|
| Cream Cheese | Provides the body and tang | Mascarpone (richer) |
| Graham Crumbs | Creates the structural base | Digestive biscuits |
| Heavy Cream | Adds air and stability | Chilled coconut cream |
The Full List:
- 1.5 cups (180g) graham cracker crumbs Why this? Essential for the traditional s'mores taste
- 6 tbsp (85g) unsalted butter, melted Why this? Binds crumbs into a solid crust
- 2 tbsp (25g) granulated sugar
- 0.25 tsp (1.5g) salt
- 16 oz (450g) full fat cream cheese, softened Why this? Prevents lumps in the filling
- 1 cup (120g) powdered sugar
- 1 tsp (5ml) vanilla extract
- 1.5 cups (360ml) heavy whipping cream, chilled Why this? Must be cold to whip properly
- 0.5 cup (85g) semi sweet chocolate chips, melted and cooled
- 2 cups (300g) mini marshmallows
- 2 tbsp (30g) shaved chocolate
- Semi sweet chips
- Use milk chocolate for a sweeter, softer taste.
- Graham cracker crumbs
- Crushed Biscoff cookies work well for a caramelized twist.
- Powdered sugar
- You can pulse granulated sugar in a blender, but the texture might be slightly grainier.
Equipment Needed
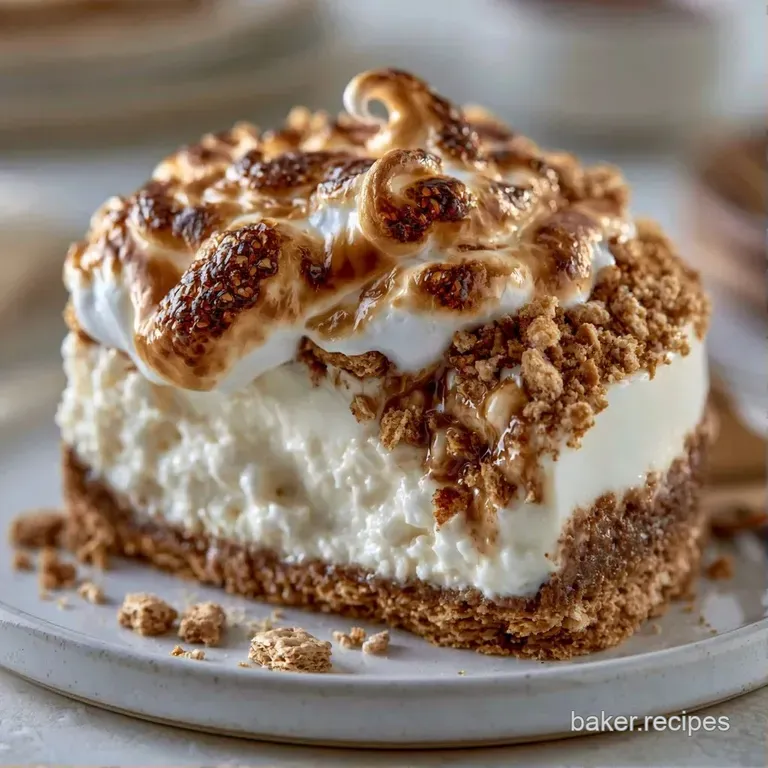
While you don't need high end equipment, a few key tools will make things much easier. A 9 inch springform pan is the best choice here, allowing you to remove the sides without damaging the dessert.
For the filling, you'll definitely want a hand mixer or a stand mixer. Beating 16 ounces of cream cheese by hand is an exhausting task you'll want to avoid. I also recommend using a rubber spatula for folding.
Lastly, use a kitchen torch for the topping. While the oven broiler works, a torch gives you the precision needed to brown the marshmallows without burning them in an instant.
From Prep to Plate
Phase 1: Building the Base
- Mix the graham cracker crumbs, melted butter, sugar, and salt in a medium bowl until the mixture resembles wet sand.
- Use a flat measuring cup to pack the mixture into a 9 inch springform pan, ensuring the sides are well compressed.
- Place the pan in the freezer for 10 minutes to flash set the crust.
Phase 2: Whipping the Filling
- Beat the softened cream cheese and powdered sugar on medium high speed until smooth and free of lumps.
- Stir in the vanilla extract and cooled, melted chocolate until the filling is a uniform mahogany chocolate hue.
- In a separate cold bowl, whip the heavy cream until stiff peaks form.
- Using a spatula, gently fold the whipped cream into the chocolate cream cheese mixture with a slow over and-under motion to keep it airy.
Phase 3: The Layering & Chill
- Spread the filling evenly over the chilled crust and smooth the top with a spatula.
- Top the cheesecake with mini marshmallows and refrigerate for at least 6 hours to set.
Phase 4: The Final Torch
- Before serving, toast the marshmallows with a kitchen torch until browned and bubbly. Garnish with shaved chocolate.
Avoiding Kitchen Disasters
Filling Stays Too Soft
This usually happens if the cream cheese wasn't soft enough before beating, or if the heavy cream was under whipped. If your cake feels a bit wobbly after the 6 hour mark, just give it another 2 hours in the fridge. Trust me, the wait is worth a clean slice.
Crust Crumbles When Slicing
If the base is falling apart, it's often because the butter didn't fully bind the crumbs or the pan wasn't pressed down hard enough. Next time, use the bottom of a heavy glass to really pack those crumbs into the corners.
Marshmallows Burn Too Fast
A torch can be aggressive. Keep the flame moving in constant circles rather than holding it in one spot. If you're using a broiler, watch it like a hawk, as they can go from golden to black in literally five seconds.
Ways to Twist It
You can easily customize these treats with a few simple swaps. For an alternative crunch, turn them into Oreo Cheesecake Bites by replacing the graham crackers with Oreo crumbs.
Another great option is adding a peanut butter layer between the base and the filling. Simply melt 1/2 cup of creamy peanut butter with a splash of maple syrup and spread it thinly; the savory saltiness provides a nice contrast to the sugar.
To create a more sophisticated flavor, use 70% dark chocolate chips. The subtle bitterness of the dark chocolate perfectly offsets the sweetness of the toasted marshmallows.
| Method | Time | Texture | Best For |
|---|---|---|---|
| Standard Pan | 6 hrs chill | Sliceable | Dinner Parties |
| Mini Cups | 4 hrs chill | Scoopable | Large Crowds |
| Bar Style | 6 hrs chill | Denser | Lunchboxes |
Storage & Reheating
Store this dessert in the refrigerator. It will stay fresh for around 4 days when covered with plastic wrap. Since it contains heavy cream and cream cheese, it should not remain at room temperature for longer than 2 hours.
Freezing is an option, but I suggest doing so before you torch the marshmallows. Wrap the chilled cake securely in foil and keep it frozen for a maximum of 2 months. Thaw it in the fridge overnight, then toast the marshmallows just before serving.
If you have any remaining graham cracker crumbs, don't throw them away. Mix them with a little sugar and melted butter, then bake at 325°F for 8 minutes to create a simple crumble topping for vanilla ice cream.
The Final Touch
For sharp, professional looking slices, rinse your knife in hot water and dry it off before each cut. This prevents the chocolate from clinging to the blade and keeps the layers distinct.
I enjoy presenting this on a wooden board to lean into the campfire aesthetic. A few fresh berries on the side offer a bright, tart contrast to the deep chocolate flavor.
As this is a rich dessert, a cup of bold, unsweetened black coffee is the perfect accompaniment. The coffee's bitterness refreshes the palate, making every single bite of the No Bake Smores Cheesecake feel as indulgent as the first.
Recipe FAQs
How to toast the marshmallows if I don't have a kitchen torch?
Place the cake under a broiler for one to two minutes. Watch it closely to prevent burning since the sugar toasts quickly.
Is it true this cheesecake must be frozen to set properly?
No, this is a common misconception. It only needs to refrigerate for at least 6 hours to achieve the right consistency.
Can this dessert be prepared in under 60 minutes?
No, because the filling requires 6 hours of chilling to set. You can finish the active prep in 30 minutes, but the wait time is mandatory.
What prevents lumps from forming in the cream cheese mixture?
Beat the softened cream cheese and powdered sugar on medium high speed until smooth. If you enjoyed mastering this texture, see how a similar creamy consistency is achieved in our traditional Mexican dessert.
No Bake Smores Cheesecake