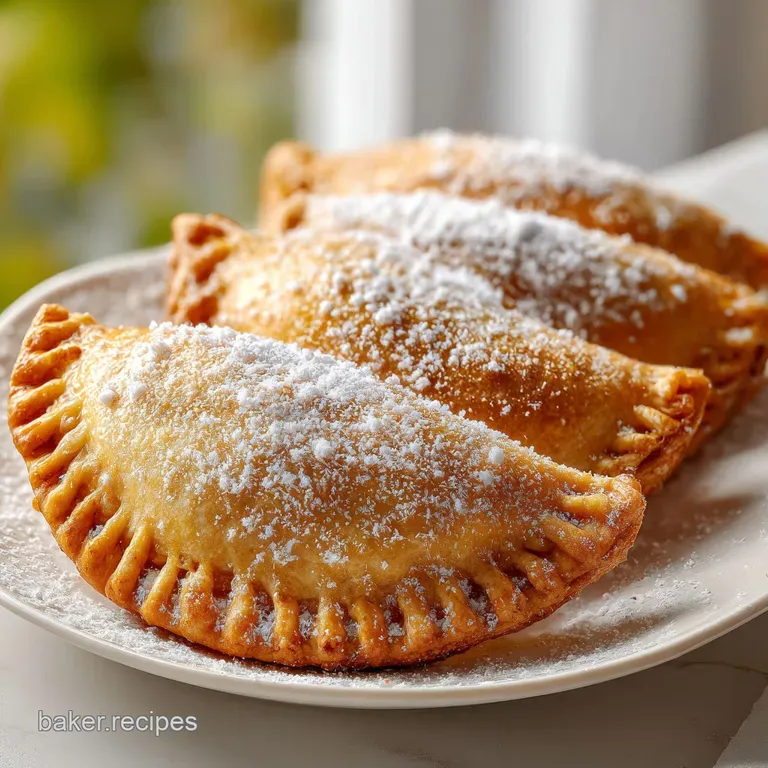
Old Fashioned Apple Hand Pies: Shatter Crisp

- Time: 20 min active + 2 hours chilling = Total 2 hours 45 mins
- Flavor/Texture Hook: Shatter crisp pastry with a velvety, cinnamon spiced center
- Perfect for: Autumn gatherings, portable snacks, or orchard inspired treats
The smell of warm cinnamon and browned butter always takes me back to the old county fairs. I remember seeing those rustic, handheld treats wrapped in brown parchment paper, smelling like a concentrated version of a whole orchard.
There's something about the tradition of the "hand pie" that feels more intimate than a giant cake, it's a treat designed to be eaten while walking through crisp fallen leaves.
For generations, these were the go to snacks for farm workers and families during the harvest. They weren't meant to be fancy, just hearty and portable. But over time, we've learned that the difference between a limp pastry and one that actually cracks when you bite into it comes down to a few simple rules about temperature.
We're going to make some Apple Hand Pies that honor that rustic spirit but use a few tricks to make them feel professional. You can expect a crust that's flaky and light, paired with a filling that's thick and jammy rather than runny.
It's the kind of treat that makes your whole house smell like a cozy autumn afternoon.
The Secret to Flaky Crusts
The real magic here isn't in the ingredients, but in how we treat the fat. When we talk about a "flaky" crust, we're actually talking about tiny layers of dough separated by pockets of fat.
If the butter melts before it hits the oven, those layers disappear, and you end up with a tough, cookie like crust instead of a shatter crisp pastry.
Cold Butter Pockets: Keeping butter in pea sized lumps creates steam vents during baking, which pushes the dough apart into layers.
Moisture Control: Pre cooking the apples removes excess water, so the crust doesn't absorb liquid and turn mushy.
Starch Binding: The cornstarch slurry transforms thin apple juice into a velvety gel that stays put when you bite into the pie.
Protein Browning: The egg wash adds a layer of protein that browns quickly under high heat, giving the pastry its mahogany glow.
| Method | Time | Texture | Best For |
|---|---|---|---|
| Oven Bake | 25 mins | Uniformly crisp and golden | Large batches and classic looks |
| Stovetop Fry | 10 mins | Bubbling, oily, and chewy | Fast treats and carnival style |
Essential Recipe Details
I've spent a lot of time thinking about what makes a filling stand out. It's not just about the sugar, it's about the contrast. Using a tart apple like Granny Smith provides a sharp counterpoint to the rich, buttery crust. According to USDA FoodData, different apple varieties vary significantly in acidity, which is why a mix or a specific tart variety is key for desserts.
| Ingredient | Science Role | Pro Secret |
|---|---|---|
| Chilled Butter | Creates Flakes | Freeze for 10 mins before cubing |
| Cornstarch | Thickens Filling | Mix with cold water first to avoid clumps |
| Lemon Juice | Prevents Oxidation | Adds a bright note that cuts through the sugar |
| Sparkling Sugar | Texture Contrast | Adds a crunch that mimics bakery style pies |
Ingredients for the Orchard
For the pastry, you'll need farm fresh staples. Don't be tempted to use room temperature butter, it's the fastest way to ruin the texture.
For the Flaky Pie Crust
- 2.5 cups (310g) all purpose flourWhy this? Standard protein level for a balanced bite
- 1 cup (225g) unsalted butter, chilled and cubedWhy this? High fat content for maximum flakes
- 1 tsp (6g) saltWhy this? Balances the sweetness of the fruit
- 1 tbsp (12g) granulated sugarWhy this? Helps the crust brown evenly
- 6-8 tbsp (90-120ml) ice waterWhy this? Keeps the butter from melting while mixing
For the Concentrated Apple Filling
- 3 medium (450g) Granny Smith or Honeycrisp apples, peeled and diced into 1/4 inch cubesWhy this? Holds shape after cooking
- 1/4 cup (50g) brown sugar, packedWhy this? Adds a deep, molasses like sweetness
- 1 tbsp (8g) cornstarchWhy this? Stabilizes the fruit juices
- 1 tsp (2g) ground cinnamonWhy this? The essential autumn aroma
- 1 tbsp (15ml) lemon juiceWhy this? Keeps apples bright and tart
- 1 tbsp (15g) unsalted butterWhy this? Adds richness to the sauté
For the Golden Finish
- 1 large (50g) eggWhy this? Creates the protein base for browning
- 1 tbsp (15ml) milkWhy this? Thins the egg for an even coat
- 2 tbsp (25g) coarse sparkling sugarWhy this? Adds a professional, crunchy finish
| Original Ingredient | Substitute | Why It Works |
|---|---|---|
| All Purpose Flour | Whole Wheat Flour | Nuttier taste. Note: Results in a denser, less flaky crust |
| Unsalted Butter | Vegetable Shortening | Higher melting point. Note: Flakier but lacks the buttery flavor |
| Brown Sugar | Maple Syrup | Deep woody flavor. Note: Makes the filling more liquid |
| Granny Smith Apple | Braeburn Apple | Sweet tart balance. Note: May soften more during cooking |
Honestly, don't even bother with low-fat butter here. You need the saturated fats to create those distinct layers. If you're feeling fancy, you can replace a tablespoon of the butter in the filling with a knob of salted butter to make the cinnamon pop.
Necessary Baking Tools
You don't need a professional kitchen for this, but a few specific tools make the process way smoother. If you have a food processor, you can use it for the crust, but a pastry cutter is my preferred method because it's harder to overwork the dough.
Overworking the dough develops too much gluten, and that's how you end up with a pie that feels like a cracker.
I usually use a standard 9 inch round cutter or even a wide mouthed glass to get my circles. A fork is essential for the sealing process, and a pastry brush is a must for that egg wash. Make sure your baking sheet is lined with parchment paper, otherwise, the sugar might stick and burn on the bottom.
The Complete Baking Method
Let's crack on. The most important thing to remember is that we are working in stages. We can't rush the chilling process, or the butter will leak out in the oven.
Phase 1: Crafting the Cold Crust
- Combine the flour, salt, and sugar in a large bowl. Cut the chilled butter into the mixture using a pastry cutter until it resembles coarse crumbs with pea sized lumps. Note: These lumps are your "flake insurance."
- Gradually add ice water, one tablespoon at a time, stirring with a fork until the dough just holds together.
- Shape the dough into a flat disk, wrap it tightly in plastic, and refrigerate for at least 2 hours. Note: This allows the gluten to relax and the butter to firm up again.
Phase 2: Reducing the Apple Filling
- Melt 1 tbsp butter in a saucepan over medium heat. Add the diced apples, lemon juice, cinnamon, and brown sugar. Sauté for 5-7 minutes until the apples are tender and fragrant.
- In a small cup, mix the cornstarch with a teaspoon of water to make a slurry. Stir this into the apples and simmer until the liquid is thick and glossy.
- Remove from heat and let the filling cool completely. Note: Putting hot filling in cold dough will melt the butter instantly, ruining the crust.
Phase 3: Assembly & Sealing
- Roll the chilled dough on a floured surface to 1/4 inch thickness. Cut into 8 circles.
- Place 2 tablespoons of the cooled apple mixture in the center of each circle. Fold the dough over to create a half moon.
- Press the edges firmly with a fork to seal the edges. Note: Make sure no filling is trapped in the seal, or the pie will leak.
Phase 4: The Final Bake
- Beat the egg and milk together. Brush the tops of the pies and sprinkle with coarse sparkling sugar.
- Place pies on a parchment lined baking sheet. Bake for 25 minutes until they are deep mahogany brown.
Chef's Tip: For a truly professional look, freeze your assembled pies for 10 minutes before brushing with egg wash. This keeps the edges sharp and prevents the dough from shrinking.
Fixing Common Pie Problems
Even the best of us have had a pie disaster. I once made a batch where the filling was so runny it basically turned into apple soup in the oven. The culprit? I didn't let the filling cool down before stuffing it into the dough.
Troubleshooting Common Issues
| Issue | Solution |
|---|---|
| Why Your Filling Leaked | If you see jammy goo oozing from the sides, it's usually because the seal wasn't tight or the filling was too wet. Ensure you're using the cornstarch slurry and that the apples have been reduced. |
| Why the Bottom is Pale | A soft, pale bottom usually means the heat isn't reaching the base. Try placing your baking sheet on the lowest rack of the oven for the first 10 minutes. |
| Why the Crust is Tough | Toughness comes from over mixing. If you knead the dough like bread, you're developing gluten. Stop mixing the moment the dough clumps together. |
Common Mistakes Checklist
- ✓ Butter stayed cold (didn't melt during mixing)
- ✓ Filling was fully cooled before assembly
- ✓ Edges were crimped tightly with a fork
- ✓ Dough was rolled to a consistent 1/4 inch thickness
- ✓ Oven was fully preheated before pies went in
Trying New Flavor Profiles
Once you've nailed the basic Apple Hand Pies, you can start playing with the fillings. I love adding a pinch of nutmeg or ground cloves to the apple mixture to give it a more "old fashioned" vibe. If you want something a bit more complex, try adding a teaspoon of vanilla bean paste to the filling.
For those who like a bit of a twist, try adding a thin slice of sharp cheddar cheese inside the pie before folding. It sounds wild, but the salty cheese and sweet apple are a classic pairing. If you're in the mood for something else, you might enjoy my Apple Turnovers recipe, which uses a slightly different pastry approach.
Using Different Pastry Bases
If you're in a rush, you can use store-bought puff pastry. It's not the same as a homemade crust, but it's much faster. Just remember that puff pastry has a higher butter content and may leak more, so keep a close eye on the oven.
Air Fryer Method
For a smaller batch, you can use an air fryer. Set it to 350°F (180°C) and cook for about 12-15 minutes. Since the heat is so concentrated, check them every 3 minutes to ensure the sparkling sugar doesn't burn.
Preserving Your Treats
These are best eaten warm, but they keep surprisingly well if you store them correctly. To keep the crust from getting soft, avoid airtight plastic containers while they're still warm, as the steam will turn the pastry gummy.
Storage Guidelines - Fridge: Store in a lined container for up to 5 days. Reheat in the oven to bring back the crunch. - Freezer: Freeze unbaked pies on a tray first, then transfer to a bag for up to 3 months.
Bake from frozen, adding 5 minutes to the timer.
Zero Waste Tips Don't throw away your apple peels and cores! Toss them in a freezer bag. Once you have enough, simmer them with water, a cinnamon stick, and a bit of sugar to make a simple orchard syrup.
Also, if you have leftover scraps of pie dough, roll them into small coins, sprinkle with cinnamon sugar, and bake them as "cinnamon crisps" for a quick snack.
Pairing Your Pies
Because these are so rich and buttery, they need something to cut through the sweetness. A sharp piece of cheddar cheese on the side is the traditional way to serve them, providing a salty contrast that makes the apple flavor pop.
If you're serving these at a party, a dollop of whipped cream or a scoop of vanilla bean ice cream is a no brainer. For a drink, a hot cup of Earl Grey tea or a spicy chai latte complements the cinnamon notes beautifully. If you're planning a full autumn dessert spread, these pair wonderfully with some Pumpkin Oatmeal Cream Pies for a variety of seasonal flavors.
Right then, you've got everything you need to create some legendary Apple Hand Pies. Just remember: keep your butter cold, your filling cooled, and your seals tight. Trust me on this, the wait for the dough to chill is the hardest part, but it's the only way to get that professional shatter. Let's get baking!
Recipe FAQs
Why did my apple hand pies leak filling?
The seal was likely loose or the filling was too wet. Ensure you use the cornstarch slurry and reduce the apples properly to thicken the liquid before filling the pastry.
Why is the bottom of my hand pie pale?
The heat isn't reaching the base of the pastry. Place your baking sheet on the lowest rack of the oven for the first 10 minutes to ensure a deep mahogany brown.
How to prevent the crust from becoming tough?
Avoid over mixing the dough. Stir the ice water in gradually until the mixture just holds together; if you enjoyed mastering dough handling here, see how we adapt it for our savory beef empanadas.
How to seal the edges so they don't open?
Press the edges firmly with a fork. After folding the dough into a half moon, create a tight crimp around the entire perimeter to lock the filling inside.
Is it true I can skip chilling the dough?
No, this is a common misconception. Refrigerating for at least 2 hours is essential to keep the butter cold, which is what creates the flaky layers in the crust.
How to get a golden brown, shiny finish?
Brush the tops with a mixture of beaten egg and milk. Sprinkle with coarse sparkling sugar immediately after brushing for added texture and professional luster.
How to store leftover hand pies?
Store them in an airtight container at room temperature. They remain fresh for a few days, or you can reheat them briefly in the oven to restore the crispiness.
Old Fashioned Apple Hand Pies

