Homemade Stuffing: the Proper, Flavour-Packed Sage and Onion Recipe
- The Proper, Flavour-Packed Sage and Onion Stuffing: Crispy Top, Moist Middle
- The Science of Perfect Homemade Stuffing
- Essential Ingredients for Robust Sage and Onion Stuffing
- Step-by-Step: Mastering the Sage and Onion Method
- Chef’s Tips for Troubleshooting Your Homemade Stuffing
- Making Ahead: Practical Guide to Storing and Freezing Homemade Stuffing
- Classic Pairings: What to Serve Alongside Homemade Stuffing
- Recipe FAQs
- 📝 Recipe Card
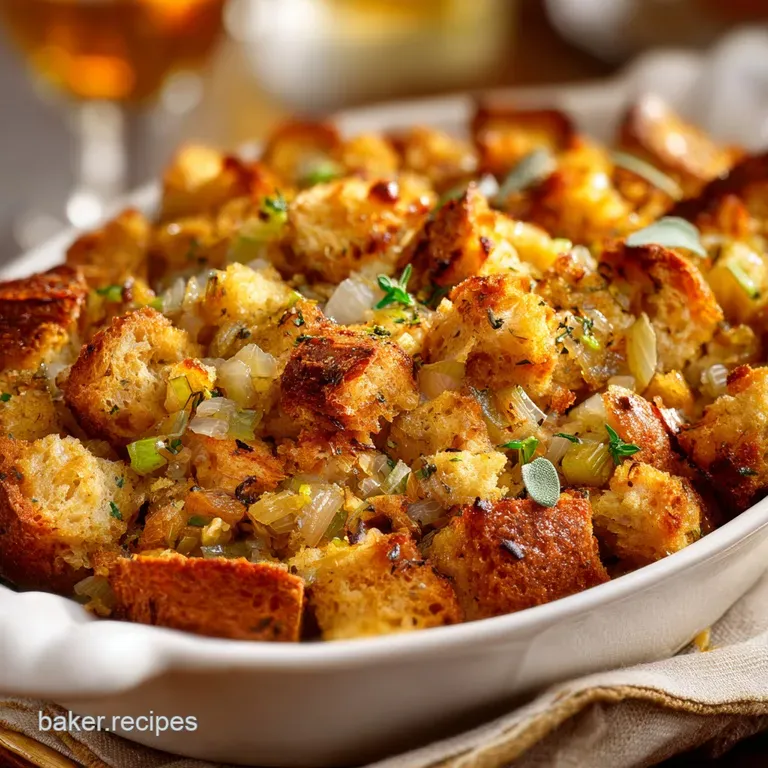
The Proper, Flavour Packed Sage and Onion Stuffing: Crispy Top, Moist Middle
Have you ever walked into a kitchen and been instantly hit by that smell? It’s the deep, savoury scent of slow cooked onions, melting butter, and pungent sage, all mingling with toasting bread.
That, my friends, is the smell of truly great homemade stuffing , and it’s arguably the best part of any holiday roast. The goal is always the same: a wonderfully rugged, crispy top crust protecting a tender, intensely herbaceous interior that crumbles beautifully.
If you’re still using the stuff that comes in a box, stop it. Just stop. Making stuffing from scratch is shockingly simple, requires only basic pantry staples, and delivers ten times the flavor impact for a fraction of the cost.
It’s also incredibly forgiving, meaning you can whip up a batch quickly even when the rest of the dinner is chaos.
This isn't just a recipe; it’s the definitive method I’ve honed over years, learning exactly what separates a perfect, textural dressing from a tragic, gluey brick. We’re focusing on building structure and flavour from the ground up, guaranteeing the best classic stuffing you will ever serve.
Let’s crack on.
The Science of Perfect Homemade Stuffing
The Unsung Hero of the Holiday Feast
Stuffing doesn't just fill space on the plate; it provides essential textural and flavour contrast to rich roasted meats and gravy. A classic stuffing recipe focuses heavily on sage and onion because those aromatics stand up beautifully to the heavy notes of roasted poultry or pork.
I promise you, once you master this traditional stuffing recipe, you’ll never look back.
Stuffing vs. Dressing: What's the Difference?
The only real difference is where you cook it. If it’s cooked inside the bird, it’s technically stuffing. If it’s baked separately in a dish (which is what we are doing, mostly for food safety reasons and superior texture), it’s called dressing.
Call it what you like, the ingredients are exactly the same, and the goal is always a crisp, golden brown crust!
The Ultimate Textural Goal: Crisp and Crumbly
The secret to a great texture crisp outside, crumbly inside comes down to hydration control and surface area. We want the bread cubes to be like tiny, dried out sponges that absorb the butter and stock evenly. We never want them to be pre-soaked.
The crispy top is guaranteed by baking covered initially to steam the interior, then finishing uncovered with a few dots of cold butter for fat delivery.
Building the Flavor Base: Slow Sautéed Onions and Butter
Flavour doesn't happen in the oven; it happens in the pan. The step of slowly sautéing the onions and celery in a generous amount of butter is mandatory. This process sweetens the onions and allows the fat to become totally infused with the aromatics and the fresh sage.
This herbed butter is the primary flavour carrier for the entire homemade stuffing mixture.
The Role of Cubed Bread in Achieving Structure
Do not use flimsy, cheap sandwich bread for this. You need a sturdy, rustic loaf, like sourdough or French bread, cut into neat, uniform cubes. The density prevents it from dissolving when liquid is added. I swear by sourdough for its slightly tangy background note, which adds incredible depth, which is why I wrote my whole recipe on it: Sourdough Stuffing Recipe: Tangy, Tender, Never Soggy .
The Crucial Moisture Ratio for a Non-Gluey Middle
This is where people fail. Too much liquid results in a dense, gummy paste; too little leaves dry, chalky crumbs. The egg provides minimal binding, ensuring the final structure isn’t loose, but the primary hydration comes from the stock.
We add the stock gradually , mixing until the cubes are hydrated but still hold their shape, never sitting in a pool of liquid.
Essential Ingredients for Robust Sage and Onion Stuffing
This traditional stuffing recipe relies on simple, high-quality ingredients. Don’t skimp on the butter or the herbs here.
Choosing the Right Bread: Stale, Cubed, and Ready for Absorption
Stale bread is non-negotiable. If you skip drying the bread out, you’re setting yourself up for mushy failure. If you haven't planned ahead, just cube it and toast it quickly in a low oven; that works just fine.
Fresh Herbs vs. Dried: Maximizing the Sage Impact
While dried herbs are fine for a quick fix, fresh sage is the difference between good and magnificent. You need that potent, almost piney aroma that only fresh herbs can provide. Use a sharp knife and chop those herbs finely so their flavour gets everywhere.
Fat Choice: Why Proper Butter Delivers Superior Flavor
We use unsalted butter because we control the seasoning, and butter provides a richness that oil simply can't match. We also use a touch of olive oil in the sauté step to raise the smoke point slightly, allowing the vegetables to cook longer without scorching the butter.
Substitutions: Adjusting Aromatics and Liquid Base
| Ingredient | Substitution/Alternative | Rationale |
|---|---|---|
| Sturdy Bread | Dry Cornbread, Baguettes, Challah | All hold their shape well after absorbing liquid. |
| Unsalted Butter | Ghee or high-quality Olive Oil | Ghee adds depth; oil makes it dairy-free. |
| Chicken Stock | Vegetable Stock or Water + Bouillon | Necessary for vegetarian versions or speed. |
| Fresh Sage | Dried Rubbed Sage (reduce amount) | Use 1 teaspoon dried for every 1 tablespoon fresh. |
| Celery | Leeks (white parts only) | Leeks offer a milder, sweeter onion flavour. |
step-by-step: Mastering the Sage and Onion Method
Preparation Phase: Drying Out the Bread Cubes
Cube your bread into 1 inch pieces. This is crucial. If you didn't leave them out overnight, spread them on a tray and bake them at 300°F (150°C) for 15 minutes. They should feel hard and dry to the touch. Transfer the dried cubes to your largest mixing bowl.
Sautéing the Aromatics: Infusing the Fat Base
In a large skillet, melt the butter and olive oil over medium low heat. Add the diced onions and celery and cook them slooooowly, for about 8 to 10 minutes. The vegetables must be translucent and sweet; we don't want any crunch left in them.
Stir in the sage, thyme, salt, and pepper, cooking until you smell a wonderful, nutty aroma about 60 seconds. Add the minced garlic last, cooking for 30 seconds before immediately removing it from the heat.
Combining and Testing the Mix Consistency
Pour the entire contents of the skillet, including all the glorious herbed butter, over the dried bread cubes. Toss gently to coat everything. In a separate bowl, whisk the eggs into the warmed stock. Pour about two-thirds of the stock mixture over the bread. Gently toss again.
Chef’s Note: Now is the test! Squeeze a handful of the stuffing mix. It should hold together nicely and feel thoroughly moist, but the moment you release it, it should begin to crumble apart. Add the remaining stock only if you still see dry bread cubes lurking.
Stir in the fresh parsley this boosts the colour dramatically.
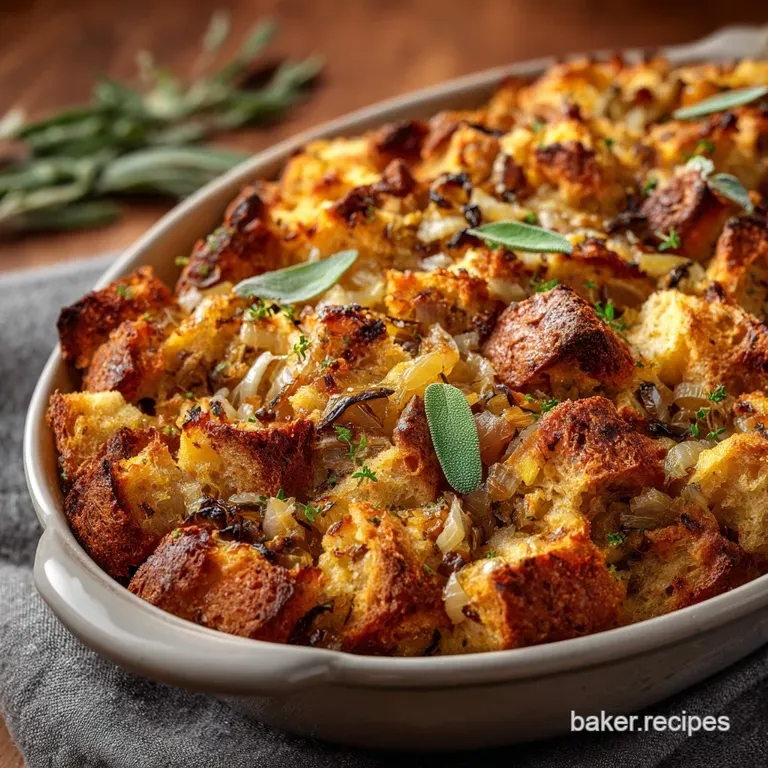
The Bake: Achieving That Perfect Golden Crust
Transfer the mixture to your greased baking dish, spreading it evenly but do not compact it down ; air pockets are essential for crispness. Cover the dish tightly with foil and bake at 375°F (190°C) for 25 minutes.
Remove the foil, dot the remaining cold butter across the top surface, and bake uncovered for another 15 to 20 minutes until the top is deeply golden brown and crunchy.
Chef’s Tips for Troubleshooting Your Homemade Stuffing
Preventing the 'Wet Gluey' Stuffing Mistake
I made this mistake my first year, resulting in a dense, almost inedible brick. The fix is always the bread and the mixing technique. You must start with truly dry bread, and when you mix the liquid, use a light hand.
Don’t compress the mixture, and definitely stop adding liquid the second the mix feels moist enough.
Should I Stuff the Bird or Bake Separately?
Always bake separately. Stuffing the bird is a classic look, sure, but it’s a food safety nightmare unless you manage to get the stuffing’s internal temperature up to 165°F (74°C) without drying out the meat.
Baking it in a dish gives you that superior crispy crust we are aiming for, every single time.
Boosting Savory Depth: Adding a Splash of Stock
If your stuffing seems bland after the first 20 minutes of baking, you can gently ladle a couple of tablespoons of warm stock or gravy around the edges of the pan before putting the foil back on. This infuses moisture and boosts the savoury flavour, especially if you used a high-quality stock.
Making Ahead: Practical Guide to Storing and Freezing Homemade Stuffing
Stuffing is an excellent make-ahead component, which saves so much stress on the big day!
Refrigerating Unbaked Stuffing Mix Safely
You can prepare the entire mixture sauté the aromatics, toss with the bread and stock/egg up to 24 hours in advance. Do not bake it yet. Cover the dish tightly with plastic wrap or foil and keep it cold in the fridge.
When ready to bake, pull it out 30 minutes before heating the oven to take the chill off. You may need an extra 5– 10 minutes in the oven since it’s starting cold.
Freezing Baked Stuffing for Future Feasts
Yes, you can absolutely freeze baked stuffing! Let the finished product cool completely after baking. Wrap the entire baking dish tightly in heavy duty foil, followed by a layer of plastic wrap, and freeze for up to 3 months. When you're craving some deep comfort food, you can even use leftover stuffing to make a quick casserole; I highly recommend this easy Chicken Stuffing Bake: Cozy Comfort Casserole, Ready in 1 Hour .
Reheating Instructions for Maximum Crispness
To reheat, thaw the frozen stuffing overnight in the fridge. Remove the plastic wrap and foil and bake, uncovered, at 350°F (175°C) for about 20– 25 minutes until heated through. If you want maximum crispness restored, broil it for the last two minutes, watching it like a hawk.
Classic Pairings: What to Serve Alongside Homemade Stuffing
Stuffing is fantastic on its own, but it truly shines when paired with the right complements.
- Proper Gravy: This is a non-negotiable component. A rich, deeply savoury gravy, whether it's made from pan drippings or a good quality store-bought version, brings the entire dish together.
- Tangy Sauces: The richness of butter and bread needs a counterpoint. A tart cranberry sauce or a sharp apple chutney offers that perfect acidic bite.
- The Comfort Factor: If you want to use this stuffing as the base for something heartier, try adding a few spoonfuls of cooked, spiced sausage to the mix it’s a delicious twist. My friend across the pond has a great method for Pioneer Woman Sausage Stuffing: The Ultimate Savoury Sage Dressing that utilizes similar base techniques.

Recipe FAQs
Why is my homemade stuffing dry and crumbly instead of moist?
A dry stuffing usually means your bread-to-liquid ratio is unbalanced; you need more stock or fat. Ensure you add the liquid gradually, testing until the mixture is moist but not saturated.
To retain moisture during baking, cover the dish loosely with foil for the first 30 minutes before uncovering it to achieve a crispy top.
How do I prevent my stuffing from becoming soggy or gluey?
Sogginess often results from wet bread or overmixing. Always use completely dried or toasted bread cubes, as fresh bread absorbs liquid too rapidly and turns mushy. Stop mixing as soon as the ingredients are just combined; excessive stirring activates the starch, resulting in a dense, gluey texture.
What type of bread is best for achieving the desired "crispy top, moist middle" texture?
Stale, crusty loaves like sourdough, French baguettes, or challah are ideal because they hold their shape well when wet. Avoid soft, highly processed commercial loaves, which tend to disintegrate easily. Regardless of the type, always ensure the bread is fully dried out first.
Can I add sausage or bacon to this classic sage and onion recipe?
Yes, adding cured or ground meat greatly enhances the flavor profile. Brown the meat (like Italian sausage or diced pancetta) separately and drain off any excess fat before folding it into the sautéed aromatic mixture. This ensures the stuffing remains flavorful without becoming overly greasy.
Is it safer to bake the stuffing inside the turkey or separately?
For food safety, it is strongly recommended to bake the stuffing (often called dressing) separately in a casserole dish. Stuffing baked inside poultry often fails to reach the safe internal temperature of 165°F (74°C) before the turkey overcooks, risking bacterial growth.
How long can I safely store leftover baked stuffing?
Leftover baked stuffing must be cooled quickly and then stored promptly in an airtight container in the refrigerator. It should be consumed within 3 to 4 days. Always reheat portions until they are piping hot (165°F) throughout before serving.
Can I prepare and freeze homemade stuffing ahead of time?
Stuffing freezes excellently, both baked and unbaked. If freezing unbaked, transfer the mixture to a freezer safe baking dish, wrap it tightly in plastic and foil, and freeze for up to three months. Thaw overnight in the refrigerator before baking as directed.
Proper Homemade Stuffing Recipe
Ingredients:
Instructions:
Nutrition Facts:
| Calories | 679 kcal |
|---|---|
| Protein | 18.3 g |
| Fat | 33.1 g |
| Carbs | 77.4 g |
