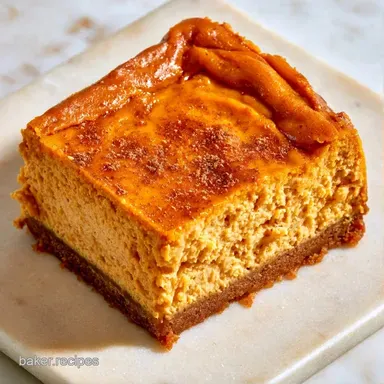
Pumpkin Cheesecake Bars with Gingersnap Crust
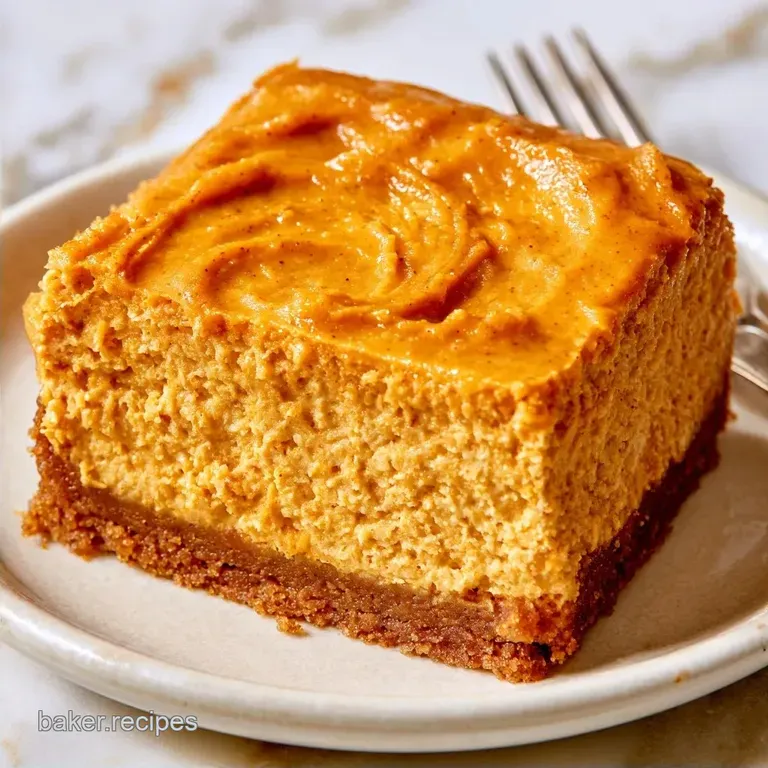
- Prep Time: 20 minutes active plus 4 hours to chill
- The Appeal: A spicy, crunchy crust paired with a velvety center
- Ideal for: Autumn get-togethers, seasonal meal planning, or a cozy weekend project
I still remember my first attempt at pumpkin cheesecake. I ignored the pre-bake step and used ingredients straight from the fridge. The result was a dismal, grey orange mass with the consistency of a wet sponge.
It was entirely bland, and because the center never set, it felt more like a failed pudding than a proper dessert.
The solution was simpler than I thought. By emphasizing the contrast between a zesty, spiced crust and a light, airy filling, everything came together. I replaced the typical graham crackers with gingersnaps and started ensuring my cream cheese was properly softened.
These Pumpkin Cheesecake Bars deliver those classic autumn notes without requiring a water bath. You get a satisfying crunch from the base, a decadent creaminess from the cheese, and a burst of concentrated pumpkin in every swirl. It’s the kind of recipe that makes your home smell like a cozy October orchard.
Easy Homemade Pumpkin Cheesecake Bars
This recipe focuses on the balance of spices and fats. Instead of a single blended mass, we create two separate batters. This keeps the cheesecake tasting like cheesecake and the pumpkin tasting like pumpkin.
The key to success here is patience during the cooling phase. Because we aren't using a water bath, the bars rely on a long, slow chill in the fridge to reach the right consistency. If you cut them too early, you'll lose those clean, sharp edges.
Since these are bars rather than a whole cake, they bake faster and are much easier to portion. You can easily swap the gingersnaps for other spiced cookies if you have some in the pantry, or even try a gluten-free alternative to make them more inclusive for your guests.
Why These Layers Work
- Room Temperature Base: Using softened cream cheese and eggs prevents the batter from breaking. This ensures the filling stays smooth and doesn't develop grainy pockets during the bake.
- The Pre Bake: Baking the crust for 8 minutes sets the butter and sugar, creating a moisture barrier. This stops the cheesecake filling from soaking into the crumbs and making them mushy.
- Separate Batters: Whisking the pumpkin and cream cheese separately allows each to maintain its own density. When swirled, they create a visual and textural contrast that's much more interesting than a uniform orange cake.
| Method | Bake Time | Texture | Best For |
|---|---|---|---|
| Fast Track Bars | 48 mins | Creamy & Crisp | Quick gatherings |
| Classic Cake | 1.5 hours | Dense & Heavy | Formal dinners |
| No Bake Style | 0 mins | Mousse like | Hot summer days |
Ingredient Deep Dive
| Ingredient | What It Does | Best Swap |
|---|---|---|
| Gingersnap Crumbs | Adds a zesty, crisp foundation | Biscoff crumbs (milder taste) |
| Cream Cheese | Provides the dense, tart body | Mascarpone (creamier, less tangy) |
| Pumpkin Puree | Brings in autumn notes and moisture | Pureed roasted butternut squash |
| Pumpkin Pie Spice | Gives it a cozy seasonal scent | Cinnamon, nutmeg, and clove blend |
For the Spiced Crust
- 1.5 cups (180g) gingersnap cookie crumbs Why this? The ginger's bite balances the richness of the filling.
- 5 tbsp (70g) unsalted butter, melted Why this? Acts as the glue to hold the crust together.
- 1 tbsp (8g) granulated sugar Why this? Encourages browning during the initial bake.
For the Creamy Cheesecake Layer
- 16 oz (450g) room temperature cream cheese Why this? Key to achieving a velvety, clump free consistency.
- 0.5 cup (100g) granulated sugar Why this? Adds sweetness without affecting the volume.
- 1 tsp (5ml) pure vanilla extract Why this? Softens the sharp tang of the cream cheese.
- 2 large (100g) eggs, room temperature Why this? Gives the cheesecake its structure and lift.
For the Pumpkin Swirl
- 15 oz (425g) pure pumpkin puree Why this? Be sure to use plain puree, not the pie filling version.
- 0.5 cup (100g) light brown sugar, packed Why this? Contributes a rich, molasses style sweetness.
- 1.5 tsp (6g) pumpkin pie spice Why this? The main driver of that warm, autumn flavor.
- 2 large (100g) eggs, room temperature Why this? Helps the pumpkin layer set into a firm custard.
Tools You'll Need
To ensure a lump free cream cheese mixture, I typically use a stand mixer like a KitchenAid, though a handheld mixer works perfectly well. You will also need a 9x9 inch baking pan and some parchment paper.
The parchment is essential. Let the edges hang over the sides of the pan, which allows you to easily remove the Pumpkin Cheesecake Bars after they have chilled. This makes slicing much simpler.
Lastly, grab a thin skewer or a toothpick. You'll use this to swirl the pumpkin batter through the cream cheese to create those elegant patterns.
Key Steps
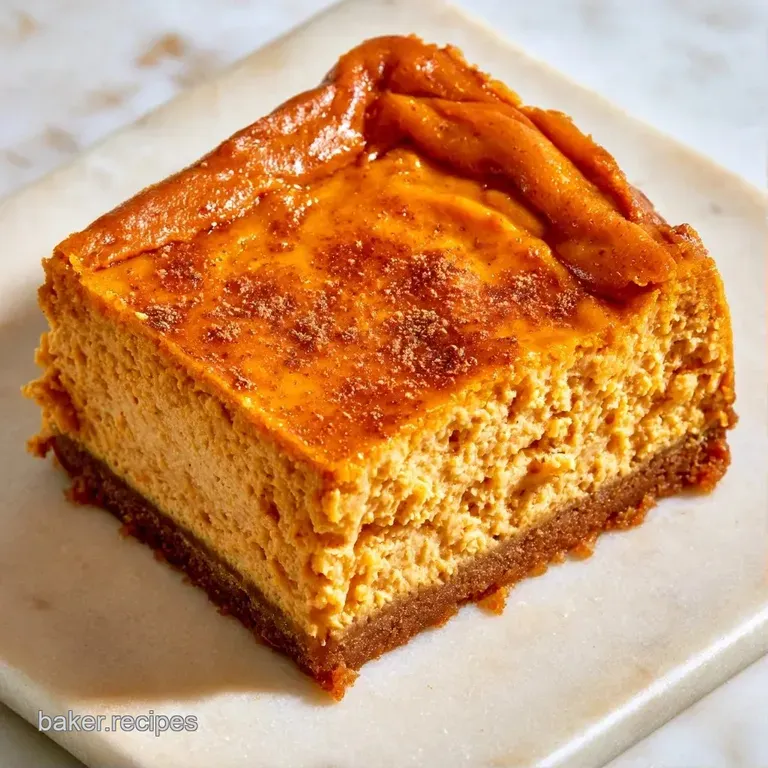
Phase 1: Setting the Foundation
- Prepare a 9x9 inch baking pan by lining it with parchment paper, making sure the edges extend over the sides.
- Combine gingersnap crumbs, melted butter, and 8g sugar until the texture resembles wet sand.
- Press the crumbs firmly into the bottom of the pan and bake for 8 minutes at 325°F (160°C) until the edges are fragrant and set. Remove and let cool briefly.
Phase 2: Whipping the Fillings
- Whip together softened cream cheese and 100g granulated sugar until smooth. Note: Avoid overbeating once the eggs are in to prevent air bubbles.
- Stir in vanilla, adding the two eggs separately while beating slowly until just combined.
- In another bowl, whisk pumpkin puree, brown sugar, pumpkin pie spice, and two eggs until the color is a consistent deep orange.
Phase 3: The Swirl and Bake
- Spread the cream cheese batter over the pre-baked crust, smoothing the top with a spatula.
- Spoon dollops of pumpkin batter over the cheesecake layer. Using a toothpick or skewer, drag the pumpkin through the cream cheese in a figure eight pattern to create a swirl.
- Bake for 35-40 minutes until edges are puffed and golden and the center has a slight jiggle.
- Let the cake cool at room temperature for one hour, then refrigerate for a minimum of 4 hours before slicing.
Why This Recipe Works
Since we're focusing on a dense yet creamy result, the aeration is key. If you've enjoyed the texture of my Oreo Cheesecake Bites, you'll notice a similar approach to the cream cheese base. We want it smooth and glossy, not fluffy like a cake.
The brown sugar in the pumpkin layer is a specific choice. While granulated sugar is fine for the cheese, the molasses in brown sugar complements the earthiness of the pumpkin and the heat of the gingersnaps. It creates a more rounded, orchard style flavor.
| Goal | What to change |
|---|---|
| More spice | Add 1/2 tsp cinnamon to the crust |
| Lighter texture | Fold in 1 cup whipped cream to cheese |
| Richer crust | Use melted browned butter |
What Can Go Wrong (and How to Fix It)
Preventing a Grainy Texture
If you notice small lumps of cream cheese in your batter, the cheese was likely too cold. While you can try to smooth the mixture by gently warming it over a double boiler for a minute, the most effective solution is ensuring all ingredients are truly at room temperature before you begin.
Addressing a Gooey Center
If the center remains soft after the allotted bake time, it is often due to particularly watery pumpkin puree. You may return them to the oven in 5 minute increments, but remember that these Pumpkin Cheesecake Bars firm up significantly in the fridge. If the edges have puffed, they are likely finished.
Solving a Crumbly Crust
A crust that falls apart during slicing usually indicates it wasn't pressed firmly enough into the pan. Press the crumbs down tightly before the pre bake to ensure a solid base.
| Problem | Fix |
|---|---|
| Lumpy batter | Sift the sugar or use a whisk |
| Soggy bottom | Confirm the 8 minute pre bake is finished |
| Surface cracks | Avoid overbeating the eggs into the cheese |
Preservation Guidelines
Keep these treats chilled in a sealed container for up to 5 days. I've noticed the taste actually matures after 24 hours, enhancing that traditional autumn vibe.
For longer preservation, these can be frozen for up to 2 months. Cut them into portions first and separate the layers with parchment paper to keep them from clumping. Let them defrost in the refrigerator overnight.
To make use of any remaining gingersnap crumbs, combine them with a touch of salt and melted butter for a delicious vanilla ice cream garnish. Any spare pumpkin puree is perfect mixed into your morning oats with a bit of cinnamon.
Make It Your Own
If you're looking for a different twist, try a Biscoff variation by replacing the gingersnaps with Biscoff cookies and adding a drizzle of melted cookie butter on top after chilling. It gives the Pumpkin Cheesecake Bars a caramelized, buttery depth.
For those needing a gluten-free version, most gingersnap brands offer a GF alternative, or you can use almond flour mixed with cinnamon and ginger. The structure remains the same, though the crust might be slightly softer. For more ideas on using almond flour, my Homemade Granola Bars show how it adds a great nutty base.
If you want something less sweet, replace the brown sugar in the pumpkin layer with maple syrup. This changes the moisture content slightly, so you might need to bake for an extra 3-5 minutes to ensure the center sets.
Presentation Tips
To get those professional looking slices, dip your knife in hot water and wipe it clean between every single cut. This prevents the cream cheese from dragging into the pumpkin swirl, keeping the layers distinct.
I love serving these with a dollop of maple infused whipped cream or a few fresh pomegranate seeds on top for a pop of color. If you're feeling fancy, a light dusting of cinnamon and powdered sugar adds a nice finishing touch.
Since these are rich, they pair well with a sharp cup of coffee or a glass of cold cider. Just keep them chilled until the very moment you serve them to ensure the texture stays firm and silky.
Recipe FAQs
How to make pumpkin cheesecake bars?
Press gingersnap crust into pan, bake at 325°F for 8 minutes, then layer and swirl cream cheese and pumpkin batters before baking 35-40 minutes.
Tip: Use a toothpick for the figure eight swirl to keep the layers distinct.
What is the secret to creamy cheesecake bars?
Ensure the cream cheese and eggs are at room temperature before mixing.
Tip: This prevents lumps and ensures a silky, uniform consistency.
Why do these bars sometimes crack?
Overbaking usually causes the surface to split.
Tip: Pull them from the oven when the center still has a slight jiggle.
Which variations are most popular?
You can swap the gingersnap base for a different spiced cookie or add extra pumpkin pie spice.
Tip: If you enjoy layering textures here, see how we use a similar base approach in cake batter blondies.
Is it true you need a water bath?
This one's false: These bars are designed to bake without one by using a lower temperature.
Tip: Cooling them at room temperature for one hour before refrigerating prevents sudden temperature shocks.
Do I really need to pre-bake the crust?
No, this is a common misconception, but pre-baking for 8 minutes actually creates the necessary barrier.
Tip: Let the crust cool slightly before adding the filling to keep the edges crisp.
Ways to make a gourmet filling?
Beat softened cream cheese and granulated sugar until completely smooth before adding vanilla and eggs.
Tip: Keep the mixer on low speed when adding eggs to avoid incorporating too much air.
Pumpkin Cheesecake Bars