Roasted Broccoli at 400 with Garlic

- Time: Active 10 minutes, Passive 20 minutes, Total 30 minutes
- Flavor/Texture Hook: Shatter crisp edges with buttery stems
- Perfect for: Busy weeknight dinners or healthy meal prep
- The Secret to Charred Texture
- Recipe Metrics and Timings
- Pantry Staples and Fresh Finds
- Necessary Tools for Success
- Detailed Walkthrough for Crispy Flaked Edges
- Quick Fixes for Roasting Problems
- Ingredient Swaps for Every Diet
- Storage Methods and Waste Reduction
- Best Main Dish Pairings
- Roasting Comparisons and Troubleshooting Solutions
- Recipe FAQs
- 📝 Recipe Card
You know that smell when garlic hits hot oil, and it starts to sizzle just enough to make your mouth water? That's what we're going for here. I used to be the person who just threw steamed broccoli in a bowl and wondered why it felt like a chore to eat, but everything changed once I cranked the oven up.
This recipe delivers perfectly tender and flavorful Roasted Broccoli at 400 with Garlic and Olive Oil.
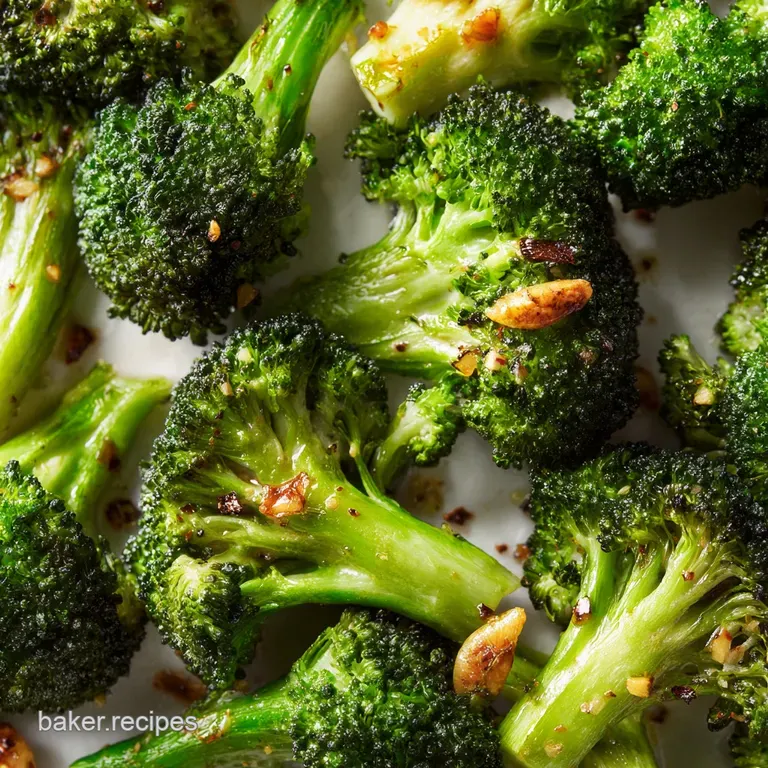
Trust me, there is a massive difference between "cooked" broccoli and broccoli that has been transformed by a hot sheet pan. We are looking for those little florets to get almost dark brown, looking like tiny trees that survived a very tasty forest fire.
It is about getting that snap in the stem while the top part gets that velvety, nutty taste.
I remember one Tuesday night when I was in a rush and didn't dry the broccoli properly. It was a disaster, basically a steamed mess on a tray. I learned my lesson: moisture is the enemy of the crunch.
Today, I'm going to show you exactly how to avoid my early mistakes and get those crispy, flaked edges every single time.
The Secret to Charred Texture
Maillard Reaction: High heat transforms natural sugars into complex, savory flavor compounds on the floret tips. Moisture Evaporation: 400 degrees is the sweet spot that dries the surface rapidly enough to prevent steaming.
Chef's Tip: Put your empty baking sheet in the oven while it preheats. When you toss the broccoli onto that screaming hot metal, you get an immediate sizzle that starts the searing process on the bottom of the stems instantly.
If you are looking for a shortcut or maybe forgot to buy fresh, you might be tempted to use the bag in the freezer. It works, but the texture will change. For a deeper dive into that specific method, check out my Crispy Roasted How recipe for frozen florets. The science is slightly different because of the ice crystals, but the goal of maximum crunch remains the same.
| Component | Science Role | Pro Secret |
|---|---|---|
| Broccoli | Fiber Structure | Dry with a spinner for maximum crispness. |
| Olive Oil | Heat Conductor | Use extra virgin for a higher smoke point than butter. |
| Sliced Garlic | Flavor Infusion | Slice thin, don't mince, to prevent bitter burning. |
| Kosher Salt | Moisture Drawer | Coarse grains distribute better than fine table salt. |
The way the oil coats the tiny nooks and crannies of the florets is vital. If you just drizzle it on top, you'll end up with oily spots and dry spots. You need to get your hands in there and massage the oil into the broccoli.
It sounds a bit extra, but it ensures every single bite has that golden, roasted finish we're chasing.
Recipe Metrics and Timings
When we talk about roasting, precision helps. I’ve found that 20 minutes is the "goldilocks" zone at this temperature. Any less and the stems are too fibrous, any more and the garlic starts to taste acrid. You want to see that the tips are starting to shatter when you poke them with a fork.
- 1. Temperature
- Exactly 400°F (204°C).
- 2. Time
- Exactly 20 minutes.
- 3. Weight
- 680g of broccoli (about 2 large heads).
The 400°F Equilibrium
At this temperature, the water inside the broccoli evaporates at a rate that allows the outside to crisp up without the inside turning into mush. If you went to 450°F, you'd burn the outside before the stems softened.
If you stayed at 350°F, the broccoli would just sit there and get sad and limp.
Strategic Surface Area
The way you cut the broccoli matters more than you think. Try to create at least one flat side on every piece. When that flat surface stays in direct contact with the hot baking sheet, you get that deep, dark caramelization that provides all the flavor.
Emulsion Coating Technique
While we aren't making a true emulsion like a mayo, the way the salt and pepper stick to the oil coated broccoli is key. The oil acts as the glue. If you salt before you oil, the salt just bounces off. Always oil first, then season.
Pantry Staples and Fresh Finds
You don't need a massive grocery list for this, which is the beauty of it. We are using 2 large heads of Broccoli (approx. 680g). Look for heads that are tight and dark green, avoid anything that looks yellow or feels spongy. For the fat, we are using 3 tbsp (45ml) of extra virgin olive oil.
Don't skimp here; the oil is what transfers the heat.
| Original Ingredient | Substitute | Why It Works |
|---|---|---|
| 4 cloves Garlic | 1 tsp Garlic Powder | Less fresh bite, but won't burn as easily. |
| Extra Virgin Olive Oil | Avocado Oil | Higher smoke point with a more neutral flavor. |
| Kosher Salt | Sea Salt | Similar coarse texture; avoid fine table salt if possible. |
For the seasoning, we use 1 tsp (6g) kosher salt and 1/2 tsp (1g) freshly cracked black pepper. If you like a little bit of a back of-the throat kick, 1/2 tsp (1g) red pepper flakes is a brilliant addition. The heat of the oven mellows the flakes slightly, so they provide warmth rather than raw fire.
I always tell people that the garlic is the heart of this dish, but it's also the trickiest part. Using 4 cloves of fresh garlic, thinly sliced, gives you those little "garlic chips" that are so addictive. If you mince it too small, the garlic will turn into charcoal before the broccoli is even halfway done.
Necessary Tools for Success
You don't need fancy gadgets, but a good rimmed baking sheet is non negotiable. I prefer the heavy duty aluminum ones because they distribute heat evenly without warping in the high heat of the oven. A warped pan means your oil pools in one corner, leaving some broccoli dry and some soggy.
- Large Baking Sheet: Provides enough room so the broccoli isn't crowded.
- Chef's Knife: Necessary for those clean, flat cuts on the florets.
- Large Mixing Bowl: Much better for tossing than trying to mix on the pan.
- Tongs: For flipping halfway through to get even browning.
One thing I've learned the hard way is that crowding the pan is the fastest way to ruin a roast. If the pieces are touching, they will trap steam between them. Steam equals soggy. If you need to double the recipe, use two pans. It is better to have more cleanup than a mediocre side dish.
Detailed Walkthrough for Crispy Flaked Edges
- Preheat your oven to 400°F. Note: A hot oven is the only way to get that sear.
- Wash the broccoli and dry it thoroughly. Wait until no water remains on the surface to ensure it roasts rather than steams.
- Cut the 2 large heads into bite sized florets. Note: Keep the stems about 1/2 inch thick so they cook at the same rate as the tops.
- Slice 4 cloves of garlic into thin, translucent slivers.
- Toss the broccoli in a large bowl with 3 tbsp olive oil. Mix until every crevice is coated and looks shiny.
- Add 1 tsp salt, 1/2 tsp pepper, and 1/2 tsp red pepper flakes.
- Spread the mixture onto the baking sheet in a single layer.
- Nestle the garlic slices underneath the broccoli florets where possible. Note: This protects them from direct heat so they don't burn.
- Roast for 20 minutes until the floret tips are charred and the stems are tender.
- Flip the pieces halfway through the cooking time using tongs.
Chef's Tip: To deepen the flavor profile even more, add a tiny pinch of espresso powder to your salt and pepper mix. It sounds wild, but it brings out an incredible earthiness in the charred brassica.
The color transition is something to watch for. It will go from bright green to a duller army green, and then finally, the tips will turn that beautiful dark brown. That brown color is where all the flavor lives. If you pull it out while it's still bright green, you're missing out on the best part of the experience.
Quick Fixes for Roasting Problems
One of the most common issues is the garlic. Garlic has a very low tolerance for high heat. If you find your garlic is turning black and bitter, you likely sliced it too thin or left it too exposed on the pan.
I like to tuck the garlic bits under the broccoli florets; they still flavor the oil and the vegetable, but they stay protected from the direct heat of the oven's heating element.
Why Your Broccoli Is Sinking
If your broccoli comes out limp and greasy instead of crisp, it usually means your oven wasn't hot enough or you used too much oil. Remember, the oil should coat, not soak. Also, make sure you aren't using a glass baking dish.
Glass doesn't conduct heat the same way metal does, and it will almost always result in a softer texture.
| Problem | Root Cause | Solution |
|---|---|---|
| Burnt Garlic | Sliced too thin or exposed | Slice thicker and tuck under the florets. |
| Soggy Florets | Crowded pan or wet broccoli | Use two pans and dry the broccoli with a towel. |
| Bitter Taste | Over charring | Reduce time by 2 minutes next time. |
Another thing to consider is the size of your florets. If you have some giant chunks and some tiny crumbs, the crumbs will burn while the chunks stay raw. Take that extra minute to make sure everything is relatively uniform.
It makes a world of difference when you take that first bite and everything is perfectly cooked.
Ingredient Swaps for Every Diet
This recipe is naturally vegan, gluten-free, and keto friendly, which makes it a total winner for dinner parties. But sometimes you want to change the vibe. If you are serving this alongside something creamy, like my Keto Alfredo Sauce recipe, you might want to omit the red pepper flakes to keep the flavors from clashing.
The Zesty Mediterranean Twist
Add a squeeze of fresh lemon juice and a tablespoon of capers right after the broccoli comes out of the oven. The acid cuts through the richness of the olive oil and makes the whole dish feel much lighter. It's a great trick for a summer side dish.
The Plant Based Umami Swap
If you want a "cheesy" flavor without the dairy, toss the broccoli with 1 tbsp of nutritional yeast before roasting. It creates a savory crust that tastes remarkably like parmesan cheese. It’s a budget friendly way to add a lot of punch without expensive ingredients.
The Nutty Keto Crunch
Toss in a handful of sliced almonds or pine nuts during the last 5 minutes of roasting. They will toast in the residual oil and provide a wonderful textural contrast to the soft stems and crispy florets. It keeps the carb count low while upping the healthy fats.
Storage Methods and Waste Reduction
Roasted broccoli is best eaten immediately because those crispy tips will eventually soften as they sit. However, if you have leftovers, they are still great. Store them in an airtight container in the fridge for up to 4 days. Whatever you do, don't microwave them to reheat; they will turn into mushy sadness.
- Fridge: 4 days in a sealed container.
- Freezer: 3 months, though the texture will be significantly softer upon thawing.
- Reheating: Toss them back onto a hot pan in the oven at 400°F for 5 minutes to bring back some of the crunch.
For zero waste, don't throw away those thick stems! Peel the woody outer layer with a vegetable peeler, slice the tender inner core into coins, and roast them right along with the florets. They actually get a lovely, almost water chestnut like crunch that is completely different from the tops.
You paid for the whole head, so you might as well eat the whole head.
Best Main Dish Pairings
Because this dish is so versatile, it goes with almost anything. I love it with a simple pan seared chicken breast or a flaky piece of salmon. The garlic and olive oil notes are neutral enough to support more complex main courses without getting lost in the shuffle.
If you are going for a full vegetarian spread, this broccoli is a great companion to other roasted vegetables. It pairs naturally with the sweetness of a Roasted Acorn Squash recipe. The contrast between the savory char of the broccoli and the creamy curry notes of the squash is honestly a match made in heaven.
For a comforting winter meal, try serving this alongside a big bowl of soup. The crunch of the broccoli provides a much needed texture break when you're eating something soft like a Classic French Onion Soup recipe. It’s much healthier than a side of bread but just as satisfying.
Roasting Comparisons and Troubleshooting Solutions
People often ask if they should use parchment paper or foil. I'm a "naked pan" advocate for this specific recipe. While parchment makes cleanup easier, it acts as a slight insulator between the broccoli and the hot metal. If you want the absolute best char, go straight onto the pan.
If you must use a liner, go with foil, but make sure it's flattened out completely.
| Method | Texture Result | Cleanup Level |
|---|---|---|
| Direct on Pan | Maximum Char/Crisp | Moderate Scrubbing |
| Aluminum Foil | High Crisp | Easy |
| Parchment Paper | Even Browning/Softer | Easiest |
Right then, let's wrap this up. Making roasted broccoli isn't about following a complex set of rules; it's about respecting the heat and managing the moisture. Once you see those first charred bits and smell that toasted garlic, you'll never go back to steaming again.
If you want X, do Y: If you want a deeper umami flavor, add 1 tsp of soy sauce to the oil before tossing. If you want it extra crispy, leave the pan in the oven for 3 minutes before adding the veg.
If you want it kid friendly, sprinkle with a little parmesan cheese the second it comes out.
Give this a go tonight. It's one of those recipes that feels like a "hack" because it takes so little effort for such a massive reward. Just remember: dry that broccoli, slice that garlic thin, and don't be afraid of the dark brown bits! Happy roasting!

Recipe FAQs
How long do you roast broccoli at 400?
20 minutes. This is the sweet spot for tender stems and slightly charred, crispy florets at 400°F. Any less and it might be too fibrous; any more risks bitter garlic.
How do you roast broccoli with garlic in the oven?
Toss broccoli with olive oil, salt, and pepper, spread on a baking sheet, and add thinly sliced garlic. Roast at 400°F for 20 minutes, flipping halfway through. Ensure broccoli is very dry before oiling to prevent steaming.
How to make broccoli with olive oil and garlic?
Cut broccoli into bite sized florets, toss with olive oil until coated, add sliced garlic, salt, and pepper. Spread in a single layer on a baking sheet and roast at 400°F for 20 minutes, until tender and browned.
How long to cook broccoli in the oven at 400 reddit?
About 20 minutes is the general consensus. Most users recommend this time for broccoli at 400°F to achieve a good balance of tenderness and crispy edges, similar to other roasting methods.
Should I dry my broccoli before roasting?
Absolutely, yes. Excess moisture causes the broccoli to steam rather than roast, leading to a soggy texture. Thoroughly drying it with paper towels or a salad spinner is crucial for crisp edges.
Can I use frozen broccoli for roasting?
Yes, but expect a different texture. Frozen broccoli will release more water, making it harder to achieve the same crispness. For the best results with frozen, ensure it's thawed and very well drained, or follow specific techniques for crispy roasted frozen broccoli.
What's the secret to crispy broccoli florets?
High heat and a dry surface are key. Roasting at 400°F allows the edges to char and crisp up, while ensuring the moisture evaporates quickly. Don't overcrowd the pan, as this traps steam and makes the broccoli limp, unlike a well prepared seasonal harvest traybake where ingredients might have more space.
Roasted Broccoli 400

Ingredients:
Instructions:
Nutrition Facts:
| Calories | 152 kcal |
|---|---|
| Protein | 5.0 g |
| Fat | 10.8 g |
| Carbs | 12.2 g |
| Fiber | 4.4 g |
| Sugar | 2.1 g |
| Sodium | 575 mg |
