Turkey and Gravy: Slow-Roasted Breast with Silky Gravy
- The Ultimate Solution for a Perfect Sunday Turkey Dinner
- The Science of Succulence: Why This Turkey Breast Stays Moist
- Master Ingredients for the Turkey and Gravy
- Preparing the Main Course: Step-by-Step Turkey Roasting Method
- Finishing Strong: Building the Silky Herb Pan Gravy
- Chef's Notes: Mastering the Roast and Avoiding Common Gravy Mistakes
- Storing and Reheating Leftovers
- Complete Your Meal: Classic Serving Pairings
- Recipe FAQs
- 📝 Recipe Card
The Ultimate Solution for a Perfect Sunday Turkey Dinner
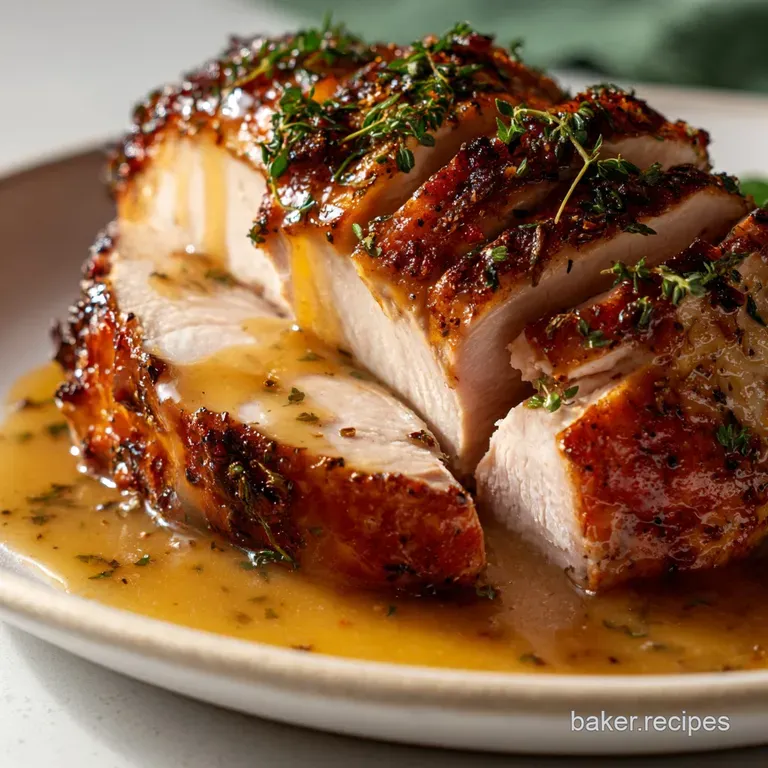
That rich, herby smell, that promises deep, savory comfort, is utterly intoxicating. When you picture the perfect Sunday table, I bet you see golden slices of bird drowning in a thick, mahogany sauce that, my friends, is the pure magic of homemade Turkey and gravy .
(1) This combination is the definition of comfort food.
Forget spending eight hours wrestling a whole Thanksgiving turkey that invariably ends up dry. This recipe focuses on a beautiful, manageable turkey breast that delivers all the flavour without the stress, making a classic, deeply satisfying Turkey and gravy meal accessible any night of the week.
(2) It's faster, easier, and consistently yields juicier results.
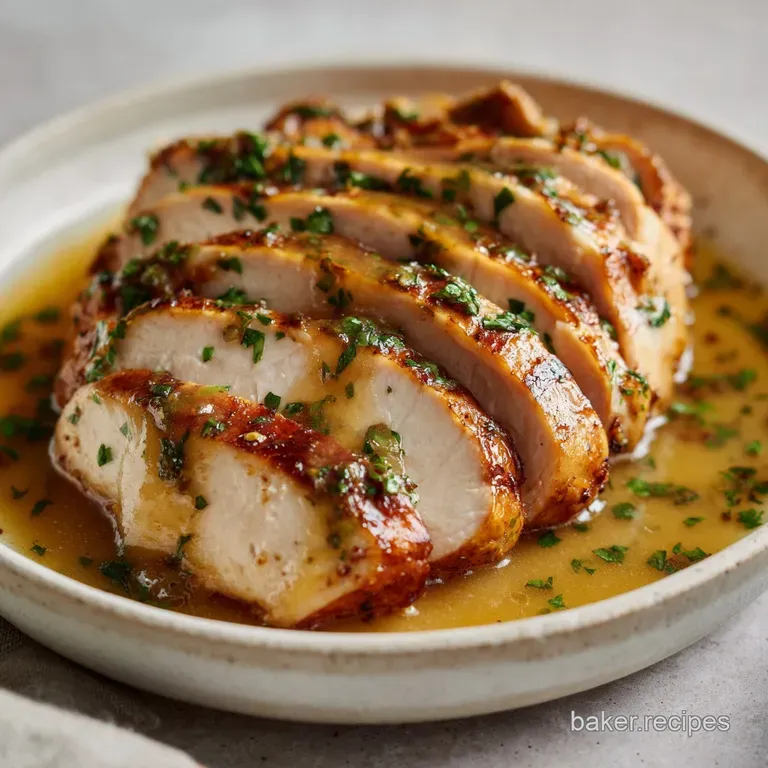
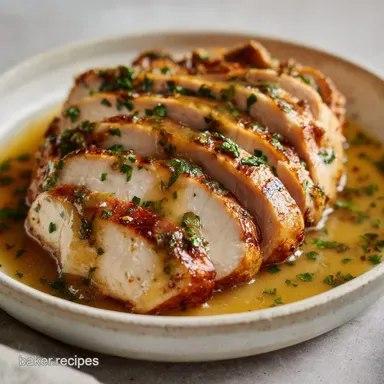
We're talking crispy skin, unbelievably juicy meat, and a guaranteed lump free, silky pan gravy built right from the drippings. This method simplifies the traditional roast, ensuring you master the art of fantastic Turkey and gravy every single time.
(3) Let’s get cooking the best roast you’ve ever tasted!
The Science of Succulence: Why This Turkey Breast Stays Moist
My biggest failure as a young cook was always dry poultry; it’s a crime against Sunday dinner. This focus on maximizing moisture in the turkey breast is the secret to a phenomenal Turkey and gravy experience.
We are utilizing two key scientific principles: low and slow roasting (after an initial crisping blast) and rigorous resting.
Moving Beyond the Whole Bird Hassle
Roasting a whole turkey means the breast (lean white meat) is finished cooking long before the legs (dark meat) are done. You end up with a huge temperature disparity, which leads to inevitable dryness. By using a boneless, rolled turkey breast, we eliminate the structural challenge.
The result is consistently juicy meat that pairs perfectly with a generous pour of warm, homemade gravy. This simplifies the whole process, making the perfect plate of Turkey and gravy achievable without breaking a sweat. (4)
What Makes This Pan Gravy Truly Silky
A silky pan gravy, the true star of any classic Turkey and gravy dish, requires two things: fond and fat . Fond is the caramelized browned bits stuck to the bottom of the roasting pan that’s pure flavour gold.
We deglaze the pan with stock, then use the reserved turkey fat to build a classic roux (equal parts fat and flour), which is the thickening agent. Whisking gradually and straining at the end ensures that incredible, glossy, lump free texture we all crave for our Turkey and gravy . (5)
Overview: Timing and Difficulty Level
| Stage | Time | Notes |
|---|---|---|
| Prep Time | 20 minutes | Active prepping and seasoning. |
| Cook Time | 1 hour 45 minutes | Roasting time (for 1.5 kg breast). |
| Rest/Gravy Time | 30 minutes | Essential resting time; gravy is made concurrently. |
| Total Time | 2 hours 35 minutes | Ready to carve. |
Difficulty Level: Medium. It's straightforward, but monitoring the internal temperature of the turkey is absolutely non-negotiable for success. Making a beautiful, lump free roux for your Turkey and gravy takes a little patience, too. (6)
Essential Equipment Checklist
You don't need fancy gadgets, but a few tools make this much easier:
- Meat Thermometer (Digital is best): This is your co-pilot. Without it, you are guessing, and guessing means dry turkey.
- Large Roasting Tin: Enough surface area for the turkey and the aromatics.
- Sturdy Whisk: Essential for mixing the roux and building that lump free gravy.
- Fat Separator: Highly recommended for quickly separating the glorious turkey fat from the pan juices for the most flavourful Turkey and gravy possible. (7)
The Compound Butter Secret to Preventing Dryness
The turkey breast is wrapped in its own skin and then slathered in a flavorful compound butter. This butter melts during the roast, basting the meat constantly and providing all the necessary fat for a crisp skin and a luscious pan gravy. This simple step elevates the moisture level dramatically.
I once skipped this step and ended up with a crusty turkey; a truly disappointing start to a plate of Turkey and gravy . (8)
Building Flavor Depth with Roasting Drippings
The key to outstanding gravy is utilizing every bit of flavour from the roasting pan. Those vegetables (carrots, celery, onion) and that small amount of stock placed under the turkey steam, keeping the environment moist and catching all the dripping herbal fat.
This foundation the drippings, the fond , and the roasted vegetables is what creates a deeply complex and savoury Turkey and gravy sauce that tastes miles better than anything from a packet. (9)
Master Ingredients for the Turkey and Gravy
When making something simple, the quality of your ingredients really shines through. Don't skimp on fresh herbs or good quality stock.
Selecting the Best Turkey Breast Cut
We are using a boneless, skin-on Turkey Breast (rolled) , often tied up by the butcher. The skin is essential for browning and generating the fat we need for the gravy.
If you can only find a skinless cut, you must add extra fat (like bacon laid over the top) during the roast, but the resulting Turkey and gravy won't have the same depth of flavour.
| Ingredient | Substitute (Viable) |
|---|---|
| Boneless Turkey Breast | Bone-in, skin-on chicken breast (adjust cooking time) |
| Fresh Thyme/Rosemary | 1 tsp dried herbs, mixed (use sparingly) |
| Unsalted Butter | Salted butter (reduce added salt by 1/4 tsp) |
Essential Pantry Items for the Herb Compound Butter
The herb butter is what makes this Turkey and gravy truly fragrant.
- Softened Butter: Must be room temperature for easy mixing.
- Fresh Herbs: Thyme and rosemary are classic, earthy choices. If you don't have fresh, use half the amount of dried herbs.
- Salt & Pepper: Use coarse salt for maximum impact on the skin.
How to Achieve a Rich Gravy Base (Stocks and Thickeners)
For the gravy, we rely on low-sodium stock and plain flour for the roux.
-
Turkey or Chicken Stock:
Always use low sodium so you control the final seasoning. If you have turkey stock (leftover from a previous year’s bones you are organized!), use it! The resulting
Turkey and gravy
will be richer. (10)
- Substitution: Vegetable stock works in a pinch, but the flavour won't be as robust.
-
Plain (All-Purpose) Flour:
This is the standard thickener for a roux based gravy.
- Substitution: For gluten-free gravy, use cornflour (cornstarch) mixed into a slurry, added after the roux stage.
Measurement Conversions and Scaling Notes
The recipe is written for a standard 3 3.5 lb (1.5 kg) turkey breast, feeding 4 6 people generously. If you double the size of the turkey breast, you must increase the cooking time by roughly 40 50% and double the butter and gravy ingredients.
Remember to always use the meat thermometer, not the clock, especially when dealing with larger cuts of meat for your perfect Turkey and gravy . (11)
Preparing the Main Course: step-by-step Turkey Roasting Method
Preparing the Turkey and Applying the Compound Butter
- Preheat and Prep: Preheat the oven high, 220°C / 425°F. Chop the onion, carrot, celery, and smash the garlic. Arrange these aromatics in the bottom of your roasting tin. Pour 1/2 cup of stock over them.
- Make the Butter: In a small bowl, combine the softened butter, fresh herbs, salt (1 tsp), and pepper. Blend thoroughly.
- Season the Turkey: CRUCIAL STEP: Pat the turkey breast bone dry with kitchen roll. This ensures maximum crispness. Rub the entire surface of the turkey with the herbed compound butter. Season generously with the remaining salt.
- Set Up the Roast: Place the turkey breast on a wire rack (if using) in the roasting tin, sitting above the vegetables. Drizzle lightly with olive oil. This set-up helps air circulate, giving us even crispier skin for our Turkey and gravy dinner. (12)
Initial Roast and Temperature Management
- Initial High Heat: Place the tin in the preheated oven and roast at 220°C / 425°F for exactly 20 minutes. This blast of heat crisps the skin beautifully.
- Lower the Temperature: Immediately reduce the heat to 175°C / 350°F. Continue roasting for approximately 1 hour 25 minutes. If the skin looks too brown, cover it loosely with foil.
- Monitor Temperature: Begin checking the internal temperature after one hour of over low heat roasting. Insert the thermometer into the thickest part of the breast, avoiding bone or the tie strings.
CRUCIAL CHEF'S NOTE: The turkey is done when the internal temperature reaches 72°C (162° F) . Pull it out! It will carry over cook to the safe temperature of 74°C / 165°F during resting.
Resting the Turkey for Maximum Juiciness
- Rest the Turkey: Immediately remove the turkey from the oven and transfer it to a clean cutting board. Tent loosely with foil. Allow it to rest undisturbed for a full 20 minutes. This step allows the muscle fibers to relax and reabsorb the juices, guaranteeing a moist final dish. Skipping the rest means all those precious juices end up on your cutting board instead of on your plate of Turkey and gravy . (13) While the turkey rests, we make the gravy.
Finishing Strong: Building the Silky Herb Pan Gravy
This is the moment we turn simple drippings into the glorious sauce that makes this classic meal what it is. I promise, homemade gravy is shockingly easy.
Deglazing the Pan for the Fond (Drippings)
- Degrease the Drippings: Pour the entire contents of the roasting tin (drippings, liquid, and roasted vegetables) into a bowl or, ideally, a fat separator. Let it sit for a moment. The fat will float to the top. Spoon or skim off the separated turkey fat, reserving exactly 4 Tbsp (60ml). Discard the watery liquid and the spent vegetables. That reserved fat is liquid gold, necessary for the best Turkey and gravy ever. (14)
Creating the Roux Consistency
- Make the Roux: Place the empty roasting tin over medium heat on your hob (stovetop). This is easier than transferring to a pan, as you get all the bits of fond. Add the 4 Tbsp of reserved fat. Once shimmering, whisk in the 4 Tbsp of plain flour until a smooth paste (the roux) forms. Cook the roux for 2– 3 minutes until it smells nutty and is a light golden brown; this step cooks out the raw flour taste.
Simmering and Adjusting the Gravy Texture
- Build the Gravy: This is the most delicate part. Gradually whisk in the warm stock (3 cups / 700ml), adding small amounts at a time. This prevents lumps. As you add liquid, scrape up any browned bits stuck to the bottom of the pan that’s the fond we talked about, essential for rich Turkey and gravy flavour. (15)
- Simmer and Finish: Bring the gravy to a simmer, whisking frequently until it thickens sufficiently to coat the back of a spoon (about 5– 8 minutes). Stir in the teaspoon of balsamic or sherry vinegar for depth trust me, the acid brightens everything up. Taste and adjust seasoning generously with salt and pepper. Strain the gravy through a fine mesh sieve into a gravy boat for a perfectly smooth, silky finish. You’re ready for the best Turkey and gravy of your life. (16)
Chef's Notes: Mastering the Roast and Avoiding Common Gravy Mistakes
We all make mistakes; I’ve made plenty! Here are the solutions to the most common pitfalls when preparing slow roasted turkey and homemade pan gravy.
Hitting the Internal Temperature Target (165°F Explained)
Why 162°F, you ask? Because of carry over cooking. When the turkey comes out of the oven, the residual heat in the muscle continues to cook the meat for several minutes, raising the temperature by 3 to 5 degrees.
If you wait until it hits 165°F (74°C) in the oven, it will climb to 170°F or more during the rest and that means dry turkey. Always pull the bird early. This ensures a tender result when serving the final Turkey and gravy . (17)
The Fix: Rescuing Lumpy or Too-Thin Gravy
- Lumps: If your gravy has lumps (we've all been there), don't panic. The easiest fix is to pour the entire thing into a blender and blend until smooth, or simply strain it through a fine mesh sieve.
- Too Thin: If the gravy is too watery, mix 1 tablespoon of cornflour (cornstarch) with 2 tablespoons of cold water to create a slurry. Whisk this slurry into the simmering gravy and cook for two minutes. It will thicken almost instantly, saving your beautiful Turkey and gravy dinner. (18)
Achieving Perfectly Crisp Turkey Skin
The two key factors here are dryness and heat. Pat the turkey completely dry before seasoning. The initial high heat setting (220°C / 425°F) for the first 20 minutes is critical to rendering the fat and crisping the skin.
If your skin is still pale after the first 20 minutes, turn the heat up slightly for another 5 minutes, but watch it like a hawk!
Troubleshooting Flavor: When the Gravy Tastes Flat
If your finished gravy lacks that deep, savoury punch, it often means the salt or umami is missing.
- Add Salt: Taste and add more sea salt, a little at a time.
- Add Umami: Stir in a few dashes of soy sauce, a spoonful of Marmite, or a dash more of that balsamic vinegar. This quick fix will instantly add depth and complexity to your classic Turkey and gravy . (19)
Storing and Reheating Leftovers
We all love leftovers, but food safety is paramount. Learning how to properly store and reheat your delicious roast ensures you can enjoy your efforts for days to come.
Safe Refrigeration Guidelines for Cooked Turkey
Cool the turkey and gravy as quickly as possible. Don't leave them sitting at room temperature for more than two hours. Store the sliced turkey breast in an airtight container in the refrigerator for up to 3 4 days. Store the gravy separately.
Keep the slices of meat moist by drizzling a little extra gravy or stock over them before sealing the container.
Freezing the Turkey and Gravy Separately
Yes, you can freeze both elements of your perfect Turkey and gravy meal!
- Gravy: Freeze the finished gravy in an airtight container or a heavy duty freezer bag for up to 3 months. When reheating, thaw in the fridge overnight and gently warm in a saucepan, whisking vigorously. If it separates, whisk in a tablespoon of cold stock.
- Turkey: Slice the turkey breast, layer it flat in a freezer bag, and remove all the air (a vacuum sealer is great here). This prevents freezer burn. Freeze for up to 3 months. To reheat without drying it out, thaw it and place the slices in a casserole dish with a splash of stock and a spoon of gravy, cover tightly with foil, and warm slowly in a 150°C (300°F) oven until piping hot. The moist heat will revive your beautiful slices of Turkey and gravy . (20)
Complete Your Meal: Classic Serving Pairings
What is delicious Turkey and gravy without the glorious accompaniments? We're going for classic Sunday roast perfection.
- Carbohydrates: Crisp, golden roast potatoes cooked in duck fat are non-negotiable. If you want a comforting side dish that reheats well, I highly recommend my recipe for Baked Macaroni and Cheese: The Best Creamy Recipe . It adds a creamy, cheesy element that stands up beautifully to the richness of the gravy.
- Greens: Serve with buttered Brussels sprouts (especially if you add bacon lardons!) or simple, steamed green beans.
- Something Tart: A tangy homemade cranberry sauce or simple redcurrant jelly cuts through the richness of the meat and the Turkey and gravy sauce perfectly. (21)
- Bonus Meal Idea: Leftover slices of this incredible turkey breast can be layered in a sandwich the next day, drenched in leftover gravy. It's truly a superior way to enjoy the remnants of a perfectly executed Turkey and gravy dinner. (22)
This entire approach ensures that the turkey stays moist and flavourful, and that the accompanying gravy is truly worthy of its star status. Now go make this glorious Turkey and gravy recipe and tell me how juicy your turkey turned out! (23) Enjoy every single, perfect bite.

Recipe FAQs
My turkey breast always comes out dry. How can I guarantee moisture using this method?
Dryness is usually caused by overcooking; ensure you use a meat thermometer and pull the turkey out promptly at 160°F (71°C), as it will rise to 165°F (74°C) while resting. The compound butter application beneath the skin locks in surface moisture and fat, acting as a crucial internal baste.
Furthermore, letting the turkey rest tented with foil for 15 20 minutes is non-negotiable, as this allows the juices to redistribute.
Why is my pan gravy thin, or why does it have lumps?
Lumps typically form if you add the flour (to make the roux) too quickly or fail to whisk thoroughly when incorporating the stock; ensure you create a smooth paste before adding liquid.
If the finished gravy is too thin, dissolve one tablespoon of cornstarch in two tablespoons of cold water (a slurry) and whisk this mixture into the simmering gravy until it thickens to the desired consistency.
Always ensure the gravy boils for at least one minute after thickening to cook out any raw flour or cornstarch flavor.
Can I use this recipe method and pan gravy technique for a whole turkey instead of just the breast?
Yes, the compound butter and pan gravy principles translate perfectly to a whole bird, but you must drastically adjust the cooking time based on weight. Ensure you increase the quantity of seasoning and compound butter proportionally to match the size of the whole turkey.
Always test the temperature in the thickest part of the thigh, aiming for 165°F (74°C).
How should I store leftover turkey and gravy, and can I freeze them?
Cooked turkey and gravy should be refrigerated in airtight containers within two hours of cooking and are safe to consume for 3 to 4 days. To freeze, slice the turkey meat and place it in a freezer bag with a little residual gravy or stock to prevent freezer burn, where it can last up to 3 months.
Gravy also freezes well, but its texture might become slightly grainy upon thawing; a vigorous whisking usually resolves this.
What if I don't have fresh herbs? Can I substitute dried herbs in the compound butter?
You may substitute dried herbs, but you must adjust the quantity; use a 1:3 ratio (1 teaspoon dried herbs for every 3 teaspoons of fresh herbs listed). For this roast, dried thyme and sage work beautifully, but crush them slightly between your fingers before mixing them into the butter to release their essential oils.
Note that dried herbs retain their flavor better when mixed into the fat early.
In recipes, is the bird referred to as 'Turkey' or 'Türkiye'?
The culinary term for the fowl is universally spelled "turkey" (lowercase) in English language recipes, regardless of the recent official name change for the Republic of Turkey to Türkiye. This is a common linguistic distinction, where the name of the food product remains consistent within gastronomic terminology.
Therefore, when preparing this recipe, you are cooking a turkey.
Slow Roasted Turkey And Gravy
Ingredients:
Instructions:
Nutrition Facts:
| Calories | 375 kcal |
|---|---|
| Fat | 18 g |
| Fiber | 1 g |
