Angel Biscuits Recipe: Light and Fluffy
- Time: Active 30 minutes, Passive 1 hours 15 mins, Total 1 hours 45 mins
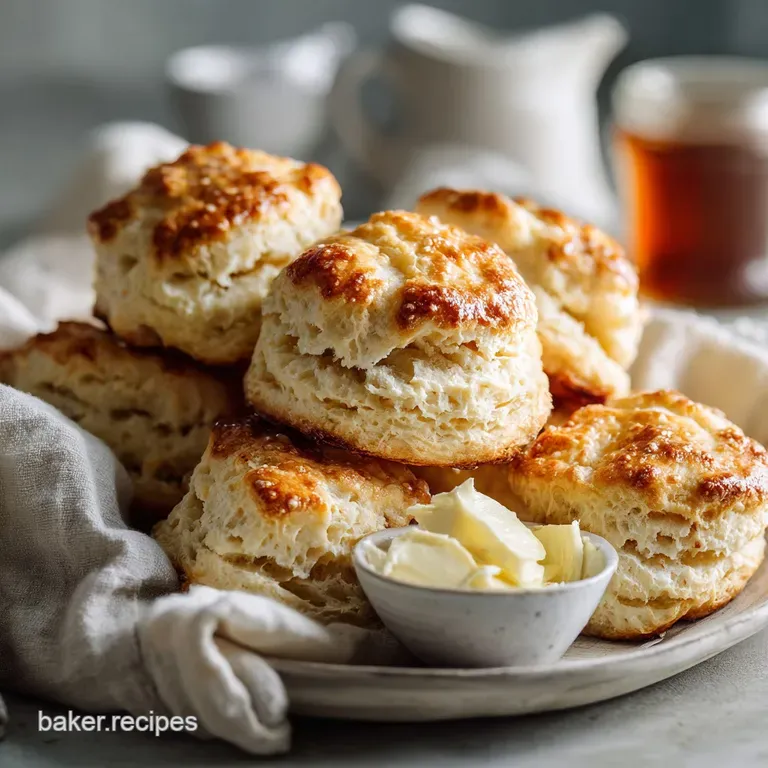
- Flavor/Texture Hook: Velvety, melt in-your mouth interior with a crisp, golden brown crust
- Perfect for: Holiday brunches, Sunday family dinners, or meal prep breakfast sandwiches
- Make The Fluffiest Angel Biscuits Recipe With Yeast
- Timeline For Successful Plan Based Baking
- Component Analysis Of This Hybrid Dough
- Essential Kitchen Tools For Flaky Results
- Executing The Perfect Golden Biscuit Fold
- Solving Problems and Common Dough Mistakes
- Adapting This Dough For Special Diets
- Storage Guidelines For Long Lasting Freshness
- Creative Pairings For Your Finished Bake
- Biscuit Myths Debunked
- Recipe FAQs
- 📝 Recipe Card
Make The Fluffiest Angel Biscuits Recipe With Yeast
The first time I pulled these out of the oven, the aroma hit me like a warm hug from a Southern grandmother I never had. There’s something about the way yeast and buttermilk play together that creates a scent that is both earthy and tangy.
I remember standing in my kitchen, watching the steam rise as I cracked one open; it didn't just crumble, it performed a delicate shatter before revealing a velvety, pillowy center that looked like a cloud.
I used to be a total biscuit purist, thinking that yeast belonged in bread and baking powder belonged in biscuits, and never the twain shall meet. But after one too many "hockey puck" batches of standard biscuits, I tried this angel biscuits recipe. It changed everything for me.
You get the reliability of a chemically leavened biscuit with that complex, fermented flavor profile that only yeast can provide. Trust me on this, once you try this hybrid method, you’ll find it hard to go back to the basic versions.
We’ve all had those mornings where we want something special but don’t want to spend four hours kneading and proofing. That’s the magic here. This recipe is forgiving, adaptable, and frankly, a bit of a show off at the dinner table.
Whether you're slathering them in salty butter or using them to mop up gravy, they hold their structure while remaining impossibly light. Let's crack on and get into the specifics of why this works so well.
The Triple Leavener Synergy
The Physics of the Rise: This recipe utilizes a "triple threat" leavening system where yeast provides a slow, airy stretch while baking powder and soda offer an immediate vertical burst upon hitting the oven's heat.
This combination ensures the biscuits stay light even if the dough is handled slightly more than a standard biscuit mix.
Chef Tip: Freeze your vegetable shortening for 20 minutes before using. When you cut frozen fat into the flour, it stays in distinct little pebbles that create steam pockets, resulting in a much more defined, flaky layers.
Timeline For Successful Plan Based Baking
Managing your time is the secret to a stress free kitchen, especially when working with yeast. Unlike a standard bread that requires intense kneading and multiple long rises at room temperature, this angel biscuits recipe is designed to work with your schedule.
I often mix the dough the night before and let it do its thing in the back of the fridge.
| Method | Time | Texture | Best For |
|---|---|---|---|
| Same Day | 1 hours 45 mins | Very light, airy | Immediate dinner needs |
| Overnight Fridge | 8-12 hours | More complex, tangy flavor | Weekend brunch prep |
| Short Cut (No Yeast) | 30 minutes | Denser, more crumbly | Emergency side dish |
The cold rise is actually where the flavor develops. If you have the time, I highly recommend the overnight method. It allows the flour to fully hydrate and the yeast to produce those subtle, nutty esters that make a "good" biscuit a "legendary" one.
If you’re in a rush, don't sweat it the baking powder and soda will still give you plenty of lift.
Pre Bake Flow
- Prep (15 mins): Bloom the yeast and whisk your dry ingredients.
- Integration (15 mins): Cut in the fats and stir in the buttermilk.
- Rest (60 mins): Let the dough chill and rise slightly in the fridge.
Component Analysis Of This Hybrid Dough
Understanding what goes into your bowl helps you troubleshoot on the fly. We aren't just tossing things together; we're building a structural masterpiece. The balance of fats butter for flavor and shortening for that specific shatter texture is non negotiable for me.
| Ingredient | Science Role | Pro Secret |
|---|---|---|
| Active Dry Yeast | Structural elasticity | Bloom in 105°F water for maximum activity |
| Full fat Buttermilk | Acidic tenderizer | The acid reacts with baking soda for instant lift |
| All Purpose Flour | Protein structure | Weighing (625g) prevents "dry crumb" syndrome |
| Vegetable Shortening | Melting point stability | High melting point creates distinct flaky gaps |
When you’re looking at your fats, remember that butter contains water, which creates steam. Shortening is 100% fat, which interferes with gluten formation more effectively. Using both gives you the best of both worlds: incredible flavor and a texture that stays tender even the next day. This is a similar logic to how we approach a How to Bake recipe for traditional biscuits, but with the added insurance of yeast.
For the Yeast Bloom
- 1 package (7g) active dry yeast: This is your primary "flavor engine."
- 1/4 cup (60ml) warm water: Must be between 105°F–110°F. Why this? Temperatures over 120°F will kill the yeast instantly.
- 1 tsp (4g) granulated sugar: This "feeds" the yeast to get it bubbling.
For the Dry Mix & Fat
- 5 cups (625g) all purpose flour: Provides the necessary structure.
- 1/4 cup (50g) granulated sugar: Adds a hint of sweetness and helps with browning.
- 1 tbsp (15g) baking powder: Essential for the initial oven spring.
- 1 tsp (6g) baking soda: Neutralizes the buttermilk acidity.
- 1.5 tsp (9g) fine sea salt: Enhances all other flavors.
- 3/4 cup (170g) unsalted butter: Chilled and cubed. Why this? Cold butter creates steam vents in the oven.
- 1/4 cup (48g) vegetable shortening: Chilled for maximum flakiness.
For the Liquid Binder
- 2 cups (480ml) full fat buttermilk: Cold. Why this? Keeps the fats from melting during the mixing phase.
- 2 tbsp (30g) melted butter: For brushing the tops post bake.
Essential Kitchen Tools For Flaky Results
You don't need a professional bakery to nail this angel biscuits recipe, but a few specific tools make the process much smoother. I’ve made these with just a fork and a bowl, but the texture is always better when I use a pastry blender.
It keeps your warm hands away from the cold butter, which is the number one rule of biscuit making.
A heavy duty baking sheet is also a must. Thin, cheap pans tend to warp and heat unevenly, which can lead to burnt bottoms and raw centers. I prefer a light colored aluminum sheet; it reflects heat just enough to give you a golden crust without over browning. And please, use a sharp biscuit cutter.
A dull one or a drinking glass will pinch the edges of the dough shut, preventing those beautiful layers from expanding upward.
| Original Ingredient | Substitute | Why It Works |
|---|---|---|
| Full fat Buttermilk | Whole milk + 2 tbsp lemon juice | Mimics the acidity needed to activate the soda |
| Vegetable Shortening | Additional chilled lard | Lard provides an even more traditional, savory flake |
| Active Dry Yeast | Instant yeast (same amount) | No need to bloom; mix directly with dry ingredients |
If you choose to use instant yeast, just remember that the rise might happen a bit faster. You'll still want to let the dough rest in the fridge to develop that signature flavor, but the initial "puff" will be more aggressive.
Honestly, don't even bother with low-fat buttermilk; you need the fat for that velvety mouthfeel.
Executing The Perfect Golden Biscuit Fold
- Bloom the yeast. Mix 7g yeast, 1/4 cup warm water, and 1 tsp sugar in a small bowl. Let it sit for 5-10 minutes until it looks like frothy cappuccino foam.
- Sift the dry ingredients. In a large bowl, whisk 5 cups flour, 1/4 cup sugar, baking powder, baking soda, and sea salt.
- Cut in the fats. Use a pastry blender to incorporate 3/4 cup cold butter and 1/4 cup shortening into the flour until it resembles coarse crumbs with pea sized lumps. Note: These lumps are your "steam generators" for flakiness.
- Combine liquids. Stir the foamy yeast mixture into 2 cups cold buttermilk.
- Form the dough. Make a well in the dry ingredients and pour in the buttermilk mixture. Stir gently with a wooden spoon until just combined and a shaggy dough forms.
- The Cold Rise. Cover the bowl with plastic wrap and refrigerate for at least 1 hour. Note: You can leave it for up to 3 days for better flavor.
- Shape and fold. Turn dough onto a floured surface. Fold it over itself 3 or 4 times. Stop when the dough feels slightly elastic but still cold.
- Cut the rounds. Pat dough to 1 inch thickness. Press a 2.5 inch cutter straight down do not twist. Repeat until you have 24 biscuits.
- Final Proof. Place on a parchment lined sheet, sides touching for higher rise. Let sit at room temp for 20 minutes until slightly puffed.
- over High heat Bake. Bake at 400°F for 12-15 minutes until the tops are a deep golden brown and the bottoms sizzle.
Chef Tip: When cutting the biscuits, dip your cutter in flour between every single cut. This prevents the dough from sticking and ensures a clean vertical "shatter" when the biscuit rises in the oven.
Solving Problems and Common Dough Mistakes
Even with a foolproof angel biscuits recipe, things can go sideways. The most common issue I see is over handling. Your hands are warm, and they want to melt that precious butter. If the dough starts feeling sticky or greasy, pop the whole bowl back in the fridge for 15 minutes.
It’s better to wait than to end up with a heavy, flat biscuit.
Why Your Biscuits Are Flat
If your biscuits look more like cookies than clouds, it usually comes down to two things: expired leaveners or twisting the cutter. If you twist the cutter, you’re basically cauterizing the edges of the dough, sealing the layers together so they can’t expand. Always press straight down and pull straight up.
| Problem | Root Cause | Solution |
|---|---|---|
| Tough, rubbery texture | Over kneading the dough | Mix until just combined; stop as soon as flour disappears |
| Biscuits leaning over | Uneven cutting or placement | Place biscuits so they touch each other on the pan |
| Dark bottoms, raw tops | Pan placed too low in oven | Bake on the middle rack and use a light colored pan |
Common Mistakes Checklist
- ✓ Check the expiration date on your yeast and baking powder (vital for the "triple rise").
- ✓ Use a thermometer to ensure your water is exactly 105°F-110°F for the yeast bloom.
- ✓ Never use a rolling pin; your hands are gentler and preserve the air pockets better.
- ✓ Don't skip the refrigeration step; it's the key to the dough's stability and flavor.
- ✓ Brush the tops with melted butter immediately after they come out of the oven.
Adapting This Dough For Special Diets
While this angel biscuits recipe is a Southern classic, I know many of us have friends with dietary restrictions. You can tweak this without losing the soul of the dish.
For a dairy-free version, I’ve had success using a high-quality vegan butter stick and making a "buttermilk" out of soy milk and apple cider vinegar. The texture is slightly different, but the yeast still provides that lovely lift.
The Savory Garlic Herb Twist
If you want to move away from the "bread and jam" vibe, add 1 tablespoon of dried rosemary and 2 teaspoons of garlic powder to the dry mix. After baking, brush them with a mixture of melted butter and fresh parsley. These are dangerous when served alongside a roast chicken or a thick beef stew.
Honey Glazed Sweet Angel Biscuits
For a more dessert focused approach, increase the sugar in the dough to 1/3 cup and brush the hot biscuits with a 50/50 mix of melted butter and honey. It creates a sticky, glossy top that is absolutely decadent. You might even find this dough works similarly to The Fluffy Homemade recipe if you were to roll it out and fill it with cinnamon sugar.
Storage Guidelines For Long Lasting Freshness
One of the best things about this angel biscuits recipe is its longevity. Because of the fat content and the yeast, these don't turn into rocks the moment they cool down.
You can keep them in an airtight container at room temperature for about 2 days, but for anything longer, the fridge or freezer is your best friend.
To freeze unbaked biscuits, place the cut rounds on a baking sheet and freeze until solid, then transfer to a freezer bag. You can bake them straight from frozen; just add about 3-5 minutes to the total bake time. For baked biscuits, wrap them individually in foil and then bag them.
They’ll stay fresh for up to 3 months.
Reheating and Zero Waste
When you're ready to eat a leftover biscuit, don't use the microwave unless you like soggy bread. Wrap it in foil and pop it in a 350°F oven for 5-7 minutes. This restores the crispness of the exterior. If you have stale biscuits, don't throw them out!
They make the most incredible croutons or a killer "biscuit pudding" (think bread pudding but richer). You can even pulse them in a food processor for buttery breadcrumbs to top a casserole.
Creative Pairings For Your Finished Bake
Now that you've mastered the angel biscuits recipe, let's talk about what to serve with them. Traditionally, these are a breakfast staple, often served with sawmill gravy or a thick slice of country ham. But I think they shine just as brightly at dinner.
The slight sweetness of the dough makes them a perfect foil for spicy fried chicken or a smoky rack of ribs.
I love setting up a "biscuit bar" for guests. I'll put out a jar of local honey, some flaky sea salt, a bowl of whipped maple butter, and maybe some pepper jelly. The beauty of the angel biscuit is that it’s sturdy enough to handle heavy toppings but light enough to not fill you up before the main course arrives.
The Modern Tea Party
For a lighter afternoon snack, split these open and fill them with a thin slice of cucumber and some herbed cream cheese. It’s a fun, Southern inspired take on a classic tea sandwich. If you’re looking for something more substantial, try using them as the base for a Benedict. The yeast in the dough gives it a structural integrity similar to an English muffin but with a much more indulgent flavor. You could even pair them with a side dish like the one found in The Homemade Green recipe for a full holiday spread.
Biscuit Myths Debunked
Many people believe that yeast doughs must be kneaded until they are smooth and elastic to rise well. For this hybrid dough, that is a myth. Over kneading will actually activate the gluten too much, resulting in a tough biscuit rather than a tender one.
We only want enough structure to hold the air, not enough to make a chewy loaf of sourdough.
Another common misconception is that you need a warm spot for the dough to rise. Because this recipe relies on a combination of leaveners, a cold rise in the refrigerator is actually preferred.
It slows down the yeast, which allows for better flavor development and makes the dough much easier to handle without the butter melting into the flour prematurely.
Finally, some say you can't over bake a biscuit as long as it's not burnt. The truth is, once the internal moisture is gone, the biscuit becomes dry and crumbly. You want to pull them when they are golden brown and just set in the middle. The residual heat will finish the job as they rest for a minute on the pan.
Trust your eyes and your nose the smell of toasted butter is the ultimate "done" signal.

Recipe FAQs
What are common angel biscuit mistakes?
Over handling the dough. Handling warms the fat (butter/shortening), causing it to melt into the flour instead of creating steam pockets, resulting in a tough, dense biscuit.
How do you keep angel biscuits from being tough?
Minimize mixing and folding. Mix the liquid into the dry ingredients only until just combined, and when cutting the rounds, press straight down without twisting the cutter to preserve the layers.
What makes angel biscuits different from standard biscuits?
They utilize a triple leavening system. Angel biscuits combine yeast for slow, airy lift with baking powder and soda for immediate oven spring, resulting in a more complex flavor and a lighter texture than standard chemical leavened biscuits.
Is it true you need a long, warm proofing period like regular yeast bread?
No, a cold proof is preferred. Allowing the dough to rest in the refrigerator for at least one hour slows the yeast action, which deepens the flavor profile and makes the high fat dough much easier to handle.
Can angel biscuits be made ahead of time?
Yes, the unbaked dough is excellent for prepping ahead. Cover the mixed dough tightly and refrigerate it for up to three days; the cold fermentation improves the final taste significantly.
How do I ensure my biscuits achieve maximum height in the oven?
Place the cut rounds touching on the baking sheet. This contact forces the biscuits to rise vertically against each other rather than spreading outward, achieving taller sides.
What is the best way to reheat leftovers for the best texture?
Bake them briefly in the oven. Wrap the cooled biscuit in foil and reheat at 350°F for 5 to 7 minutes to restore the crust’s crispness without turning the interior soggy, a technique similar to warming up leftover rolls from our Parker House Rolls recipe.
Angel Biscuits Recipe
Ingredients:
Instructions:
Nutrition Facts:
| Calories | 195 kcal |
|---|---|
| Protein | 3.5 g |
| Fat | 9.5 g |
| Carbs | 23.4 g |
| Fiber | 0.7 g |
| Sugar | 3.1 g |
| Sodium | 298 mg |
