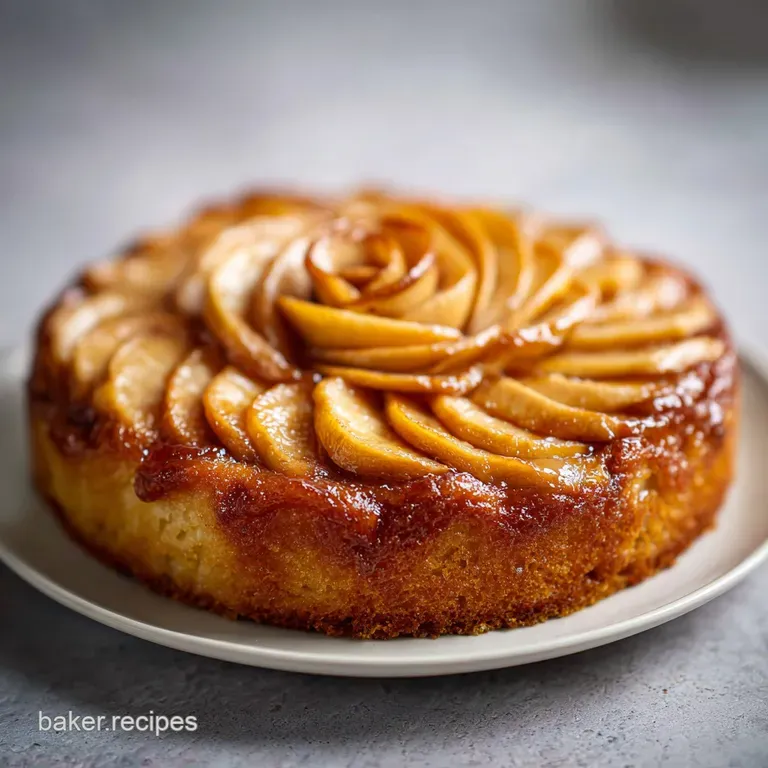
Old Fashioned Caramel Apple Upside Down Cake
- Time: 20 min active + 40 min bake + 20 min cool = Total 80 minutes
- Flavor/Texture Hook: Glistening mahogany glaze with a tender, buttery sponge
- Perfect for: Sunday family brunch or an autumn harvest gathering
- Best Caramel Apple Upside Down Cake
- The Secret to Soft Texture
- Exact Recipe Requirements
- Ingredients
- Essential Baking Tools
- Step by Step Guide
- Fixing Common Cake Issues
- Troubleshooting Common Issues
- Customizing Your Dessert
- Adjusting Batch Sizes
- Dessert Lore and Truths
- Storage and Waste Tips
- Serving and Pairing Ideas
- Recipe FAQs
- 📝 Recipe Card
The scent hits you the moment the butter and brown sugar meet the heat, a deep, nutty aroma that reminds me of walking through a cider mill in October. There is something almost hypnotic about watching the sugar melt into a thick, bubbling pool of gold in the bottom of a heavy skillet.
It is the kind of smell that pulls everyone from the other room into the kitchen before the cake is even in the oven.
I remember the first time I made this for my cousins. I was so nervous about the flip - that heart stopping moment where you pray the cake doesn't stick and leave half the dessert in the pan.
When I finally inverted it, the apples slid out in a glistening, concentric circle, draped in a rich syrup that looked like polished amber. It was a total showstopper that tasted like a warm hug from a grandmother.
You can expect a dessert that is sophisticated in flavor but rustic in presentation. This caramel apple upside down cake isn't about precise piping or fancy frosting, but about the harmony of tart fruit and sweet, salted caramel.
It's a celebration of seasonal produce, turning a few simple orchard staples into something that feels like a treat from a high end bakery.
Best Caramel Apple Upside Down Cake
The magic happens when the heat transforms simple granulated and brown sugars into a complex syrup. Because we are baking this "upside down," the fruit effectively poaches in butter and sugar while the cake rises above it.
This creates a beautiful contrast where the top is moist and jammy, while the bottom is a light, airy sponge.
Right then, let's talk about the fruit. Using farm fresh apples is non negotiable here. If you use a variety that is too soft, they will basically dissolve into the caramel, leaving you with a sugary mush instead of distinct, tender slices.
You want that slight resistance when you bite into the apple, balanced by the sweetness of the glaze.
Trust me on this, the lemon juice is the secret weapon. It doesn't make the cake taste like lemons, but it provides a tiny bit of acidity that cuts through the heavy sugar. It keeps the colors bright and ensures the sweetness doesn't become cloying.
It's a small detail, but it's what makes the flavor profile feel balanced and professional.
The Secret to Soft Texture
To get a cake that is tender rather than tough, we have to be mindful of how we handle the flour and the fats. I've seen too many people overmix their batter, which develops too much gluten and turns a delicate cake into something resembling a muffin.
Air Incorporation: Creaming the softened butter and sugar creates millions of tiny air bubbles. These bubbles expand in the heat of the oven, giving the cake its lift.
Acid Base Balance: The baking powder reacts with the heat and the slight acidity of the milk to create a steady rise. This prevents the cake from collapsing under the weight of the heavy apple topping.
Fat Distribution: Using both melted butter in the base and creamed butter in the batter ensures a rich mouthfeel. The melted butter blends with the sugar for the glaze, while the creamed butter provides the structural tenderness.
Moisture Control: The alternating addition of dry ingredients and milk prevents the batter from breaking. It keeps the emulsion stable, resulting in a silky, uniform crumb.
| Method | Time | Texture | Best For |
|---|---|---|---|
| From Scratch | 80 mins | Velvety & Complex | Special occasions |
| Cake Mix | 50 mins | Spongy & Sweet | Quick weeknight treats |
| Cast Iron | 80 mins | Crispy edges | Rustic family style |
This is a great way to see that while shortcuts exist, the effort of making a batter from scratch pays off in the depth of flavor and the lightness of the cake.
Exact Recipe Requirements
When you're picking your fruit, don't just grab any apple. According to King Arthur Baking, Granny Smith apples are the gold standard for baking because they hold their shape under high heat. They provide a sharp, tart contrast that prevents the caramel from feeling too heavy.
Component Analysis
| Ingredient | Science Role | Pro Secret |
|---|---|---|
| Dark Brown Sugar | Moisture & Color | Use "dark" for more molasses notes |
| Granny Smith Apples | Structure/Acidity | Slice them exactly 1/4 inch thick |
| Baking Powder | Chemical Leavening | Fresh powder = better height |
| Room Temp Eggs | Emulsification | Prevents the batter from curdling |
For the flour, I always recommend spooning it into the measuring cup rather than scooping. Scooping packs the flour down, and you'll end up with too much, which makes the cake dry. A little bit of extra air in the flour measurement ensures the crumb stays light.
Ingredients
For the Caramel Base:
- 1/2 cup (115g) unsalted butter, meltedWhy this? Provides the fat for the syrup
- 1 cup (200g) dark brown sugar, packedWhy this? Molasses adds depth and color
- 1/2 tsp (3g) sea saltWhy this? Balances the intense sweetness
- 3 large (approx. 1.5 lbs / 680g) Granny Smith apples, peeled, cored, and sliced into 1/4 inch wedgesWhy this? Holds shape and adds tartness
- 1 tsp (2g) ground cinnamonWhy this? Warm, classic orchard flavor
- 1 tbsp (15ml) lemon juiceWhy this? Prevents browning and adds brightness
For the Spiced Vanilla Cake:
- 2 cups (250g) all purpose flourWhy this? Standard structure for cakes
- 1 1/2 tsp (7g) baking powderWhy this? Creates the necessary lift
- 1/2 tsp (1g) ground cinnamonWhy this? Echoes the apple layer
- 1/4 tsp (1g) ground nutmegWhy this? Adds a subtle, earthy warmth
- 1/2 tsp (3g) saltWhy this? Enhances all other flavors
- 1/2 cup (115g) unsalted butter, softenedWhy this? Essential for the creaming method
- 1 cup (200g) granulated sugarWhy this? Provides sweetness and structure
- 2 large eggs, room temperatureWhy this? Binds the cake together
- 1 tsp (5ml) vanilla extractWhy this? Classic aromatic finish
- 1/2 cup (120ml) whole milk, room temperatureWhy this? Adds moisture and tenderness
| Original Ingredient | Substitute | Why It Works |
|---|---|---|
| Granny Smith Apple | Honeycrisp Apple | Similar crunch. Note: Sweeter, less tart |
| All Purpose Flour | gluten-free Blend (1:1) | Mimics wheat structure. Note: Slightly grainier |
| Whole Milk | Sour Cream (thinned) | Adds richness. Note: Makes the crumb denser |
| Dark Brown Sugar | Light Brown Sugar | Still melts. Note: Less caramel flavor |
If you find yourself wanting a different kind of apple treat, my homemade apple fritters are a wonderful way to use up extra fruit from the orchard.
Essential Baking Tools
You don't need a professional kitchen for this, but a few specific tools make it much easier. I highly recommend using a 10 inch cast iron skillet. The heavy metal distributes heat evenly, which means your caramel won't burn in one spot while remaining grainy in another.
If you don't have a skillet, a standard cake pan works, but you lose those slightly crispy, caramelized edges that make the cast iron version so special. You'll also need a sturdy spatula for the flip and a whisk for the dry ingredients.
Honestly, don't even bother with low-fat butter substitutes here. You need the saturated fats to get that velvety texture. This is a dessert meant for indulgence, so stick to the real deal.
Step by step Guide
Phase 1: Creating the Caramel Bed
- Preheat your oven to 350°F (175°C).
- Pour the melted butter and dark brown sugar directly into your skillet. Use a spatula to spread it evenly until a smooth, mahogany colored layer is formed. Note: Don't let it clump; you want a flat surface for the apples.
- Arrange the apple slices in a concentric circle pattern atop the sugar. Sprinkle the cinnamon over the fruit and drizzle with lemon juice. Note: The pattern makes the final reveal look professional.
Phase 2: Mixing the Spiced Batter
- In a medium bowl, whisk together the flour, baking powder, cinnamon, nutmeg, and salt. Note: Whisking aerates the flour and removes lumps.
- In a separate large bowl, cream the softened butter and granulated sugar. Beat them together until the mixture is pale and fluffy.
- Beat in the eggs one at a time. Once combined, stir in the vanilla extract. Note: Adding eggs slowly ensures the emulsion doesn't break.
- Alternately add the dry ingredients and the milk. Start and end with the flour, mixing on low until just combined. Note: Stop mixing as soon as the flour streaks disappear to avoid a tough cake.
Phase 3: The Bake and The Flip
- Carefully spread the batter over the apples. Use your spatula to smooth the top evenly.
- Bake for 35–40 minutes. Check it until a toothpick inserted into the center comes out clean. Note: You'll smell a rich, toasted sugar aroma when it's almost done.
- Let the cake cool in the pan for 20 minutes. Run a knife around the edge, place a plate on top, and flip it in one confident motion.
Fixing Common Cake Issues
The most stressful part of this caramel apple upside down cake is the flip. If you do it too soon, the caramel is too liquid and it will run everywhere. If you wait too long, the sugar cools and grips the pan, making the cake stick.
Troubleshooting Common Issues
| Issue | Solution |
|---|---|
| Why Your Cake Stuck to Pan | This usually happens because the cake cooled completely before flipping. The sugar essentially becomes glue as it reaches room temperature. To fix this, you can briefly place the skillet back on a low |
| Why Your Apples are Mushy | If the apples lost their shape, they were likely sliced too thin or were overripe. Using an apple with a firmer cellular structure, like the Granny Smith, prevents this. Getting the apple texture righ |
| Why Your Center Sunk | A sinking center is almost always a result of overmixing the batter or opening the oven door too often. When you overmix, you create too many gluten bonds that can't support the weight of the apples. |
Common Mistakes Checklist
- ✓ Use room temperature eggs to prevent batter curdling.
- ✓ Do not overmix the flour into the wet ingredients.
- ✓ Ensure the apples are peeled completely to avoid tough skins.
- ✓ Wait exactly 20 minutes before flipping for the best release.
- ✓ Measure flour by weight or the spoon and level method.
Customizing Your Dessert
Once you've nailed the basic version, you can start playing with the flavors. If you want a salted caramel apple upside down cake, increase the sea salt in the base to a full teaspoon. The salt creates a sharper contrast with the brown sugar, making the whole thing taste more like a gourmet candy.
For a Bold Flavor Twist
Try adding a pinch of ground ginger or cardamom to the dry ingredients. These spices pair beautifully with the orchard notes of the apple and add a slightly spicy kick that keeps the dessert from feeling too one dimensional.
For a Modern Salt Profile
Instead of sea salt in the batter, sprinkle a few flakes of Maldon salt over the cake immediately after flipping. The crunch of the salt crystals against the velvety caramel is a fantastic sensory experience.
For gluten-free Guests
You can use a high-quality 1:1 gluten-free flour blend. However, be aware that gluten-free cakes can be more fragile. I recommend letting the cake cool for an extra 10 minutes before flipping to ensure the structure has fully set.
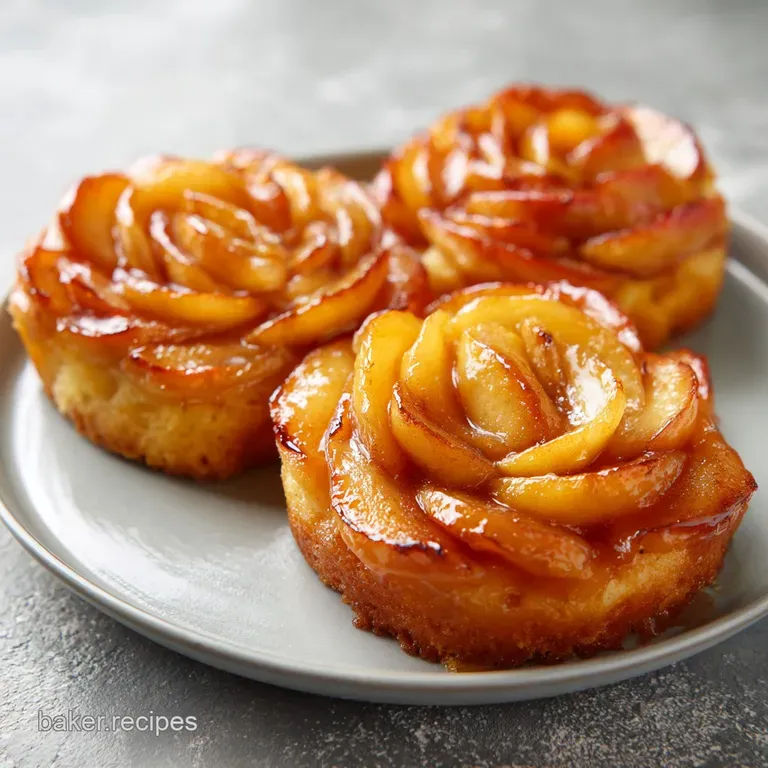
Adjusting Batch Sizes
If you're making this for a small gathering, you can easily scale it down. For a half batch, use a 6 inch skillet. You'll need to beat one egg in a small bowl and then use half of it by weight or volume. Reduce the bake time by about 20%, but still rely on the toothpick test for doneness.
For those wanting to double the recipe for a party, I suggest making two separate cakes rather than one massive one. Large cakes often suffer from "wet centers" because the edges bake much faster than the middle.
If you must use a larger pan, lower the oven temperature by 25°F (about 10°C) and extend the bake time.
Keep in mind that spices and salt don't always scale linearly. If you double the recipe, only increase the salt and cinnamon to 1.5x the original amount. This prevents the spices from overpowering the delicate flavor of the butter and apples.
Dessert Lore and Truths
There is a common belief that you must use a specific "upside down" pan for this recipe. In reality, any heavy bottomed pan, especially cast iron, works better because it holds heat more consistently. The pan shape is less important than the material.
Some people think you need to pre cook the apples on the stove before adding the batter. While this can ensure the apples are soft, it often removes the "sizzle" and the fresh fruit taste. Baking them directly in the caramel allows the juices to mingle with the cake batter, creating a more cohesive dessert.
Finally,, don't believe the myth that you can't use other apples. While Granny Smiths are the best for structure, Honeycrisp or Braeburn can work if you slice them slightly thicker to account for their softer texture.
Storage and Waste Tips
This cake is best served warm, but it keeps well. Store any leftovers in an airtight container in the fridge for up to 4 days. When you're ready to eat it again, I recommend popping a slice in the microwave for 15-20 seconds. This softens the butter in the sponge and makes the caramel glossy and runny again.
For freezing, you can freeze individual slices wrapped in parchment paper and foil for up to 2 months. Thaw them in the fridge overnight before reheating.
To avoid waste, don't throw away the apple peels and cores. Toss them into a freezer bag with some cinnamon sticks and a few cloves. Once the bag is full, simmer them with water and a bit of sugar to make a simple, farm fresh apple syrup for pancakes or oatmeal.
Serving and Pairing Ideas
The best way to enjoy this is straight from the skillet. The heat from the pan keeps the caramel in a liquid state, which is exactly what you want. I love serving a warm slice with a dollop of unsalted whipped cream or a scoop of high-quality vanilla bean ice cream.
The cold cream melting into the warm, spiced cake is absolute bliss.
The Coffee House Style
For a more refined presentation, serve a thin slice with a drizzle of salted caramel sauce and a sprinkle of toasted pecans. This adds a bit of crunch that contrasts the velvety texture of the cake.
The Classic Pairing
Pair this with a strong, black coffee or a tart cider. The bitterness of the coffee or the acidity of the cider cuts through the richness of the butter and brown sugar, cleansing your palate between bites.
Right then, you're all set to bring this orchard classic into your own kitchen. Just remember to be confident with that flip, and enjoy every single bite of this caramel apple upside down cake.
Recipe FAQs
Should you peel apples in an apple upside down cake?
Yes, peel them. This prevents the skin from curling and ensures a consistent, tender texture throughout the fruit layer.
What are common upside down cake mistakes?
Waiting too long to flip the cake. When the caramel sugar cools completely, it acts like glue and sticks the cake to the pan.
Why are the apples in my cake mushy?
Use firm Granny Smith apples sliced into 1/4 inch wedges. Overripe fruit or slices that are too thin will lose their shape during the 35 40 minute bake time.
Can I use a different variety of apple?
Stick with Granny Smith for the best structural integrity. If you prefer a softer fruit profile, you might enjoy the texture of our spiced applesauce cake.
How to store leftover caramel apple cake?
Place slices in an airtight container in the fridge for up to 4 days. Reheat in the microwave for 15 20 seconds to make the butter in the sponge soft and the caramel runny.
Is it true that you cannot freeze this cake?
No, this is a common misconception. Wrap individual slices in parchment paper and foil for storage in the freezer for up to 2 months.
Why did the center of my cake sink?
Avoid over mixing the batter after adding the dry ingredients. Over working the flour develops too much gluten, which can cause the cake to collapse while cooling.
Caramel Apple Upside Down Cake

