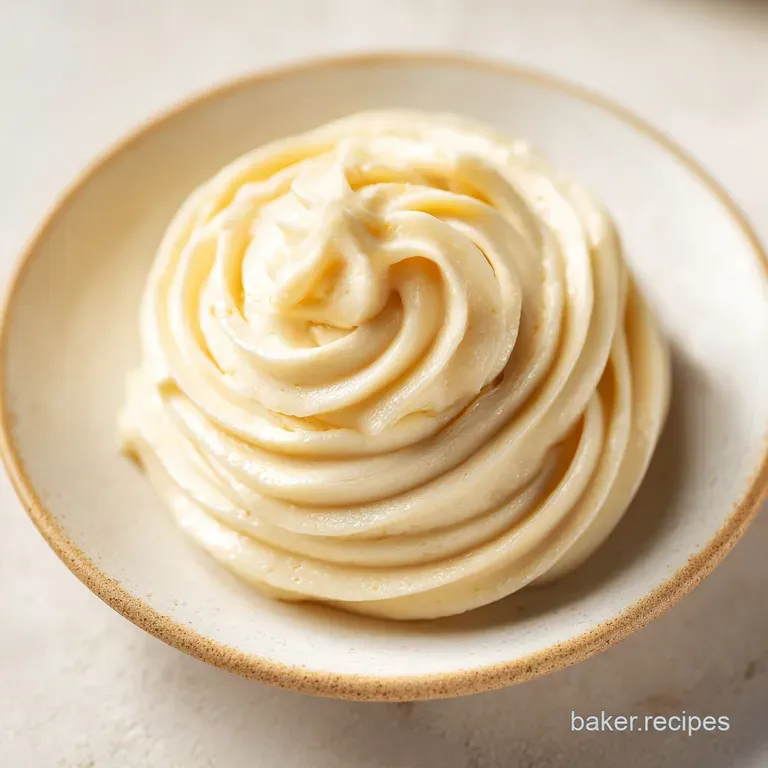
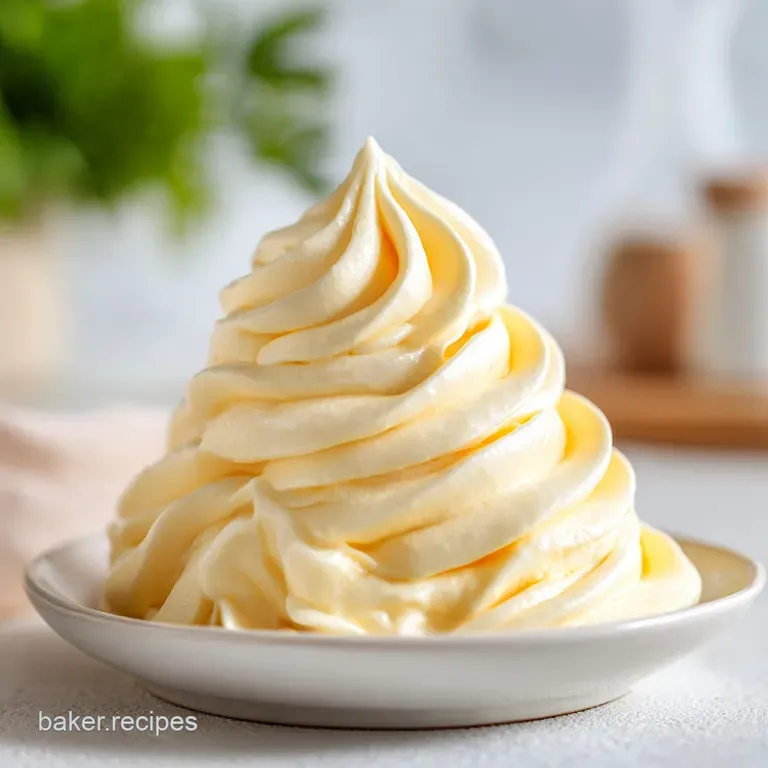
Velvety Homemade Pastry Cream
- Time: 10 min active + 4 hours 15 mins chilling = Total 4 hours 25 mins
- Flavor/Texture Hook: Velvety, vanilla scented, and buttery
- Perfect for: Filling tarts, eclairs, or layering in cakes
The smell of warm vanilla and simmering cream always takes me back to a tiny bakery in a coastal village where I spent a summer. I remember watching the baker whisk this custard with a focused intensity, the aroma filling the street long before the doors even opened.
He told me that most people overcomplicate the process, treating it like a chemistry experiment instead of a simple comfort.
Forget the idea that you need a professional culinary degree or an expensive stand mixer to get that glossy, professional finish. I used to think the "lumps" were just an inevitable part of the process until I realized it was all about the temperature shift.
Once you stop fearing the heat and start trusting the visual cues, this becomes the most reliable tool in your dessert kit.
Whether you're filling a tart or just eating it with a spoon from the bowl, this Pastry Cream recipe is about achieving a specific, luscious weight on the tongue. It should feel heavy but smooth, like melted silk, with a vanilla punch that hits you the moment it touches your palate.
Let's get into the bits that actually matter.
Making the Best Pastry Cream
Many guides tell you to just "whisk until thick," but they leave out the most important part: the visual transition. The real secret isn't in the ingredients, it's in the patience. If you rush the heat, you get scrambled eggs; if you don't heat it enough, you get a runny soup.
I've spent way too many afternoons staring at a pot, learning exactly when the bubbles change from "small and lazy" to "active and bubbling," which is the signal that the starch has actually done its job.
To make pastry cream that doesn't separate, you have to respect the eggs. Tempering isn't just a fancy word; it's the only way to prevent the yolks from shocking. I remember a batch I made for a friend's birthday where I skipped the tempering step.
The result was a grainy, lumpy mess that looked more like cottage cheese than a dessert. Since then, I've treated the tempering process as non negotiable.
Right then, let's look at why this specific approach works better than the "dump and stir" methods you see in quick videos. We're going for a texture that can hold its own in a cake but still melt away when you eat it.
How the Thickening Happens
Starch Activation: Cornstarch granules swell and burst when they hit a specific temperature, trapping liquid in a mesh. This creates the structure without making it feel like glue.
Fat Integration: Adding butter at the end allows the fat to emulsify into the hot cream. This gives the finish a glossy sheen and a velvety mouthfeel.
Protein Stabilization: The egg yolks provide a rich base that supports the starch. They add a golden color and a weight that keeps the filling from collapsing.
| Method | Prep Time | Texture | Best For |
|---|---|---|---|
| Fast/Stovetop | 10 minutes | Thick, pudding like | Quick tarts, bowls |
| Classic/Chilled | 4 hours 25 mins | Stable, pipeable | Eclairs, layer cakes |
Component Analysis
| Ingredient | Science Role | Pro Secret |
|---|---|---|
| Cornstarch | Structural Agent | Sift it with sugar to avoid tiny white clumps |
| Egg Yolks | Emulsifier & Color | Use room temp yolks for a smoother blend |
| Whole Milk | Liquid Base | Don't use skim; you need the fat for the "cling" |
| Butter | Finish & Shine | Keep it chilled and cubed for a better emulsion |
The Essential Specs
When you're getting ready to make pastry cream, your environment matters. I always make sure my bowls are large enough to allow for vigorous whisking without splashing. You want a heavy bottomed saucepan - something that distributes heat evenly.
If you use a thin pot, you'll get hot spots on the bottom that will scorch the milk, and once that burnt taste is in there, there's no getting it out.
The timing here is precise. While the active cooking is only 15 minutes, the chill time is where the magic happens. The starch needs time to fully set and the flavors to meld. If you try to pipe it while it's still lukewarm, it'll slide right off your pastry.
Trust the 4 hour wait; it's the difference between a professional look and a melted puddle.
Ingredient Deep Dive
For the dairy, I always go for full fat whole milk. Some people try to cut calories here, but honestly, don't even bother with low-fat options. The fat is what carries the vanilla aroma and gives the filling its characteristic richness.
I add a bit of heavy cream to the mix to push it over the top, making it feel more like a treat and less like a standard pudding.
- 2 cups whole milk Why this? Provides the essential creamy base and volume (Substitute: Oat milk for a nuttier, dairy-free version)
- 1/2 cup heavy cream Why this? Adds a velvety richness and stability (Substitute: Extra whole milk, though it will be less rich)
- 1 tsp pure vanilla extract Why this? The primary aromatic profile (Substitute: Vanilla bean paste for those beautiful black specks)
- 1/2 cup granulated sugar Why this? Sweetness and moisture retention (Substitute: Caster sugar for faster dissolving)
- 1/4 cup cornstarch Why this? The primary thickener (Substitute: Flour, but note it requires longer cooking to remove the raw taste)
- 4 large egg yolks Why this? Richness, color, and binding (Substitute: 2 yolks + 1 whole egg for a lighter feel)
- 1g salt Why this? Balances the sugar and enhances vanilla (Substitute: A pinch of fine sea salt)
- 3 tbsp unsalted butter Why this? Adds gloss and a smooth finish (Substitute: Coconut oil for a dairy-free twist)
Must Have Kitchen Tools
You don't need a lab, but a few specific tools make this easier. A silicone whisk is great for getting into the corners of the pan, but a traditional stainless steel whisk is better for the initial tempering. I also suggest using a fine mesh strainer.
Even if you think your mixture is smooth, passing the finished cream through a sieve is the "pro" move that catches any tiny bits of cooked egg.
A plastic wrap sheet is also mandatory. You don't just put a lid on the bowl; you press the wrap directly onto the surface of the cream. If you don't, a rubbery skin will form on top. While you can just stir the skin back in, it ruins that silky texture we're after.
The step by step Process
Now we get into the actual work. Pay attention to the smells here - the scent of the milk should shift from "fresh" to "sweet and toasted" as it warms.
- Combine milk, heavy cream, and vanilla in a heavy bottomed saucepan. Heat over medium until it reaches a gentle simmer with small bubbles forming around the edgesNote: avoid a rolling boil to keep the milk from scorching.
- In a mixing bowl, whisk together the egg yolks, granulated sugar, and cornstarch until the mixture becomes pale and thick.
- Slowly ladle about 1/2 cup of the hot milk into the egg mixture while whisking constantly. Continue adding milk in a thin stream to gradually raise the temperature of the eggs.
- Pour the tempered egg mixture back into the saucepan with the remaining milk.
- Whisk continuously over medium heat until the cream thickens to a pudding like consistency and just begins to bubble (approximately 1-2 minutes).
- Remove from heat and stir in the chilled cubed butter and salt until completely melted and smooth.
- Transfer to a bowl and cover with plastic wrap touching the surface.
- Chill for at least 4 hours.
Chef's Note: To get an even deeper flavor, try infusing the milk with a cinnamon stick or a peel of lemon during Step 1. Just strain them out before you start tempering the eggs.
Fixing Texture Issues
The most common struggle when you make pastry cream is the texture. Sometimes it's too thick, sometimes it's lumpy, and occasionally it separates. Most of these are easy fixes if you act quickly. For example, if you find the mixture is too stiff after chilling, just whisk it vigorously for 30 seconds.
It'll loosen up as the fat softens.
Why Your Filling Is Lumpy
Lumps usually happen because the cornstarch wasn't fully dissolved or the eggs weren't tempered properly. If you see small clumps, don't panic. The easiest fix is to push the cream through a fine mesh sieve with a spatula.
Solving Curdling
If the cream looks "grainy," the eggs have likely overcooked. This usually happens if the heat was too high during the final thickening stage. You can sometimes save this by blending it with an immersion blender, which forces the fats and proteins back together.
Adjusting Runniness
If your cream didn't thicken, it likely didn't reach the "bubbling" stage. The starch only activates at a certain temperature. You can put it back on the heat, but be careful not to overcook the eggs this time.
| Problem | Root Cause | Solution |
|---|---|---|
| Grainy texture | Eggs overheated | Blend with immersion blender |
| Small white lumps | Cornstarch pockets | Pass through a fine sieve |
| Too runny | Under heated starch | Return to medium heat until it bubbles |
Common Mistakes Checklist
- ✓ Did the milk simmer but NOT boil over?
- ✓ Was the egg mixture whisked until pale before adding milk?
- ✓ Did you stir in the butter after removing from heat?
- ✓ Is the plastic wrap touching the surface of the cream?
- ✓ Did you wait the full 4 hours for the set?
Creative Twist and Swaps
Once you've nailed the basic version, you can start playing with the flavor profiles. I love adding a bit of zest from an organic lemon to cut through the richness. If you're looking for something more decadent, a chocolate twist is easy - just whisk in some melted dark chocolate at the same time you add the butter.
For those who want a different approach, you can look into a French pastry cream recipe that uses different thickening ratios for a stiffer result. If you prefer something a bit more light hearted, you could fold in some of my homemade whipped cream to turn this into a "Diplomat Cream," which is much airier and better for cakes.
If you're avoiding certain ingredients, you can attempt a pastry cream without cornstarch by using a flour roux, though it will have a slightly heavier taste. For a dairy-free version, coconut milk works beautifully, though it adds a tropical note. If you're making a treat like an authentic tres leches cake, you can use a thinner version of this cream as a topping.
Adjusting the Batch Size
When scaling this recipe, remember that liquids and thickeners don't always move in a straight line.
- Scaling Down (1/2 batch): Use a smaller saucepan to prevent the milk from evaporating too quickly. Reduce the cooking time by about 20% as it will reach the bubbling stage faster.
- Scaling Up (2x-4x): Do not simply quadruple the salt; increase it to only 1.5x to avoid an over salted finish. Work in batches if your pot is too small, as a massive volume of cream takes much longer to heat evenly and is more prone to scorching.
Debunking Custard Myths
There's a common belief that you must use a double boiler to make this. While a double boiler is safer, it's incredibly slow. A heavy bottomed pot on medium heat is perfectly fine as long as you keep whisking.
Another myth is that you can't freeze it. You actually can, but the texture changes slightly. When you thaw it, you must whisk it very thoroughly to re emulsify the fats, otherwise, it will feel "split" or grainy.
Storing and Saving
Store your chilled cream in an airtight container in the fridge for up to 3 days. Beyond that, the quality starts to dip and the vanilla aroma fades. If you have leftovers, don't let them go to waste.
You can whisk a bit of the cream into your morning coffee for a rich, vanilla latte feel, or use it as a dip for fresh orchard fruits like sliced pears or apples.
If you've made too much, you can freeze it for up to 1 month. Thaw it in the fridge overnight and give it a good whip before using. To keep the cream fresh, always use a clean spoon; introducing bacteria from a used spoon will make the dairy spoil much faster.
Best Serving Ideas
The most classic way to use this is in a fruit tart, but don't stop there. I love layering it with fresh berries and a sponge cake for a simple trifle. For a more sophisticated look, pipe it into choux pastry shells to make profiteroles.
If you want a real treat, serve a bowl of the cream topped with toasted almond slivers and a drizzle of honey. It's a comforting, farm fresh dessert that feels like a hug in a bowl. Because of its stability, it also works as a great filling for macarons if you've whipped in a little bit of butter for extra firmness.
Just remember to keep it chilled until the very moment you serve it to ensure that velvety texture remains intact.
Recipe FAQs
What exactly is pastry cream?
It is a thick, creamy custard made from milk, heavy cream, egg yolks, sugar, and cornstarch. It is traditionally used as a stable filling for tarts, eclairs, and cakes.
What is the method for making pastry cream?
Heat milk, heavy cream, and vanilla until simmering, then whisk into a mixture of egg yolks, sugar, and cornstarch. Return the tempered mixture to the pan, cook over medium heat until thick, and stir in butter and salt before chilling.
What is a substitute for pastry cream?
Vanilla pudding or a thick custard are the closest alternatives. For a completely different dessert filling, you could use a cooked fruit filling similar to an apple pie.
Can you use whipping cream for pastry cream?
Yes, as a partial replacement. This recipe already uses heavy cream for richness, but replacing all the milk with whipping cream would make the texture too heavy and dense.
Why did my pastry cream get lumps?
Insufficient whisking or improper tempering usually causes lumps. Ensure you add the hot milk in a very thin stream and whisk constantly while heating the mixture over medium heat.
How long can I keep pastry cream in the fridge?
Up to 3 days. Store it in an airtight container with plastic wrap pressed directly against the surface to prevent a skin from forming.
Is it true that you cannot freeze pastry cream?
No, this is a common misconception. You can freeze it for up to 1 month; simply thaw it in the fridge overnight and give it a vigorous whip before using.
Homemade Pastry Cream

