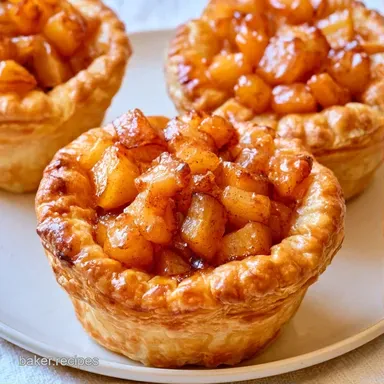
Muffin Tin Apple Tarts with Puff Pastry
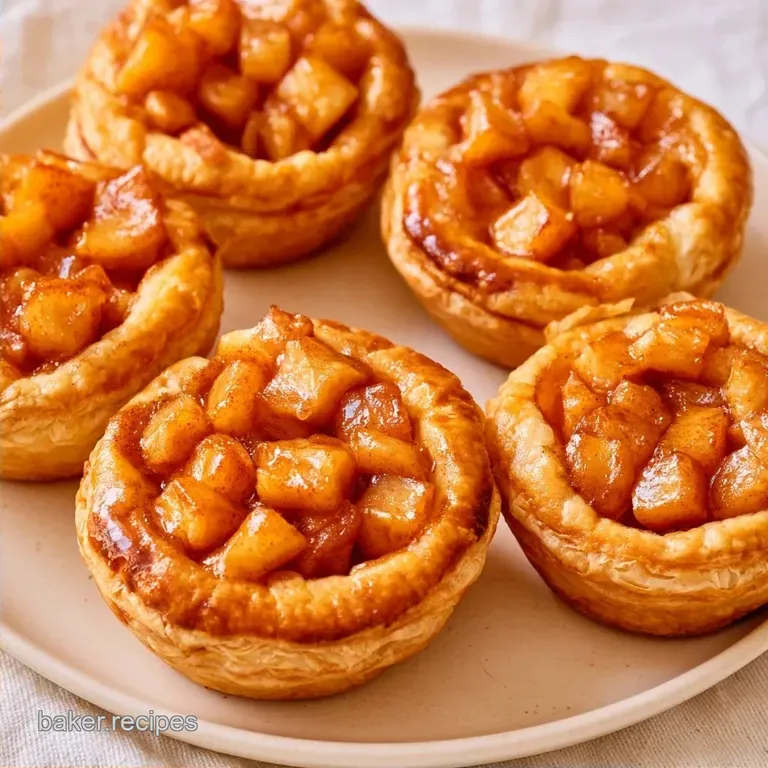
- Time: 35 min active + 20 min baking
- Taste & Texture: Buttery, shattering pastry with tangy, cinnamon-spiced apples
- Great for: Seasonal get-togethers or a simple, orchard-inspired treat
Have you ever noticed how some tarts have a soggy bottom while others remain crisp? It isn't luck; it's actually a matter of moisture control. Most people just put raw apple pieces into their pastry and cross their fingers, but that's a shortcut to a mushy mess.
I discovered this the hard way during a harvest party a few years back. I filled puff pastry with raw diced apples, and by the time the edges were golden, the centers had turned into apple soup. It was a soggy catastrophe that almost spoiled my afternoon.
Since then, I've approached these Apple Tarts by preparing the filling like a jam. By reducing the fruit on the stove first, you get a concentrated essence of flavor that won't seep into the crust. This creates a beautiful contrast between the hot, bubbling center and the crisp, golden edges.
Apple Tarts
These Apple Tarts bring together the brightness of Granny Smith apples and the rich, earthy notes of maple syrup. It's a balance of acidity and sweetness that feels like a walk through a crisp autumn orchard.
The key is the texture. You want the pastry to shatter when you bite into it, followed by the tenderness of apples that have been slowly caramelized in butter. It's a simple approach, but the results are far more refined than a standard slice of pie.
Common Filling Pitfalls
- The Moisture Trap: Raw apples are mostly water, which turns into steam and makes the dough limp. Pre cooking the filling removes that excess liquid so the pastry stays crisp.
- Metal Conductivity: Using a muffin tin focuses the heat on the sides and bottom of these Apple Tarts, ensuring the dough cooks evenly and doesn't stay pale.
Ingredient Deep Dive
| Ingredient | What It Does | Best Swap |
|---|---|---|
| Granny Smith Apples | Provides tartness and holds shape | Honeycrisp (sweeter, softer) |
| Puff Pastry | Creates flaky, buttery layers | Shortcrust (sturdier, less airy) |
| Maple Syrup | Adds deep, woody sweetness | Honey (floral, slightly stronger) |
| Coarse Sugar | Adds a crunch to the crust | Demerara sugar (similar caramel notes) |
Getting the right apple is the most important part of this recipe. I always go for Granny Smith because they don't turn into mush when sautéed. If you use a softer apple, you might find your filling is too soft to hold its shape.
Essential Baking Tools
Specialized gear isn't required, though a few specific tools will make the process easier. A heavy bottomed skillet is ideal for the apples, as it provides even heat distribution and prevents the maple syrup from scorching.
For the pastry, a 3 inch round cutter is recommended. A wide rimmed drinking glass is a perfect substitute if you don't have one. You'll also need a standard muffin tin to serve as the mold for the tarts.
To achieve a polished finish, a small pastry brush is useful for applying the egg wash. If you lack one, simply use the back of a spoon to carefully dab the yolk along the edges.
Step by step Baking
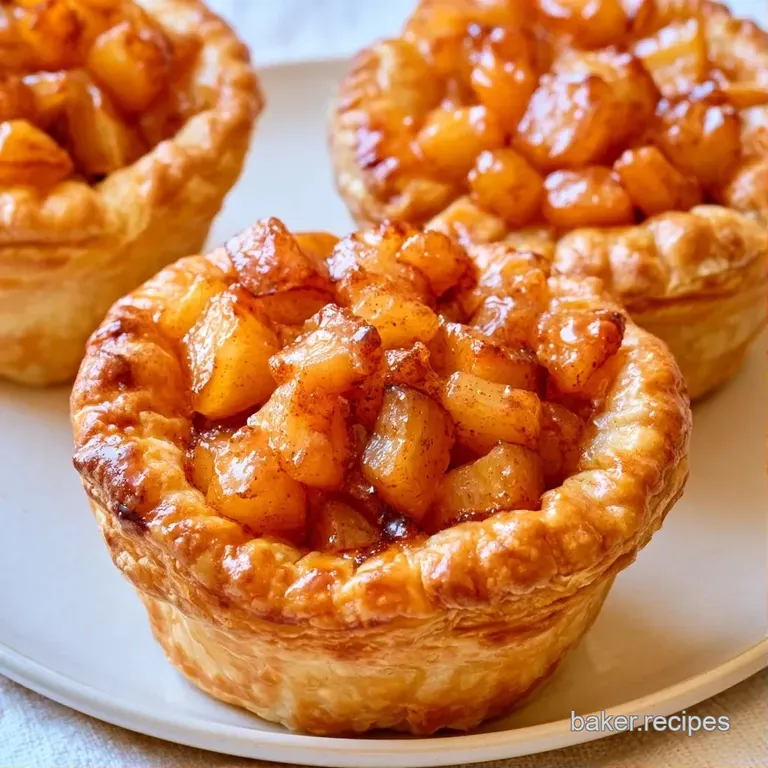
Reducing the Filling
- Melt 14g of unsalted butter in a skillet over medium heat.
- Add 450g of diced Granny Smith apples, 30ml of maple syrup, 2g of cinnamon, and 15ml of lemon juice to the skillet.
- Sauté for 5–8 minutes until the apples soften and the liquid bubbles into a glossy syrup.
- Remove the pan from the heat and let the mixture cool for a few minutes. Note: Cooling prevents the raw pastry from melting instantly.
Shaping the Muffin Tin Apple Tarts
- Preheat your oven to 190°C (375°F).
- Roll out the 250g sheet of thawed puff pastry on a lightly floured surface.
- Use the 3 inch cutter to stamp out 9 circles.
- Press each circle into a muffin tin cavity, pushing the dough up the sides until it reaches the rim.
Filling and Finishing
- Spoon 2 generous tablespoons of the cooled apple mixture into each pastry shell.
- Whisk one egg yolk with 15ml of water and brush a thin layer over the exposed pastry edges.
- Sprinkle the edges with 5g of coarse sparkling sugar.
- Bake for 20 minutes until the pastry is golden brown and smelling of cinnamon.
Chef's Tip: If your pastry feels too soft while shaping, pop the tin in the freezer for 5 minutes before adding the apples. This "locks" the butter in place and gives you a better rise.
Fixing Common Issues
The Pastry Shrinks
If the dough pulls away from the edges of your Apple Tarts, it's usually because the butter in the puff pastry got too warm. When butter melts before it hits the oven, the dough loses its structure. To fix this, always keep your dough chilled until the very last second.
Filling Leaks Out
When the apple filling bubbles over the sides, it's often because the apples weren't diced small enough or the syrup wasn't reduced sufficiently. Ensure your apple pieces are roughly 1cm cubes. This keeps them tucked neatly inside the pastry walls.
Pale Crust
If your tarts look white instead of golden, your oven might be running cool or you skipped the egg wash. The egg yolk is what creates that mahogany finish. If you're in a rush, a splash of heavy cream on the edges also helps with browning.
Bottoms Stay Soft
This happens if the muffin tin isn't fully preheated or if the filling was too wet. Make sure the skillet filling is thick and doesn't "run" when you spoon it. For a bit more crunch, you can try blind baking the shells for 3 minutes before filling.
Dietary Adaptations
For those who want a different sweetness, you can swap the maple syrup for coconut nectar. It's a great option for a more earthy flavor and works well in these Apple Tarts. Just be mindful that coconut nectar is slightly thicker, so you might need a teaspoon of water to help it blend with the lemon juice.
If you're looking for a gluten-free version, there are many frozen GF puff pastries available now. They tend to be a bit more fragile, so roll them out between two sheets of parchment paper to avoid sticking. Note that the texture will be slightly denser than the wheat version.
For a more complex flavor profile, try adding a pinch of ground cardamom or a grating of fresh nutmeg to the sautéing apples. If you have a sourdough starter sitting in your fridge, my Apple Pie with Discard recipe is a fantastic way to use up that tangy discard in a similar seasonal treat.
Storage and Freshness
Keep any remaining Apple Tarts in a container with a loose lid. They will keep in the refrigerator for approximately 2 days, though the crust may soften. To restore the crunch, heat them in a 180°C oven for 5 minutes.
These tarts can also be frozen for up to a month. Wrap each one individually in plastic wrap before storing them in a freezer bag. To enjoy, move them to the refrigerator for a full night to defrost, then reheat in the oven. Steer clear of the microwave, which can make the pastry chewy.
Save your apple peels! Simmer them in a pot with water, cinnamon, and sugar to create a fast syrup. Drizzle this over the tarts just before serving for a concentrated burst of orchard flavor.
Serving Suggestions
These Apple Tarts are delicious served warm. A bit of vanilla bean ice cream provides a lovely temperature contrast as the cold cream melts into the warm, cinnamon spiced apples, making the treat feel even more indulgent.
For a more refined option, a spoonful of crème fraîche or a pinch of flaky sea salt balances the maple syrup's sweetness. It elevates a simple dessert, giving it the feel of an authentic French pâtisserie.
To further enjoy the harvest, serve some Apple Fritters alongside these tarts on a variety platter. The fried crunch of the fritters is a perfect match for the light puff pastry.
Quick Comparison: Stovetop vs Oven
| Method | Focus | Result |
|---|---|---|
| Sautéing (Stovetop) | Reducing moisture | Glossy, concentrated fruit |
| Baking (Oven) | Structure and color | A golden, crisp shell |
Choice Guide
- For a crunchier base: blind bake the shells for 5 minutes.
- For tarter fruit: add 5ml more lemon juice to the skillet.
- For a richer glaze: use two egg yolks instead of one.
Now you're all set to bake. Just remember to keep the pastry chilled and don't rush the apple reduction. Trust me those extra minutes in the skillet are what prevent these Apple Tarts from becoming soggy. Enjoy the season!
Recipe FAQs
Should I cook apples before making tarts?
Yes, sauté them first. This removes excess moisture and creates a glossy syrup that prevents a soggy crust.
Can pears be substituted for apples in most pastry recipes?
You can swap them, but pears are softer and juicier. If you enjoyed the sweetness and texture balance here, see how we manage flavor in our coconut pecan recipe.
How to use the extra apple pie filling that didn't fit into the pie?
Chill the leftover filling and use it as a topping for pancakes or oatmeal. You can also freeze it in small portions for a quick dessert base later.
Is it true that any apple variety works for these tarts?
Surprisingly, no. You need a firm apple like Granny Smith so the slices hold their shape during the 20-minute bake.
Muffin Tin Apple Tarts